How to make an internal page for a group menu in Contact. How to make a menu in a VKontakte group or public Codes for a VKontakte group menu
Besides being memorable, .com domains are unique: This is the one and only .com name of its kind. Other extensions usually just drive traffic to their .com counterparts. To learn more about premium .com domain valuations, watch the video below:
Turbocharge your Web site. Watch our video to learn how.
Improve Your Web Presence
Get noticed online with a great domain name
73% of all domains registered on the Web are .coms. The reason is simple: .com is the where most of Web traffic happens. Owning a premium .com gives you great benefits including better SEO, name recognition, and providing your site with a sense of authority.
Here's What Others Are Saying
Since 2005, we"ve helped thousands of people get the perfect domain name
- simple and easy to use. - Nick Collins, 10/25/2019
- I like hugedomains - Bo Pham, 10/23/2019
- I just bought my domain from Hugedomains.com after contacting them about something I was wondering about. They got back to me right away, and answered my question precisely. I chose a paymen tplan for my domain, and it went so smooth! I got everything in a very short time, and explanations about what to do. Thank you, I am very pleased! Best regards Herdis - Herdis Jenssen, 10/23/2019
- More
Good day, dear readers of my blog. With this article I open a series of publications on the topic of beautiful design of VKontakte groups. Now we will work on creating a menu, then we will move on to creating a stylish single image, and in the end we will learn how to make images clickable.
In the end, you will end up with a community that looks something like this. When you click on the transition button, an additional stylish page actually opens.

The work ahead is not that difficult, I will explain in detail how to proceed. The work will take no more than a couple of hours. Let's talk about everything in order.
1. Preparation for work. Tools you can't do without
So, before I get to the main question and we start looking at how to make a menu in a VKontakte group, let’s talk about what you’ll need.
1.1. Photoshop
Of course, you can do without Photoshop, watch this video, which explains everything in detail. If you want to. However, if you do not have the skills, then I strongly recommend that you bother and go through all three of my publications.

If you want a normal group, then you have no choice but to learn Photoshop. You can't go anywhere without high-quality pictures. I can recommend you course by Zinaida Lukyanova . You will get used to your new profession quickly and without getting bored and can even earn money using your design skills. Enough knowledge!

So, well, let's continue. Is everything you need available? Then you are ready to move on.
2. Working in Photoshop or do-it-yourself menus
Well, now you can proceed with the step-by-step instructions directly for creating the menu. Open Photoshop, then the illustration with the menu. I hope there won't be any problems. In the upper right corner, select “File” and then “Open”. We find the document on the computer. What's next?
The picture needs to be cut out. Select the “Cutting” tool. As you can see, it is hidden under the “Frame”. Just click on it and hold the left mouse button for a few seconds until an additional menu appears.

Now on the picture itself, right-click and find “Split fragment”.

In this particular case, I will divide the image into 4 parts. Why is this so? Any button on the Internet is a picture that is assigned a specific code. You point the arrow at the desired fragment of the illustration and your browser transmits the information to the computer: “Boy, there are additional features here.”
Sometimes the entire image changes. For example, the buttons that sink when pressed are just the second image, there is no animation there.

In my case, one picture needs to be divided into several parts and each of them needs to be assigned its own action. Somewhere is a link to a list of products, somewhere is a link to the website. There is also a part of the picture that is labeled “Menu”. Nothing should happen when you hover the mouse.
In a good way, I should have highlighted 5 parts in order to separate the buttons more evenly, but I justify myself by saying that if a person misses, he will still do what he wanted, and if he presses correctly, he will not know anything.
It's not a problem to make more categories or arrange them in two columns. If you understand the basic information, you can handle everything else.
I moved the lines to make it smoother. It's not difficult, it's done using a cursor.

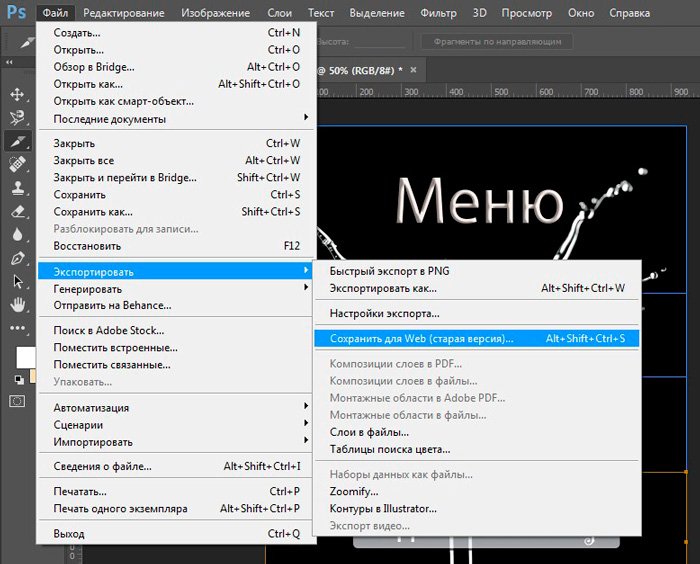
Make sure that images are saved as jpeg (topmost category on the right). Next, click “Save”.


OK it's all over Now.

We're done with that, now we can move on to the group itself and working with the code.
3. Layout in VK for dummies
I used to think that wiki markup was only applicable to communities. I don’t know if something has changed or it’s always been this way, but now it doesn’t matter at all whether you create a group or a public page. Pages can be made both here and there.
Well, all that's left is the small matter of layout. Open the “List of Wiki Pages”.

And add a new one.

Give it a name. In our case, the menu.


And move on to editing.

The first step is to add all the parts of our picture.

Loading.

Do this from the folder from bottom to top of the list. From the very last one (the bottom one, in my case “Write to admin”) to the top one (“Menu”), then everything will fit correctly, although it’s not that difficult to drag fragments with the mouse. Whichever is more convenient for you.

Now we need to remove the indentation and make different fragments links, and in some places completely remove the ability to click. Let's switch to code mode.

“center” tags indicate that the photo and its fragments are located in the center. I will remove them to make it easier for you to perceive the information.

If you want, you can do the same, but keep in mind that the illustration will move to the right.

We return to the code again to remove the indents between the fragments of the drawing.

To make the image unified again after resizing, put a semicolon and write the nopadding tag (;nopadding).

It will look like this.

Naturally, there should be no indentation after each fragment, and therefore the tags need to be duplicated.

Now the illustration looks unified. If it doesn’t work, check whether you spelled the word correctly and put a semicolon, remove spaces where necessary so that it is as in my example. Every little detail is important for the result.

Now when you click on different parts of the image, they open in a new window.

To prevent this from happening, you will need another tag. Nolink. Don't forget the semicolon.

There will be no transition only in the first picture, but you can substitute your own URLs for the rest.


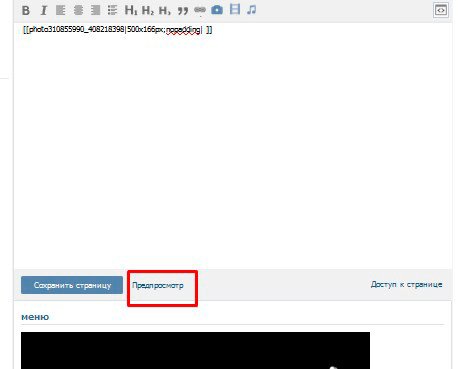
You can redirect readers to other wiki pages, posts, blogs and other social networks. Now it’s not difficult to do this, you can do everything. All that remains is to save.

This is what our menu looks like.


And here is the desired link.

4. Final stage of registration

Finally, the time has come to decide whether you have a public page or a group. The future strategy depends on this.
If you don’t know what you have, then go to the management section from the “My Groups” category.

If you want to do as I did and put it on the menu, then go to the second part and we will continue to beautifully design the public. The result will be something like this.

I’m not a fan of making the menu just a status picture, but some people want just that. I have no right to criticize anyone, and if you have a group, then you can realize your task.
5. Video instructions
Watch the video, we have already done all the main work, only a small matter remains.
6. An alternative method for Dummies for 100 rubles.
If you have any difficulties creating a menu yourself, feel free to use this service - VkMenu.ru , where for a modest price of 100 rubles. (today it’s like this), you can make a menu through an online constructor.
In my opinion, it’s a great alternative to manual work and cursing everyone and everything if nothing comes out with wiki markup.

With this I say goodbye, but not for long. Rest a little and move on to the next part.
![]()
Subscribe to my VKontakte group . Have fun and see you soon!
IMPORTANT UPDATE: this article is very outdated, since a special service has appeared MenuMake, which allows you to create a menu for a group automatically. The manual approach is no longer necessary. However, I leave this article for history.
Groups in VKontakte are the place where their users gather the largest concentration. That is why many are trying to design them better in order to attract the maximum number of them. It is best for the creator to think about graphic design before the immediate one, simultaneously with the development of the future.
It is important to understand that the design of a group is its face, which a new user sees immediately as soon as he enters the page, only after that he begins to get acquainted with the content. This sentence, in fact, reflects all its weight. In addition, the graphic menu is also a group functionality, as it allows you to quickly and conveniently find the information you need.
Let's talk about ideology
Before you start drawing and laying out anything, it's important to think about what should your menu say? To understand this, it is also worth deciding on the main purpose of the group - to entertain, inform or sell. The appearance and functionality of the future menu largely depends on this.
Menu to attract visitors
If you plan to publish entertaining, informational, educational content, you should create a menu that will display the main topics. For example, these could be sections: the latest publications, the most popular, about fashion, healthy food, children, etc. This will serve to increase loyalty, because it will be convenient for users to navigate through the mass of content.
Sales Menu
On the contrary, if the goal of the page is to sell, the menu should help users navigate among a huge number of products. It is best to place sections in it that direct the visitor to the catalog or a specific part of it, talk about delivery, contacts, company, promotions and, of course, to the contact page.

The first stage – we work in Photoshop
Menus for contacts are starting to be created not on a social network, but with the help of graphic editors. For this, it is best to use Photoshop, despite the fact that even minimal knowledge is quite enough for this. Therefore, open the program and create a menu template. The size of the new document directly depends on the number of sections you need.

Next you will need a background. It could be just a white background, or a color, or a specific picture. Download from the Internet and paste into the template. Next, write the menu items you have planned on the background image. These labels will later turn into links that direct the user to a specific section.

But in order for this image to be transformed and easily made into links, it must be cut. This is done in the same Photoshop using the “cutting” tool.

But to do this smoothly and beautifully, it is important to use auxiliary lines, which are activated by the CTRL+R key combination. Blue lines will appear that you can drag to set the boundaries for the cut. Next, click on the “Cutting” tool and select “fragments along guides” in the top menu, as a result of which the picture is clearly divided into several separate menu sections.
Besides being memorable, .com domains are unique: This is the one and only .com name of its kind. Other extensions usually just drive traffic to their .com counterparts. To learn more about premium .com domain valuations, watch the video below:
Turbocharge your Web site. Watch our video to learn how.
Improve Your Web Presence
Get noticed online with a great domain name
73% of all domains registered on the Web are .coms. The reason is simple: .com is the where most of Web traffic happens. Owning a premium .com gives you great benefits including better SEO, name recognition, and providing your site with a sense of authority.
Here's What Others Are Saying
Since 2005, we"ve helped thousands of people get the perfect domain name
- simple and easy to use. - Nick Collins, 10/25/2019
- I like hugedomains - Bo Pham, 10/23/2019
- I just bought my domain from Hugedomains.com after contacting them about something I was wondering about. They got back to me right away, and answered my question precisely. I chose a paymen tplan for my domain, and it went so smooth! I got everything in a very short time, and explanations about what to do. Thank you, I am very pleased! Best regards Herdis - Herdis Jenssen, 10/23/2019
- More
And again I am glad to welcome you!
In today's article we will talk exclusively about the VKontakte group, although for the most part, I prefer to work with public pages. But when in the last article I touched on the example of my public, many had questions, specifically about the menu for the group.
How to create a menu in a VKontakte group
Here's what I got.
I made the menu as an example only. In order to understand it for groups, to consider in more detail all the subtleties for you.
So. Here are the basic steps:
- Think over the main menu
- Select image
- Photoshop (nowhere without Photoshop, as always 🙂)
- Image cutting
- Uploading an image to a contact's album
To activate Recent Entries(for your future menu), you need to go to the community management and turn on the item - “Materials”
After the materials are included, the “Latest News” item will appear at the top of the group, in which you will need to create a menu. Just like with any contact page, we find ourselves in an editor in which we can either manually upload images or menu buttons, or through wiki markup (button in the upper right corner).
As you guessed, the easiest way is to first draw the necessary picture in Photoshop and place buttons on it in advance; in the future they will be links.
In my example, I used a girl's background and placed 3 buttons to the left of her. Each button had its own name.
My menu consisted of the following items:
To integrate the finished image into contact, it must first be cut out. To do this, we use the “Cutting” tool in Photoshop. I think there will be no difficulties with this. Everything is simple there... Just in case, I took a photo :)
We select this tool and start “cutting”. I got 4 parts. (the simplest thing I came up with :), although you can cut it into pieces)
All necessary work to create the menu has been completed. Now you can start creating a VKontakte menu. To do this, upload the images to the contact one by one. Here's what we ended up with:
Now click on each button (or part of the image) and assign the required address (link). To remove extra spaces you need to use the “nopadding” tag (in the Wiki markup menu)
The “nopadding” tag removes spaces between images, that is, it helps to “join” them closely to each other.
As a result of adding the tag, the result was the following:
It seems that everything is clear and there is nothing complicated. And if you suddenly decide to create it yourself, then go for it, you’ll probably end up making it more beautiful... In my example, it didn’t turn out as cool as I would like, but I looked at the working part for you. Surely, if you spend more time, and even turn to freelancers, you can create a very cool menu.
I saw many people making a continuation of the main avatar. It turns out as one whole image. Looks good. But to create something like this, you need to have a better understanding of Photoshop :)
I also noticed that many people are interested in the question - how to make the group menu open, that is, so that the VKontakte group menu is open initially when entering the group.
Answer: As far as I know, this feature was removed by Vkontakte administrators. Previously, there was a separate button to make the menu fixed - open. Then this function was removed, and now the menus have to be opened separately.
Although, I have seen some that are open by default... and someone even said that there is some code that copes with this problem. But I wouldn't recommend using it. Judging by the discussions on many forums, the admins do not welcome this!
That's all for today. See you in touch!