How to enable BIOS on a dell laptop. What's wrong with BIOS on Dell laptops ?! Updating the BIOS on Windows systems
To reinstall the operating system on a Dell laptop with your own hands, you need to go to the BIOS. BIOS is the basic input and output system. It is installed on all laptops.
Entering the BIOS is done to prioritize booting from hard drives, change the date and time on the laptop, and control it. The speed of the processor coolers, RAM - all this is controlled by the user from the BIOS.
Attention! When the laptop boots up, the message "Press Del to Set Up" is displayed in the lower left corner of the screen. Usually the key that the system asks to press is the entrance to the BIOS.

On laptops with Windows 7 and XP
A distinctive feature of Win7 is the display of the post-check window. Thanks to him, the user will be able to have time to press the desired key several times and enter the system.
To open BIOS on a Dell laptop from Windows 7 or older XP, the user needs to:
- Turn off the device.
- Turn it back on. When the laptop boots up quickly, press the F2 button on the laptop keyboard several times. F2 is a BIOS login trigger in Dell models such as Inspiron and Presicion. In the Dimension and Optiplex modifications, instead of this button, the role of the input key is played by Delete or Del.
- The settings window will appear on the screen. If a security code has been set to unlock the entrance, then it must be entered.
- Now the user will be able to make the necessary amendments to the system.
- To save these changes and continue using Windows, you need to click on F10.
- The system will ask: "Save settings and exit"? To confirm the changes, left-click on “Yes” on the monitor.
- The computer will remember the settings, reboot and the user will be able to continue working with Windows OS, or will install it.

Attention! Not always a single press of a button to enter the I / O system works. Sometimes it takes two or three tries to get into the BIOS.
To log into a system with a Dell 4400 modification, the user must proceed as follows:
- If the gadget is turned on, then restart it.
- When the logo of the company that released the laptop appears, have time to click on the F12 key.
- Press your finger on it until the settings window appears on the screen.
- Then repeat steps 4 - 7 from the previous description.
And the Dell 400 modification uses a completely different button unlike previous types of laptop. Therefore, you need:
- Restart Dell 400.
- While it is loading, quickly press one of the keys or alternately both: F1 or F3.
- Repeat steps from 4 to 7 of the very first description of entering BIOS.
If the modification of the laptop is already decently outdated, then another key is required. In this case, the instruction changes:
- You need to log out by holding Ctrl + Alt + Del on the laptop keyboard at the same time.
- The device will reboot.
- To have time to press the Del button several times.
- Register the necessary settings in the input-output system.
- Use the F10 button to save the settings and click "OK".
Windows 8 and 10 can be logged in directly from the operating system. These operating systems do not have a post-check window as they use fastboot mode. BIOS is now called UEFI in these operating systems. 
UEFI is a new kind of motherboard firmware. It supports heavier hard drives, boots quickly and is secure.
On laptops with Windows 8 and 10
To enter BIOS on a Dell laptop, the user needs to use the following instructions:
- Open the desktop of the operating system.
- Move the mouse cursor to the upper right position.
- A menu will exit from the right side of the laptop monitor.
- Click the "Options" button.
- In the window that opens, select "Change computer settings".
- Several sections will appear on the screen. Click on the tab with the name: "Update and Recovery".
- Find the item "Recovery" in the window that opens.
- Click on it with the left mouse button.
- Find the "Restart" button. Click on it.
- Wait for the laptop to restart.
- The laptop will enter the recovery menu.
- Now the user needs to open the "Diagnostics" item.
- Then go to the Advanced Options tab and finally select Embedded UEFI Options.
Now the user can use the BIOS settings to improve the performance of the computer or to boot from removable media. To save the changes and exit, he will need to click on the F10 button on the Dell keyboard and press the "OK" button.
On older Dell models, enter BIOS as follows:
- You need to open the desktop of the Windows 8 or 10 system.
- Move the cursor to the upper right corner.
- In the drop-down menu, find and click on the "Parameters" button.
- Press the "Shutdown" button.
- Press Shift on the laptop keyboard and hold it.
- After the laptop restarts, go through the same tabs that were specified in paragraphs 12, 13, 14 of the previous instructions to enter the Windows 8 and 10 I / O systems.
- Save changes in BIOS settings and exit by pressing F10.
For this type of operating system, there is another option to enter BIOS, this is the command line. You need to do this:
- Click the "Start" button in the lower left corner of Windows.
- In the search line, write "cmd.exe".
- The menu item "Open command prompt as administrator" will appear. Click on it.
- This will open a command prompt dialog box on your desktop.
- Write the following code in it: shutdown.exe / r / o.
- The user will see the laptop reboot and various settings will appear on the screen.
However, the user can disable fast startup in Windows 8 or 10 in order to use the standard keys to enter the I / O information system.
How to disable fast startup
The POST window is enabled on Dell laptops with Windows 8 or 10 operating systems as follows:

Attention! If the BIOS settings are lost, and the PC owner has forgotten the parameters that were set, then he can always reset them to the factory settings. He needs to remove the battery, disconnect the CMOS battery on the motherboard and wait twenty minutes. Then plug it back in. The settings will return to default.
Now you know how to enter UEFI or BIOS using different keyboard shortcuts. Further in the BIOS, you can customize the laptop for yourself to make the necessary changes.
Good time!
You can enter the BIOS for a variety of reasons, for example, to reinstall Windows, to fine-tune the operation of function keys, to check device detection, etc.
In this regard, Dell laptops are quite simple: in the latest models of various lines of this manufacturer, the entrance is carried out using the F2 key (it is best to press several times when the company logo appears). However, in some cases, it is not possible to enter the BIOS in this way ...
For example, once I even had to discharge the battery to solve this problem. Actually, I will give this and other methods just below in the article.
Everything that I write below is relevant only for devices from the manufacturer Dell!
Classic version
The most common BIOS entry scheme, suitable for most modern models, is:
- turn on the device;
- immediately press the key in sequence F2 (several times, the main thing is to "catch" the logo when loading (which may flicker for less than 1 second));
- then the BIOS / UEFI settings menu should appear.

Note that in some cases the key F2 must be pressed simultaneously with Fn (This happens if the multimedia functions were enabled on the F2).
By the way, below I present data from the specification from Dell for various models of PCs and laptops (Dimension, Inspiron, Latitude, Optiplex, Vostro, Precision, etc.). Alternative buttons: F1, Del, F3, Fn + F1.

By the way! If you have a fairly old device (earlier than 10th year of release), pay attention to the message at boot (it indicates the desired button).
For example, one of the most common boot labels - means that when you press the "Delete" button, you will be taken to the BIOS settings.

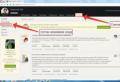
We find information on the official. website
If you have any difficulties with the entrance, then you can find out details about your specific laptop model on the official website of the manufacturer (so that he gives the specification and manuals in Russian). I will show you how to do this in the screenshots below.
Official Support Site:

Alternative: using a dead battery
Some notebooks from Dell (for example, the Inspiron line) do not always handle the F2 key correctly (more precisely, they boot so quickly that it is rather difficult to get into the "window" when you need to have time to press this key). As a result, entering the BIOS becomes a real quest ...
As one of the alternatives (which I recommend trying) is to drain the battery to ~ 5% (in my case 2%). Then you need to turn off and turn on the laptop again. You should see a warning window that the battery power is low (example below).
Note: this method will not work on all laptop lines.

Note that the message also includes buttons:
- F1 - continue booting the laptop (i.e. boot Windows);
- F2 (to run setup the utility) - go to BIOS settings (this is what you need to select).
The main feature of this window is that it expects you to press a button! So you will have time.
As a result, it is easy to enter BIOS / UEFI in such a "tricky" way.
Using the Windows interface
If you have modern Windows 10 installed, it boots, and you can work with its interface - then you can enter the BIOS through options ... To do this, press the combination of buttons Win + i (to open Windows options), then under Update & Security / Recovery reboot OS with special boot option. See screenshot below.


That's all for now ...
Sooner or later, Dell PC owners need to learn how to enter BIOS on a Dell laptop.
The basic input / output system, or BIOS, in the system is designed to control all the basic functions that are performed by the computer. The BIOS controls everything from date and time settings to settings such as boot priority, memory, and processor speed.
It also manages enabling or disabling certain items such as the built-in audio processor and USB ports. The user may need to format the system by booting from a USB drive or Windows CD, or need to change other settings. To make any changes, you need to access the settings program.
The setup program is available on your Dell laptop like any other. It controls all hardware configurations.
These configuration parameters are stored in the optional metal oxide semiconductor (CMOS) battery chip. This chip maintains settings when the PC or laptop is turned off.
Accessible on Latitude Dimension, Inspiron, Precision and Optiplex models
In order to get access from the listed models, you should follow these steps:

Login from Dell 4400 Model
If the user has a 4400 model, then follow these steps:
- Turn on or restart your Dell computer.
- From the start screen, when the Dell logo is displayed, quickly press the F12 button until the logo disappears. Continue pressing until the message "Enter setup" appears.
- Enter a password if required. Wait a few seconds for the BIOS screen to load to navigate through it.
Access from Dell Model 400
In 400 models it is important to follow the instructions:
- Power on your Dell 400 laptop. If it is already on, you need to reboot the system. To access the base system, go to the home screen of the display.
- When the initial screen with detailed information about the supplier appears, press the "F1" or "F3" button.
- If a password is requested, enter it. When changing settings, be sure to save the changes.
Access from older Dell models
If you have an older computer, it makes sense to follow these steps:
- Restart or turn on your Dell laptop.
- On the initial boot screen, press the Del key or the Ctrl + Alt + Enter key combination.
- Wait a few seconds for the BIOS to load the screen and swipe across it. Enter the password if it is already set.
Please note: Incorrect changes to BIOS settings can lead to problems. After they occur, the operating system may no longer start on the device. As such, it would be best to write down the settings before making any changes.
BIOS password recovery
Changing the BIOS settings on your computer can lead to unknown problems and it is for this reason that you need to protect it. This way no one else can access it and try to make changes.
But sometimes this additional security can lead to the fact that it is not possible to enter the BIOS (in the event that the password is forgotten).
There are methods and techniques that can help you recover your password.
Backdoor
Most BIOS creators insert a password into the Backdoor, which acts as a master password. Even if some other password has already been set, having received this master password, you can restore access to the system.
To restore access, you must perform the following steps:

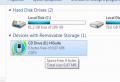
Take out the CMOS battery
This is the best way to recover, as even an inexperienced user can easily open the processor panel. All you need to do is turn off the laptop, disconnect all peripherals, and remove the case cover. Find the CMOS battery on the motherboard that looks like the picture below.
Take it out and wait for 20-30 minutes. Now, when you put the battery back in about 30 minutes, all settings will be reset and you will need to re-enter them, including the password.
Conclusion
Different laptop models have different procedures for accessing the BIOS. In general, you may need to press the F2, Del, F12, F1, or F3 buttons, depending on your hardware configuration. To know exactly how to do this, be sure to consider the version of the laptop.
Today we will look at:
It is very common for different laptop manufacturers to define different hotkeys for accessing the environment. And if you happened to work with BIOS on more than two laptops, then you might encounter problems entering this shell, since different brands and models of laptops require pressing different buttons. Today we will tell you how to enter BIOS on a Dell Inspiron laptop and describe the three easiest ways to do it yourself.
Method 1: using "hot" keys
The most understandable, simple and affordable method on how to enter BIOS Dell Inspiron is to constantly press certain keys during laptop startup. In the case of the Dell Inspiron model, these buttons are Fn + F2. Hold the first and continuously press the second until you enter the BIOS environment.
There are several nuances in this method: these keys (or one of them) may not work, or, if you have an old model, after confirming the transition to BIOS, you may be thrown to the stage of starting Windows itself. Of course, this order of things does not suit us, so you can resort to one of the additional ways described below, how to enter BIOS in Dell Inspiron.
Method 2: using a discharged battery
Another simple, but time-consuming, method is that you need to discharge the laptop battery to a state where there is less than 10% charge remaining. This can be done by connecting USB devices to the laptop and running the diagnostic process at the same time. Alternatively, you can discharge the device completely, then connect it to the charger and recharge it a little. So, you will not need to catch the moment when the battery charge is set at the mark you need.
When the battery reaches an acceptable level, restart your Dell Inspiron and you will see this notification:
Now it remains to press the F2 button, after which you will successfully enter the BIOS.
Method 3: remove the battery
The last available way to enter the BIOS in Dell Inspiron is to remove the special battery on the motherboard. We talked about how this is done in the topic "".
This method works for both computers and laptops, but the latter can be difficult. The fact is that in Dell Inspiron laptops, this battery can be accessed only by completely disassembling the back, which is not recommended for inexperienced users. However, if you are sure that you can return everything back after parsing, then this method is perfect for you, if the first is not possible.
Greetings, my dear readers. The topic of our conversation is how to enter BIOS on a Dell laptop. This technique has become quite popular and is a serious competitor to personal computers of other brands. But even in a stable operating system, sometimes there is a desire to improve something and for this you need to enter the system settings.
To enter the BIOS on Dell's laptop, remember that there is no universal way for this, since there are several determining factors:
- a key (or a combination of them) provided by the manufacturer to enter the system settings;
- bIOS type;
- laptop model and year of manufacture. It can be a PC for work or for home, for example, the popular Inspirion;
- type and version of the operating system;
How do I choose the right button?
But let's talk about everything in order. First, I will talk about the general principles of entering BIOS. In most cases, this procedure begins with turning on the computer. If it works, then it needs to be overloaded.
This starts the process of checking the internal parameters of the PC, and before the operating system starts loading, you must press certain keys. Which ones - you can see on the screen, usually this information is present. But if it is not there, then here are some options.
- Fn + F2
- Delete

Sometimes fast constant clicking from the moment of switching on helps, and in other cases the "Shift" button comes to the rescue. There are two options: either the system is buggy and you have time to start the BIOS, or the "Ten" will boot and then you will need to reboot with the "Shift" pressed. In this case, you will be taken to the system recovery menu, through which you can enter the BIOS, (by going to "Diagnostics" - "Additional parameters" - "UEFI firmware settings").
Also, if you want to have time to enter the BIOS during the next restart, you can simply turn off fast boot in the system power settings.
Do not be surprised, but BIOSes are different
I think you should succeed. For those who are going to work in BIOS for the first time, I will tell you how it looks. Simple models like the early Inspirions have a familiar interface with tabs for Main, Advansed, Security, Boot, and Exit. This will help you navigate the settings.

Over time, the BIOS interface of Dell laptops began to change, and in the Inspirion 1525 you can find this option of the extended menu and the transition from the tab menu to a view like "Explorer"

But modern advanced models like Vostro, XPS , Latitude BIOS was further developed and became completely different from the system settings of other manufacturers.
And this is good, because as for me, it is more understandable and all important sections are highlighted here. The minimum knowledge of English will allow you to quickly find and correctly set the necessary parameters.

Well friends. Now you know how to enter BIOS on a Dell laptop and you can easily navigate through its settings.
On this I say goodbye to myself and wish you good luck.
Related entries:
 Promotion on Instagram: the most detailed instructions Promotion on Instagram: free or effective
 How to make money on Glopart
 How to connect the Internet via Wi-Fi on Huawei P10 and similar smartphones and tablets on Android
 What is the difference between an ultrabook and a laptop?
 How to choose a sound card for your computer


