NVIDIA Control Panel does not open. Adjusting video card performance for games through the NVIDIA control panel How to enter nvidia settings
Category ~ What to do (errors and problems) – Igor (Administrator)As part of this note, I will tell you how to open the NVidia control panel using several methods, as well as what to do if the panel does not open.
Standard Windows tools for adjusting video card characteristics are very limited in their capabilities. And the point here is not the quality, but the fact that they are designed for all possible video cards. If you need to use advanced settings, then in such situations you cannot do without control panels from a manufacturer such as NVidia. However, not all users know how to find and open it. Therefore, next we will consider several methods and what can be done if the panel does not open.
How to Open NVidia Control Panel - Methods
Open the NVidia control panel through the Start menu:
1. Open the Start menu.
2. In the search bar, enter "nvidia" (without quotes).
3. Select "NVidia Control Panel" from the search results.
Open the panel using the context menu:
2. Right-click on any empty space.
3. In the context menu that appears, select "NVIDIA Control Panel" (usually a little above the "Screen Resolution" and "Personalization" items).
Open NVidia through the Control Panel:
1. Open the Start menu.
2. Click on "Control Panel".
3. In the window that appears, switch the view to “Large icons”.
4. Find "NVIDIA Control Panel" and click on it.
NVidia Control Panel won't open
Now, let's look at what can be done if the NVidia control panel does not open.
Using the distribution from the official website:
1. Download NVidia drivers for your video card series.
2. Reinstall the video card drivers.
This method is good because the installer resolves many errors and failures independently, without the need for user intervention.
Check that the NVidia Display Driver Service is running:
2. Switch the view to "Large Icons".
3. Go to "Administration".
4. In the window that appears, open "Services".
5. Find "NVidia Display Driver Service" or it may also be called "NVidia Display Container LS".
6. Right-click on this item.
7. From the context menu that appears, select either "Run" or "Restart".
8. Wait for startup (it is advisable to wait an additional 20-30 seconds) and try opening the NVidia control panel again.
A few additional points. If the NVidia control panel does not open, then the reason for this may also be viruses (download an antivirus and scan the system) or special programs for controlling the monitor (if any are installed, they must be removed and restarted the computer, as they can block the NVidia panel).
Now, you know several convenient and quick methods for opening the NVidia panel (including for fixing errors). If you know more methods, feel free to share them in the comments.
The guide describes in detail the process of managing NVIDIA video card settings. We will also tell you how to configure NVIDIA 3D settings for some games. Before setting up, you need to install drivers for Nvidia.
If the drivers are installed, we begin configuration.
Right-click on the desktop to display a pop-up menu. In which we select the item:
After this we get to the control panel. Let's go to the section: 3D Options
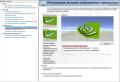
In the window that appears, first select the item: Adjusting Picture Settings with Preview
Click: Apply(as shown in the picture below)

Now the fun begins.
Configuring NVIDIA 3D Settings for Games
Let's go to the section: Managing 3D Settings
 After this, we proceed to configure the parameters in the right window.
For the applications to work correctly, you must set the following parameters:
- CUDA - GPUs: All
- Anisotropic filtering: Turn off
- V-Sync (Vertical Sync): Turn off
- Vertical sync pulse": Use 3D Application Setting
- Background lighting shading": Turn off
- Maximum number of pre-prepared frames: you should select the item marked with the NVIDIA icon
- Streaming optimization: Automatically
- Power management mode: Adaptive
- Antialiasing - gamma correction: Turn off
- Antialiasing - parameters: Turn off
- Antialiasing - Transparency: Turn off
- Antialiasing - mode: Turn off
- Triple buffering: Turn off
- Multi-display/mixed GPU acceleration: Multi-Display Performance Mode
- Texture filtering - anisotropic sampling optimization: Turn off
- Texture filtering - quality": Highest performance
- Texture filtering - negative UD deviation: Turn on
- Texture filtering - trilinear optimization": Turn on
- Anisotropic filtering. Directly affects the quality of textures in games. Therefore it is recommended turn off.
- Enable scalable textures: Turn off
- Expansion limitation: Turn off
After changing all the settings, click the Apply button. These settings do not guarantee 100% results, but in 90% of cases they can increase FPS by up to 30%.
By adjusting the video card settings, you can adjust the quality of graphics and video display, change the display resolution, set modes for using one or more monitors, and much more. If the video card control panel does not start automatically when the system boots, you can also enter the program that provides video card settings manually.
Instructions
When choosing a computer, ordinary users primarily look at the processor, RAM and hard drive, while gamers, among other things, pay special attention to the video card, which has a strong impact on the overall performance of the PC. A powerful video card is the key to smooth gameplay and high-quality images in games. Alas, not everyone can afford an expensive graphics card; you often have to make do with what you have.
Experienced users, when there is a lack of resources, sometimes resort to overclocking, but this is quite a risky business, so no one can guarantee that after this procedure the video chip will not fail. There is another, safer way, namely optimizing the video card settings for better performance. If you have an NVIDIA chip, you can configure your graphics card performance for gaming in the NVIDIA Control Panel. This procedure is not particularly difficult - the panel has a convenient and simple interface, and in addition to everything, it contains built-in help in Russian.
Setting NVIDIA for maximum performance in this case means, first of all, increasing FPS in games. The price of such optimization will be a decrease in graphics quality, do not forget about this.
How to open the NVIDIA panel
Naturally, setting up an NVIDIA video card using the method described below is only possible if the computer has an NVIDIA driver package. If the drivers are not installed, they need to be downloaded and installed from the official website of the developer www.nvidia.ru/download/Index.Aspx.
Now let's see how to configure your NVIDIA graphics card for gaming on Windows 7/10, but first you need to find the right settings. You can open the NVIDIA panel using the tray icon, or by right-clicking on the desktop and selecting the appropriate option from the menu.

Changing settings
The NVIDIA Control Panel interface is represented by two columns. On the left you can see a list of available settings, on the right there are the settings themselves - switches, drop-down menus and brief explanations for them. There are many of them, but we only need a few, located in the "Manage 3D Settings" section.
 The first item contains a list of video processors, one of which you can select as the main one (it’s better to leave “all”). There is no need to change anything else here. If anyone doesn't know, CUDA technology is used by modern video cards to increase performance.

The next point to pay attention to is anisotropic filtering– an algorithm developed to improve the quality of game textures located at an angle relative to the camera. Anisotropic filtering makes textures sharper, but at the same time consumes a significant amount of video card resources, so if you want to increase FPS in the game, it is better to disable it.

We continue setting up the NVIDIA Control Panel. Smoothing(FXAA, gamma correction, transparency, parameters, mode). The smoothing function makes the movement better. It also consumes a lot of resources, so it can also be disabled.

DSR or Dynamic Super Resolution– a technology designed to increase the resolution of images, used to improve the quality of fine details by artificially increasing the number of pixels. We disable it due to the significant load on the video card.

This is not such an important parameter; we either disable it or set it to adaptive. Used to improve the smoothness of gameplay, it compensates for tearing during sudden camera turns.

But this function should not be deactivated. If you have it disabled, be sure to enable it. Caching allows you to save shaders to your hard drive and use them as needed, thus avoiding having to recompile the CPU shaders.

Multi-frame anti-aliasing (MFAA)– another technology for improving image quality, eliminating “jaggedness” along the edges of graphic objects. Anti-aliasing plays an important role in setting up NVIDIA for games; it is very demanding on video card resources, so it must be disabled.

Vertical Sync(V-Sync). Controversial point. The setting synchronizes the video card with the monitor to avoid the former generating unnecessary frames. The performance of the video card is optimized, but FPS is reduced. Let's turn it off and watch. If the picture has gotten worse, turn it on; if not, leave it turned off. At the same time, we also disable triple buffering (it serves to reduce the number of artifacts), since it only works in conjunction with V-Sync and is practically useless on its own.
Used to increase the realism of the picture by softening the lighting of shadowed objects. The function is very demanding on resources and, moreover, does not work in all applications. If you want to optimally configure your NVIDIA graphics card for gaming, it is better to disable this option.

A useful thing that allows the game to use several GPUs at once, but it does not work with all applications. If the hardware and game are new, you can try enabling streaming optimization. If the game does not work correctly, either set the function to “Auto” or disable it completely.

Determines the number of frames prepared by the central processor for the video card. In theory, the higher the value of this parameter, the better. If the CPU is powerful, set it to 3 or the maximum value; for weak processors, it is recommended to set it to 1.

We select the maximum performance mode; when using it, power consumption increases and, accordingly, performance increases. Adaptive mode, on the contrary, serves to reduce power consumption.

Texture filtering.
- Quality. Controls Intellisample technology, designed to improve the quality of image anti-aliasing using translucent textures. Set to high performance mode.
- Trilinear optimization. Improves video card performance by reducing the quality of trilinear filtering. Turn it on.
- Negative level of detail deviation. Increases texture contrast. Set "Binding".
- Anisotropic optimization by filtering. It is recommended to disable to improve overall performance.

An additional setting used when you have multiple displays and video cards. If there is only one display, select the single-display performance mode; if there are two or more displays, select the multi-display performance mode. If programs do not work correctly, switch to compatibility mode. The same mode should be selected if there are two or more video cards on the PC.

Basically, that's all you need to know about tuning NVIDIA for maximum performance. Yes, you can also look into the “Adjust image settings with preview” section and set the “Custom settings with emphasis” slider to “Performance,” but this is a secondary matter.

By adjusting the above parameters, you can increase productivity by 15-20%, which is very good. However, it all depends on the model of your video card - in some cases the increase can reach 30-40%. The quality of the picture in this case, of course, will seriously deteriorate.
The control panel from NDIVIA is a specialized modern application that is designed for driver management and hardware. The application in question was developed directly by a team specializing in user interface from NVIDIA. This program is supported by almost all known operating systems, and it will also work well on the new generation OS.
The panel allows, if necessary, to get the most out of the capabilities of NVIDIA devices and ForceWare series drivers, or set optimal settings for their operation. In addition, it simplifies the process of using the software, as well as setting device settings, parameters and configurations.
NVIDIA provides a tool for configuring its hardware, displaying images and all kinds of multimedia content. In addition, we provide extensive possibilities for gaming needs, to ensure comfort, stability, compatibility and reliability. Support advanced modern graphics and at the same time satisfactory performance in games and other applications, ForceWare drivers with a unified architecture will help.
The described software from NVIDIA has the following advantages:
- Single application to access and manage all company devices and products;
- Optimization game quality and performance;
- Ease of use, both for advanced users and beginners;
- Connectivity modern widescreen panels;
What to do if the program does not start
 As with any other software, problems can also arise with NVIDIA. Often they are related to the fact that the application either won't start, or simply Freezes while working. There are many reasons and ways to solve this problem, let’s consider most common:
- First of all, it is worth checking whether the service is running on the Windows system - NVIDIA Display Driver Service. Why should you go to the “section” in the control panel? Administration” and then “ Services” and, if necessary, enable automatic start.
- May be required enable hardware acceleration, located in the Control Panel and Display Properties.
- By going to the operating system registry using the following path: HKLM\SOFTWARE\NVIDIA Corporation\Global\NVTweak the values for NoPages and NoMenus should be reset.
- Programs for directly controlling the monitor should be disabled or completely disabled. delete.
- Maybe update required an outdated version of Microsoft Windows Installer.
Of course, this is not a complete list of possible problems and their solutions, but other troubles happen much less frequently than those listed above.
Related posts:
 Adjusting video card performance for games through the NVIDIA control panel How to enter nvidia settings
 High magnification monoculars - features and benefits Monocular magnification 50
 World of Tanks crashes on startup - fixing errors World of tanks crashes after every battle
 Server key 1c over the network
 How to turn on WiFi on laptops Add a new wireless network to a laptop


