Disk cleanup using standard Windows tools. Disk Cleanup Disk Cleanup standard program
If programs take longer to load, and the computer slows down with each subsequent operation, you need to clean the system drive C from “garbage”. Unused software products, remnants of incorrectly deleted software and files, saving errors due to disk fragmentation are the main reasons for uncomfortable work with a PC. Let's figure out how to clean the system drive C from unnecessary files and programs?
Standard Windows Features
While working with a computer, the user installs and updates software. Some programs are used daily, others several times a month, and others are forgotten after 1-2 weeks. It is the latest software products that you should get rid of first, using any available methods. Namely:Manual
First of all, empty the “Trash”, “Downloads” and the “Temp” folder. These are three large storage areas for temporary and unnecessary files. You can get to the “Temp” folder using the search bar, pressing WIN+R. Then proceed like this:- On an empty line write “ %Temp%"(without quotes);
- Enter;
- In the window that appears, type the key combination from the keyboard Ctrl+A;
- Then the key combination Shift+Delete.

Important! Not all files in the folder will be deleted, but only those that are not used during program operation. A complete cleanup can be performed before turning off the PC, after closing all programs.
The “Temp” folder is located on system C, and can also be found manually. It is recommended to free up user folders and OS storage. All of them are located on the main disk. But when manually deleting objects, you need to be extremely careful, otherwise there is a high probability of erasing a system file, without which the OS will not boot.
Important! You should not remove objects with an unfamiliar extension in the windows.old folder - files for system recovery are stored here.
Using Disk Cleanup
A safe and easy way to clean up your system C is to use the Properties tab. If the manual cleaning method is dangerous due to the possibility of erasing an object important to the OS, then using the built-in functions is absolutely safe. They do the following:- Find the folder " My computer"and open;
- Right-click on the disk C;
- From the vertical menu select " Properties»;
- « Clean disk", and in the new window tick all menu items;
- Click " OK" confirm deletion.

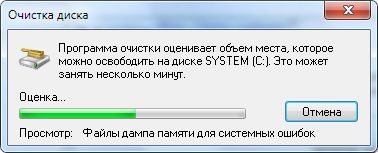
In the Disk Cleanup window, you can also destroy accumulated junk in system files. To do this, select the “Clean up system files” button. The procedure is safe, but may take from 1 to 15 minutes. This is fine.
Deep sedum
It is carried out using the command line, which is called through the search bar on the Start panel. Here you need to enter cmd symbols in English. Next do the following:- In the “black” window that opens, enter the term: “ %systemroot%\system32\cmd.exe /c cleanmgr/sageset:65535 & cleanmgr/sagerun:65535»;
- Press Enter;
- Waiting for the process to complete.

This command will open a window with a large list of files. So the process has begun. There is no need to close the command prompt until the procedure is complete.
Third-party resources for cleaning system and other disks
On the Internet you can find paid and shareware software products for optimizing free space. If you are servicing a home PC, the second type of utility is also perfect - less functionality, but free download. Reliable and easy to use include:- CCleaner and Advanced;
- PC Booster and Ashampoo WinOptimizer Free;
- SlimCleaner Free and Comodo System Utilities;
- Auslogics Boost Speed and Glary Utilities;
- Kaspersky Cleaner and Clean Master for PC.
- We wait until the utility automatically scans the disks;
- In the new window click " Clean Now»;
- We are waiting to receive the report;
- Close the program.
During its operation, the operating system creates a lot of temporary data that is stored on disk (usually drive C) in the form of files and registry entries. These can be files from update packages, archivers, shadow copies, content downloaded from the Internet, etc. Third-party programs behave in a similar way, for example, browsers that store website data in a cache. Some temporary files are deleted automatically after a certain time, others remain on the disk until they are forcibly deleted.
If the user does not regularly maintain and clean up the C drive, the free space on it becomes less and less, to the point that the disk eventually ends up filled to capacity with temporary files, which precludes further writing of any data to it and reduces its performance. There are two ways out of this situation - either increase the size of the system partition at the expense of the user volume, or perform a comprehensive cleanup of it, which is more preferable. Let's see how to free up space on your local C drive in Windows 7/10.
What can you delete if the disk is full?
The system volume contains many important files that ensure the normal operation of Windows, so deep cleaning it should be approached with the utmost care. What can you delete from the C drive to free up space and not disrupt the system? All its contents can be divided into three groups. The first includes files that can be deleted without any fear. The second consists of files, the deletion of which, although it will not harm the system, can still cause certain problems under some circumstances. The third group includes files that cannot be deleted, as this can make programs and the system inoperable. You can clean up drive C without negative consequences by deleting:
- Cart Contents.
- Library catalogues.
- Folders and Downloaded Program Files in the Windows directory.
- Cache of browsers and some third-party programs.
- Icon sketches.
- Logs and memory dumps for system errors.
- Old Chkdsk utility files.
- Bug reports.
- Files created by the Windows debugger.
With some caution, you can delete shadow copies () created during the installation of updates and stored in backup copies, files from previous system installations (Windows.old folder), unnecessary components and applications, folders of uninstalled programs in the ProgramData, Program Files and Roaming directories, MSOCache Microsoft Office folder. If you do not use Quick Start, you can delete the file hiberfil.sys in the root of drive C, having previously disabled these functions in the settings. It is acceptable, but not recommended, to delete the swap file pagefile.sys. Other files and folders on drive C cannot be deleted so as not to disrupt the operation of the system.
Cleaning junk and temporary files using Windows
First, let's look at how to clear drive C of unnecessary files in Windows 7/10 using the operating system itself. Windows has a built-in utility for these purposes. cleanmgr.exe, which can be launched either through the properties of the partition being cleaned or through the “Run” dialog box. After the utility scans the disk for outdated files, check the boxes on the “Disk Cleanup” tab and click “OK.”
If you click the “Clean up system files” button, reports, device driver packages, error dumps and, additionally, restore points, with the exception of the most recent one, will become available for deletion.

For a deeper and more thorough cleaning of drive C from garbage, you can use the built-in console utilities Dism And vssadmin. The first allows you to delete temporary data from the WinSxS folder, including backups created before installing Windows updates. To do this, use the following commands executed in the CMD console running as administrator:
- DISM.exe /online /Cleanup-Image /StartComponentCleanup
- DISM.exe /online /Cleanup-Image /SPSuperseded
- vssadmin delete shadows /all /quiet
The first command does the same thing as the cleanmgr.exe utility, only more thoroughly.

The second deletes all backup update packages from the WinSxS folder.

The third command can delete all restore points, including the last one.

However, you should use these tools with caution, since after executing the indicated commands, you will no longer be able to roll back the system to a working state or a previous version.
Note: Before cleaning the WinSxS folder, it is recommended to set its true size, thereby making sure that it really needs cleaning. To do this, you need to run the command on the command line Dism.exe /Online /Cleanup-Image /AnalyzeComponentStore and compare the actual size of the component store with the size indicator in the Explorer properties.

After updating Windows to a newer version, a folder appears in the root of drive C Windows.old, which can take up significant disk space.

The contents of this directory are copies of the system installation files of the previous version of Windows. If you are determined not to return to the old version of the system, you can delete the Windows.old folder. This is done again either using cleanmgr.exe or using the command line. In the first case, you need to find and select the “Previous Windows installations” item on the “Advanced” tab; in the second case, run the command in the CMD console running as administrator rd /s /q c:/windows.old.

You can get a little extra space on the C drive by removing unused components, the same ones that are accessible through the classic Add/Remove Programs applet.

The standard Dism utility is also used here. To select and uninstall an unused Windows component, run the following two commands in the CMD console running with elevated rights:
- DISM.exe /Online /English /Get-Features /Format:Table
- DISM.exe /Online /Disable-Feature /featurename:NAME /Remove
The first command displays a list of all components in the system, the second deletes the selected element. In this example, its name must be substituted for the NAME line element.


Manual removal of programs and files
With the exception of Windows 8.1 and 10 universal apps, almost all desktop programs are installed in the folder Program Files. If a program is no longer needed, it should be deleted so that it does not take up disk space, but this must be done either using a standard uninstaller or using special third-party programs. However, after uninstalling applications, folders with configuration files may remain on the disk, the weight of which can reach several hundred megabytes. Such data must be deleted manually.
Let's say you have removed Microsoft Office or Skype from your computer and you also want to get rid of all their “tails” remaining on the C drive. To do this, carefully check the Program Files and ProgramData directories in the root of drive C, as well as the folders C:/Users/Username/AppData. If the folder name matches the name of the deleted application, it can be deleted.

The AppData folder is a little more complicated. This hidden directory contains three subfolders: Local, LocalLow and Roaming. The first stores files created during the operation of various programs. You cannot clear it entirely, as this will most likely lead to the loss of saved application settings, however, half-empty folders of uninstalled programs can be completely safely deleted. You can also safely clear the contents of the folder located in it Temp.


The same applies to the LocalLow and Roaming folders; it is permissible to delete from them only those directories that belonged to previously uninstalled applications.

Note: By clearing the contents of the Local, LocalLow and Roaming folders, you lose user settings and data saved in their cache. For example, after deleting its folders in your user profile, you will lose your current messenger settings and part of your message history.
As for removing universal applications, they are uninstalled using the standard tools of the system itself or the CCleaner program, which will be discussed below. You can also move some universal applications from drive C to drive D, if they support this feature.

Transferring desktop programs to another volume is also possible; there is a special utility for this purpose SteamMover, which you can download from the developer’s website www.traynier.com/software/steammover.
Using CCleaner
Many novice users are interested in how to delete unnecessary files from drive C using third-party programs, as well as which of these programs are more effective and safe in this regard. These can be recommended CCleaner– a simple, fast, convenient, and most importantly safe Windows disk and registry cleaner. This program allows you to delete temporary data from the Internet and Windows itself, the contents of the thumbnail cache and DNS, Index.dat files, memory dumps, fragments of chkdsk files, various system logs, outdated prefetch files and a lot of other unimportant data.

Using CCleaner, you can clear the system registry of incorrect entries, optimize, enable, disable or remove browser extensions, analyze the contents of hard drives, search for duplicates and, of course, uninstall unnecessary applications, including universal ones.


CCleaner's interface is very simple, so understanding its simple functionality will not be difficult even for a novice user.
Considering, however, that the main purpose of CCleaner is still cleaning, all its additional tools have limited functionality. If your C drive is full of unknown things, and you want to find out what exactly it is, then for these purposes it is better to use specific utilities, for example, Scanner, JdiskReport or their analogues, showing more accurate information about the file structure of the media with the ability to navigate through subdirectories.

Other ways to free up space on drive C
Clearing the Driver Store
The steps described above are usually enough to free up enough space on the system volume, but what if drive C is still full? What else can you do to get additional space? One option is to clear the contents of the folder FileRepository located at C:/Windows/System32/DriverStore.

This directory contains copies of device drivers that were ever connected to the computer, and may also contain outdated versions of drivers. Before deleting driver packages from the FileRepository folder, it is highly advisable to create a complete list of them and find only outdated versions in it, leaving the rest untouched. It also wouldn't hurt to create a complete copy of all drivers installed on the system. To list the DriverStore drivers in a file, run the following command in an elevated command prompt:
pnputil.exe /e > C:/drivers.log

Compare the driver versions in the list and remove only the outdated ones.

To remove the selected driver, immediately run the command in the console pnputil.exe /d oem№.inf, where № is the name of the driver in the list.

If an error appears in the console when uninstalling a driver, it means the driver is being used by the system. There is no need to touch such a component.
As an alternative to the command line, you can use the free utility Driver Store Explorer, just designed to remove old unused device drivers.

Disabling hibernation
Thanks to the hibernation mode, the user can quickly return to work in running applications; on the other hand, its use requires the allocation of significant space on the system disk, slightly less than or equal to the amount of RAM. If having free space on your hard drive is a priority for you, you can disable hibernation mode by deleting the hiberfil.sys container file.

Launch the CMD console as an administrator and run the command in it powercfg -h off. Hibernation will be disabled and the bulky hiberfil.sys file will be removed.
Note: The hibernation file can be compressed by a maximum of two times with the command powercfg hibernate size 50.
Disabling the page file
In addition to other hidden system objects, there is also a file in the root of drive C that can be deleted under certain conditions. This is the swap file pagefile.sys. This file plays the role of a RAM buffer, and if an application does not have enough RAM to operate, its data is temporarily written to . Accordingly, if there is no swap file, a heavy application will slow down greatly or simply freeze while waiting for faster RAM to become available. Therefore, disabling and deleting the paging file is not recommended unless the computer has a very large amount of RAM.
If your PC has more than 10 GB of memory or you do not intend to run resource-intensive applications, you can try carefully disabling swap. To do this, open Advanced system settings and on the “Advanced” tab in the “Performance” block, click the “Options” button.

This will open another window. Switch to the “Advanced” tab, and then click the Change button in the “Virtual Memory” block.

Uncheck the “Automatically select paging file size” checkbox, turn on the “No paging file” radio button, save the settings and reboot. The pagefile.sys file will be deleted.

Removing the MSOCache folder
Users who have installed Microsoft Office have a hidden folder in the root of the system volume MSOcache, the weight of which can reach several gigabytes.

This folder is an office suite cache and contains files that may be needed to restore Microsoft Office if it becomes corrupted. The MSOcache folder is not involved in launching Microsoft Office or working with documents, so it can be deleted in the standard way. Just keep in mind that if Microsoft Office is damaged for some reason, you will have to restore the package from the installation disk with its distribution.
Compressing the contents of a system volume
You can free up some free space on drive C without deleting anything from it at all. Instead, all system files can be compressed. To do this, just open the properties of drive C, on the “General” tab, check the box “Shrink this drive to save space” and click “OK”.

To compress system files in Windows 10, you can use the function Compact OS by running one of two commands in the CMD console running as administrator:
- compact /CompactOs:query
- compact /CompactOs:always

The second command performs the same actions as the first, but in forced mode. It is used if you really want to shrink the system volume, and the first command rejects the operation, considering it inappropriate. Compression is completely reversible and to return the file system to its normal state, just execute the reverse command compact /CompactOs:never.
In addition to NTFS compression, LZX compression is available in Windows 10, but it has a number of disadvantages, which is why it is not widely used. LZX compression is applicable to read-only files and directories, but an entire system volume cannot be compressed with its help due to the risk of an unbootable system.
Utility cleanmgr.exe is standard software for Windows operating systems and is designed to clean disks of unnecessary files in order to increase free disk space. It can be launched through the main menu – “Programs” – “Accessories” – “Service” – “Disk Cleanup”, through the context menu of disk properties, or in the command line (Run dialog). If no parameters are specified on the command line, the utility goes into interactive mode, waiting for user actions.
For help using CLEANMGR, run the command:
cleanmgr /? or cleanmgr /usage
The help contains the most minimal level of information, without any examples:
To get the maximum effect when cleaning up the disk, the utility must be run in the context of an administrator account.
Command line options:
Sageset:n- setting a set of disk cleaning parameters with an identifier n to further perform this disk cleanup option using the parameter Sagerun:n.
. Sagerun:n- performing disk cleanup with a pre-prepared setting specified by the identifier value n.
/Tuneup:n- this parameter is similar to the parameter Sageset:n.
/LowDisk- the utility displays the Disk Cleanup tool window with checkboxes selected for all possible cleaning options. If you run as administrator, the “Clean up system files” button is not displayed and not only user data is cleared, but also system data, without any additional actions, after clicking the “Ok” button.
/VeryLowDisk- similar to the /LowDisk key, but disk cleanup is performed immediately, without dialogue with the user. .
/Setup- used to clear the disk of previous Windows data saved when reinstalling or updating the system. If you, for example, upgraded your Windows 8.1 to Windows 10 or reinstalled the system while preserving user data, then the command cleanmgr.exe /SETUP will remove all files of the previous system and data from the directories used for installation - C:\Windows.old, C :\$Windows.~BT, C:\$Windows.~LS, $Windows.~WS, C:\ESD\Download, C:\$INPLACE.~TR. The cleanup command with the /SETUP switch must be executed with elevated privileges. The results of program execution are saved in log files setupact.log And setuperr.log catalog C:\Windows\System32\LogFiles\setupcln. Instead of a parameter /Setup can be used /Autoclean.
/D drive letter- perform cleanup for the specified disk. If the parameter is not specified, the disk is selected manually.
Disk Cleanup settings are stored in the registry key
HKLM\Software\Microsoft\Windows\CurrentVersion\ Explorer\VolumeCaches
Examples of using.
cleanmgr /sageset:1- create a set of disk cleanup parameters with ID 1.
cleanmgr /sagerun:1- perform disk cleanup with a set of parameters specified by identifier 1.
cleanmgr /verylowdisk- perform maximum cleaning of the system disk without dialogue with the user.
cleanmgr /d D:- clean up disk D:
When running Disk Cleanup with administrator rights, it is possible to delete all shadow copies of a volume except the last one, which can significantly increase the amount of free disk space. Why go to the “Advanced” tab?

In Windows 7 and later, shadow copy data not only contains system restore points, but also represents an almost complete copy (snapshot) of the entire disk. These copies are stored in a specific format in the system folder System Volume Information, and are base snapshot files and subsequent snapshot files that reflect file system changes relative to the base snapshot. Shadow copies are created periodically by a special scheduler task, or when installing or uninstalling programs. There can be from several to two dozen such copies, depending on the size of the part of the disk space allocated for system protection, and each of them can be a snapshot file ranging from several hundred megabytes to several gigabytes. Therefore, it is the cleaning mode with additional removal of shadow copies that provides the maximum increase in free disk space.
To work with shadow copies of volumes, you can use the command line utility VSSADMIN
Hello, friends. When the question of freeing up disk space arises, users quickly run to the Internet to find the necessary information, of which there is a lot there. Most likely, you already know about the disk cleanup utility, which you can access through disk properties. There are also many other methods to which I will provide links; I wrote about them. For those who don't know, there is a so-called advanced disk cleanup, which I will talk about today.
Those who have run regular disk cleanup (this is when we right-click on the disk, go to properties and click on the “Disk Cleanup” button), we see several items there, for example, temporary Internet files, the recycle bin, thumbnails and other clutter. If this is not enough for you, you can go to the “Clean up system files” function. There is already a little more choice - cleaning previous versions of Windows, device driver packages, Windows Defender. This is where the new points end.
After this, other methods of cleaning the disk are used using various utilities. But there is no need to rush, because there is another systematic method.
How to clean up your disk using the Advanced Disk Cleanup tool
By the way, to quickly perform standard disk cleaning, I suggest always using the keys Win+R to open the Run window and enter the command there cleanmgr. Then you select the drive you want to clean.
To take advantage of the additional options that Advanced Disk Cleanup provides us, you must use an elevated command prompt. This can be done in any version of Windows except XP.
Launch CMD as administrator and enter the following:

This feature works starting with Windows 7. After entering, a window will open similar to regular disk cleanup, but there are many additional items there.
I won’t list them, everything is clear there. I’ll say right away that everything can be deleted. By clicking on any item below, a message is displayed indicating its meaning. Let's say that cleaning Windows updates only removes copies of already installed updates, but why do you need to store all these copies.

The only thing you may need is that previous installations of Windows allow, in case you change the system back.
As you can see, the tool is quite interesting and useful. In order not to enter this command every time through the command line, let's make a file on the desktop and run it if necessary.
Add an advanced disk cleanup shortcut to the desktop
We open the most ordinary notepad, you can use Notepad++, but run it with elevated privileges. Next, enter the same command as above, only with a small addition:
| cd C:\windows\system32 %systemroot%\system32\cmd.exe /c cleanmgr /sageset:65535 & cleanmgr /sagerun:65535 |

We save it along the way C:\Windows\System32 under the name clean.bat. Be sure to specify the bat extension, otherwise it won't work.

Now create a shortcut on the desktop, click browse and indicate the path to the file that you created.
Then enter the name of the shortcut and click Finish.


That’s all, an “advanced disk cleanup” shortcut has been created on the desktop and now you don’t have to constantly enter that command. Everything is done in a couple of clicks. The same can be done with absolutely any Windows command.
During the use of the operating system, many files accumulate on the hard drive that are no longer used, but still remain on the disk, gradually reducing the amount of free space and ultimately leading to system slowdowns. To reduce the number of unused files on your hard drive to free up disk space and improve computer performance, use the ". It deletes temporary files, cleans out the Recycle Bin, and removes many system files and other unused items.
To run the program, press WIN+R and enter the command cleanmgr and OK
Now select the disk you want to clean. This is usually drive C.

In the window that opens, click the button for a more complete disk cleanup. In the Disk Cleanup: dialog box, select the hard drive you want to clean up again and click OK. A new tab will appear in a new window. Additionally».

The next step is to select the checkboxes for the types of files you want to delete and click OK. In the message window, click the button

Tab " Additionally» is available when you select to delete files from all users on the computer. This tab contains two additional ways to free up even more disk space.

Programs and components. Opens Programs and Features in Control Panel, where you can remove unused programs. The Size column in Programs and Features shows how much disk space is used by each program. You can also remove unused Windows components there.
System Restore and Shadow Copies. Deletes all recovery points from the disk except the most recent one. System Restore uses restore points to return system files to a previous state. If your computer is running smoothly, you can delete earlier restore points to free up disk space. In some editions of Windows 7, restore points may include previous versions of files called shadow copies and backup images created using Windows CompletePC Backup. These files and images will also be deleted. For more information about System Restore, search for "System Restore" in Windows Help and Support.
Automatically launch Disk Cleanup according to a schedule
To create an automatic launch of the Disk Cleanup program, press WIN + R and enter the command mmc.exe taskschd.msc and OK

This command starts the Task Scheduler. Task Scheduler is an MMC snap-in that allows you to schedule automated tasks that run at a specific time or when certain events occur. The Job Scheduler contains a library of all scheduled jobs, allowing you to quickly view and easily manage jobs. From the library you can start, disable, change and delete a task.
Now we need to create a new task. On the menu Action select item. The Create a Simple Task Wizard dialog box opens.

A window will open Wizards for creating a simple task. Enter the name of the task and, if necessary, a description. Click next.

The next steps are clear and simple. Choose a schedule for this task. When the schedule is set, the program launch window will appear. Click Further. In the new window click Review

In the window that opens, find the field File name and enter cleanmgr.exe and click Open.


The last stage of creating a task.

All. Now you can view the properties of the task. Change the schedule, enable or delete a task.

This completes the creation of a schedule to run disk cleanup.
Related posts:
 High magnification monoculars - features and benefits Monocular magnification 50
 World of Tanks crashes on startup - fixing errors World of tanks crashes after every battle
 Server key 1c over the network
 How to turn on WiFi on laptops Add a new wireless network to a laptop
 How to find out iPhone serial number?


