Installing xp from disk to computer. The most comprehensive guide to step-by-step installation of Windows XP. Installing boot from disk and switching the operating mode of the hard drive
A fairly convenient option when loading Windows XP on a device is to use a special flash drive. The WinToFlash program will help you here. When it starts up for the first time, you must agree with the user agreement and click OK. Next, the main application window is displayed, which looks like this.
Since the program has been fully translated into Russian, the process of working with it is greatly simplified. To create a bootable USB drive, you must use the wizard. He assumes support at all stages of this process. There is another approach to the implementation of the task. To do this, open the "Advanced Mode" tab and click on "Transfer Windows XP Setup to a Drive". Select the appropriate drive if not specified. After that, the "Create" button is pressed.

Now you need to set the location of the Windows XP files. There are various options - they can be located on a hard disk, CD or as an image. The last point deserves a separate consideration. If you have an ISO image, you should open it with any archiver followed by unpacking. 
The next step is to specify which USB flash drive should become bootable. Be sure to consider the fact that this will entail the deletion of all data without the possibility of their recovery in the future. It is recommended that you save important information to your hard disk beforehand. The conversion process itself takes some time and you just need to wait.
As you can see from the written manual, creating a bootable Windows XP USB stick using WinToFlash is not a problem. The application provides two main modes for performing this task. The wizard accompanies the user and is the classic approach. Advanced mode allows you to set certain parameters. For example, this can include the choice of a bootloader type, fix some errors, and more. If this doesn't tell you anything, you don't need to use the advanced mode.
You can download the program on the official website of the developer //wintoflash.com/home/ru/
Creating a bootable USB drive using - WinSetupFromUSB
The WinSetupFromUSB program is quite popular when creating bootable USB drives. It is freeware and offers a simple process for getting things done. This application can be used for a wide range of purposes. 
The process should be considered in more detail:
- The USB flash drive must be inserted into the USB port of the device and run the program.
- It is required to indicate the path to the flash drive. If it is the only connected storage device, it will already be set by default. When the location is specified, Bootice is pressed.
- A special Bootice window is displayed, where you need to click "Perform format". There will be several items to choose from, among which you need to specify USB-HDD mode (Single Partition). A formatting message is displayed and must be confirmed. As in the previous case, it is recommended to save all important references beforehand.
- When the formatting is finished, you need to click "Process MBR", where you select the item "GRuB for DOS" and click the "Install / Config" button. When the process completes, Bootice can be closed.
- Now you need to specify where the files of the Windows XP operating system will be taken from. As with the previous method, there are several approaches, but the principle of operation remains the same. When the location is specified, the Go button is pressed and waits until the task is completed.
The main advantage of WinSetupFromUSB is its in-depth approach that allows for a lot of functionality. The program is great for advanced users.
Preparing the hard drive during Windows XP installation
Before you begin the process of installing Windows XP on your hard drive, you need to prepare it. It should be understood that installing multiple operating systems on one logical disk is not possible, since in this case none of the systems will be able to work correctly. Therefore, before starting the installation, it is necessary to format the HDD partition on which we will install.
We start from the previously created bootable flash drive, 
After that, the monitor will display the message "Installing Windows XP Professional". During this time, the process of loading the drivers that are necessary for the OS installation program to work occurs. 
After that, a window appears that offers to choose one of several options for continuing work. We need to start installing Windows XP, so press the Enter key and agree with the first point.

We read the license agreement from Microsoft and agree with it by pressing the F8 key. 
After that, we see a window in which we are asked to restore the previous version of Windows. You will see this message only if one of the versions of Windows XP is already installed on your computer. In any case, we recommend not performing a system restore, but proceeding with the installation of a new version, since only this option is able to solve all problems and ensure stable and reliable computer operation. To do this, press the Esc key. 
The installer now shows us a list of logical partitions on the hard drive. It is recommended to install the new version of Windows XP on the same partition where the old version was previously installed, as a rule, this is drive C. Select this partition and press the Enter key. 
Now we have to choose the type of file system that will be created on the logical disk after formatting. For modern computers, in most cases, the NTFS file system is best suited, so select the "Format partition in NTFS system" item and press the Enter key. 
After that, the installation program will display a window with a warning that all information from this partition of the hard disk will be deleted during formatting. If you transferred all the important information to other sections in advance - feel free to press the F key.
The formatting process begins, which can take quite a long time, depending on the size of the logical disk. 
Once the formatting process is complete, the installer will automatically begin copying the Windows XP files to your computer. 
After that, the computer will automatically restart. The system will boot from the computer's hard drive and start the Windows XP graphical installation process.
Windows XP installation process - main step
This section will directly answer the question "How to install Windows XP". This information is absolutely identical for the process of installing Windows XP from a CD, and for installing Windows XP from a USB flash drive to a laptop. The Gathering, Dynamic Updating, and Preparing to Install phases are all happening without our involvement. After that, we are asked to configure the language, regional standards for displaying numbers and currencies. To do this, click on the "Configure" button in the "Location" section. In the drop-down menu, select your country and click OK. After that, again click on the "Configure" button, but this time in the "Language" section. In the first drop-down menu, we can select the language that will be used by default when the computer boots. Below you can add input languages \u200b\u200bby clicking on the "Add" button (by default, two languages \u200b\u200bare available, Russian and English). If you click on the "Keyboard Options" button, we will get to a menu where you can set a key to disable Caps Lock mode, and also change the keyboard shortcut to switch keyboard layouts. Upon completion of the language settings, click "Next" and go to the next window. 
Here we are asked to enter our own name and the name of the organization. We enter absolutely any data and click "Next". 
Now you need to enter the 25-digit license key for your copy of Windows. This key is on the box, if you are using a licensed copy. In the case of pirated products, it must be in a text file. We enter this key, check the correctness of the input and click the "Next" button.

After that, a window appears for setting the computer name and password of a user with administrator rights. If you work on a home computer, you yourself choose a name that will later be assigned to your PC in the home network. If you are working on a corporate computer, check with your network administrator. Remember or write down the administrator password that you set in the same window, as it will be required every time you start Windows. 
In the next window, we are given the opportunity to customize the date and time. Select the desired settings and click "Next".

After that, go to the "Network Settings" window. It is best to skip the LAN setup at this stage and do it later, after the installation is complete. To do this, select the item "Typical parameters" press the "Next" button. 
We leave the working group unchanged "WORKGROUP" and click on. 
After that, copying system files to your computer's hard drive begins. Wait for the installation process to complete, after which the first start of Windows XP will occur. If automatic monitor setup starts at this time, wait until it finishes and click OK. 
In this window, left-click on "OK" 
After that we will see an animated Windows XP welcome window. 
After that, a window appears asking if you want to enable Windows Automatic Updates. From experience, it should be noted that it is better to leave automatic updates disabled. And update the system manually.

Next, we will be asked to configure the Internet connection and activate a copy of the OS. You can skip this step for now. 
Ready to sign up with Microsoft? To this question, we answer "No, some other time" and click on.

The next window prompts you to enter your account name, as well as the names of other users who will also work on this computer. Note that accounts with the names Administrator and Guest were created during OS installation. 
This completes the installation of Windows XP, click the "Finish" button and enjoy a clean operating system.

It usually takes up to 2 hours to install Windows XP. Installation can be done from disk and from a flash drive. If you want to install Windows XP from a flash drive, you
So, to install from disk, insert it into your floppy drive and restart your PC. You will need to put in the bios boot from the floppy drive, or call the boot menu, (Boot menu is a function that allows you to choose which device to boot the computer from. (Floppy drive, HDD (hard disk), portable hard drive, flash drive, etc.) On each PC, the boot menu call may differ, so press the f8, f9 keys in turn , f10, f11, f12) unless disabled in bios.
You can find out how to enter bios, turn on the boot menu there or set the computer to boot from a floppy drive or flash drive
If you write everything in one article on how to enable the boot menu or install boot from various devices, it will turn out to be very extensive, so I just made links. If a person can do all this, this information is useless to him.
Installation begins.
After the PC has seen and spun the disc, you will see Press any key to boot from CD press the space bar. If you missed this message, restart your computer and start over.
Choose to install Windows automatically. The mouse does not work during installation. Use the keyboard. After loading the system files, the following window will appear:

Then choose fast format NTFS

Formatting will begin, then copying the new files, and after completing, the computer should restart.
Now you need to boot not from the disk that is in the drive, but from the hard disk. When the Press any key to boot from CD entry appears again, ignore it. And if you set the boot from the HDD after the floppy drive to the bios, then the windows should start loading as if the PC was turned on normally, then the following window will appear:

Also, a little further, there will probably be windows asking you to enter a license key, computer name and password, etc. (In different versions of XP everything is different) We enter all this and wait for the installation to complete. After the installation is complete, the PC will reboot, again you need to boot from the HDD and you will see the desktop after a while:

After installing Windows.
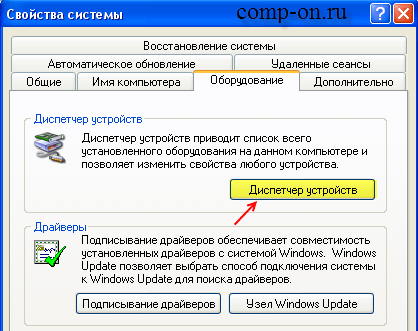
Next, you need to install the drivers for Windows to work correctly, if they have not been installed themselves. In order to see if all the drivers are in place, click the Start menu and right-click on my computer and select Manage. A window will appear where we press Device Manager.

As you can see in the picture above, I have not all drivers installed. If you have disks with drivers that come with your computer / laptop, put firewood from them. When there are no such disks, I use the wonderful Driver Pack Solution program.

Download it from the Internet, then run it and check the Expert mode checkbox on the left in the column. If there is no column, click the Expand button at the top right. Select the drivers you need to install, scroll down the list and there will be an Install button. After installation, restart your computer. Also, you can additionally look at the "" section and select what you need there. Almost all articles describe in detail how to install firewood.
Windows XP installation is complete.
Below you can watch a video detailing the installation of Windows XP from a disk. Good luck!
Reinstalling the Windows system for many users remains something mysterious and unknown, when in fact it is easy and quick. If you decide to upgrade to Windows XP and complete the installation yourself, then this article will help you cope with all the difficulties and answer many questions.
What to do before installing Windows XP
During the installation process, the files on the Local C drive will be formatted. Optionally, you can delete all the contents of the computer, cleaning it completely, however, if photos and programs are dear to you, it is better not to do this.
If your file system is divided into several disks, transfer important data from drive C to any other. After reinstallation, you will lose your photos, music, programs installed on the C drive.
Capturing Windows XP Image
The system is installed from any storage medium: optical disc, usb media, flash drive. If you do not have an operating system disk, you will have to create one yourself. For this, programs for creating and recording images are suitable:
- Daemon Tools;
- Ultra Iso;
- Alcohol.
It is more convenient to use Daemon Tools, since it is distributed free of charge on the official website: https://www.daemon-tools.cc/rus/products
Go in and download the product.
For complete instructions on recording images, see the article
- Install the program following the instructions of the installer;
- Go to the section for recording the image;
- Insert the disc into your computer;
- Select media and start recording.

Installing Windows XP
When you have an operating system disk or flash drive in your hands, you have saved the most important files - it's time to start installing.
- Go to BIOS. To do this, you need to reboot the system by pressing a special button when turning it on. Most often, this is F7 or F12. Pressing the correct button will take you to the BIOS menu. Be careful, as you need to have time to press the button before the boot splash screen appears.
- BIOS is different, it all depends on its version. Most often, it is designed in the form of tabs. You need to find the “Boot” tab.
- In it you will find the item “Boot Device Priority”. This section configures the primary media from which the system will boot. By default, it boots from the hard disk, but during the installation this priority must be changed to your optical disk or USB flash drive.


- Now select the primary medium with the “+ -” keys. With the help of the screenshot below you can easily understand how a memory card is translated and how a CD is translated. Your media should be on the “1st Boot Device” line.
- Remember the sequence of devices, which was originally.


- Now all that remains is to click on install and wait for the system to install. It will take up to an hour, during the process the computer may restart itself several times.
- Once the installation is complete, you will receive a completely new Windows XP system.

Things to do after installing Windows XP
This is not the end of the procedure. First of all, you need to go to BIOS again and set the boot priority to the one that was originally.
- Then download the drivers.
- If you do not have a driver disk, then use this trick:
- Go to the control panel through the Start menu.
- Find the Hardware and Sound tab.

- In this section, click on the "Task Manager" item.

- Now you can see all the devices on your computer. Right-click on them and select "Update Drivers".
As you can see, reinstalling the operating system is not that difficult.


Unlike XP, Windows 7 uses a new bootloader, so installing two operating systems with different bootloaders on the same computer is sometimes a daunting task for a beginner. It is good that Microsoft allows you to keep the old XP bootloader, installing a newer "seven" instead, and add an item to the boot menu to boot an outdated OS.
Today we will consider a picture when a user needs to install Windows XP next to an already installed "seven". The salt of the situation is as follows: if you install Windows XP after Windows 7, then the latter stops loading, and to get out of the situation, you will have to manually restore the boot loader "seven".
Installing XP after Windows 7
To install XP on a computer running Windows 7, it is recommended to use different partitions, hard disks, or install the "seven" on an SSD, and XP - on a magnetic disk if you have a solid state drive. Never install two systems on the same volume - it may end badly.
Consider a classic situation when the installation is performed on different volumes of the same hard drive or different HDDs when the partition with the installed Windows 7 is active (that is, without physically disconnecting or in the BIOS of the second hard drive).
Preparing a section for installing XP
We start the computer under Windows 7 and prepare a partition for installing XP on it. Under no circumstances use the program built into the XP installer for this (with its help you can only format the partition).
If you need to create a disk for installing an old OS, use a Windows tool called "Disk Management" or one of the popular free programs created to manage partitions. With their help, it is easy to split an existing partition with user data, "cutting off" part of the free space from it, and create a new system disk in the unallocated area.
After creating a new partition, be sure to set its label, so as not to be mistaken when choosing a location for installing Windows XP.
Installing Windows XP
We boot from a CD or a bootable USB-drive by entering the BIOS boot menu. Depending on the assembly, we select the XP installation option, wait for the preparatory stage, when the compressed files of the future OS are copied from the removable media. Now we indicate the section prepared in advance or created in the previous step, focusing on the size and letter label.

After pressing "Enter", we launch the installation or, if necessary, perform a quick formatting of the partition in the NTFS file system.

When the installation is complete, install the application software and device drivers and configure the system and proceed with restoring the boot loader "seven".
Reanimating the Windows 7 bootloader
Download two console utilities "bootsect" and "bcdedit" from any trusted source. Unpack the downloaded archive or archives to the system drive (C :). As a result, the directory "C: \\ FixBoot" should appear, if this does not happen, move the downloaded files into it.
![]()
You will need programs to restore the MBR boot record and boot loader that were replaced during the XP installation. First, we will reanimate the new bootloader used in the "seven", and then add an entry about XP to it to display a window with the choice of the operating system to be loaded.
Launch the command interpreter through the Start menu.

We enter the command "c: \\ FixBoot \\ bootsect.exe / NT60 all", which applies the main boot loader to all partitions designated as bootable (these are disks with Windows 7 and XP installed). We press "Enter".

At the end of the procedure, add a new entry to the reanimated bootloader, which allows you to display the bootable OS selection menu, where XP will show off along with Windows 7. Enter the code below and press "Enter":
The command will create a new entry in the boot loader configuration for the legacy ntldr boot loader used in XP. The text in quotes can be anything - this is the name of the item in the bootloader selection menu.

The XP loader (ntldr) is located on the C: drive. We indicate the path to it using the command:

We set the name of the loader:

We restart the laptop or PC and get into the OS selection menu.

If you use XP on a regular basis, the boot item should be set last in the list:

That's all. We reboot the laptop and see such a menu with the choice of the operating system to boot.

Reanimating the bootloader using the graphical interface
Using the Shell and unknown commands can seem daunting to most users. To simplify and visualize the above actions, there is a graphical shell with advanced functionality.
Stage one - bootloader recovery
- Download, run the EasyBCD installation file and wait for the application installation to complete. For the utility to function, you must install the .NET Framework 2.0 from Microsoft.
- Launch the application and go to the "Installing BCD" section.
- We select the volume where the bootloader was located before the XP installation (usually, this is the 1st partition with a volume of ~ 100 MB).
- We select the type of bootloader.
- Click "Overwrite MBR".

- We restart the PC.
Windows 7 should start due to the destruction of the XP bootloader.
Stage two - adding an XP boot record to the repaired Windows 7 bootloader
- Click "Add Record".
- We indicate the type of bootloader and enter its name displayed in the computer boot menu.
- We mark the "Autosearch disk with a working operating system" checkbox.
- Click on the "Add" button.

- Go to "Current Settings" and make sure that the program was able to add a new boot record.

If necessary, go to the "Edit boot menu" to edit the order of displaying the OS in the list and the delay time before loading the operating system by default. Click "Save".

(Visited 7 808 times, 1 visits today)
Everybody has to install or reinstall Windows XP for the first time. Many are afraid to do it on their own and entrust the installation to specialists, although even a novice user can easily cope with this procedure.
Actually, the process of installing any version of Windows is initially developed by Microsoft specialists in such a way that even a beginner can handle it. After reading this article, you will learn how to do this and understand that installing Windows is not difficult.
* Preparing to install Windows XP
If you want to install or reinstall Windows XP on a not new computer - transfer from the system partition (Usually C) all the files that you want to keep to other partitions of the hard disk. This does not apply to programs, they still have to be reinstalled.
It is advisable to have disks with drivers from:
- motherboard
- video cards
- other devices
 In principle, Windows has its own driver library that it uses during installation, but there is no guarantee that everything you need will be found. Although you can always find the missing driver on the Internet. If you are reinstalling an already working system, make a backup of the installed drivers and save it on any partition except the system one.
Programs such as Double Driver and the like will help you with this. It is very easy to find a description of the process and download the program via Google.
Of course, you must have a disk with the operating system itself. If you downloaded the image of the installation disc on the Internet, write it to the disc.
* Install Windows XP
Windows XP disk load into the drive (floppy drive). Now we need to set the BIOS to boot from this disk.
To do this, we reboot the computer and at the very beginning of the boot we start repeatedly pressing the DEL key (for laptops, the F2 key) until we get into the BIOS. Then we will need to find the tab responsible for setting the priority of the download.
In different BIOS versions this tab may have different names. One of the most common options is as follows: Find the "Boot" tab on top (move with the arrows on the keyboard), go to it (press Enter) and set with the arrows or +/- keys to the top position - "CD / DVD Drivers" (now "Hard Disk Drivers "). For more information, see the video at the end of the article.

Another BIOS option: find the "Adwanced Bios Features" tab and go into it (Enter)

Next, we are interested in a parameter that indicates to the system from what it should be loaded in the first place. By default, this line is "Hard Disk" (or HDD - hard disk). Again, select it with the arrows, press Enter, select "CDROM" from the list that appears (instruct the system to use the CD drive to boot), press "Enter", press F10 (save changes) and again "Enter".
In different BIOS versions, the names of the tabs and parameters may differ slightly (for example, instead of CDROM there may be a DVD, etc.), but the meaning of the actions is now clear to you and you can always figure it out. You can go into the BIOS in advance for review before reinstalling the system and find all the necessary parameters, so that later you will not look for anything.

After pressing the last "Enter", the system goes to reboot and starts to boot from the Windows XP disk, which we previously inserted into the drive. This will be evidenced by the following screen:

We press any key, even a space bar, and the installation begins.
Windows XP Setup starts up. We are offered a choice of one of three actions and the keys that correspond to them are indicated. Since we want to install Windows XP, we press "Enter", respectively.

A license agreement appears, which usually nobody reads. Press "F8" to continue (by the way, all the keys that you can use for actions are displayed in the tips that you see in front of you and at the very bottom).
At the next step, we are asked to select a hard disk partition into which the operating system will be installed. Usually this is section C. Select it with the arrows on the keyboard and press "Enter".
If you are installing Windows XP to a new computer, then your hard disk has not yet been partitioned and it's time to create them. As it is written in the tips, to create a partition, you need to press "C" on the keyboard and select the size of the future partition in megabytes.
Let's say if you want to allocate 50 GB for the system partition - that's 51200 megabytes. The section has been created. Press "C" again and create the next section. At a minimum, it is enough to divide the hard disk into two partitions: partition C for the operating system and programs, with a capacity of 50 GB, and another partition for everything else (for all the remaining free space).
However, we cut as many sections as you need. After creating the partitions, select the one into which we will install Windows XP, and press "Enter".
In the next window we are asked to format this section. We choose exactly the option that is shown in the picture below and no other. We press "Enter".
Most likely, no drivers will be needed, since assemblies from the Web, often, everything is already included. After that, do not forget to enter BIOS again when rebooting and change the first boot device from CDROM back to HARD DISK (HDD).

Those who install the licensed version, or an assembly without automatic installation and activation, will have to go through a few more steps. The first is regional settings. Here you can adjust the language and regional standards for your country. The default is "Russian". Click "Next".

Then there will be a window for entering the name and organization, you can enter any, it does not matter. In the next window you will need to enter the Windows XP activation key. If the license - look on the box from the OS. Either buy online or find anywhere else. We enter the key - "Next".

Then we enter the computer name (any) and the password (remember). Next, we customize the time and date for ourselves. If a window appears with configuring network parameters - just click "Next". That's all. Windows is installed. Do not forget to reboot and change the first boot device in BIOS to HDD.
After starting the freshly installed operating system, go to the device manager: "My Computer" - "View system information" - "Hardware" - "Device Manager".


We look at devices marked with yellow question marks as having no drivers. Install drivers on them. If it doesn't work automatically, we look for drivers on the Internet by name or device code and update it manually.

By double-clicking on any device, we get a window with all the information about it. On the "Driver" tab, information on the installed driver, on the "Details" tab, you can find out the device code.

On this topic, the installation of Windows XP is complete. If, after installing the operating system and all the necessary software, you make a copy of the system partition with Acronis, you will always have at hand an image of a fresh working operating system without bugs and everything else that you can deploy at any time.
Windows XP installation video


