How to erase all data from iphone 4s. How to reset iPhone to factory settings and clean it completely. Removing apps in iCloud
If you want to sell, give away or release your used iPhone to others, the first thing you should do is to erase everything on iPhone completely to keep your personal information safe. When you buy a second-hand iPhone, you may need to erase all the content and settings on the iPhone before using it to avoid unnecessary troubles. If you have deleted some private data on your iPhone, you must want them to disappear permanently to prevent your secrets being revealed.
Apple have considered these situations and erasing iPhone is rather easy. In this tutorial, 5 ways to erase iPhone will be introduced:
1.
2.
3.
4.
5.
Method 1: Erase iPhone directly with your iPhone (FREE)
1. Make sure that you have backed up your iPhone with iTunes or iCloud, and the backups are up to date if you need to restore the iPhone later;
2. Tap “Settings”\u003e “General”\u003e “Reset”\u003e “Erase all Content and Settings” on your iPhone.
Method 2: Erase iPhone using iTunes with iPhone connected (FREE)
1. Disable “Find My iPhone” in “Settings”\u003e “iCloud” if you have turned it on;
2. Connect your iPhone to your computer and launch iTunes;
3. Select the iPhone when it is found by iTunes;
4. In the “Summary” tab, backup your iPhone with either iTunes or iCloud using the “Backup Now” button if you want to restore the iPhone again;
5. When the backup is finished. Click the “Restore iPhone ...” button in the same panel and then hit “Restore” in the pop-up to erase all the content and settings on your iPhone.
Method 3: Erase iPhone remotely with iCloud if your iPhone is lost or stolen (FREE)
You are able to erase iPhone only if you had enabled “Find My iPhone” before it was lost;
1. Log in to https://www.icloud.com/#find with your Apple ID, then click “Find My iPhone”;
2. Click “All Devices” and choose the iPhone you want to erase after it is located;
3. In the iPhone’s Info window, click “Erase iPhone”;
4. Click “Erase” in the pop-up window;
5. Enter your Apple ID password;
6. Click “Next” and all the content and settings on your iPhone will be erased.
If your iPhone is running iOS 7 or later, you are allowed to input a phone number and a message to display on the iPhone after it's erased.
The remote erase of your iPhone will start immediately if it's online; if it is office currently, the iPhone remote erase will start the next time it's online.
Note: After easing an iPhone, you cannot use “Find My iPhone” to locate it any more. So, it's recommended to locate it or play a sound on it before you decide to erase it remotely.
All the 3 above methods provided by Apple are not 100% safe since iPhone “Restore” does not delete personal data and there are so many iPhone data recovery tools available. If you want to erase your iPhone securely and completely, download the professional iPhone eraser SafeEraser.
SafeEraser is an easy-to-use but professional iPhone erase tool to erase all data (all the content and settings), only deleted data or just private data (Safari history, cookies, input history, search history and so on) on iPhone and overwrite the data with junk files using US Military specification over-writing technology to ensure the erased data is not recoverable. In addition, it also enables you to clean up iPhone data (such as log files, cached files, temp files and junk files) to free the storage space on your iPhone.
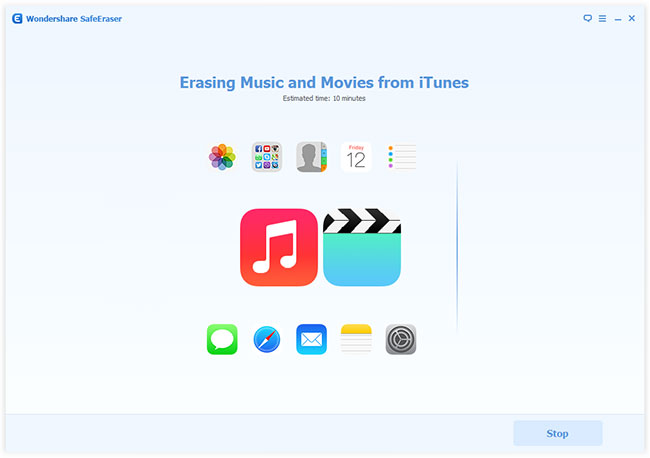
Method 4: Erase iPhone data completely and securely with SafeEraser
With this method, you can erase all the content and settings on your iPhone 4, iPhone 4S iPhone 5, iPhone 5s, iPhone 5c, iPhone 6, iPhone 6 Plus, iPod touch 4/5/6 and all iPad generations and restore the device to factory settings no matter whether the device is jailbroken or not, carrier-locked or not.
1. Connect your iPhone to your computer and launch SafeEraser;
2. After the iPhone is found by the software, choose “Erase All Data” on the right;

3. Click the link of “Security Level:” and change the “Security Level” as “High Level (3 Times)” in the “Settings” window;


4. Input “delete” in the box to confirm the iPhone erase and click “Erase Now”, then the iPhone eraser will start to erase your iPhone.
The “High (3 times)” Security Level uses the DoD 5220.22-M data sanitization standard originally defined by the US National Industrial Security Program (NISP) in the National Industrial Security Program Operating Manual (NISPOM). There is no possibility to recover the erased data on iPhone any more once the iPhone is erased with this method even if the government's state-of-art data recovery technology is used.
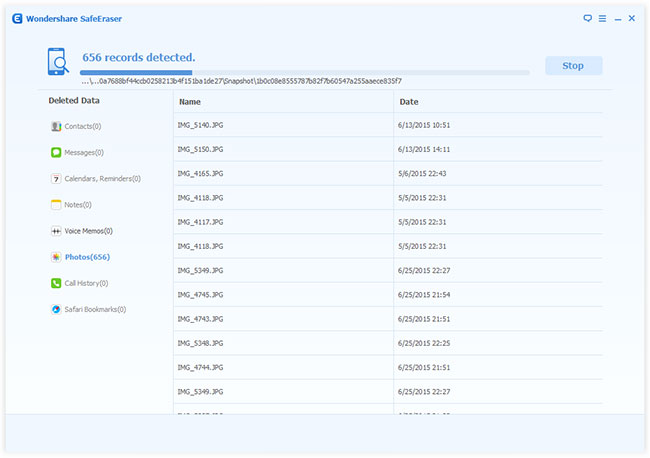
Method 5: Erase deleted data on iPhone completely using SafeEraser
1. Get your iPhone connected with your computer using the USB cable came with the iPhone;
2. When the iPhone appears on the SafeEraser, select “Erase Deleted Files”;

3. The software will automatically start to analyze and scan the deleted data on your iPhone;
This step is just a must before advertising a sale. The reason is very simple: with the help of a backup, you can transfer absolutely all data from your old iPhone to, starting with contacts, mail, notes, applications and ending with the arrangement of icons on the desktop.
First, we save a local backup. To do this, connect the iPhone to your computer, open it in "Devices" and select "This computer" in the "Backups" section. Next, click on the "Create a copy now" button and wait for the backup process to complete.


Now you need to save the backup to iCloud. Directly on the iPhone, go to "Settings" → iCloud → "Backup". Here we need to turn on the "Backup to iCloud" toggle switch and click the "Create backup" button.
Step 2. Remove the SIM card
The most obvious and commonplace advice when selling a phone, which is nevertheless neglected by some users. Losing your number and other troubles related to paying bills is not needed by anyone, so do not forget to remove your SIM card before giving the iPhone to the new owner.
If you are the owner of the CDMA version, it will be a little more difficult for you: you have to visit the nearest communication salon of your operator in order to unlink your number from the old iPhone.
Step 3. Delete all data and reset settings
The last item on the list, but not by importance. The iPhone has taken on many of the responsibilities that other devices used to do. Contacts, mail, SMS, notes, calendars, reminders, photos, payment data - all this is confidential information, not intended for prying eyes. Therefore, it should be removed before your iPhone falls into the wrong hands.


Open "Settings" → "General" → "Reset" and click "Erase content and settings." The uninstallation process will start, after which your iPhone will be as good as new. All that remains is to turn off the iPhone and provide its initial setup to the new owner.
IPhone 6s is about to go on sale, and if you are, then it's time to get rid of it. You can just post an ad and sell the smartphone as it is, but at the same time there is every chance to give the new owner and your personal data with a credit card in addition. Below I will tell you what you need to do to get your iPhone ready for sale and not be damned for "".
Disable iCloud (Find My iPhone and Activation Lock)
After that, the data of those applications that were stored in iCloud will be erased from the device, and the "Find iPhone" function will be disabled. This is very important not only for you, but also for the buyer, as you will save him from problems with Activation Lock. Just in case .
Reset your iPhone
Last step - . Once again, make sure that the backups are safe and sound, as after that you will lose all information.

After erasing content and settings, the iPhone will need to be reinstalled. You do not need to enter your Apple ID and password (if you have previously disabled Find My iPhone).
Finally
After the steps described above, you can safely sell your iPhone, it remains to publish an ad and wait for the call. The main thing is to meet with the buyer in a crowded place and avoid dubious proposals in the style of "money in the morning, chairs in the evening." For those who, on the contrary, want to buy an iPhone from their hands, I advise you not to buy a "brick" or a copy on Android.
Have you decided to purchase a new model of a gadget from Apple, and sell the old device or give it to another person for use? To do this, it must be properly prepared: delete personal information, save and protect your data from being used by third parties.
Storing personal data from an iOS device
In order not to regret that your contacts, personal photos or important documents have disappeared without a trace, make a backup copy of the entire contents of the device before cleaning the device for sale. There are 4 ways to do this, which are described below.
iCloud
- Connect your device to Wi-Fi and charge it.
- Next, open "Settings", select iCloud - "Backup" and activate this function.
- In the "Start Copying to iCloud" window that appears, click "OK".
Confirm the start of the copying process with the "OK" button
- Confirm your Apple ID password.
- Click the "Create Backup" button.
iTunes
To use iTunes to copy your data, follow the instructions:
- Connect iPhone to computer using USB.
- Launch iTunes on your computer.
- Select your iPhone from the list of connected devices.
- Click Create Copy Now.
Mac FoneTrans
You can also use the Mac FoneTrans app to save your personal files:
- Connect your device to your computer using USB.
- Open the Mac FoneTrans app on your computer.
- Select To Folder from the main menu.
- In the Output Folder field, specify the required folder to save the copy.
Choose where to back up your files to your PC
- Click on the Start button and wait for the process to finish.
iMazing
You can also create a copy of your files from an iOS device through iMazing:

To reduce the likelihood of data loss or damage from your device, save it using several of the above methods at once.
IOS device cleaning
An iOS device can be cleaned in two ways. In the first - the device is still with you and you can perform certain manipulations with it, in the second - the device has already been sold or lost and you do not have access to it.
If you have access to the device
Before selling a device, it is important to erase all data on it so that no one can view or use your content later.
If you still have the device, to clean it you need to follow these steps:
- unpair your device and Apple Watch if necessary.
- create a backup (methods of creation are given above);
- exit iTunes and App Store;
- delete iCloud data;
- delete all data from the device.
To sign out of iTunes and the App Store, in the device settings, select: iTunes Store / App Store - Apple ID - Sign Out.
To delete data stored in iCloud from your device, do the following:

To delete all data from your device, you need to follow these steps:

Video: How to Delete Data from an iOS Device Before Selling
If there is no access to the device
Even if you've already sold or transferred your device without first cleaning it, you can delete all content and personal information remotely. To do this, follow these steps:
- If your device is using Find My iPhone and iCloud, go to the website or Find My iPhone on another device.
- Select the required (your) device and click "Erase".
- Then click "Remove from Account".
If you are unable to delete information using the described method, block the ability to view your content on the device. To do this, change your Apple ID password. Data from the device will not be deleted, but the new owner will not be able to view and use your information and content.
On the iCloud site, you can also delete the debit or credit card information you used for Apple Pay.
Make sure to remove all sensitive information from your iOS device before transferring or selling your iOS device. This is easy enough. Also, do not forget to create a backup copy of your content so that later you do not regret losing important information or your favorite photos and videos. Good luck!
Oftentimes, the reason why iPhones and iPads start to perform much worse than usual lies in the lack of free space in the device's memory. If you notice that your device has become "brooding", often freezes, involuntarily reboots without a command, then it's time for "general cleaning". It's time to clear the device memory from extra megabytes, or even GB of software junk. Agree, "handles" to delete each application and its files is not professional.
Today I will tell you how to quickly clear the device memory in whole or in part, as well as how to reset the iPhone to factory settings.
In the settings of iPhone, iPod Touch and iPad in the menu "General -\u003e Statistics" there is an interesting section - "Storage". This menu contains information about how much and what the device's memory is busy with. Take a look, you might be surprised that even the seemingly harmless applications, such as social media managers, can store gigabytes of useless data.
Recently, we were contacted by an iPhone owner who faced a problem of insufficient memory. When this led to the fact that the device fell into. Restoring iPhone was not considered a solution to the problem. the user did not want to lose data from the device. Fortunately, everything ended well, the person still had to restore the iPhone through iTunes, and the information was restored from the existence of which he did not even know.
This precedent pushes to always keep the device's memory "clean", or at least periodically clean it of information "trash".
You can clean your iPhone radically, i.e. completely, or partially, by removing individual applications and their files. It is quite simple to do this in several ways at once.
Ways to Clean iPhone
- Erase content and settings on iPhone.
- Erase iPhone to iCloud.
- Removing the application from the desktop.
- Removing the application in the iPhone settings in the "Storage" menu.
- Removing an app from iPhone via iTunes.
The first 3 methods allow you to completely "zero" the device's memory, as a result of which you will have an iPhone with a "clean" one. After cleaning, you will need to re-configure it and restore the necessary data from an iTunes or iCloud backup.
The last 3 are classic, allow you to manually delete individual applications and all their data.
We have already written about restoring the iPhone and that's enough, I don't see the point in repeating it. Let's try to erase the content and settings on the iPhone and see what it threatens.
How to erase content and settings on iPhone
This procedure is carried out very simply, in only 5 "tapes".

To erase content and settings on an iPhone, it does not need to be connected to a power source, but make sure that the battery level is at least 25%. Otherwise, if the battery is completely discharged during the erasing process, you may need to restore the iPhone using iTunes.
!Warning
If you have an iPhone or iPad with a jailbreak (Pangu for example), as a result of erasing the content and resetting the settings, the device will go into "eternal apple mode", but instead of the Apple logo, the progress icon will rotate on the screen. The iPhone will have to be restored using iTunes.

- Warning -
I draw your attention, the application (program or game) is removed along with all the content. If, for example, you created files in a particular program, Pages for example, and delete it, all files created in Pages will be permanently deleted. Save files created on iPhone in cloud storage (iCloud, Dropbox, etc.).
In addition to applications, free space on an iOS device is consumed by photos, videos, music, contacts, notes and other important information. But there is another secret (for many) memory eater - Safari.
The mobile web browser from Apple works like any other: when the site is loaded, it loads its contents into temporary storage (cache). This is done in order to speed up the loading of pages upon repeated access to them.
When re-accessing the web pages loaded into the cache, the cached data is not downloaded from the servers again, but is retrieved from the cache. On the one hand, this allows you to save on traffic and get fast loading of web pages, on the other hand, you have to put up with the fact that the cache "eats" memory.
So, if you actively use your iPhone or iPad for "Internet surfing", be prepared for the fact that the Safari cache can take up a lot of memory space. This amount depends on how much data the server hosting the site has allowed to be cached. The iPhone owner cannot limit this size, all that remains is to clean it periodically.
Advice: Get in the habit of periodically clearing your Safari cache to improve the health of your iPhone and iPad.
How to clear the Safari cache on iPhone

So, in fact, everything is simple. Now you know how to remove the "problem" application from the iPhone or completely clear its memory.
If you have any difficulties or questions about the topic of the article, welcome to the comments.
Related entries:
 Promotion on Instagram: the most detailed instructions Promotion on Instagram: free or effective
 How to make money on Glopart
 How to connect the Internet via Wi-Fi on Huawei P10 and similar smartphones and tablets on Android
 What is the difference between an ultrabook and a laptop?
 How to choose a sound card for your computer


