Connecting laptops to each other. Ways to connect two laptops. Connection cable
In today's article, we will consider a situation where we need to connect a laptop and a PC for an equivalent exchange of information. In principle, a laptop is the same computer, so we will just need to create a network between two computers, but more on that a little later.
First, I would like to say that a laptop is not a flash drive and you can’t just plug it into a USB connector; we’ll have to make a full-fledged network. So let's get started.
Connecting two devices
The first thing you will need is an Internet cable (twisted pair) crimped on both sides; it looks like this:
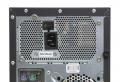
Now we find the network card connector on the back of the computer:

And a similar connector on the back of the laptop:

We connect the two network cards to each other with a cable and go to the settings of the Windows operating system.
OS setup
In order to connect a laptop to a computer correctly, you need to ensure that these devices there were different names, different IP addresses and one workgroup.
In order to change the name of the computer and workgroup, go to “Start” and right-click on “Computer”, from the drop-down menu select “Properties”

In the window that opens on the left, select the item "Advanced system settings":

In the window that opens, in the tab "Computer name" click on the “Change” button:

If necessary, change the name of the computer and workgroup:

Now let's look at IP addresses and other network settings. Everything that I will describe will need to be done both on a computer and on a laptop.
Right-click on the network status icon (near the clock) and select .


We look for our local network connection and right-click on it, select “Properties”.

Looking for a component in the list "Internet Protocol Version 4", select it and click on the “Properties” button

We put the switch in position "Use the following IP address" and enter the IP address – 192.168.1.2, and the subnet mask 255.255.255.0. This is what we enter for the computer:

For a laptop, we simply set a slightly different address: 192.168.1.3, the subnet mask remains the same:

Checking the created connection
In theory, after these settings, the connection between the computer and laptop should be established. Let's check if this is true and ping the network. To do this, press the Win+R key combination on your PC and write the command cmd in the window that opens.

In the command line, enter the command ping 192.168.1.3 (the IP address of the laptop that we specified above). If there is no packet loss and you get normal responses, then everything is fine:

If there is packet loss, then there is no connection, and you will have to disable Windows Firewall or another firewall that you have installed.
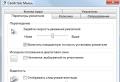
We also go to "Network and Sharing Center" and in the left column click on the item "Change advanced sharing settings"

There in the section "Home or Work" enable all parameters as shown in the screenshot:

We also disable password protected sharing. If you do not do this, then you will not be able to connect your computer to a laptop that has accounts with passwords on the Windows operating system (How to set a password on Windows 7).

Create shared access
Once you've done all this, you can't just drag and drop information from your laptop to your computer and vice versa. To do this, you need to open shared access to hard drive partitions or individual folders.
To hard drive partition
To open access to a hard drive partition, you need to right-click on it and select the item from the drop-down list "Sharing - Advanced settings...":

In the “Access” tab, click on the button "Advanced setup..."

We put a bird near the point "Share this folder". If you want full access to this disk from another computer with the ability to change information, you can additionally click on the “Permissions” button and check the box next to “Full access”. And in the main window, click on the “Apply” button and click “OK”.

Let's see, now the icon of our section has changed slightly, two people have appeared next to it. This means that public access is open.

To folder
To share a folder, right-click on it and select "Shared Access - Specific Users":

Add all users and click on the “Sharing” button. If you want information to be able to be changed in this folder from another computer, then we give all users the rights "Read and Write".

We are given a message that the folder is open for public access:

We do all the manipulations described above both on a computer and on a laptop (I will repeat).
Login from one device to another
Everything is set up, now all that remains is to figure out how to get from the laptop to the computer and vice versa. To do this, go to Explorer and look for the “Network” item in the right corner, or simply write in Explorer the IP address of the computer to which we want to connect as follows: 192.168.1.2. If everything is in order, then we should see the folders and drives we have shared:

If you forgot to disable password protected sharing, you will see the following window:

In this case, either create a password for the user or disable password-protected sharing.
That's all, I explained all the main nuances of how to connect a laptop to a computer via a cable.
And also watch a video on the topic:
Rate this article:
(1
ratings, average: 5,00
out of 5)
Webmaster. Higher education with a degree in Information Security. Author of most articles and computer literacy lessons
- Actually two computers
- Cross cable
- Perseverance and a little patience
- "Regular" network (EtherNet, IEEE 802.3). “Native” method in the sense that the network connector is intended exclusively for communication with other computers. Available on any modern laptop; for an ancient device without a built-in network adapter, you can easily purchase an external PCMCIA one. To connect a laptop directly with another computer you will need the so-called. crossover cable, which is a regular “twisted pair” cable with a different wiring from the usual one. Available at any more or less decent computer company. Cable length - up to 100m. After connecting two machines with such a wire, these machines are able to see each other in a network environment. This may require setting up a network connection. The method is supported by the overwhelming number of operating systems; it can be said that it is platform independent. The theoretical speed of the most common EtherNet version is 100 Mbit per second; a gigabit network, as the name suggests, is capable of more; the speed is determined by the slowest adapter on the network.
- IEEE 1394, also known as FireWire and i.Link. It is usually used to connect a digital video camera or external storage device, but it can also be a way to connect two computers directly using an appropriate cable. The IEEE 1394 interface is not very often found in laptops (external PCMCIA solutions can also be used), but if it is available, pay close attention to it, because the theoretical speed limit of the protocol is 393 Mbit per second, almost 4 times faster than the usual 100- megabit network. Cable length - no more than 4.5 m. Support from the operating system is required, and this support is not available everywhere. Under WindowsXP, a connection via FireWire is established without problems, “pretending” to be a regular EtherNet network.
- The USB connector also provides the ability to connect two computers, but is somewhat less convenient. There are two types of USB-Link cables. The first, the simplest, only provides the opportunity to “see” the contents of another computer connected with such a cable from a simple program that imitates the standard “Windows Explorer” and drag files (only from this program) with the mouse from one machine to another. The second, more expensive, is actually two USB-to-EtherNet controllers connected to each other by a network cable. Of course, in this option we will get a regular network connection, but if there are built-in network adapters on both connected devices, this option seems like a “redundant entity”: it’s easier, faster and cheaper to use a regular network connection (see above). The theoretical maximum speed of a USB connection is 480 Mbit per second, however, the operating features of the interface greatly reduce the actual speed, which is lower than the speed of IEEE 1394.
- One of the most practical options for transferring information from or to a laptop is, oddly enough, the indirect method using a USB flash drive as an intermediate medium. It would seem that this method has only one disadvantage compared to the direct connection of two computers - additional operations, lower speed, limited storage capacity. However, the wide distribution and ease of use of USB flash memory drives (always at hand, really working Plug-and-Play) reduces all these disadvantages to the level of insignificant ones.
- Wireless LAN, aka wireless network, aka Wi-Fi, aka IEEE 802.11. A modern wireless way of “communicating” computers (and not only) with each other. Features are discussed above. The speed in the most common modern version (802.11g) is 54 megabits per second, the communication range is within 30 meters. At the operating system level it is represented by a network connection of the EtherNet type. Supported by the vast majority of modern operating systems.
- Bluetooth (bluetooth, IEEE 802.15.1) is not very good as a method of connecting two computers. Not very high speed (no more than 723 kilobits per second in one direction), short range (up to 100 meters in the open air, highly dependent on the environment), not the easiest setup, worse interference and burglary protection compared to Wi-Fi make using Bluetooth to transfer data between two computers not very convenient. On the other hand, if you need to connect a laptop with a PDA or mobile phone, Bluetooth will be a good option.
- IrDA, aka infrared port. Historically the first wireless method of communication. On new laptops it occurs less and less often (due to competition with other methods), but on laptops that came out before it occurs quite often. The speed is low (the fastest options, the so-called Fast Infrared - 4 Mbit per second, "regular" - only 115 kbit per second), the typical communication range is 5-60 cm, and there must be direct visibility between the transceivers ( within approximately a 30-degree cone) and the absence of direct solar illumination. Therefore, it is used only for transferring small amounts of data, and more often not with another computer, but with a mobile phone, for example. In technical terms, it is a type of serial interface.
- LPT-link, also known as LapLink cable, also known as parallel direct cable connection, also known as “direct cable connection via a parallel port”, IEEE 1284. Historically, one of the oldest methods of connecting computers with each other, therefore it has practically no problems with use under different operating systems systems. Currently dying due to the dying of the interface itself; but where an LPT connector is present, you can use it without problems. The cable length is limited to 2-3 meters. The speed depends significantly on the type of LPT port and can reach 2 megabytes per second, although on older machines without ECP/EPP support the speed will be an order of magnitude lower.
- COM-Link, also known as serial link, also known as Null modem, also known as serial direct cable connection, also known as “direct cable connection via a serial port”, RS-232. Also one of the most ancient methods. Low speed (usually the upper limit is 115 kilobits per second, and often even less) and the death of COM ports were the main reasons for the almost complete ignoring of this method in today's practice, although for the sake of sporting interest and in some extravagant cases the method can be used apply.
- Indirect methods using various storage media, such as floppy disks, CDs, external hard drives, magneto-optics, etc., have a right to exist, but are either very outdated (floppy disks) or less convenient compared to using a USB flash drive (see . above) as an intermediate carrier.
- Exotic communication options using a direct cable via a modem, encoding via a sound card, etc. perversions are theoretically feasible, but have no practical meaning.
- Two laptops with network cards.
- Crimped RJ-45 cable.
- Open Network and Sharing Center.
- There should be “Local Area Connection” here - right-click on it and open “Properties”.
- The window contains a list of components, from which you must select “Internet Protocol TCP/IP”.
- The protocol properties will open. Here you need to check “Use the following IP address” and set the parameters.
- Give the first laptop the address 192.168.0.1, the second one – 192.168.0.2. Do not change the subnet mask value.
- Click "OK" - both devices are now accessible via the IP addresses you assigned.
Connecting two computers using a cable may be needed in a variety of situations. Using a cross cable, you can make a working connection between two computers, between two laptops, or between a laptop and a computer. In particular, such a connection can be useful for those users who want to transfer large files from one machine to another (for example, a collection of films or music albums).
Using a cable is ideal if you want to connect two computers but do not have special network equipment at hand. If one of the machines has two network cards installed, then you can easily configure Internet access on this machine and on the other. If only one network card is installed on the computers, this will not work.
We will analyze in detail two connection options. In the first case, we will talk about the features of setting up a connection when only one network card is installed on each computer. In the second case, the settings will imply the presence of two network cards on one of the computers (either a regular PC with two cards or a laptop with one regular network adapter and a second wireless one will do).
What is needed to connect two computers
We do not need any special network equipment to cable connect computers. You can carry out all operations yourself using a minimal set of components.
We will need:
A crossover cable can be easily purchased at any electronics store or radio market. Also, if you wish, you can prepare such a cable yourself, but this will undoubtedly be more difficult and longer. The crossover cable pinout is shown below.

The finished cable that will be used to connect computers is shown below.

This option is used most often, since few computers (especially PCs) have two network cards installed. In most cases, a home computer is equipped with one network card. With this type of connection, both machines will not have access to the Internet. The general connection diagram is shown in the photo below.

After a physical cable connection between two computers, you need to carry out simple network settings. We will analyze the entire setup process in detail so that you do not have any questions.
To get started, go to the Network and Sharing Center and click on the “Change adapter settings” link.

After that, double-click on the cable network connection.

Click on “Properties”.


We install selectors opposite the manual setting of network parameters and enter the values there as in the photo below.

Click “Ok” and “Apply”. On the second computer, the sequence of actions is similar, but in the IP address field we enter the value “192.168.0.2”. After these simple settings, a working connection will be established between the two computers.
To check the functionality of the created network on a second PC, press the key combination “Win + R” and enter the command “cmd”.

In the window that appears, enter the command “ping 192.168.0.1”. In response, a message should appear indicating the successful transmission of packets.

The same can be done on the first computer, just use the command “ping 192.168.0.2”. If you are unable to ping the network, it means you did something wrong or the connection is blocked by an antivirus or firewall.
Now let’s take a closer look at the option of how to connect two computers with a cable so that each computer can access the Internet. To do this, one of the machines must have two network cards installed: one for connecting to another computer, the second for connecting the provider’s cable. The general connection diagram is shown in the photo below.

The network settings are the same as those we looked at in the first method, with the exception of one point. In addition to the IP address and mask, you will also need to set the gateway.
On a computer with two network cards, you need to configure network access to the Internet so that you can freely use the Internet on the first computer. To do this, on a computer with the address 192.168.0.1, go to the “Access” tab and check the box next to the corresponding inscription. After this, both computers will be able to access the Internet.

conclusions
We found out how you can connect two computers using a crossover cable and how to properly configure the connection for normal network operation. We really hope that this information will help you solve the problem of connecting two computers quickly and efficiently.
It is difficult to imagine the life of a modern person without the use of computer technology, since it has “penetrated” almost all areas of his activity. Laptops are especially popular due to their compactness and amazing portability. For this reason, when going on a visit, many people definitely take a laptop with them to take advantage of the opportunity and show off downloaded photos, videos, etc.
Users no longer want to use external storage media
Laptops are also active assistants in solving production problems. However, there may be situations when you need to provide communication between two laptops in order to quickly transfer important data. Using disks or flash drives is quite inconvenient because it takes a lot of time. For this reason, it is important to understand how to connect a laptop to a laptop, which should be purchased in advance. There are fairly simple connection methods that involve communication via cable or Wi-Fi network.
Wireless connection
This connection method is only suitable for those laptops that are equipped with Wi-Fi modules. However, it should be noted that all modern laptops have such a wonderful function, so you can connect via a wireless network in almost every specific case.
In addition, connecting via Wi-Fi is popular among users because it is not accompanied by any additional financial expenses.

Wi-Fi connection
So, having outlined the task associated with connecting two laptops to each other, it is now important to understand technically how to connect a laptop to a laptop via Wi-Fi.
Connecting laptops via Wi-Fi is also good because it allows you to provide a single network not for two, but simultaneously for several laptops, tablets or smartphones. It is absolutely important that the user does not even have to worry about additional software installation. Modern operating systems Windows 7 and 8 already have software installed that allows you to easily and without problems provide a wireless connection.
So, in order to figure out how to connect a laptop to a laptop, first determine the laptop on which the wireless connection will be installed.

Having decided, the user enters the “Start” menu, then at the bottom there is a search bar in which to type the phrase “command line”. After completing the search, the required utility will be displayed at the top; clicking on it will open it as an administrator.
If you have not logged in as an administrator, you should call the utility again, and then right-click on it, initiating a call to the context menu, in which you can easily find the line “Run as Administrator”.
In the command line that opens, a command is written to create a wireless network using the Wi-Fi module. For this purpose, the user writes: netsh wlan set hostednetwork mode=allow ssid= "..." key= "...". Instead of quotation marks and ellipses, you should specify the desired network name, as well as a password, to prevent unauthorized use of the network by unauthorized users.
To complete, enter the new command again: netsh wlan start hostednetwork. At this point, the process of creating a wireless network is considered complete. However, you should take the following steps to ensure that all connected laptops operate correctly.

It is very important to change the settings of the wireless adapter to obtain an IP address and DNS server automatically. These two important settings are set on the Internet Protocol Version 4 (TCP/IPv4) tab.

At this point, all sorts of wireless options will be displayed in the lower right corner of the laptop display. You should select the required network name, agree to automatically connect, and enter the correct password, which you can automatically remember so that you don’t have to type it every time you log in.
This connection option is also good because the main laptop itself acts as a Wi-Fi router, successfully distributing the Internet to connected devices.
Wired connection
You can connect multiple laptops without using a wireless connection via Wi-Fi. However, in this case, you will have to visit a specialized store and purchase a special HDMI or RJ-45 cable. After a successful purchase, it will be useful to familiarize yourself with the recommendations on how to connect a laptop to a laptop via an HDMI or RJ-45 cable.

Connection via cable
Many users wonder if it is possible to connect a laptop to a laptop via HDMI. To answer this question, it doesn’t hurt to understand what an HDMI cable is.
An HDMI cable provides communication between home appliances. In most cases, an HDMI cable is used when there is a desire to connect a computer or laptop to a TV, since the main functional purpose of an HDMI cable is to transmit audio and video signals.

Since HDMI guarantees high speed and quality of video and audio transmission, users actively use it when connecting two devices that support a network connection via HDMI.
If users want to avoid problems associated with connecting devices over a network via HDMI, it is rational to fully study the information whether it is possible to connect a laptop to a laptop using any other cable.
Such a connection may indeed be actively used if it is impossible to provide a wireless connection. The RJ-45 cable is used as a basis.

One end of the purchased cable is inserted into the network card of one laptop, and the other end into the network adapter of the second laptop. After this, you must make changes to the adapter parameters.
On the first laptop you should register the IP address 192.168.1.1, the subnet mask will be set automatically, nothing should be changed. On the second laptop, the IP address changes only slightly and can take the following form - 192.168.1.2, the subnet mask will again remain unchanged. After the corresponding changes take effect, both laptops will be visible on the network, so users can perform various actions, exchanging data quickly and comfortably.

It sometimes happens that the first login to the local laptop after connecting fails. However, there is no reason to despair, because everything can be fixed, ensuring successful use of the network in the future. To avoid connection problems, the user must go to the “Network and Sharing Center” menu, then go to the “Change additional sharing settings” section, in which set the access parameters by enabling sharing.

You may also need to make changes to your guest policy settings. To go to “Security Settings”, where changes will be made directly, type secpol.msc at the command line. In the dialog box that opens, go to the “Local Policies” line, then to “Security Settings”, where you select guest access.

Despite the fact that you have to perform a number of actions and make some changes, all these manipulations are quite simple, accessible and feasible. Each user, if there is a desire to provide communication between several laptops, can achieve what they want and become much more aware of this issue.
NastroyVse.ru
How to connect two laptops, wired or wireless (wi-fi) connection
Almost every user has had the idea of connecting one computer to another. The reasons are different for everyone: be it playing on a local network or transferring files (without removable media). Here I will talk about how such a connection can be made so that users have the opportunity to network merge, unify, if you understand what I’m talking about.
So how do you connect two machines to each other? There are several solutions to this problem:
1). Wired connection. To do this, you need a network card in every laptop (most often it is built-in initially) and a wire, of course.
2). Wireless connection. For this you need a Wi-Fi adapter, which is most likely also included with your laptop; if not, then in the form of a PCMCIA card.
Wired connection.
We connect laptops using a twisted pair network cable. You need: network cards in each laptop, a crimped network cable, which can be purchased at the nearest computer store (which, by the way, I advise you to do; such a cable costs no more than 20 rubles per meter, instead of experiencing extra hemorrhoids with cable crimping yourself). But, as they say, it’s a matter of business, so it’s up to you to decide, maybe you already have experience working in this profile. For those who want to directly participate in the entire “connection” process, I will give an explanation of how to crimp the cable yourself. You will need: a crimping tool - crimper, RJ-45 connectors (2 pcs.) and the number of meters of cable you need. Next, I will present a crimping diagram.
Cut off the outer sheath of the twisted pair, carefully! Under it you will see 4 pairs of multi-colored wires. They need to be inserted into one of the connectors according to the diagram shown in the figure and crimped with a crimper.

The cable is ready! It should look like this:

We insert our connectors into the network cards of laptops. On both devices, go to the “Network Connections” -> “Local Network Connections” folder. By right-clicking, go to properties and in the “Components..” list, select “Internet Protocol (TCP/IP)” and click “Properties”. On the first computer we enter the following IP address parameters: 192.168.0.1, and on the second: 192.168.0.2, leaving the subnet mask as is, that is, by default (255.255.255.0). We summarize the work done by pinging one laptop to another. This is done by calling the command line (cmd.exe): ping 192.168.0.1. Have packets started being sent? You did it.
To make it more convenient to share files, you can assign one workgroup to both laptops. Right-click on “My Computer” -> “Properties” -> “Computer Name” -> “Change”. Then we set the same workgroup names on both machines. Computer to reboot. Next, to open access to a folder, right-click on it - “Properties” - “Access” - “Sharing”, click on the link and confirm. In the future, you can simply check the “Share this folder” checkbox.
Connection completed, congratulations!
Connecting computers or laptops via Wi-Fi, do it yourself.
To make this connection, you don't need anything other than laptops with Wi-Fi. This connection mode is called Ad-Hoc. It will also be possible to connect the Internet to both computers, while only one computer will be connected to the Internet. It doesn't matter which laptop you start with, because the settings are almost identical in every way. Let's start with the one where there is no Internet:
1) Open “Network connection properties” (via the start menu)
2) Turn on Wi-Fi
3) Now setup wi-fi. In network connection properties
4) Let's start setting up the IP address. “TCP/IP protocol” and set it up like this: we assign the following parameters to the computer that has Internet access: 192.168.0.1, and to the other: 192.168.0.2. Subnet mask is the default on both.
4.1) Default gateway – set the IP address of the first laptop
4.2) DNS server. Its meaning is different for each laptop, find out yours by looking at the provider parameters
Click “OK”.
We set up shared Internet access only on the first laptop.
4.3) Go to the “Advanced” tab in the network adapter properties and select “Allow other network users..”
After we click OK. Windows will warn us that local communication may be lost. network, and that the IP address 192.168.0.1 will be assigned, but we have already installed it. So don't worry and click OK. (you just may have to turn off your firewall, because it happens that it “does not allow” the second computer to connect to the first).
5) Go to the “Wireless Networks” tab and click add.
6) Create a wireless network to connect laptop to laptop. Choose any network name. At the bottom, click on “This is a direct connection..”. We remove the sign from “The network key is provided automatically”, after which we enter the key (from 5 to 13 characters) manually and confirm it. BE SURE TO REMEMBER YOUR KEY.
7) Configuring automatic connection to the created network
In order for your computers to connect to each other themselves as soon as they are in sight, in the “Connection” tab, check the required box.
Click OK. We do the same thing on the second laptop.
When your Wi-Fi is configured correctly, a wireless connection icon should appear in the taskbar on the right.
To check for IP connectivity, we ping computers. If difficulties arise, try disabling the Firewall.
That's all you need to do to connect, enjoy your work!
I offer as a gift to download a free book: causes of freezes on a PC, data recovery, computer network through electrical wiring and many other interesting features.
Did you like this useful article? Subscribe to RSS and get more information you need!
mycompplus.ru
How to connect laptop to laptop
To simplify the transfer of information, say, from one laptop computer to another using a regular flash drive, users often try to connect two laptops to each other via a network or cords. Yes, such options do exist - let's look at some.
Create a local network using a network cable through the physical connection of the devices, provided that built-in network cards are present in the laptops. If possible, just in case, buy two adapter adapters.

Disable Windows Firewall in the standard way through the Control Panel.

Next, go to “Network Center...”. In the local network settings, select the “TCP/IP” protocol properties. Next, activate “Use the following IP address”, where you enter the data in the long window. Do similar manipulations with another laptop, but in the “Change adapter parameters” window, replace the final address digit with a third-party one, even if it’s 12 – it doesn’t matter.

There is another option - a wireless channel. Add and create a computer-to-computer network in the standard way through the “Network Sharing Center and...” and for speed, type “Manage wireless networks” into the search line, then follow the steps of the wizard.

Make sure that the laptops are not very far from each other to begin with, but preferably within sight, and have sufficient battery power, only then make the necessary settings.
SovetClub.ru
How can you connect two laptops to each other? Where will it be faster? - website Notebooks.Net (Hardware section)
In fact, you can transfer data between two computers using any of the peripheral connectors of a computer, in particular a laptop. Each method has its own characteristics, let’s consider them in descending order of their prevalence and ease of use:
laptop.net
Connecting two laptops to a network: effective methods
 A huge number of external drives have been invented to transfer information. But they also have disadvantages: limited capacity, low recording speed. This can be annoying, especially if you need to transfer files from one laptop to another. They seem to be portable devices, but they are of no use.
However, this is not the case. By learning how to connect a laptop to a laptop, you can directly transfer large amounts of information without having to write to external drives.
The connection is usually carried out in two ways, the choice of which depends both on the technical capabilities of the devices and on the desire of the user.
Wired connection
If wireless modules are missing or not working correctly, an excellent connection can be ensured using a special cable.
You will need:
Note: it’s easier to immediately buy a ready-made cable - it should be freely available in any computer store. You can do it yourself, but this requires special knowledge and additional tools, the cost of which significantly exceeds the price of the cable.
The cable connectors are installed in the network card of laptops. Next, all actions are performed simultaneously on two connected devices:
How to log in from one laptop to another
The connection is established, but now you need to learn how to use it. Open Windows Explorer and clear the address bar. Write in it the IP address of the second laptop in the format \\192.168.0.2. All accessible folders from the other laptop should appear.
Possible problem
Sometimes it happens that when a connection is established, there is no network access. To open it, go back through the control panel to the network management menu and click on the “Change advanced settings” link, which is located on the left.
There will be several points here, in each of which you need to check whether access is enabled. Save your changes and try connecting again through Windows Explorer. This time the connection should go through without any problems.
Wi-Fi connection
This is the most convenient way to connect two laptops. Considering that in the last decade, all laptop models without exception are equipped with Wi-Fi modules, such a connection will not require any additional costs. In addition, several computers, smartphones and tablets can be connected into one network at once.
But first, let's figure out how to connect a laptop to a laptop. The first step is to choose one laptop on which to create a wireless connection. Further:

Then you need to obtain IP addresses. To do this, use steps 1 to 4 described for creating a connection via cable. The only difference is that you do not register the IP addresses, as well as the DNS server address yourself, but click “Get automatically”.
After creating a wireless network and setting up IP addresses, you can connect between laptops. To do this, go to “Wireless Networks” through the control panel or by clicking the corresponding icon in the system tray. Here you will see the name of the network you created. Select it, click connect and enter the password you came up with when creating the connection.
Check connection
To check if the connection is established, you need to launch the Windows command prompt and type “cmd” without quotes. In the command line, write the address of the other laptop – 192.168.0.2. Press "Enter". If the packets are exchanged, it means the connection is configured correctly. If not, try checking from the second laptop by also opening the command line and entering the address of the first laptop - 192.168.0.1. The main thing is not to confuse the addresses - otherwise you will “ping” the same computer from which the check is being carried out and will not get the correct result.
Other connection methods
Some users try to use USB cables to connect two laptops. This method cannot be considered successful, since the throughput of such a connection corresponds to the speed of writing data to a regular flash drive.
There are other ways to connect a laptop to a laptop: infrared port, Bluetooth, HDMI, etc. But, firstly, the throughput then becomes extremely low, and only a very small amount of information can be transmitted. Secondly, connecting using such methods is a much more labor-intensive process compared to those described above.
Often laptop users need to connect two devices. Depending on how well you understand this type of technique, there are several ways. Before connecting your laptop to your laptop, be sure to check out all the options to choose the one that suits you best.
Wi-Fi as a synchronization method
Perhaps the simplest and most accessible way to connect two laptops is to connect via. You don’t need any special knowledge, you just need to follow the simple instructions step by step, even if you don’t understand anything about this synchronization method. It is noteworthy that if at least one of the computers has access to the Internet, then the second device connected to it can automatically get into the network.
1. Set up PC No. 1 as for a regular Wi-Fi connection. Turn on the router, open “Network Connections” in your laptop, create a new wireless network if there is none. At all connection steps, agree with what the system offers. Attention: if you want to access the Internet on device No. 2, then in the last step, check the box next to: “Allow network access to other users.”
2. On device No. 2, configure the following parameters in the “Network Connections” tab: “Internet Protocol TCP/IP” window, “Properties” tab IP 192.168.0.2; “Subnet mask” 255.255.255.0; The “main gateway” should be the same as device No. 1 (you can view it in the same tabs on the configured laptop). Whatever the system tells you, choose these values, agree with everything.
3. On device No. 1, create another wireless connection with any name (this will be your home network, that is, the place where both PCs are connected). Use any word or set of numbers as a key, but be sure to write it down so you don’t forget. Before connecting a laptop to a laptop, check the “Direct connection” box, and also disable automatic key entry (it’s easier to do this manually).
4. On device No. 2, repeat step three so that the laptops have one common network where they can see each other. This is where the created key will be needed to connect them without any wires.
5. Test the visibility of devices to each other. This is not difficult: in the active Wi-Fi zone on each of the laptops, a window should appear notifying you about the presence of a home network (current connections).
Possible problems include the following: it blocks a network that is foreign to it (the one you created), and therefore prevents devices from synchronizing. Just disable it on both laptops.

in a couple of clicks
This method is simple, but there is no guarantee that both devices will be able to access the Internet. For example, one will remain connected to the network, and the second will act as a few simple steps and clicks to connect two independent laptops.
It is not so important what company they are, what operating system they use (if it is the same Windows family, of course). This method is ideal for those who need to frequently and frequently transfer information (of any format) from one device to another. Before connecting 2 laptops, distribute the information into folders on them. This will significantly reduce your time in the future.

Step 1: Create a HomeGroup
On any laptop, go to the “Control Center” folder. For convenience, the main laptop will be numbered 1. Click on the “Network and Internet” tab, then “Homegroup”. If you have not previously created it (for any purpose), then this needs to be done. Click on the “Create Home Group” button.
Step 2: Define Folders
Windows will offer you several folders to choose from that will be visible to your HomeGroup. Check the boxes where you need them. If your personal devices are connected, then there is nothing wrong with setting access everywhere. In any case, you can then add folders at your discretion for general viewing in the home group.
Step 3: Create a Password
For security purposes, the system will give you a password, which you can then use to connect a second device to the home group. Write it down. Your group is ready immediately after clicking “OK”.
Step 4: Join a HomeGroup
Before you connect your laptop to your laptop, make sure they are (it doesn't matter how). Without this, it is impossible to create an environment for devices to “communicate.” On device No. 2, go to the “Home Group” in the same way as step 1, click “Join”. Enter your password, allow access to the required folders, and click “OK.” After this, you can safely send files from one device to another, but to strictly specified locations on your hard drive.

Of course, these are far from the only ways to connect a laptop to a laptop, but they are the simplest and most affordable, without extra costs. As, for example, in the case of a cable, which you need not only to buy, but also to choose the appropriate one, otherwise there is a risk of ruining both devices.