Contact form 7 letter 2. Actions after successful submission of the CF7 form. Create and display contact forms
For roofing a roof in St. Petersburg.
Hello! Today I will tell you how you can put feedback form forWordPress using plugins as well as simple code in different ways. So, let's start with the fact that although I don't have a feedback form, most likely you will need it for a number of the following reasons:
- Convenience and efficiency. If you sell something or provide paid services, then the feedback form is vital for you. Imagine that a client has found a product that suits him, but he has a few questions left that haunt him. In this case, he will probably want to contact you to clarify some details. If you left only email from your contact information, then this can be a big problem for the buyer, because nowadays there are not so many people using mail, but mostly they are on social networks.
So sometimes it happens that a client can just sit from another computer that does not have authorized mail, and he does not remember the password. Or, for example, while he went to his mail, he had doubts about whether you can be trusted at all and whether he needs this little thing that you offer. As you can see, while the client crawls to his mailbox, he is likely to change his mind or, from simple laziness, go to look for a more attractive offer, where the price will be lower and convenient feedback from customers.
- Protection of your email address. If you once conducted your mailing list, then you probably received letters of the following content: "Selling email addresses inexpensively", etc. These emails are collected from all over the Internet by special bots (robots), to which spam letters will subsequently be sent. If you do not want to be among them, then you need not to shine (show) your address from the mail anywhere. In my case, this no longer makes any sense, since my soap (mail) has been surfing the Internet for more than 3 years and is registered on more than 1000 sites.
By the way, for a long time, in order to somehow fight spam, many site owners who did not yet know about the feedback form, instead of their mail, left its picture. In this case, bots could not enter the email into the spam database, but this caused inconvenience for visitors. Who wants to spell for an hour to enter someone's mailbox when today there are two cool buttons "copy" and "paste".
Contact form plugins for WordPress.
The Internet today is just a sea of \u200b\u200bvarious extensions that create a feedback form for visitors. You will meet many in this article today.
1 ) So, I present to you the Usernoise plugin.

In my opinion, this is the coolest feedback plugin that is perfect for many online stores and businessmen. This form appears as a pop-up window and can be called from any page of the site by clicking on the special button on the right or left.
Installing and configuring the Usernoise plugin.

5 ) Installing and configuring the Contact Form 7 plugin.
How to make a WordPress contact form using other methods?
You may be surprised, but I have described only the smallest part of how you can make a feedback form for WordPress. No matter how I tried to grasp the immensity, it did not work for me. So, the feedback form can be made through a number of the following plugins: Fast Secure Contact Form, Contact Form by Contact ME, Visual Form Builder, nForms - WordPress Form Builder, Mapped Contact Form, Ninja Forms. In addition, there are also various services such as main-ip.ru and smartoforms.ru.
That's all, if you have any questions, ask.
Hi everyone. As, then I have too much energy and I decided today to write another article that will be devoted to one of the WordPress plugins. Quite an interesting and functional plugin, it copes with its duties 100% and I haven’t found it better yet to issue a feedback.
I don’t want to torment you for a long time, I think you already understood about what will be discussed in the article. And so, today we will understand and configure contact Form 7 plugin for WordPress, namely, create a feedback form.
I sat for a long time and thought about the disadvantages of the plug-in and nothing came to my mind, but this creation has a lot of advantages.
Pros of the Contact Form 7 plugin.
- Clarity and ease of customization. The person who comes across this plugin for the first time will be able to figure it out without any problems.
- Creation of a large number of different forms and their integration into the site.
- The form is inserted using a shortcode on the page and anywhere on the site. It is very convenient.
- Support for Russian and other languages.
- Support for Ajax requests.
- Spam protection with a text question or captcha. For captcha, you will additionally need to install Really Simple CAPTCHA.
- Customizing the appearance of the form using css styles.
- Integration with the Akismet service to protect against spam.
On our website you can see and use such a form. If you click on the "Contact us" menu item, a window will appear where you can see an illustrative example.
Let's get started!
First, we need to download this plugin. It is possible from our server here is the link -\u003e or from the official site here is the link -\u003e Download from the official site .
After downloading you need to install it on. I will not describe how to install, I think you should know this process from A to Z. Downloaded, installed, now we directly go to ourselves, in order to understand and configure it.
Setting up the Contact Form 7 plugin and creating a feedback form.
Now that you have downloaded and installed everything as needed, go to the WordPress admin panel and find the item Contact Form 7, click on it and we will be taken to the page for adding a new form.

Form creation.
In order to create a new form, click on “ Add new”, Then select the language (Russian by default) and click“ Add new ”. After all the steps taken, you should have the following picture:

The form is created, now we will customize it, according to your needs, and first give it a name. In my case, I will call “ Test form”, You name it whatever you want and then click“ Save ”. Now you can see the shortcode that will need to be inserted into the site code where this form will be displayed.

We'll need the code a little later as we need to set up the form first. Go to the form template and customize it.
On the right is the drop-down list “ Generate tag”, If you expand it, you can see many fields that are added to the form.
 Generate Tag field
 On the left you can see the fields that have already been added to the form.
For example, let's make a simple form with a name, mail, phone number, a text question to protect against spam, a message and a send button.
Commences.
We make a text field for the name. In the “Generate tag” drop-down list, select “ Text field”. We put a check mark on the required field, give it a name in my case “NAME” and assign an id so that the field can be styled using css styles. I got id \u003d "name". Below you can see the text “ Copy this code and paste it into your form template on the left”. We take this code and copy it into the form template, as in the picture:

For mail (e-mail) we do the same, for the phone we select from the list “Generate tag”, the field “ Phone number”And we do the same by analogy.
To configure the message, select “ Text field”And do the same by analogy with everything described above.

Now add the field “ Question". To do this, in the drop-down list, select the item “ Question”, Give it a name. In the Question | Answer field, you can ask different questions and answers, below the field there is an example of a logical question, you can ask a text question, for example, “Is it the third month of the year? March ”, etc. Paste the code as before.
 field "Question"
 And the last thing we need is the button “ Send message”, You can leave the one that in the template or in the“ Generate tag ”list, select“ Send button ”. The template is ready, press the button “ Save”.
Let's check what we got, copy the shortcode and paste it on the page or in any part of the code where necessary. I will paste on a test page.
Here's what I got:

You should have something similar.
Configuring the recipient of the form and messages
We go down a little below the form template and see the addressee settings.
- Destination field. Enter the mail from which letters will be sent to visitors who fill out the form.
- Sender field. Instead<>, we substitute our shortcodes (the names that were given to the fields). You can see them above. In my case it will be<>.
- Topic field. I always write the Feedback Form and indicate the site.
- Letter template box. Here you can deduce what your heart desires. For our example, I make the From field:<> and data Phone:, Message ..
- The rest of the fields are empty.

In the end, do not forget to save.
If you go even lower, you can see the message settings. Everything here is in Russian, so you can edit it to suit your needs as you want. Here I think you'll figure it out
The form is ready, you can go to test and see if the message comes to the mail that you specified.
Everything works fine for me, after pressing the “Submit” button, I see the message “ The message was sent successfully. thanks. ”You can test and see what errors the form will give if the data is not entered correctly.
As for the css styles, they can be added to the main css file style.css. With firebag, you can look at the field ids and classes and style them appropriately.
Contact Form 7 Plugin for WordPress very functional, you can make a form of any complexity, I am sure you are convinced of this. On this I will end, if some points are not completely clear, write in the comments I will try to help figure it out. Thanks.
A contact form is extremely useful for your site - it keeps your email address out of the way (reducing spam) and helps users easily contact you directly through the site.
If you created a page Contact us on your WordPress site, adding a feedback form, customizing it and starting to receive messages is easy.
The easiest way to create a contact form is to use - there are many different plugins, and you can choose any. However, in this tutorial, we will be using Contact Form 7.
With over 3 million installations, Contact Form 7is the most widely used WordPress contact form. Its intuitive interface and quick setup will help you create a feedback form in minutes.
Before you start this tutorial, you need the following:
- Access to WordPress dashboard
Step 1 - Installing Contact Form 7
- Login to your WordPress dashboard and click on Plugins → Add New in the left panel menu.
- Find Contact Form 7 in the search and click Install.
- After installation, click Activate to activate the plugin.
Step 2 - How to create a feedback form
After activating the plugin, a new section will appear in the left panel menu Contact Form 7.
- Click on Contact Form 7 → Add new to create your first shape.
- Enter the name of your contact form, for example WordPress Contact Form.
- Some of the labels and text areas have already been positioned to help you figure out the process. You can delete them or add new labels and text areas by selecting them from the list above.

If you are not sure which of the form elements you need, then just leave them as they are, you can go back and edit them later.
Depending on the items you selected, your code should look something like this:
- You can add and remove items depending on your needs. For convenience, use special tools above the area with the shape itself.
- The * in the code means that this field is required.
Step 3 - Configuring the Message Format
When a visitor sends a message through the feedback form, you will receive a message containing his name, contact information and its content itself.
You can customize this message in the section Letter - some of the tags that you can use in the letter are listed above the letter itself. Try changing the email template by adding some tags to it - you can come back at any time and change it again.
IMPORTANT! Make sure you enter the correct email address in the field To whom - this is the address to which all messages will be delivered.

Step 4 - Configuring Notifications
In the tab Notifications you can customize the messages that your visitor will see when the email is successfully sent or any error (incorrect email address or missing one of the required fields, etc.).

Step 5 - Saving and Publishing the Form
When you are finished with the settings, you can save the changes by clicking on the button Save at the top right of the panel.
After saving, a shortcode will appear at the top of the page. It will be highlighted in blue and should look something like this:
- Highlight the shortcode and copy it
- Paste the shortcode into the page, post or widget where you want the form to display

- The result should be something like this

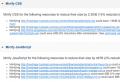
Step 6 - Validating the WordPress Contact Form
It is very important to check the work of the feedback form and take care of its correct appearance. Also make sure that the delivery of messages through the form is stable.
To do this, just visit the page of your site with the form and send a message using it - you can always go back to the form editor and make the necessary changes.
Conclusion
This guide helped you learn how to create a contact form using the Contact Form 7 plugin for WordPress. Now you can receive messages from your users directly through the site.
Want to know even more? You can experiment with tags and templates and change pretty much everything. You can also try setting Flamingo - a plugin for storing messages to store all received messages in a database (this is quite useful if you have problems with your mail server).
In this article, we will look at how to create a feedback form on the site using the Fast Secure Contact Form plugin. Spam protection (!), Easy settings, wide possibilities, beautiful form.
Fast Secure Contact Form - how to make a feedback form
The feedback form must be on the site. It can be installed on the page "Contacts", "About me", "About us", "Services". Search engines welcome interactivity and boost the site in search results. If you are not interested and you do not plan to make money on your site, install the feedback form anyway. Over time, you will surely have regular readers and partners. Give them the opportunity to contact you.
Compared to other plugins, Fast Secure Contact Form does not use JavaScript, which reduces the use of web server resources (even less than a simple Contact Form plugin), protects against spam using the Akismet plugin, which is installed in the basic version of WordPress, and most importantly (for girls), you can make beautiful feedback forms without much knowledge.
Plugin Fast Secure Contact Form in English. Here you will find a partial translation on the settings and installation of the form (version 4.0.32) on the WordPress site (compatible with version 4.1).
Remove external links
After installing and activating the plugin, remove the link to the plugin author page:
Plugins - Fast Secure Contact Form - Edit - si-contact-form.php file (in previous versions - si-contact-form-display.php)
This is how the form looks with default settings. Not bad already. But it could be even better. In the following articles: add fields, customize, decorate.
In the same tab, you can change the format of the fields: date, time, start of the week, types and size of attached files and save empty lines in the message (text field).
Save the made lines with the blue button Save Changes and go to the next setting.
If you still have questions on how to make a Fast Secure Contact Form feedback form, ask questions in the comments. We will try to answer them.