Connected hard drive with seven boot ini correction. Boot file boot ini in Windows XP. What should be done
Boot problems are common among Windows users. This happens due to damage to the tools responsible for starting the system - the MBR master boot record or a special sector that contains the files necessary for a normal start.
As mentioned above, there are two reasons for boot problems. Next, let's talk about them in more detail and try to solve these problems. We will do this using the Recovery Console, which is contained on the Windows XP installation disc. For further work, we need to boot from this media.
If you only have a distribution image available, you will first need to write it to a flash drive.
MBR recovery
The MBR is usually recorded in the very first cell (sector) on the hard disk and contains a small piece of program code that is executed first at boot and determines the coordinates of the boot sector. If the entry is damaged, then Windows will not be able to start.
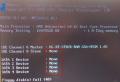
- After booting from a flash drive, we will see a screen with options available for selection. Push R.

- Next, the console will offer to log in to one of the copies of the OS. If you have not installed the second system, then it will be the only one on the list. Here we enter the number 1
from the keyboard and press ENTER, then the administrator password, if any, if it is not set, then just click "Enter".

If you have forgotten the administrator password, then read the following articles on our website:
- The command that "repairs" the MBR is written like this:


- The new MBR was written successfully, now you can exit the console using the command
and try to start Windows.

If the launch attempt was unsuccessful, then move on.
Boot sector
Boot sector in Windows XP contains bootloader NTLDR, which "works" after the MBR and transfers control directly to the files of the operating system. If this sector contains errors, then further system start is impossible.

Restoring the boot.ini file
In file boot.ini the order of loading the operating system and the address of the folder with its documents are registered. In the event that the file is damaged or the syntax of the code is violated, then Windows will not know that it needs to start.

Transferring boot files
Besides boot.ini files are responsible for loading the operating system NTLDR and NTDETECT.COM... Their absence makes it impossible to boot Windows. True, these documents are on the installation disk, from where they can simply be copied to the root of the system disk.
- We start the console, select the OS, enter the admin password.
- Next, you need to enter the command
This is necessary to view the list of media connected to the computer.

- Then you need to select the letter of the drive from which we are currently booted. If this is a flash drive, then its identifier will be (in our case) "\\ Device \\ Harddisk1 \\ Partition1"... You can distinguish a drive from a regular hard drive by its size. If we are using a CD, then we choose "\\ Device \\ CdRom0"... Please note that the numbers and names may differ slightly, the main thing is to understand the principle of selection.
So, we have decided on the choice of the drive, enter its letter with a colon and press "Enter".

- Now we need to go to the folder "I386"why we write

- After the transition, you need to copy the file NTLDR from this folder to the root of the system drive. We enter the following command:
and then agree to the replacement if prompted ( "Y").

- After successful copying, a corresponding message appears

- Next, we do the same with the file NTDETECT.COM.

- The final step is to add our Windows to a new file boot.ini... To do this, run the command

Enter the number 1 , we register the identifier and boot parameters, exit the console, load the system.

All actions we have taken to restore the boot should lead to the desired result. If you still fail to start Windows XP, then most likely you will have to use a reinstallation. You can "rearrange" Windows while saving user files and OS parameters.
Conclusion
Boot failure does not happen by itself, there is always a reason for this. It can be both viruses and your actions. Never install programs obtained from sites other than the official ones, do not delete or edit files that were not created by you, they may turn out to be systemic. Following these simple rules will help you avoid having to resort to complicated recovery procedures.
In order to get access to the BOOT.INI file, which allows you to flexibly configure Windows startup parameters, you should enable the display of hidden files, because this file is not displayed by default and is hidden - which makes it difficult to find it.
To enable the display of hidden files and folders in Windows, do the following:
- Click on the " Start", Go to" Toolbar“, Further, find the item“ Folders settings»And open this item.
- In the window that appears, go to the " View", Then in the list that appears, check the box next to" Show hidden files and folders«.
Now hidden Windows items will be displayed.
When you complete these steps, go to the local drive "C", at the root of which is the file BOOT.INI. However, this method is only relevant for operating systems not older than Windows XP.
For Windows 7 and higher, the BOOT.INI file is missing.
It has been replaced with a Boot Configuration Data (BCD) file that can be edited on the command line. To find where the file is stored and make changes to the BOOT.INI of the Windows 7 operating system, you should use a special program that is included with Windows 7.
- This program is located at the path c: \\ Windows \\ System32\u003e bootcfg /? BOOTCFG /<операция> [<аргументы>]
The specified command line program can be used to retrieve, modify, or remove BOOT.INI parameters.
It happens that more than one operating system is installed on a hard disk. When you turn on the computer, a list of operating systems, in which you can select one or another OS to boot within 30 seconds. But what if you want to choose within 10 and not 30 seconds? Or let's say what to do if during the installation of the second system, something went wrong, Windows was not installed, but managed to register in the bootloader and now hangs in the list as a dead weight? By selecting this item from the list, the screen will only display a message stating that the bootloader cannot load the OS. In this post we will look at how the list is edited in Windows XP, changes to the list on Win7 systems are made differently. We will also consider how to solve the problems that arise with it (the list).
List of operating systems in the boot.ini file
The list that we see during system boot is written in the boot.ini file. In Win 7, this file is not there, everything is different, so for now we are considering editing the list in XP.
To begin with, let's decide in what cases you may need to edit the list.
- Not satisfied with the time ( default 30 sec.) during which you can choose the loaded system.
- During the installation of the second OS, a failure occurred and now, as it is necessary remove selectionthis system at boot computer.
- There is a need to change system boot order... Let's say you have Win XP Pro in the list first, and you want Win XP Home to be first.
- I'd like to see a non-standard system name in the list. For instance: My Windows.
Editing the list
To open the boot.ini file for editing, do the following:
Hover the mouse cursor over My Computer, right-click the menu, in which we select Properties.

In the opened window System properties, select the tab Additionallythen Boot and Recovery - Options.

- The default bootable system. She will be the first on the list.
- The time during which you can select the system.
- If you uncheck the box - Display OS list, then accordingly it will not appear at all.
- Edit the download list manually by clicking the button Edit... This is our boot.ini

Before editing boot.ini, copy its contents and save somewhere in a safe place. For in case of problems, it will be possible to restore the original version.
So, if one OS is installed on the PC, then after clicking on the Edit button, a window will appear with the following content:
timeout=30
default
multi (0) disk (0) rdisk(0)
partition
As you can see, boot.ini is nothing more than a regular text file that you can safely edit. And what do all these mackerel mean?
- timeout - the time during which the OS list is displayed
- default- operating system loaded by default
- rdisk (0) - physical disk number. (0) is the first hard drive, (1) is the second
- partition (1) - this is already the number of the partition on the physical disk where the system is located. For example (1) - drive C, (2) - drive D
- Microsoft Windows XP Professional RU - system name. Here you can write My Windows.
To be honest, when I first got acquainted with the syntax ( with these same mallards) of the boot.ini file, I didn't understand the first time what's what. And he even made a couple of mistakes after which the system did not boot. Therefore, I will try to show what's what with an example.
Let's say I have two hard drives installed in the case of the system unit rdisk(0) and rdisk(1). The first one has Win XP Pro installed in the C drive: partition(1). On the second hard drive in the first partition partition(1) Win XP Home. Win XP Pro is loaded by default.
The file syntax will be like this:
timeout=30
default\u003d multi (0) disk (0) rdisk (0) partition (1) WINDOWS
multi (0) disk (0) rdisk(0)partition(1) WINDOWS \u003d "Microsoft Windows XP Professional RU" / noexecute \u003d optin / fastdetect
multi (0) disk (0) rdisk(1)partition(1) WINDOWS \u003d "Microsoft Windows XP Home" / noexecute \u003d optin / fastdetect
If we have one hard, physical disk and systems are installed on it in different logical partitions, then the syntax is already like this:
timeout=30
default\u003d multi (0) disk (0) rdisk (0) partition (2) WINDOWS
multi (0) disk (0) rdisk(0)partition(1) WINDOWS \u003d "Microsoft Windows XP Professional RU" / noexecute \u003d optin / fastdetect
multi (0) disk (0) rdisk(0)partition(2) WINDOWS \u003d "Microsoft Windows XP Home" / noexecute \u003d optin / fastdetect
Here we see that by default the system will boot from drive D:
At first glance, all this seems like a dark forest. I understand you Read the syntax description several times, think about it and everything will fall into place.
And finally, I want to clarify one point. If you, while editing a file with one system, suddenly accidentally write the wrong disk or partition, and then save and restart your PC, then the system will no longer boot. Why? I'll give you an example again.
You have a system on your C: drive. The file looks like this:
timeout=30
default\u003d multi (0) disk (0) rdisk (0) partition (1) WINDOWS
multi (0) disk (0) rdisk(0)
partition(1) WINDOWS \u003d "Microsoft Windows XP Professional RU" / noexecute \u003d optin / fastdetect
And you, for example, made a mistake partition(2). During boot, the loader will refer to the Boot.ini file and read in it that the Win boot files are located on the D: drive. That's the problem for you. If this happens, then the error can be resolved like this:
- Boot from Alkid live CD. This is a special bootable disk with which you can recover errors in the system. Having booted in this way, you need to get to the boot.ini file and fix the incorrect settings there. Where is the boot.ini file ? It is located at the root of the C drive:
- And the second way is to connect the hard drive with the damaged system to another PC. Find our file on it and fix everything that we nailed there.
In general, something like this. Try it, but be careful.
The boot.ini file contains information about the operating systems that are on your computer. If the computer has several operating systems, then there will be several entries. Each entry is responsible for a specific operating system (C).
In Windows XP and Windows 7, the situation is slightly different.
File Locations
In Windows XP, this file is located in the root folder "C: \\". The path may be different. It all depends on which hard or local drive your computer boots from.
In Windows 7, this file does not exist at all. The situation there is a little different.
File contents
You can view the contents of the file, find out the number of OS and other parameters in various ways. For example, there is a special method provided by any Windows.
To do this, you need to call the "Run" utility. You can find it through "Start" or press on the keyboard "Windows" + "R". Enter the command "msconfig" there.
You will see the "System Configuration" window:

This is how the information about the loaded OS looks like. If there are several of them, then the "Delete" button will be available.

In Windows XP, the content will be as follows:

As you can see, it states:
What hard and local disk to boot from;
Operating system header. For example, there can be two OS (1 - "Windows # 1", 2 - "Windows # 2").
Timeout time. The default is 30 seconds.
Which system to load by default.
Editing the bootloader
Editing was very easy in Windows XP. The timeout could be done in "msconfig" too.

But, you can completely edit the file by simply opening it in a text file. Its path is "C: \\ boot.ini".
In Windows 7, the situation is more complicated. If you go to the address "C: \\ boot.ini" you will not find anything, because this file does not exist. For this, many different programs have been invented. For example, EasyBCD.

It is free and very easy to find online. As you can see, the content is more verbose than showing the content with "msconfig".
Here you see:
Timeout 30 seconds;
Default OS;
OS name - Windows 7;
The device volume is "C";
The path to the bootloader;
Windows folder.
The display format can be changed using the following radio buttons.
When viewed in detail, you will see the following:

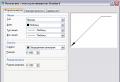
The controls for this program are very simple. By clicking on "Change settings" you will see the following general settings:

When you click on "Add / Remove Entries" you will see a window with operating system boot records:

Adding a new entry is easy. There is a special block for this. Here you can select the type you need, specify a name, specify a local drive and then click on "Add Entry".

There are also additional settings:

In addition, you can overwrite the bootloader file in the "Manage Bootloader" item. You can make a backup or restore data from a previously created copy.

Using the command line
The Windows operating system provides the ability to edit the bootloader data in more detail. In fact, all programs work on this principle.
To do this, you need to run the command line. We call the "Run" utility. We enter the command "cmd".

Now you need to enter the "bootcfg /?" Command.

For each command, you can call additional help. How to do this is shown in the screenshot.
Boot Loader Repair
Sometimes it happens that this file is damaged or deleted deliberately for mercenary purposes. You can also restore it using the command line, only you will have to start from the installation disk.
| Like |
File boot.ini located in the root directory of the hard disk, or rather, in its
system partition. There are also other files necessary for correct
operating system boot: ntdetect.com, ntldr, ntbootdd.sys,
bootsect.dos... File boot.ini is responsible for the choice of the operating system, sets
the parameters of its functioning, during the PC boot, he also supervises
by the download process itself.
The boot.ini file is edited in a regular text editor. Actually,
the need for editing may appear if this file is damaged,
for recovery in case of accidental deletion, to add disks or their
partitions into the system, as well as delete.
Before editing boot.ini enable viewing hidden files, otherwise you will
you will not find, then be sure to make a backup copy, in its properties
uncheck "read only", otherwise you will not be able to save
the result of editing, be sure to make a backup copy of the file.
Partially, editing is possible through: System properties Loading
operating system Boot and recovery, or through a utility Windows
msconfig.exe., as well as through third-party programs, but full editing
only possible manually.
1
.Create a backup: My computer, right click Properties
- Additionally
-
- press
operating system
we press Edit
... This will open a text editor
Notebook, this is your saved file for editing. Here
click on File
- save as in the blank space of the dialog box
right-click and select Create a
- Folder
enter the folder name,
for example file and press enter. On the created folder, double-click the mouse and
push Save
, the backup has been created.
2
.Editing
: we do everything as in the previous paragraph. The file will open in Notepad.
Here is an example of what you will see (sample boot.ini file for Windows XP
Professional):
timeout \u003d 30
default \u003d multi (0) disk (0) rdisk (0) partition (1) \\ WINDOWS
multi (0) disk (0) rdisk (0) partition (1) \\ WIND OWS \u003d "Microsoft Windows XP
Professional "/ fastdetect
You can use the window for editing, Where are you
you can choose the default operating system, set the timeout
choice of operating system. Edit manually, possibly with the command
lines, via the command Bootcfg.exe. ("this utility is available
only in Windows XP Professional, not available in the home version):
Start
- Run -
to introduce cmd, the command line will open, in it we enter
bootcfg /?This is where the editor options and help open.
To select the default operating system, at the command prompt, enter
bootcfg / default / ID #
, # - sequential number of the operating system in the list
operating systems.
To remove an operating system from the operating systems section of the file
Boot.ini:
enter bootcfg / delete / ID #
, where # is the serial number of the operating system
on the list.
To add an OS: enter bootcfg / copy / d @@@@ / ID #
where @@@@
- text
operating system name, ex. Windows Vista, # is the OS number in the list.
Set the waiting time for OS selection: enter in the command line:
bootcfg / timeout #
, where # is the time in seconds after which there will be
boot the operating system by default.
Next, we save the editing results: we do everything as in step 1, only
don't create a folder, just save the file, this way you save
changes in the file.
There are other possibilities in editing this file, but for an inexperienced user it is better to stop at this, so as not to harm due to inexperience.
Note: to open the properties My computer do not click on the shortcut, here
the properties of the shortcut will open, not the computer, go to the start menu and there select