Accessing your home network via VPN
Increasingly, there are situations in which users on the road have to access their home network and network storage. To minimize the risks in unencrypted wireless networks during such actions, it is recommended to organize a "virtual private network" (Virtual private network, VPN). The advantage of such a VPN connection compared to a solution using a dynamic domain name system is that you have a direct connection to your entire home network, the same as if you were sitting at home in your office. In this article, we'll walk you through setting up the VPN function on Synology NAS and configuring devices.
1 VPN connection to Synology NAS
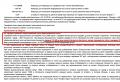
The most important prerequisites are the latest version of the DiskStation Manager (DSM) operating system installed on your Synology NAS and remote access configured. In this case, launch the "VPN Server" component located in the "Utilities" section in the Control Center. Now you can choose from three connection options. Since “PPTP” is considered insecure, and “OpenVPN” is not fully supported by mobile devices, click in the left section (“Settings”) on the item “L2TP / IPSec” and activate the function. Settings that have already been entered, such as the "Dynamic IP address" assigned to VPN-connected devices, do not need to be changed. You just need to enter a strong password in the "Preset password" item and repeat it in the "Confirm preset password" item. Save the changes by clicking the "Accept" button, and click "OK" to confirm the message about forwarding UDP ports 500, 1701 and 4500.
An important point: if you are using a NAS firewall, you should open the above ports. In addition, in the "VPN Server" dialog box, you must select the "Privileges" item and restrict the rights of users who are denied access via VPN. To avoid these actions in the future, select the "General settings" section in the left column and uncheck the box "Give VPN access rights to new users". Users with VPN access rights are listed in the "Protocol" section. Asustor and Qnap network storage systems also support VPN access. The setup is almost the same: launching the application (Asustor - "VPN server", Qnap - "QVPN service"), selecting the type of VPN and entering the necessary information.
2 Setting up port forwarding on the router
 In order for the router to forward data packets coming from the Internet to the required devices, it must "know" what network clients these devices are. To do this, you need to configure port forwarding on it. This is done using the router configuration mask. Open a web browser and log into your router via the web interface.
Then click on the menu item "Internet | Permissions" and activate the "Port Forwarding" tab to set up port forwarding. Scroll down to Add Allowed Device and select your NAS. After clicking the "New Permission" button, select the "Port Permission" option, then in the "Application" item, select "Filter Name" and enter a name, for example, "VPN Server". In the "Protocol" section, select "UDP", in the "Port to device", "To port" and "Desired external port (IPv4)" items, enter the number "500" and confirm the entry by clicking "OK". Then set up forwarding of UDP ports 1701 and 4500 in the same way. Save the settings by clicking the "OK" button.
3 Create a VPN connection with Windows 10
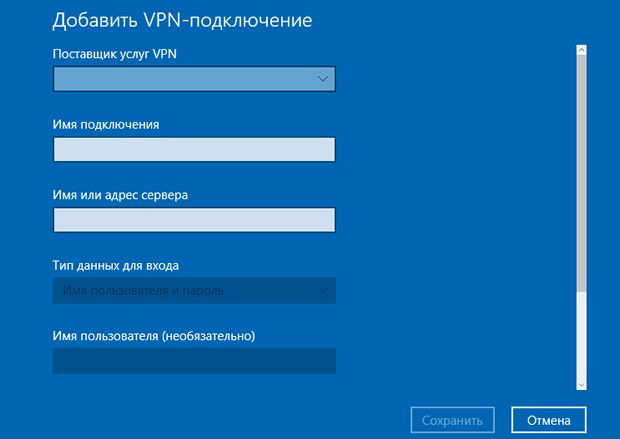 After carrying out the preparatory steps, you can check whether everything worked out. Ideally, the first VPN access should be from the local computer, because in case of problems, you have access to both the router and the network storage, and therefore, you will be able to make changes quickly. When working with Windows 10, the setup is quite simple. Select "Network and Internet" in the "Settings" section, select "VPN" in the left column, click on the "Add a VPN connection" link and enter the required data. In the "VPN Service Provider" menu, select "Windows (built-in)", you can specify any name for the connection, for example, "VPN-NAS". In "Server Name or Address", enter the dynamic DNS address of your Synology NAS, in "VPN Type", select "Automatic". Confirm the entry with the "Save" button, then click on the VPN icon and select "Connect".
In the Registration dialog box, enter the information you use to connect to the NAS and click OK. After a few seconds (at which time Windows 10 and the NAS are communicating about the type of VPN), a connection will be established and you will be able to access all the resources available on your home network, including the Synology NAS configuration mask.
4 VPN setup on mobile devices
 Access to network storage via VPN is also possible from mobile devices. However, setting them up is a bit more complicated than in Windows 10.
Android: open "Settings", in the "Network connections" item, click "Advanced settings" and add a new connection by clicking on the "+". After that, in the "Type" section, select the "L2TP / IPSec PSK" item, enter the "Server Address" (the dynamic DNS address of your storage), as well as the "IPsec Pre-shared Key" (that is, the password set in step 1), then click "Save". Finally, tap the new connection, enter your username and password, activate the "Save account details" option and click "Connect".
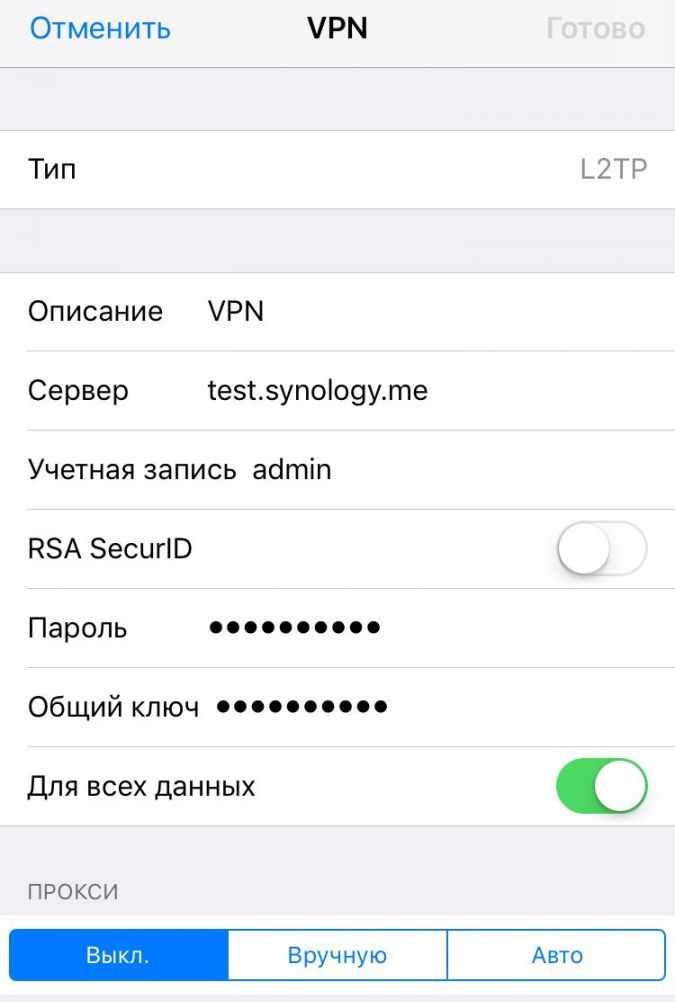
iOS: Go to "Settings | Main | VPN | Add VPN" and in the "Type" section, select "L2TP". After that, enter the data in the "Description", in the "Server" item specify the dynamic DNS address of your network storage, and finally, in the "Secret password" item - the password set in step 1. Enter the access data in the "Login" and "Password" items. Then click "Finish", return to the previous dialog box and set the switch in the "VPN Configuration" section to "On" to establish a connection.
Related posts:
 How to clear the browser on android
 How to connect an Xbox 360 or One controller to a computer
 How to install Tor browser on a computer?
 MTS Unlimited - wean from greed: paid distribution of wifi - bypass
 Programs for watching TV over the Internet: the best applications for stationary and mobile systems


