Functions available only through the program
| Manufacturer: | HP (Hewlett Packard) | |
| Device type: | IFIs | |
| Model: | LaserJet | |
| Series: | 3000 | |
| Model number: | 3200m | |
| Compatibility: | Windows XP, Vista, 7, 8, 10 | |
| Downloads: | 85,157,218 | |
| Loading volume: | 3.4 MB | |
| Database update: | ||
| Available for download using DriverDoc: | ||
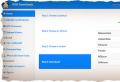
Install Optional Products - DriverDoc (Solvusoft) | | | | |
||

This page contains information about installing the latest HP LaserJet 3200m (3000) driver downloads using the HP (Hewlett Packard) Driver Update Tool.
HP LaserJet 3200m (3000) drivers are tiny programs that enable your All-in-One Printer hardware to communicate with your software operating system... Maintaining updated HP LaserJet 3200m software prevents crashes and maximizes hardware and system performance. Using outdated or corrupt HP LaserJet 3200m drivers can cause system errors, malfunctions and failure of hardware or computer. Moreover, installing the wrong HP drivers can make these problems worse.
Advice: If you're unsure of how to manually update your HP device drivers, we recommend downloading utility program for HP LaserJet 3200m (3000) drivers. This tool will download and update the correct HP LaserJet 3200m (3000) driver versions automatically, protecting you against installing the wrong LaserJet 3200m drivers.
About the author: Jay Geater is President and CEO of Solvusoft Corporation, a global software company focused on innovative services. He has been passionate about computers all his life and loves everything related to computers, software and new technologies.
The HP LaserJet 3200 product is a powerful business tool with the capabilities of a wide range of office equipment. With this device you can perform the following tasks:
Faxing - Use the machine as a stand-alone fax machine to send and receive faxes with quality laser printingand perform additional tasks such as forwarding faxes to another address.
Printing - You can easily print documents at 1200 dots per inch (dpi) and nine pages per minute.
Making copies - You can make excellent copies with laser print quality. You can create up to 99 copies of a 30-page original. You can also adjust contrast, increase or decrease the size of copies, collate copies of documents, and more.
Scan Execution - Scan important documents to create electronic copies. Scan documents and save them on a web page. Use the scanner to create a fax cover sheet or scan documents for use in other programs. You can also scan a document and attach it to email (if you have a compatible email program).
Using the software - Can be used software for storing and organizing scanned documents so that, for example, you can quickly find an invoice, receipt or business card scanned several weeks ago.
it multifunction device helps to improve your productivity by allowing you to perform multiple tasks at the same time. For example, you can send an e-fax while the machine is making copies, or scan a document while printing.
Understanding Printer Parts
In this section, you will get acquainted with the control panel and learn how to use it. Here you will also find illustrations to help you correctly identify the various external parts of the device.
Getting to know the details
Control Panel Lights and Keys
The lights on the control panel show the status of the product, and the keys are used to send and receive paper faxes, receive copies, scan documents, and configure product settings.
1 Error - Probably the device has occurred 2 Ready - When this indicator is on an error.
3 The control panel display shows messages and menu settings.
Return - With this key you can go one level up in the menu settings or delete the character on the right when entering text.
Forward Arrow (\u003e) - Use this key to move forward through menu items at the same level, or to insert a space when entering text.
Scan - Performs a scan function.
One-touch keys - Use the keys on this keypad to store frequently dialed fax numbers.
Volume - Use this key to adjust the line tracking volume for incoming and outgoing fax tones.
Repeat. Dial / Pause - Use this key to redial the last fax number or to insert a pause in a fax number.
Reduce / Enlarge - Use this key to adjust the size of the current copy job.
4 Enter / Menu - With this key you can call up a menu, save a highlighted item or move one level down in the menu settings.
Arrow to down (
Stop / Clear - With this key you can stop or cancel any action in progress, or exit the menu settings.
Copy - Performs the copy function. Fax / Send - Performs the function of sending and receiving faxes or going to manual mode set.
Speed \u200b\u200bdialing - Press this key in combination with the one-, two-, or three-digit code dialed using the number keys to dial pre-stored fax numbers.
Numeric keys - Use these to dial codes and enter fax numbers. You can also use these keys to add letters when entering a name in a fax header or for speed dialing.
Resolution - Use this key to adjust the resolution (sharpness) for the current fax or copy job.
Contrast - Use this key to adjust the contrast (the difference between light and dark areas) for the current fax or copy job.
Using the control panel menu structure
Below is a hierarchical diagram of the control panel menu structure. You may need it before changing settings and properties.
To use the control panel keys:
1 Press Enter / Menu to start.
2 Use keys to select one of the main menu alternatives, then press Enter / Menu.
3 Use keys to select one of the submenu alternatives and press Enter / Menu.
4 If possible, use keys to select one of the alternatives of the second submenu and press Enter / Menu.
Getting to know the details
The two illustrations below show the exterior of the device.

1 Front paper exit cover
2 Document output slot
3 Document ejection cover / control panel
4 Printer cover
5 Printer cover latches, inside

6 Document feeder tray
7 Paper output bin
8 Page feed slot
9 Paper feed tray
11 Lever for printing on special media
Selecting print media
In this section you will find information on the following topics:
Selecting print media
Choice for printing
The company recommends using HP Multipurpose paper, if available in your area (because these types of paper were specifically designed for use with the device), or other paper that meets specifications. You can also use 100% recycled fiber paper if it meets the requirements.
Printing on canvas may be uneven. Very smooth paper can jam or repel ink. Non-uniform media may jam or jam in the device. In addition, paper of poor quality, such as tears, wrinkles, or curled edges, can jam.
Avoid using envelopes with too smooth finishes, self-adhesive areas, clasps, or transparent windows. Also, avoid using envelopes with rough, irregular, or curly edges, wrinkles, tears, or other damage.
Use strong envelopes that weigh approximately 7.25 to 12.25 kg. Envelopes should be neatly glued and folded tightly.
Media size
The paper feed tray can hold up to 125 sheets of 75 g / m2. The single sheet feed slot can hold one sheet. Both can be configured to accommodate media sizes from 76.2 x 127 mm to 216 x 356 mm. This includes the following incomplete list of sheet and envelope sizes:
|
Paper type |
Metric system |
English system |
|
216 by 279 mm |
8.5 by 11 inches |
|
|
216 by 356 mm |
8.5 by 14 inches |
|
|
184 by 267 mm |
7.25 by 10.5 inches |
|
|
210 by 297 mm |
8.25 by 11.75 inches |
|
|
SOM10 envelopes |
105 by 241 mm |
4.125 by 9.5 inches |
|
DL envelopes |
110 by 220 mm |
4.33 by 8.67 inches |
|
C5 envelopes |
162 by 229 mm |
6.4 by 9 inches |
|
B5 envelopes |
176 by 250 mm |
6.9 by 9.85 inches |
|
Monarch envelopes |
98.5 x 190.5 mm |
3.875 by 7.5 inches |
|
Other custom media sizes |
custom |
custom |
Selecting Items for Faxing, Copying and Scanning
The device can scan items in various sizes from 51 x 89 mm (business card sizes) to 215 x 356 mm, and can fax and copy items from 51 x 89 mm to 215 x 889 mm.
The device accepts heavy paper, tissue paper, newsprint, magazine paper, transparencies, and photographs and other items in the carrier sheets. In addition, rough grades of paper are easier to scan than smooth grades. You can feed smooth paper into the printer, but it may be difficult to feed. To receive best results, feed smooth sheets one at a time with the special media slider set to the correct position.
To minimize the possibility of jams, follow these guidelines:
Remove self-adhesive labels.
Remove staples and paper clips.
Straighten any creases or creases in the documents before placing them in the document feeder.
Do not insert any documents that have glue, correction fluid, or wet ink on them.
Do not insert paper or labels with an adhesive backing.
Place documents with tears, perforations, or knockouts in a carrier sheet you can buy or make yourself. (See Loading Special Items.)
Avoid using multiple forms when copying.
Loading print media
Selecting the paper delivery path
The procedure for loading a document is the same for faxing, copying or scanning. If your document is printed on normal weight paper (46 to 105 g / m2), see "To load standard print media". If your document is wrapped in a carrier sheet, printed on transparencies, or not on regular weight paper, see Loading Special Items.
To load standard print media
1 Set the document feed tray adjusters to match the size of the item you are loading.

Place up to 30 pages top first, face down in the document feeder tray.

Loading special items
When loading items to be faxed, copied or scanned, you must protect small, fragile, and light items (lighter than 46 gsm) and irregular items such as receipts, newspaper clippings, photographs, and old or dilapidated documents.
1 Do one of the following:
Place the element on the carrier sheet. You can buy the carrier sheet or make your own by stapling the transparencies and paper along one of the short sides. Place the item to be faxed, copied, or scanned on the carrier sheet and insert it with the stapled side first in the document feed tray.
Using transparent tape, attach the leading and trailing edges of the element to a piece of Letter or A4 paper. If the element is not square or rectangular, attach all of its edges to the sheet.
If you are using a copier standard sizes, first make a copy of the item and then send it through the scanner.
2 Adjust the document feed tray adjusters according to the size of the item you are loading.

3 Locate the special media slider at the top of the control panel and slide it to the right.

Do not touch the regulator after the machine has started sending the page to be scanned.
4 Load paper only one page at a time in the document feed tray, top first, face down.
When loading a business card, insert it long edge first.
5 After feeding the specialty items, slide the special media lever back to the left. When feeding a stack of standard sheets with the adjuster set to the right, sheets may pass through multiple sheets of paper and become jammed.
Loading items for printing
You can load print media in the paper feed tray or single-page feed slot.
You can load up to 125 sheets of 75 g / m2 in the paper feed tray and one sheet in the page feed slot at a time.
Insert all media vertically (portrait orientation) into the paper feed tray or page feed slot. If you want to print the sheet horizontally (landscape orientation), change the appropriate settings in your program. Do not print on paper smaller than 76.2 * & 127
The machine prints documents, makes copies, and prints received faxes using media from the paper feed slot (or from the page feed slot).
To load paper in the feed tray
1 Set the adjusters in the paper feed tray to match the size of the media you are loading.

2 Insert up to 125 sheets of paper in the paper feed tray. Be careful not to overfill the tray.

When adding paper to an existing stack in the paper tray
feed, always remove all paper and align it with a new stack before loading to avoid multiple feeding or paper jams.
When loading special media, make sure the bottom paper path is selected.
3 Straighten the stack by reinstalling the adjusters.

Using the single feed slot
With the page feed slot, you can print one sheet of media without using the paper feed tray. The machine picks up media from the single-page feed slot before it picks up media from the paper feed tray.
The page feed slot can be useful when the first page to be printed is different from the rest. For example, you may need to print the first page of your job on letterhead or print an envelope first.
To print using the page feed slot
1 Adjust the adjusters at the page feed slot to approximately the size of the sheet being used.

2 Place one sheet of media in the page feed slot. When loading special media or letterhead, insert the top first and the front toward you.

3 Straighten the sheet by reinstalling the adjusters.

When loading special media, make sure the bottom paper path is selected.
Selecting the paper delivery path
The output path you select determines whether the printed media will exit from the paper feed slot or the front paper exit slot. Use the front paper exit slot when printing on special media such as 100 g / m2 or higher paper, envelopes, transparencies, or labels. This will prevent wrinkling and curling of the paper.
To select the paper delivery path
To use the front paper output slot, make sure the front paper output cover is closed.

To prevent curl, use the straight paper path with the front paper output cover open. Any media exiting the front paper output slot will be printed in reverse order.

To avoid paper jams, clear space at the front paper exit slot to allow media to exit freely, and make sure the front paper exit cover is fully open.
Functions available only through the program
The services and options described in the following sections are available only through the software provided with the HP LaserJet 3200 product.
For more information on using the services and options, see the software help.
Using the HP LaserJet Director
If your computer is directly connected to the product, plugged into a network, and software is installed, the HP LaserJet Director appears when you load a document into the feed tray.
HP LaserJet Director not supported by OS Microsoft Windows 95.
The HP LaserJet Director software is a shortcut toolbar that allows you to quickly process documents using HP LaserJet 3200 tools such as scanner, copier, and fax. If you do not want the HP LaserJet Director to appear when you load a document in the feed tray, see To turn off the HP LaserJet Director.
If the product is connected to your computer using a supported HP JetDirect print server, the HP LaserJet Director will not appear when a document is loaded into the feed tray. To start the HP LaserJet Director, click the HP LaserJet Director icon in the system tray, as shown below.

Below is an example where the HP LaserJet Director toolbar displays only buttons by default.
|
Description |
|
|
Scan |
Scans a document through the document feed tray. |
|
|
Attaches electronic copy the document in the feed tray to the new email and displays the new message so you can enter the address and send it. |
|
Opens the HP LaserJet Send Fax dialog box. From this dialog you can add recipients, select title pageand then send the item. |
|
|
OCR (Optical Character Recognition System) |
Scans a document into the document feeder and then converts it to text suitable for editing with a word processor. |
|
Copy |
Opens the HP LaserJet Copier dialog box. From this dialog box, you can set the number of copies, reduce or enlarge the image, adjust the contrast and copy quality, and change the output paper size. |
|
Scans a document through the document feeder and stores it in the specified location. |
|
|
Tools |
Displays tools and help with support information. |
|
Setting up |
Displays the Setup dialog where you can change the settings for the HP LaserJet Director. |
To turn off HP LaserJet Director
Use this procedure if you want the HP LaserJet Director to appear when you load a document into the feed tray.
1 From the HP LaserJet Director panel, click the Setup button.
2 Click the Control Device tab.
Uncheck the box next to Use Director to monitor device activity, then click OK to confirm to turn off the HP LaserJet Director.
Click on Apply, then on OK.
To start the HP LaserJet Director software when it is disabled, click the Start button, point to Programs, HP LaserJet 3200, and then click HP LaserJet Director.
Using HP LaserJet Document Manager
HP LaserJet Document Manager is a complete set of tools for organizing all of your documents. Using the HP LaserJet Document Manager software, you can perform the following tasks:
Organize documents on your desktop.
Fax, print, scan, or copy using the device.
Annotate .HPD files (.HPD files are scanned documents saved using the HP LaserJet Document Manager software).
Add simple graphical shapes to documents such as rectangles, arrows, and freeform polygons.
HP LaserJet Document Manager is not supported on Microsoft Windows 95.
If you don’t want to waste time on hunting after the needed driver for your PC, feel free to use a dedicated self-acting installer. It will select only qualified and updated drivers for all hardware parts all alone. To download SCI Drivers Installer, follow this link.
| Device: | HP LaserJet 3200 Scanner Drivers Installer | |
| Version: | 2.0.0.18 | |
| Date: | 2019-12-28 | |
| File Size: | 1.12 Mb | |
| Supported OS: | Windows 2000, Windows XP, Windows Vista, Windows 7, Windows 8 | |
| Download Drivers Installer | ||
HP LaserJet 3200 Scanner: Drivers List
4 drivers are found for 'HP LaserJet 3200 Scanner'. To download the needed driver, select it from the list below and click at the ‘Download’ button. Please, ensure that the driver version totally corresponds to your OS requirements in order to provide for its operational accuracy.
| Version: | 6.1.7600.16385 | Download |
| Date: | 2006-06-21 | |
| File Size: | 80.56K | |
| Supported OS: | Windows 7 32bit |
| Version: | 6.1.7600.16385 | Download |
| Date: | 2006-06-21 | |
| File Size: | 91.43K | |
| Supported OS: | Windows 7 64bit |
| Version: | 6.2.8306.0 | Download |
| Date: | 2006-06-21 | |
| File Size: | 95.1K | |
| Supported OS: | Windows XP 64bit, Windows Vista 64bit, Windows 7 64bit, Windows 8 64bit |
HP LaserJet 3200 Scanner: Supported Models of Laptops
We have compiled a list of popular laptops models applicable for the installation of ‘HP LaserJet 3200 Scanner’. By clicking at the targeted laptop model, you’ll be able to look through a comprehensive list of compatible devices.
| # | Manufacturer | Model | Devices |
| 1 | DakTech | DTMD ISP4 |