The most comprehensive guide to step-by-step installation of Windows XP. When is it possible to upgrade to Windows Vista
There are several ways. First, if your distribution CD is similar to the one released by Microsoft, then it must be bootable. To boot from it you need to BIOS-e parameter Set "Boot sequence" to CD-ROM, insert CD and reboot. After starting the computer, the installation program will start. Then just follow the instructions.
This is the only way to boot directly into the installer with just the CD. Microsoft believes that the CD-ROM is an essential and absolutely necessary part for the computer on which Windows XP is installed, so the tools for implementing the good old method of booting from floppy disks are no longer included in the distribution.
Second, you can boot from the DOS system diskette with the CD-ROM driver and run the "winnt.exe" program in the i386 directory on the distribution disk.
Note: if your hard drive is connected to an external controller (SCSI or IDE), then do not forget to download the new Windows XP (or W2k) driver for it and drop it onto a floppy disk. You will need it if the installation program cannot correctly identify and install the device. In this case, you must press F6 when searching for such devices.
And finally can be from under W9x, NT4 or W2k run the "setup.exe" program from the root directory of the CD disk, or winnt32.exe from the i386 directory, and upgrade the system to Windows XP. This is done correctly, and before rebooting, the system displays a list of programs and drivers incompatible with Windows XP.
But, the last method is not the most optimal. Despite the fact that Windows XP tries to independently determine the list of programs and drivers that will not work with it correctly, it is not able to do it correctly in all cases. Therefore, in order to avoid compatibility problems, we would recommend that you reinstall the system.
There is an even more radical method for solving compatibility problems. When installing over an existing OS, you will have the option of choosing an OS (Dual boot).
Note: after installing Windows XP as a separate OS, it will be impossible normal work Outlook Express and Internet Explorer on Windows 9x, since Windows XP will replace the latter. This is only true if both OSs are installed on the same disk partition. But this problem can be solved by copying some DLLs from WinXP \\ System32 to Windows \\ System. You can use ShowDep (www.showdep.com) to identify the required libraries, or Outlook Express displays similar information in the About window.
In addition, many programs will have to be installed twice, separately for Windows XP and for W9x. Sometimes it is possible to go to the same directory, for example Office 2000, already during installation, is able to understand that it is already installed, and as a result installs only about 18 megabytes.
We choose the version you want kernel and HAL during installation.
At the very beginning of the text phase of Windows XP installation, when the message "Setup is inspecting your computer's hardware configuration" appears, press and hold the F5 key. In the list of HAL library versions that appears on the screen, select the version corresponding to your computer, or select the "Other" item in order to specify the library file from the hardware manufacturer. Then proceed with the Windows installation. The following versions of the HAL library are included with Windows XP:
- ACPI Multiprocessor PC - for ACPI systems with multiple processors.
- ACPI Uniprocessor PC - used for ACPI systems with a multiprocessor motherboard and one processor installed.
- Advanced Configuration and Power Interface (ACPI) PC - used for uniprocessor ACPI systems.
- MPS Uniprocessor PC - for systems without ACPI support, with a multiprocessor motherboard and one installed processor.
- MPS Multiprocessor PC - for multiprocessor systems without support.
- ACPI Compaq SystemPro Multiprocessor or 100% compatible - for Compaq SystemPro computers or fully compatible with them.
- Standard PC - used for any standard computer, not multiprocessor and without ACPI support.
- Standart PC with C-Step i486 - used for computers that support this technology.
During installation, the system does not allow you to select components, and after installation there is almost nothing in Add / Remove programs - Windows Components.
Unfortunately, you will not be able to select anything during installation. But, after installation, in Windows / inf, find the sysoc.inf file and delete the word hide or HIDE in it wherever you find it. New items will appear in Add / Remove Windows components. Unfortunately, you cannot delete everything from the items that have appeared, but you can still do something.
Should you upgrade from FAT32 to NTFS?
It all depends on the purpose for which you are using the computer and how much RAM you have. It should be noted that NTFS is somewhat slower than FAT due to additional downloadable services and its security system. If you have little RAM and you decide to install XP for yourself, then you definitely cannot install NTFS for yourself. If you have 128MB or more, then you might already consider NTFS. You should weigh the advantages and disadvantages of NTFS for the common user and decide what you need. The advantages of FAT32 include the fact that it is faster and requires less memory to work. If the system works only with FAT32, then drivers and services required by NTFS are not loaded into memory. In addition, when using FAT32, it is possible to access the disk when booting from the W9x boot floppy. The advantages of NTFS for the common user can be summed up in one succinct word: indestructible. In all seriousness, knocking out NTFS is extremely difficult, although possible. For experience, a bunch of different applications were launched, disk optimizers, and at the most inopportune moments the reset button was pressed. The repetition of this sadism a dozen times did not make any impression on the system; it continued to work without errors. In addition, NTFS has built-in file encryption tools, which provides some confidence in the safety of data. Of course, provided that the system will not be reinstalled.
What is NTFS and how does it work?
NTFS grew out of the HPFS file system co-developed by IBM and Microsoft for the OS / 2 project. It began to be used alongside Windows NT 3.1 in 1993. Windows NT 3.1 was supposed to compete with NetWare and Unix-based servers, so NTFS incorporated all the technological advances of that time. Here are the main ones:
1. Working with large disks. NTFS has a cluster size of 512 bytes, which is optimal in principle, but it can be changed up to 64K. More importantly, NTFS is capable of theoretically handling 16,777,216 terabytes of volumes. In theory, because such hard drives simply do not exist yet, and they will not appear very soon.
2. Sustainability. NTFS contains two copies of the FAT analog, which are called MFT (Master File Table). Unlike FAT MSDOS, MFT is more like a database table. If the original MFT is damaged in the event of a hardware error (for example, the appearance of a bad sector), then the system at the next boot uses a copy of the MFT, and automatically creates a new original, already taking into account the damage. But this is not the most important thing. The main thing is that NTFS uses a transaction system when writing files to disk. This system came from a DBMS, where protecting data integrity is vital. This already speaks of its effectiveness. In a simplified form, it works like this:
- The NTFS I / O driver initiates the recording process while instructing the Log File Service to log everything that happens.
- Data is written to the cache, under the control of the Cache Manager service.
- The Cache Manager sends data to the Virtual Memory Manager (manager virtual memory) to write to disk in the background.
- Virtual Memory Manager sends data to the disk driver by passing it through the Fault Tolerant Driver (if you have a RAID array).
- The disk driver sends them to the controller, which already writes them either to the cache or directly to the disk.
- If this operation goes without errors, the log entry is deleted.
- If a failure occurs, the log record remains in the transaction table, and the next time the disk is accessed, the Log File Service detects this record and simply restores everything as it was before this operation.
Such a system guarantees the absolute safety of data in the event of copying, moving and deleting files or directories. When you make changes to the file, you lose those changes that were at the time of the failure in memory or in the controller cache, and did not have time to write to disk.
3. Security. NTFS treats files as objects. Each file object has properties such as its name, creation date, date last update, archive status, and security descriptor. The file object also contains a set of methods that allow you to work with it, such as open, close, read, and write. Users, including network users, call these methods to access the file, and the Security Reference Monitor determines whether the user has the necessary permissions to call any of these methods. In addition, files can be encrypted. However, you should be careful with encryption. If your system crashes or you reinstall it, then you will not be able to read encrypted files if you do not have ERD.
4. Data compression. NTFS allows you to compress individual directories and files, unlike DriveSpace, which only compresses entire disks. This is very convenient to save disk space, for example, you can compress large graphic files BMP format, or text files, and all this will be transparent to the user.
5. Support for ISO Unicode format.The Unicode format uses 16bit to encode each character, as opposed to ASCII, which used 8bit, or worse, 7bit. For a common user, this means that now he can name files in any language, even in Chinese - the system will support this without requiring a change in the code page, as DOS and W9x did.
Ministry of Education of the Russian Federation
Moscow State University of Economics
Statistics and Informatics (MESI)
Institute of Computer Technology
Abstract on operating environments, systems and shells on the topic:
“Installing Windows XP. Windows XP shell configuration, optimization
Artist: Alexey Cherkasov
student of group DKE-102
Moscow 2002
| Introduction | 3 pages |
| What is Windows XP? | 4 pages |
| How to install XP? | 10 pages |
| Conclusion | 19 pages |
| List of used literature | 20 pages |
Introduction.
Operating System (OS), which is based on Windows 2000. Since it
a completely new OS, then I'll rely on mixing from the Internet.
What is WindowsXP?
This is the new OC from Microsoft, starting with which an attempt was made to combine
two previously existing independently, the W9x and NT lines. Originally this
the project was called Whisler, but now it split into two lines, WindowsXP,
positioned to replace W9x and W2kPro, and Windows.NET, positioned
to replace NT Server of all sorts. Regardless of the name, they are all
is the direct heirs of Windows2000, and the successors of the line
WindowsNT. This fact determines the main features of WindowsXP. it
fully 32-bit OS with priority multitasking. At its core
are the same principles that all NTs were based on. it
1. Compatibility. The system can have a familiar interface
OS of the Windows family, with some additions and extensions, support
file systems NTFS5, NTFS4, FAT16 and FAT32. Most applications
written under MSDOS, W9x, NT4, as well as some programs under OS / 2 and
POSIX will start up and function without issue. When designing NT
the possibility of the system operation in various network environments was taken into account, therefore
the delivery includes tools for working in Unix and Novell networks.
2. Portability. The system runs on different processors
x86 families from Intel and AMD. 64 bit version already exists
WindowsXP and Windows.NET designed to run on Intel Itanium.
Implementation of support for processors of other architectures is possible, but will require
some effort.
3. Scalability. WindowsXP supports
sMP technologies. On Windows .NET Advanced Server and Datacenter Server except
it has support for COW (Cluster Of Workstations).
4. Security system. The system familiar to NT has been implemented
user-level security.
5. Distributed processing. WindowsXP has
network capabilities built into the system, allowing
ties with different types host computers due to the presence
various transport protocols and client-server technologies.
6. Reliability and robustness.
The OS architecture protects applications from damage to each other and itself
operating system. This uses a fault-tolerant
structured exception handling at all architectural levels,
which includes the recoverable file nTFS system and provides
protection with built-in security and advanced
memory management methods.
7. Localization. The system provides opportunities for work
in many countries of the world in national languages, which is achieved by using
iSO Unicode standard.
8. Extensibility. Thanks to the modular design of the system
it becomes possible to add new modules to various architectural
oS levels.
The final build is 2600. You can find it out either with the winver command, or by
xP kernel versions, such as ntoskrnl.exe. Distinguish a pirated release from
the present is possible thanks to the activation mechanism (Windows Product
activation) added to the system. The pirated release must include
tools to combat it, so if you see a folder named crack, or
something like this, you can be sure that the release is pirated. If on
There is nothing similar to your disk, but the disk itself has all the features
illegal (no hologram, no license agreement on paper, no
sticker that changes color if you heat it with your finger), then you risk that
that your version will stop working within a month. However, there are
"Broken" pirated releases that do not require registration at all. Besides
of this, there are so-called corporate releases made by Microsoft
for their largest OEM partners. Such releases do not require registration
initially.
Windows XP has Windows Product Activation. This is a new technology
developed by Microsoft to combat illegal copies of their software
provision. For the first time such a mechanism was tested on Terminal Service,
from W2k Server, now it seems that everything will be protected in this way,
or many subsequent Microsoft products. The essence of the technology is
next. After installing the system based on serial number, which the
provided with every copy of XP, and some features of your computer
the so-called Product ID is generated. It consists of 20 digits, and based on it
(along with the correct serial number, of course) you get Activation
Code, after the introduction of which Windows is considered activated. how
microsoft claims based on these two numbers they cannot find out
nothing about your computer. That is, complete anonymity. Perhaps this is
true. If you do not do this procedure, then after 30 days in XP, simply
everything will cease to function except for the applet responsible for
activation.You can find out if your version of XP is activated in the System
Summary located in Programs -\u003e Accessories -\u003e System tools -\u003e
System Information. If you see the line Activation Status, and opposite it
an inscription like Activation Pending (XX days remaining), which means after XX days
Your XP will stop working. The applet that is responsible for activating XP
located in Programs -\u003e Accessories -\u003e System Tools -\u003e Activate
Windows. When you run this applet, a simple wizard will open which
will offer to register your copy of XP online, or by phone.
After the system is activated (in any way), the line
Activation Pending from System Information will disappear without a trace.
There are two kinds of XP version - Windows XP Home and Windows XP Professional.
In addition, there is a 64-bit version of Windows XP Professional, made
for 64 bit Intel Itanium. Later will be released (according to
Mircosoft) Widows.NET Server, Windows.NET Advanced Server and Windows.NET
Datacenter Server (x86 and 64 bit edition for each). XP Home
positioned as an OS to replace the W9x line, XP Professional, as a replacement for
Windows2000 Professional. From the significant differences between them, you can
note only the lack of SMP support in XP Home. But despite this,
official release of XP) we can talk about the long-promised official death
line W9x, and the ideology of MS-DOS along with it. Windows.NET is different from XP
the availability of system services and applications specific to the server, and support
more powerful hardware. So, if XP Pro only supports SMP for two
processor, then NET Server is already at 4, NET Advanced Server is at 8, and NET
Datacenter Server at 32.
Microsoft claims that in order to successfully install XP, you need
processor at least 233 megahertz, 64 megabytes of RAM, and 1.5
gigabyte of free disk space. However, for a more or less comfortable
work you will need a processor of at least 500 megahertz, and at least 128
megabyte of RAM. Although, by making the interface as easy as possible
make XP require less memory than W2k, so if
donate all sorts of "gadgets" and visual effects, then it is
it will be possible to work comfortably on less powerful systems. In general, if on
Your machine is running W2k, then XP will work, no worse, if not
it's better. Like any OS based on the NT kernel, XP is very fond of extra RAM,
therefore, 512 MB for such a system will not be superfluous at all, although not
are required. At 256 Mb, the system is very fast and very
nice if you don't load it with very heavy applications. If you include all
visual effects, then XP will noticeably slow down on relatively
weak processors, regardless of the amount of RAM. Same
the effect is observed when using a weak video card. However, if
the system is powerful enough, a normally configured XP will work
much faster than any OS from Microsoft previously released.
As in W2k, the NT kernel imposes its own limitations, so you cannot expect
from XP absolutely full compatibility with old software.
However, compared to w2k, the compatibility situation has improved somewhat.
Of the most noticeable changes, we can note the sound that appeared in old
DOS games, which was very difficult to achieve in W2k. Supported
emulation of Sound Blaster 2 and General MIDI, so now you can without running around with
tambourine and third-party utilities to make such old hits work with sound
like Worms, Duke Nukem 3D, Warcraft 1 and 2, Dune 2. In addition, XP has built-in
compatibility mode with old OS. In order to use it,
you must select the Compatibility tab from the Properties file or shortcut
(shortcut) to the file. In this tab, you can specify under the guise of which OS
you need to run the program, whether you need to change the resolution or color depth
at the same time (necessary for many old programs).
Unlike acompat.exe from the W2k distribution, XP in compatibility mode does not
simply tells the program that it is not it (like an old utility from
MS-DOS, called setver), but also emulates the structure of the Windows registry,
specific to a particular OS version. If there is no desire to climb properties
files and a shortcut yourself, you can use Program
Compatibility Wizard, from Start - Programs - Accessories. However, not
one should expect a miracle from this mechanism, 100% compatibility has not been achieved
succeeded, so it will not be superfluous to go to the website of the manufacturer of your
programs and see if there is an update on it that makes it
compatible with XP. How about compatibility with old software
security? As in W2k, the NT kernel imposes its own limitations, so
you cannot expect from XP to be absolutely complete compatibility with old software
security.
This issue DL-hell was given the closest attention. Moreover, to
this issue has been approached more comprehensively than ever before. At first,
no one will be allowed to simply overwrite any DLL in the system
directories. In addition, the SFC mechanism familiar to us from W2k, System
File Protection. This system monitors the main system files, and in case
replacing any of them, changes everything back. In addition, Microsoft
for some reason they took care of crooked programmers who cannot write
ok, and they definitely need their creation to work with their own
DLL, replacing system. When installing such a program, these
the converted DLLs will still be written to disk, but not instead of
system. Then, when starting such a program, in the case of a DLL call, it must
not a system file is called, but a previously saved file from this
programs.
Dynamic Disk is a physical disk on which
dynamic sections, here, too, they devoted a lot of time to this section.
Such a disk can only be accessed from W2k or XP. Dynamic partitions
can be of the following types:
1. Simple. Simple sections are virtually indistinguishable from
those to which we are accustomed.
2. Spanned. Consists of several dynamic disks that
presented as one disc. Data is written and read sequentially.
3. Stripped. Multiple dynamic disks that
presented as one disc. Data is written and read simultaneously on
multiple disks. This, in theory, should provide twice the
speed on disk operations. In practice, the gain, although significant,
but less than twice. It is better to use this mode only if
in case you already have two disks. Otherwise, it is much more profitable
buy one hard drive, twice as large, with excellent speed
characteristics than two small and slower ones, based on the fact that
they will be much faster. Of course, if you take two fast drives and combine
them in Stripped Volume, then they will be faster than one. However, the systemic
the section cannot be Stripped Volume. In this case, it is wiser to purchase
hardware IDE-RAID controller that provides the ability to work with
RAID even from under DOS; this way you can make the system partition
alternating.
4. Mirror (mirrored). These partitions consist of two physical disks.
Data written to one of the disks is automatically duplicated on the other.
This does not provide any speed advantage, but it does provide
twice the degree of reliability of data safety.
5. RAID5. Consists of three or more discs. Is stripped
volume with error control. That is, the data is written to two disks, two
block, and on the third disc, and in the third block ECC is written, the correction code
errors, with the help of which, according to the information of any of the blocks, you can
restore the contents of the second block. Moreover, the ECC code is written
alternately, for each of the disks included in the array. This technology
allows more economical use of disk space than mirrored
volumes, but is slower. Any of these sections can be
formatted for both FAT32 and NTFS. Dynamic disk management
through the Disk Management section of the Computer Management window.
Note: All these sections, except for simple, can only be created on
dynamic disks.
A regular disk can be converted to a dynamic one from the Disk window
Management, but the reverse process (convert dynamic disk to
simple) is not always possible. For example, if the disc was created from the very beginning
as dynamic, then it lacks the usual partition table, and that
to create it, it will have to be split again using fdisk and
format.
In addition, if you delete several partitions on a dynamic disk, then
free space is not merged and a new partition is equal in size
remote, will consist of several small partitions combined into
volume set under one letter.
Task Manager is one of the most powerful and convenient tools in NT,
designed to control processes. It is called either
Ctrl + Shift + Esc, or by choosing from the menu that appears after pressing the right
button on the Taskbar. Task manager in XP consists of five tabs -
Applications, Processes, Performance, Networking and Users. Let's start with
This tab displays information about the load of the processor (s) in
real time (green user processes, red system
processes), the load of physical memory is shown, and how much
used / free RAM, and how much system Swap is busy.
In addition, other additional information is given, such as Threads and
Processes, - the number of threads and processes currently running on the machine,
Peak - peak Swap size during the session, Nonpaged - amount
memory allocated for the kernel. This information can be used when
it will be necessary to answer the question, which factor in the system is "bottle
throat "slowing down the work (although for this purpose it is better to use
Performance Monitor).
The second tab, Processes, contains a list of processes active in this
For each process, you can find out some additional information, like
then: PID (Process ID), the amount of used RAM,
the number of threads generated by the process, and more. Of useful
additions that appeared in XP, it should be noted the appeared column
User Name. In it you can find out which user, or system service
launched this or that process. Add / remove displayed parameters
it is possible through View -\u003e Select Columns.
In addition, with any of these processes, certain
actions. To do this, you just need to right-click on it, it will appear
context menu, through which you can end, "kill" the process (End
Process), you can kill the process itself, and all the others that it "spawned"
(End Process Tree). You can set the priority to the process, from the highest Real-
Time to the lowest, Low. If the machine has two processors and
multiprocessor kernel, then another item appears in this menu, Set
Affinity, which allows you to transfer a process to another processor, Cpu 0,
Tab - Applications, allows you to view the list of working
applications, and "kill" any of them. Task Manager allows not only
"kill" applications, it can also launch new applications. File -\u003e
New task (Run ..). This can be very helpful sometimes. For example, if by what
or the user interface freezes for some reason, then it can be easily
"kill" (the explorer.exe process), and then start over. Moreover, it is not
must be explorer.exe. You can, for example, run
progman.exe, and get an interface similar to the W3.1 interface, or any of
external interfaces that can be found in abundance on the Internet.
Networking tab. This is one of the tabs that appeared in Task Manager
only in XP. It shows the load of the local network.
Users tab. On it you can see the users who are currently
moment work on the machine. If you have sufficient rights, then you can
disable this user, or simply send him a message. Similar
things have long been widely used in a wide variety of software,
designed to manage multi-user systems, but it is
this is the first time in Task Manager.
After a long enough hiatus, Microsoft significantly changes its appearance
their OS. The basic principles of the interface remain the same, but all
small, and not so, changes and improvements are just a huge amount.
The first thing that catches your eye is the changed design of the system. On
replacement of strict, even lines without unnecessary "embellishments" came rounded
lines, soft tones and shadows. Actually Microsoft didn't invent
"bike", many trends that have found their embodiment in a new
we could see the design of XP before, including on the PC. Like W2k,
using the color gamut first introduced in KDE 1.2, XP uses
elements of the color scheme and design of some interface elements
(for example scroll bars) similar to those used in KDE 2.0 If anyone does not
like the new trends in "computer fashion", it can easily lead
the appearance of the system in a more familiar form, such as that of the W2k or W98.
How do I install XP?
There are several ways. First, if your distribution CD looks like
to the one produced by Microsoft, then it must be rubble
(bootable). To boot from it, you need the "Boot
sequence "set equal to CD-ROM, insert CD and reboot.
when you start the computer, the installation program will start. Further - just follow
instructions. This is the only method that will load directly into the program-
installer. Microsoft believes that CD-ROMs are essential and absolutely
a necessary part for the computer on which XP is installed, therefore
the good old way of booting from four floppies is no longer supported.
Second, you can boot from a DOS system diskette with a CD driver.
ROM and run the program "winnt.exe" in the i386 directory on the disk with
distribution kit.
Note: if your hard drive is connected to an external controller (SCSI or
IDE), then do not forget to download the new XP (or W2k) driver for it and drop
it to a floppy disk. You will need it if the installation program cannot
correctly identify and install the device. In this case, it is necessary
press F6 when searching for such devices.
And finally, you can run the "setup.exe" program from under W9x, NT4 or W2k
from the root directory of the CD disk, or winnt32.exe from the i386 directory, and
upgrade the system to XP. She does it very correctly and before
reboot gives a list of programs and drivers incompatible with XP.
However, the latter method is not the most optimal. Though
XP tries to independently determine the list of programs and drivers that
will not work with her correctly, she is not able to do it right
in all cases. Therefore, in order to avoid compatibility problems, it is better to
reinstall the system.
There is an even more radical method for solving compatibility problems. When
installation over an existing OS, you will have the option of choosing an OS (Dual
Note: after installing XP as a separate OS, it will not be possible
normal operation of Outlook Express and Internet Explorer in Windows 9x, because
W2k will replace the latter. This is only true if both OS are installed on one
and the same disk partition. But, this problem can be solved by copying
some DLLs from WinNT \\ System32 to Windows \\ System. To determine the required
libraries, you can use the ShowDep program
() or similar information shows Outlook
Express in the About window. In addition, many programs will have to
install twice, once for XP, and once for W9x. Sometimes, it is possible in
the same directory, for example Office XP is capable of
understand that it has already been worth it, and in the end installs only about 18
megabyte.
It is very important to select the correct kernel and HAL version during installation.
At the very beginning of the text phase of XP installation when the message appears
"Setup is inspecting your computer" s hardware configuration "click and
hold down the "F5" key. In the list of library versions that appears on the screen
HAL, select the version appropriate for your computer, or select
the "Other" item to indicate the manufacturer's library file
equipment. Then proceed with the Windows installation. XP package includes
the following versions of the HAL library:
ACPI Multiprocessor PC - for ACPI systems with multiple processors
ACPI Uniprocessor PC - used for ACPI systems with multiprocessor
motherboard and one installed processor.
Advanced Configuration and Power Interface (ACPI) PC - used for
uniprocessor ACPI systems
MPS Uniprocessor PC - for systems without ACPI support, with multiprocessor
motherboard and one installed processor
MPS Multiprocessor PC - for multiprocessor systems without support
ACPI Compaq SystemPro Multiprocessor or 100% compatible - for computers
Compaq SystemPro or fully compatible with them.
Standard PC - used for any standard computer, not
multiprocessor and no ACPI support.
Standart PC with C-Step i486 - used for computers with support
this technology.
During installation, the system does not allow you to select components, and even after installation
there is almost nothing in Add / Remove programs - Windows Components. During
unfortunately, you will not be able to select anything. But after
installation, in Windows / inf find the file sysoc.inf and delete the word in it
hide or HIDE wherever you find it. Add / Remove Windows components will show
new items. Unfortunately, you cannot delete all of the items that appear, but
something is still possible.
It is worth asking questions, is it necessary to switch from FAT32 to NTFS? It all depends
for what purpose you use your computer, and how much you have
random access memory. Please note that NTFS is somewhat slower
than FAT, due to additional downloadable services and its system
security. If you are low on RAM and you decide to install
yourself XP, then you definitely cannot put yourself NTFS. If you have 128MB or
more, then you might already think about NTFS. The benefits should be weighed against
disadvantages of NTFS for the common user and decide what you need. TO
the advantages of FAT32 include the fact that it is faster and requires less
memory for work. If the system only works with FAT32, then the memory is not
drivers and services required by NTFS are loaded. In addition, for
using FAT32, it is possible to access the disk when booting from
boot floppy W9x. The benefits of NTFS for the common user can
describe in one capacious word: indestructible. In all seriousness, kick out
NTFS is extremely difficult, if possible. For experience, a bunch of
various applications, disk optimizers, and at the most inopportune moments
the reset button was pressed. Repetition of this sadism a dozen times no
the system did not make an impression, it continued to work without errors.
In addition, NTFS has built-in file encryption tools that
provides some confidence in the safety of data. Of course, with
provided that the system will not be reinstalled.
NTFS grew out of the HPFS file system jointly developed by IBM and
Microsoft for OS / 2 project. It began to be used with Windows NT
3.1 in 1993. Windows NT 3.1 was supposed to compete with servers
based on NetWare and Unix, so NTFS incorporated all the
technological advances. Here are the main ones:
1. Working with large disks. NTFS has a cluster size of 512 bytes, which is
in principle, it is optimal, but it can be changed up to 64K. More importantly, NTFS
can theoretically work with volumes of 16,777,216 terabytes.
In theory, because such hard drives simply do not exist yet, and
they will not appear very soon.
2. Sustainability. NTFS contains two copies of the FAT analog, which are called
MFT (Master File Table). Unlike FAT MSDOS, MFT is more like
database table. If the original MFT is damaged in case of a hardware error
(for example, the appearance of a bad sector), then the system at the next boot
uses a copy of the MFT, and automatically creates a new original, taking into account
damage. But this is not the most important thing. The main thing is that NTFS uses the system
transactions when writing files to disk. This system came from a DBMS where
protecting data integrity is vital. This already speaks of her
efficiency. In a simplified form, it works like this:
NTFS I / O driver initiates the write process while
telling the Log File Service to keep a log of everything that happens.
Data is written to the cache, under the control of the Cache Manager service.
The Cache Manager sends data to the Virtual Memory Manager (manager
virtual memory) to be written to disk in the background.
Virtual Memory Manager sends data to the disk driver, skipping it
via Fault Tolerant Driver (if you have a RAID array).
The disk driver sends them to the controller, which already writes them either to the cache,
or directly to disk.
If this operation goes without errors, the log entry is deleted.
If a failure occurs, the log record remains in the transaction table, and if
the next access to the disk, the Log File Service detects this entry, and
just restores everything as it was before this operation.
Such a system guarantees the absolute safety of data in the event of
copy, move and delete files or directories. When making
changes to the file, you lose the changes that were at the time of the failure
in memory or in the controller cache, and did not have time to write to disk.
3. Security. NTFS treats files as objects. Each file
the object has properties such as its name, creation date, date
latest update, archived status, and security descriptor. File
the object also contains a set of methods that allow you to work with it,
such as open, close, read and write. Users, including network users, for
file calls call these methods, and the Security Reference Monitor
determines whether the user has the necessary rights to call any
of these methods. In addition, files can be encrypted. True, with encryption
you should be careful. If your system crashes or you reinstall it
4. Data compression. NTFS allows you to compress individual directories and
files, as opposed to DriveSpace, which only allowed drives to be compressed
entirely. This is very convenient for saving disk space, for example
you can compress large BMP graphics files on the fly, or
text files, and all this will be transparent to the user.
5. Support for ISO Unicode format. Unicode format uses 16bit for
encodings of each character, as opposed to ASCII which used 8bit,
or worse, 7bit. For a common user, this means that now
it can name files in any language, even in Chinese - the system is
will support without requiring you to change the codepage like DOS did
Dignity of the NTFS5 file system from NTFS4. The most important thing is what they scolded for
NT4, and what it was inferior to NetWare, is the lack of quotas.
Quota is a limitation of the maximum amount of disk space
for the user that he can use. Why is this needed? Well, on
computers operating in large networks, in firms and organizations and without
the questions are clear why, because hard drives are not rubber. And at home
computer, for example, you can select the user "wife" or "younger brother"
no more than 50MB on the hard drive, so that they do not clutter the disk with anything.
Moreover, it is not at all necessary that all user files be stored in
one place, they can be scattered across all discs. Installed
quotas through the Properties of the NTFS partition, the Quota tab. Via Quota Entries ...
you can set quotas for each individual user. Second,
quite an important difference between NTFS5 and the old version - the ability to search
file, by the name of its owner. Why is this needed? But why: for example, you
you need to find all the files created in Word, by some one user, on
disk, where there are thousands of these files. This was a problem in NT4. With Access
Control List, you can easily check which
files are available to the user, and set the permissions for individual files
or directories. In addition to directly changing the structure of NTFS itself, in XP
added Microsoft Index Server, which significantly speeds up the search for files,
especially by their content, by indexing the contents of the disks.
This service is managed through the Indexing Service section of the Computer window.
Management. In this section, you can view which directories
indexed, and, if desired, add new ones or remove old ones. Working
this is with any partitions, not just NTFS. NTFS5 adds this feature
as mount points or, in other words, junction points.
This function has long been familiar to users of various Unix / Linux variants, but
it appeared in Microsoft products for the first time recently (only with W2k). WITH
using this technology, you can attach any disk resource at any
file system location. For example, you can attach the hard drive D: \\ to
any of the directories on the C: \\ drive, for example, in C: \\ games Now by going to
directory C: \\ games, you can see the contents of the root directory of the disk
D: \\. All changes that will be made in this directory will be
produced on the D: \\ drive. After that, you can in the Computer management -\u003e
Disk Management remove the letter assigned to this disk (Change disk letter
and path), and the user won't even know what's on the computer
two disks installed! It will work with one C: \\ drive and a directory
C: \\ games for him will be no different from others. Mount disk
or a partition to a directory on an NTFS partition or disk, you can from the already familiar
us the Change disk letter and path menu, by selecting Add .. -\u003e Mount in this
Ntfs folder -\u003e Browse ... You can also control this function through the command
line using the mountvol command. Immediately after mounting the disk, the directory in
which it has mounted will show with a different icon:
But as soon as you rename it, it will take the same form as everyone else.
To unmount a disk, use Disk Management, Change disk menu
letter and path by selecting Remove. If you just delete the folder with
mounted disk in Explorer, then together with the folder you will delete ALL
the contents of the mounted disk. So be careful. Besides
mounting entire disks, you can mount separate directories, but for
you will have to use a third-party utility. You can take it here:
http://www.3dnews.ru/reviews/software/win-xp-faq/junction.zip. Go to
console, run it, and familiarize yourself with its operands.
What is a cluster? Cluster is the minimum amount of disk space that
can be allocated by the file system to store one file.
It is determined, as a rule, automatically, when formatting the hard drive,
according to the dependence indicated in the table: Size of the Sectors section in the cluster
Cluster size
| Size | Sectors in | Size |
| partition | cluster | cluster |
|\u003e 32768 MB | 128 | 64K |
A small exception for the system partition: if it is less than 2048MB, then
the cluster size, when using NTFS, is always 512 bytes. Find out the size
a cluster in XP can be done in several ways. First, you can go to
Administrative Tools -\u003e Computer Management -\u003e Storage -\u003e Disk
Defragmenter. Choose desired disk and click on Analyze. In a few
seconds a plate will appear with three buttons. Clicking on View Report
launches a window in which a sea of \u200b\u200binformation about the selected disk, including
and Cluster size. There is another method that is not only suitable for XP.
Creates, or takes a ready-made, small file from 1 byte to 500
byte. Pressed on it right button mouse, Properties is selected. We look
by two points, Size and Size on disk. Size should be something like 10 bytes
(or whatever size it really has), and Size on disk will be, for example,
4096 bytes, which corresponds to the cluster size, i.e. 4K. Cluster size
you can choose it yourself, manually, however, only when formatting.
This is done like this: "format d: / A: size", where size is the size of the cluster in
bytes. However, there are some rules to be followed
stick: first, the cluster size must be a multiple of the size
physical sector, that is, 512 bytes in the vast majority of cases;
secondly, there are restrictions on the number of clusters per partition.
You can reduce the size of the installed XP, for example, by removing
directories:
1)% SystemRoot% \\ Driver Cache \\ i386 \\
This can be done if all the equipment is already standing and working.
When adding new hardware, the system will ask for the distribution kit.
This is a cache of protected system files used to automatically
recovery in case of damage. The default size of this folder is 400 MB,
and it is determined by the SFCQuota (0xFFFFFFFF) parameter in the registry key
HKEY_LOCAL_MACHINE \\ SOFTWARE \\ Microsoft \\ Windows NT \\ CurrentVersion \\
You can change the size of the system file cache using the sfc command:
sfc / cachesize \u003d 0 (you can enter another value, for example, 3 MB), and then
manually delete all files in the specified directory. If you don't ask
/ cachesize \u003d 0, then at the next check of protected system files the system
will refill its cache to the specified size.
3) Turn off System Restore. You can hand it over here: System Properties -\u003e
System Restore -\u003e Turn off System Restore for all drives. This will erase
all information recorded by System Restore and stored in the System folder
Volume Informatiоn.
If you have a FAT32 system, then you can convert the disk to NTFS
no data loss. 1. Use the command CONVERT volume: / FS: NTFS
The conversion will happen on the next reboot. No information loss
this will not happen, but you need to keep in mind that the cluster size after
conversion will be 512 bytes, which is not very good on large partitions,
in addition, the disk after conversion will be highly fragmented. The reverse
conversion (NTFS -\u003e FAT) without data loss by means of XP is impossible,
you will need to reformat the partition again.
2. Partition Magic will also be able to convert. With NTFS 5
works fine since version 6.0, but if you only use
boot floppy, version 5.01 will do. This program also
allows you to perform the reverse conversion without losing data and can even
change the cluster size (unfortunately, only on FAT16 and FAT32). Partition
Magic does not work with dynamic disks, only basic ones.
You can customize the download process "for yourself", for this you can change
parameters in boot.ini? boot.ini is responsible for the OS boot order
installed on the system, and allows you to set some boot parameters
these systems. This file begins with a section In this section
only two parameters:
Timeout, defines the time in seconds that the system waits before
start loading the OS by default, if the system is installed
multiple OS.
Default, defines the system that boots by default.
The second section, which contains a list of possible
loading the OS. For each OS, its location is indicated using
aRC (Advanced RISC Computer) names.
scsi (*) or multi (*) - the scsi (*) element is used in the controller case
SCSI with BIOS disabled. The multi (*) element is used for all drives
other types including IDE, EIDE, ESDI and SCSI with BIOS enabled. (*) -
the number of the adapter from which to download. Adapters are numbered from
zero, starting with the controller located closer to slot 0 on the mat. board.
disk (*) - if (1) \u003d scsi (*), then equal to the logical device number
(LUN) set for the disk. If (1) \u003d multi (*), then it is always zero.
rdisk (*) - if (1) \u003d multi (*), then equal to the number of the disk in the chain, count
disks starts at 0. If (1) \u003d multi (*), then it is always zero
partition (*) - defines the disk partition containing the OS files. In contrast
from all other elements of ARC names, section numbering starts from 1,
those. the first partition is designated partition (1), the second partition (2), and so on.
\\ path - defines the directory (or subdirectory) of the section in which the
oS files. The default path in XP is \\ windows.
In addition, the quotes contain the text that will be visible in paragraph
selection of this OS in the start menu. There may be keys after this text
which affect OS boot. For XP, the following keys are possible:
/ basevideo - with this key, the system will only use the standard
VGA driver. This parameter can be useful if you are for a short time
put another video card, and you do not want to suffer with rearrangement
drivers.
/ fastdetect - usually installed automatically during system installation. When
installing this key, the system does not detect all Plug and Play devices in
loading process.
/ maxmem - defines the maximum size of RAM that can be used
system. Theoretically, it can help if you have a buggy RAM.
/ noguiboot - When using this switch, no color will be drawn
splash screen when loading. Can be used by those who do not want to look at
this picture in 60 hertz. But we must take into account that apart from this there will not be
draw BSOD at boot. But the system hangs if something is not in
order, naturally will not stop.
/ noserialmice \u003d - using this parameter will not
determine the mouse connected to the COM port for the ports listed in
brackets. If port numbers are not specified, the mouse will not be detected on
all ports. / bootlog - when this parameter is set, the system will write
boot log in% SystemRoot% \\ Nbtlog.txt This parameter can be used to
find the reason why the system can only boot in safe mode.
/ safeboot - when installed, the system will boot into Safe mode. Same
can be done by pressing F8 at the beginning of the system boot. Colon can be
set several options for / safeboot. Minimal - minimum
configuration. Network - with network support. Dsrepair - only available on NET
Server and allows you to restore Active Directory in advance
made backup... Alternateshell - allows you to use
alternative graphical shells. By default, the system is set
only Explorer (standard shell) and Progman (inherited from
Windows3.11 and NT 3.5).
/ sos - displays a list of loaded drivers on the screen. May I help
find out where the system is stumbling upon loading.
/ baudrate - this parameter specifies the speed at which COM will work
port for system debugging. If you do not specify a specific speed, then there will be
9600 for modem and 19200 for null modem cable. When enabled this
parameter is automatically set to the / debug parameter
/ crashdebug - with this flag the debugger is loaded, but remains inactive
state until a kernel error occurs. Can be used
software developers.
/ debugport \u003d com * - indicates the COM port number (* must be the port number)
used with the debugger. Automatically enables the / debug switch
/ debug - loads a debugger that can be invoked by others
computer through the connected COM port. Can be used
software developers.
/ nodebug - no debug information is displayed on the screen.
/ hal - specifies the name of the file to be used as hal.dll
after loading.
/ kernel - specifies the name of the file to be used as
ntoskrnl.dll after loading.
My default is:
default \u003d multi (0) disk (0) rdisk (0) partition (3) \\ WINXP
multi (0) disk (0) rdisk (0) partition (3) \\ WINXP \u003d " Microsoft Windows XP
Professional RU "/ fastdetect
C: \\ \u003d "Microsoft Windows 98"
If you need to install Win9x with XP already installed, then you can
do as follows. Win9x overwrites the boot
xP sector. Whatever this happens, before installing Win9x you need
correctly configure its installer.
To do this, in the MSBATCH.INF file (if there is no such file in your distribution,
create it) you need to register the following lines:
After installation Win9x installs the default boot on itself, but this
easy to change. If the Win9x distribution is on CD (as usual and
happens), then the corrected or newly created MSBATCH.INF can be used,
by running the Win9x installer with the parameter:
setup.exe drive: \\ path \\ MSBATCH.INF
In this case, the file can be named anything, not just MSBATCH.INF.
It is possible to change the letter of the system / boot drive in XP. It may
required if a mirrored volume breaks down or changes
disk subsystem configuration. See below how to swap
letters for C and D drives. If you don't need to swap letters, just
change the value \\ DosDevice \\ [letter]: to any unused letter. But with
changing the drive letter on a normally working system will stop working
programs that use an absolute addressing method will have to
reinstall them or manually change any invalid paths in the registry.
Log in as an administrator and run Regedt.exe.
Open the key HKLM \\ SYSTEM \\ MountedDevices and allow the administrator
full access to it (Security menu -\u003e Permissions
In HKLM \\ SYSTEM \\ MountedDevices find the drive letter you want
edit, in our case it is "\\ DosDevices \\ C:".
Change the letter to any unused letter, for example, "\\ DosDevices \\ Z:".
Select the second drive letter to change, i.e. "\\ DosDevices \\ D:",
change
Its required, in our case it will be "\\ DosDevices \\ C:"
Select the \\ DosDevices \\ Z: value and rename it to
"\\ DosDevices \\ D:".
Restart your computer.
It is possible to rename the Administrator account folder. Go to
system under an administrator account, create a folder with the desired name in
the Documents and Settings directory. Then - right click on the "My
computer "-\u003e Properties -\u003e Advanced -\u003e User Profiles, click the Copy button
To ... and copy the administrator profile to the created folder. Launch
regedit and find the key:
HKLM \\ SOFTWARE \\ Microsoft \\ Windows NT \\ CurrentVersion \\ ProfileList
In this key, we find the branch corresponding to the administrator profile by
the value of the ProfileImagePath key and in it we correct this parameter to the required one.
We log in, if everything went well, you can delete the old folder - it
is no longer needed.
Conclusion
Having worked with XP, few people want to move to the old 9x, 2k and
especially to ME, because XP combines all the best aspects of these
Windows'ov. XP is a new tool in the hands of humanity and to use
it is necessary for its intended purpose.
List of used literature
1.www.3dnews.ru
2.www.microsoft.com/rus
3.www.expocrocus.ru
4. + Help Center and windows support XP
Greetings. I decided to write today about how to install Windows XP... They just brought me a computer, so old, already. 256 MB RAM, Celeron processor, 40 GB hard drive. Well, what? Where there is, XP is the most for him.
It's just that everyone is already writing about installing Windows 8, but I have something to do with the old days. Well, okay, I think that XP will still survive, because whatever you say it is a good OS and many still work with it. Just want to apologize for the pictures, I took pictures on a 15-inch monitor, and also on a phone. Ideally, of course, you could install Windows XP on a virtual machine and make beautiful screenshots, but I have a living example :).
Preparing to install Windows XP
Important! Make sure that there is no important information on the C drive (the disk on which you have or was installed the operating system). Desktop and folder "My documents" stored on drive C. If you have information, you can copy it to drive D using a bootable drive.
If everything is fine, then move on. Insert the Windows XP installation disc into your computer drive and restart your computer. If after the start of the download at the bottom of the screen you will see the download (the points will move), then everything is fine. Quickly press any key (did not have time :), restart your computer again) and you can proceed to the beginning of the installation.
Well, if your boot from the CD did not work, and the computer started to boot as usual from the hard disk, or an error appeared through which you undertook to reinstall the operating system, then it means that you do not have boot from the drive in the BIOS in the first place. I already wrote an article about that, but in this computer the BIOS was different from what is described in the article.
Go to the “Boot” tab.
Click “ Boot Device Priority ”.
Using the “Enter” and “Top” “Down” keys, set the first CD / DVD, then the hard disk, etc. Now press F10 and save the changes. The computer will restart and start loading the CD. We press any button and go to the beginning of the installation.
Windows XP installation process
As soon as you pressed any key, we see this:
Here you have to wait, well, nothing can be done, we are waiting :).
In this window press “Enter”.
We accept license agreement by pressing the F8 key.
As you can see, I've already found old version Windows XP and you can try to restore it, but I think you also need a clean installation, so press “Esc”.
Select the partition on the hard drive where we want to install the operating system. As a rule, this is C:, select it and press “Enter”.
We confirm the setting with the "C" key.
Here you need to choose how the section will be formatted. I recommend choosing FAT and not fast. We press "Enter". We confirm the formatting by pressing the "F" key.
We are waiting for the partition on the hard disk to be formatted.
Copying files from the disk will start immediately, wait again :(.
You can immediately configure the language and keyboard. Click "Next".
Enter your name and organization name. Go ahead.
We adjust the time and date. Click "Next".
We are waiting again, just don't go too far :).
I left "Common parameters" and clicked Next.
You can register with Microsoft. But I refused. Let's continue.
We indicate users by the computer.
Congratulations! Windows XP installation is complete.
All friends, the installation is complete and you can start using the computer. I also want to note that I installed the simplest build of Windows XP. You may also have an assembly from ZWER, for example, the installation process there may be slightly different. For example, in this version I also entered the key, forgot to take a picture. And in the assembly from ZWER, there seems to be no such item. Well, if it asks for a key, then look for it in text filewhich you most likely downloaded from the disk image.
Well, that's all. Good luck friends!
Today, the tenth version of Windows has become very popular, however, some novice users want to use Windows 7 on their laptops, since it is a little easier. Moreover, not every beginner knows how to properly install this operating system. In this case, you must familiarize yourself with all the steps associated with the installation, from start to finish.
Before proceeding with the installation
Before starting the installation, novice users need to pay attention to several very important aspects. It is necessary to familiarize yourself with them, as non-compliance with them can lead to the fact that the laptop will not work as expected.
The first thing you need to pay attention to - if the laptop was sold with a preinstalled Windows 7 operating system, but still there is a desire to reinstall the system due to device slowdown, OS failure to start, presence of a virus or the like, you do not need to apply the instructions described below.
In this case, you can use a hidden recovery partition, which will fix all the above problems and bring the laptop to its factory state. In this case, the entire installation of the operating system will take place almost automatically.
If there is a desire to reinstall the licensed operating system available on the laptop on a pirated more advanced version of Windows 7, then it is not recommended to do this, since nothing will change functionally, and performance will not increase, but serious problems may appear in the future.
It should be noted that with any option for installing Windows, unless DOS or Linux was installed on the laptop when buying a laptop, it is not recommended to delete the device recovery partition. The place that this section will occupy will not play a big role, but it may come in handy in the future if any problems arise.
In general, below will be described the manipulations that must be carried out when installing the operating system from scratch. There will also be instructions on how to format the system partition of the hard drive, if it is impossible to restore the preinstalled system or it is not necessary. In other situations, it is advisable to use the built-in means to return the laptop to the factory state.
What is needed to install Windows 7 on a laptop
For installation, you need to have an operating system distribution kit, it can be installation media or flash drives. Naturally, you need a laptop and a lot of free time. If you don't have an installation media, you can easily create one. How to do this, you can read on the Internet.
It is worth noting that it is better to use bootable USB drivebecause it is faster and more convenient. In addition, many laptops, especially netbooks, do not have optical driveso the disc cannot be used. In addition, it is worth remembering that when installing the system, all data will be deleted from the C drive, so they must be saved in a safe place.
After that, you need to set the boot from a USB drive or disk in the BIOS. This is not difficult to do, as you can read about on the Internet. After specifying the drive for loading, the PC will restart and the message Press any key to boot from dvd will appear on the black screen. Here you need to click on any button, which will start the installation.
Beginning Windows 7 Installation
After that, a progress bar and the phrase Windows is Loading Files should be displayed on the screen. Next, the Windows 7 logo and Starting Windows will be displayed. No further user action is required here.
Selecting the installation language
Then a screen will appear where you need to specify the language that will be used during installation. You need to choose the appropriate one and click "Next".
Installation start
The "Install" button will be displayed under the system logo, which must be pressed. In addition, on the same screen, you can activate the recovery of the operating system. To do this, click on the link below.
License
On the next screen, you should see the message "Start installation". It is worth noting that in some cases at this stage this inscription may be displayed for several minutes, however, this does not mean that the laptop is frozen. You should wait for the next window, which requires you to accept the license agreement.
Specifying the Windows 7 Installation Type
After these manipulations, a window will appear in which you must specify the type of installation. It can be Full Install or Update. Here you need to choose the first option, since there should be no problems with it.
Selecting a partition for installing Windows 7
This is the most crucial stage. The screen will display a list of hard drive partitions that are available on the laptop. Sometimes it may be that nothing is displayed on this screen, then you need to look for solutions to this problem. This is generally not very difficult.
It is worth paying attention to the fact that if several departments with different types and sizes are displayed, then it is not recommended to touch them, since these can be recovery or caching partitions, as well as various service areas of the hard drive. You can only use discs that you are familiar with. Typically they can be calculated by volume. You can also divide the hard drive into departments.
Partition formatting and installation
If you do not need to split the hard drive into departments, then you need to click "Disk Setup", and then "Format". Then specify the formatted section and click "Next". Also, when using a new drive, it needs to be divided and then formatted.
Installing Windows 7 on a laptop: copying files and rebooting
By clicking "Next", the procedure for copying the operating system files will start. The PC will restart several times. It is advisable to enter the BIOS at the first restart and set the boot from the hard drive, and then restart the computer. Then you just have to wait.
Upon completion of copying files, an offer will pop up to register the name of the user and the PC. You must enter them and click "Next". You can also set a password to enter the operating system. Then you need to register windows key 7. This step can be skipped or added later. This can be done within 30 days.
After that, a request will pop up to select a method for updating the operating system. In this case, you must select "Use recommended settings". Then you need to set the date, time, time zone and network. If the plans do not include the creation of a local network, then you must specify "Public". This can be adjusted in the future.
Then you need to wait a little while the system sets all the necessary parameters, creates a desktop and restarts for the last time. This completes the main stage of installing Windows 7 on the laptop.
After that, you will need to install all the necessary drivers for the laptop hardware. In this case, you do not need to use any driver packs. To download drivers, go to the laptop manufacturer's resource and from there download the latest versions for this model.
This completes the installation of Windows 7 on the laptop. By adhering to these instructions, a novice user can easily install it without any assistance.
Foreword This article examines the most vital situation: installing a new operating system Windows Vista on top of Windows XP (with Service Pack 2), and this is not a synthetic test conducted in a laboratory. The subject is the author of this article, who will sacrifice on the altar of science his current home system, which is used every day for games and work, with a dozen or more installed applications, a mail client with correspondence, network connections local ISP, etc., etc. A sort of "deadly number - performed for the first time", as a result of which, in my final conclusions, I will either admit the possibility of the current painless transition to Windows Vista or ... Or, in the worst case, I will join the number of Microsoft accusers, if not all mortals in a number of specific sins for sure :).
In the second part of this short article, a freshly installed Windows Vista system will face another test - an almost complete change of the computer's hardware - the motherboard, CPU, video card, RAM. In fact, only a Windows Vista hard drive and a DVD-RW / + RW drive will remain. How will the operating system survive such bullying? We will also find out the answers to these questions during our experiment ...
Part 1. Installation over Windows XP
Training
So, we have the following system at our disposal:
From the installed software, we note (this list is far from complete):
Agnitum Outpost Firewall Pro 4.0
PaintShop Pro 9
K-Lite Mega Codec Pack 1.66
Microsoft .NET Framework (versions 1.1, 2.0, 3.0)
Microsoft Office 2003
PowerDVD version 6
Kaspersky Anti-Virus 6.0
"Guild 2" (game)
What opportunities await the user of the licensed box windows versions XP if you want to upgrade (OEM versions don't count)? Here is the answer given by Microsoft itself:

Yellow dots indicate that you need a clean slate installation, without the ability to save installed applications and settings. Green dot - the ability to install Windows Vista over the current version of the Windows XP operating system, while maintaining your settings and applications. The above label is valid for 32-bit operating systems. You can read more about upgrading Windows 64-bit here.
Here is information about the commercial side of the issue - how much will it cost to switch from a boxed version of Windows XP to a boxed Upgrade version of Windows Vista:

Just in case - Microsoft Corporation invites you to check the possibility of upgrading to Windows Vista using the Windows Marketplace Upgrade Options Tool (see " useful links"at the end of the article).

Now for the preliminary preparations for migrating to Windows Vista in light of possible incompatibilities. Another useful utility will help you here - Windows Vista Upgrade Advisor (also located in the "Useful links" section at the end of the article). It allows you to pre-assess the consequences of switching to a new operating system, identifying potential pitfalls in advance. Moreover, inconsistencies are displayed for a specific version of Windows Vista (Home Basic, Home Premium, Business and Ultimate). I have a boxed version of Windows Vista Business ...

After installing the utility and scanning it with it, you are informed about the compliance with the system requirements ...

Device Drivers ...

And installed applications.

Actually, the Windows Vista Upgrade Advisor found two real problems for me and six potential problems:
Agnitum Outpost Firewall Pro by Agnitum Ltd. before upgrading from Windows XP to Windows Vista - must be uninstalled, and during installation after upgrading to Windows Vista - it may not work due to lack of compatibility.
Kaspersky Anti-Virus 6.0.1.411 from Kaspersky Lab must be uninstalled before upgrading from Windows XP to Windows Vista, and during installation after upgrading to Windows Vista it may not work due to lack of compatibility.
Potential issues with Windows Messenger IM client version 4.7.
A slight limitation of the functionality of ABBYY Lingvo 9.0 Multilingual Dictionary from ABBYY (BIT Software) is possible.
There may be a slight limitation in the functionality of PowerDVD version 6.
There may be a slight limitation in the functionality of the Citrix ICA client.
No driver information: Creative Audigy Audio Processor (WDM) from Creative Technology, Ltd.
No driver information: Creative Game Port by Creative Technology Ltd.
Well, let's start solving problems ...
Agnitum Outpost Firewall Pro 4.0.1005.7229. Alas, the problem is not solvable, and the application will have to be removed:
"The current version of Outpost Firewall 4.0 and the forthcoming Outpost Security Suite 2007 are not compatible with Windows Vista. However, Vista-compatible versions of both products are under development and will be available to all registered Outpost users free of charge under a valid license."
Kaspersky Anti-Virus 6.0.1.411. After updating to version 6.0.2.621, the product has become fully compatible with Windows Vista.
Windows Messenger version 4.7. Windows application Messenger version 4 is installed automatically during Windows XP installation. Using one of the many utilities fine tuning Windows XP - Windows Messenger version 4.7 has been removed from the system.
ABBYY Lingvo 9.0 Multilingual Dictionary. The application is left in the system - to check its functionality under Windows Vista.
PowerDVD version 6. The application is left in the system - to check its functionality under Windows Vista.
Citrix ICA client. The application is left in the system - to check its functionality under Windows Vista.
Creative Audigy Audio Processor (WDM) driver. The driver will be updated after installing Windows Vista.
Creative Game Port driver. The driver will be updated after installing Windows Vista.
So, to summarize: Agnitum Outpost Firewall Pro will have to be removed; the antivirus has been updated and the problem has disappeared; Windows Messenger removed; ABBYY Lingvo 9.0, PowerDVD 6 and Citrix ICA client are left in the system; we will update drivers from Creative after installing a new operating system.
All potential issues highlighted by the Windows Vista Upgrade Advisor have been resolved or addressed, and you are ready to install Windows Vista Business.
We insert the disc into the drive, and the window displayed after the automatic launch offers four actions - check the compatibility of the computer via the Internet, install the operating system, display useful preliminary information, or transfer user files, parameters and settings from another computer.

We will not check the compatibility of the computer - the Upgrade Advisor has already told everything that is needed. A helpful background information is a brief basic explanation document for novice users. It contains the following items:
Before updating or installing Windows
To upgrade to Windows Vista ...
To install a new (clean) copy of Windows Vista ...
Things to know before installing Windows Vista
The item offering to transfer files and settings from another computer - calls the Windows Easy Transfer wizard (this utility is also located in the "Useful links" section at the end of the article), which helps to copy the account, user files and settings from the old computer (running Windows 2000, Windows XP, Windows Vista) to a new one, with the installed Windows Vista operating system.
We are interested in the update, so feel free to click "Install" ...
When is it possible to upgrade to Windows Vista?
An important point needs to be made. Upgrading (not to be confused with a clean install of a new version) to Windows Vista is only possible if you have an absolutely identical language version of Windows installed. That is, from the Russian version of Windows XP you can upgrade to the Russian version of Windows Vista, from the English version to English. If you want to upgrade, for example, from the English version of Windows XP to the Russian version of Windows Vista, you will receive a notification that this operation is impossible:

So if you decide to buy the Upgrade edition of Windows Vista - remember to match language versions!
In addition, there are additional restrictions on the upgrade process to Windows Vista from other versions of operating systems. Cannot update from the following Windows versions:
Windows XP with the following interface language packs installed: Bulgarian, Latvian, Lithuanian, Romanian, Serbian (Latin), Slovak, Slovenian, Thai, Ukrainian, Croatian, Estonian.
Windows XP Media Center Edition: Danish, Spanish, Traditional Chinese (Hong Kong), Traditional Chinese (Taiwan), Norwegian Bokmål, Polish, Portuguese (Portugal), Russian, Turkish, Finnish, Czech, Swedish.
Windows XP Tablet PC Edition: Hungarian, Danish, Spanish, Italian, Dutch, Norwegian, Polish, Portuguese (Brazil), Portuguese (Portugal), Russian, Turkish, Czech, Finnish, Swedish.
We continue installation
First, the installer asks you to update it (requires an Internet connection).


When entering the serial number - pay attention to the checkbox "Automatically activate Windows when connected to the Internet". If you do not have plans to immediately activate Windows (for example, as in my case - after all, immediately after installation, I will make a significant change in the hardware configuration), remove the checkbox.

After entering the serial number and clicking on the "Next" button, information about the previous installed system, user preferences, installed applications, etc. A warning is displayed about possible availability problems:

After that, the routine installation (more precisely, the update) of Windows begins.

By the way, if you are trying to install Windows Vista on top of an operating system that cannot be updated (for example, you had an English version and you are installing a Russian version), then in the case of the same partition of the hard drive, the old system will be left in the Windows.old directory:

But back to our case - updating the Russian version of Windows XP Professional SP2 to the Russian Windows Vista Business. It proceeds slowly, with a couple of scheduled reboots, but in general, the time is quite comparable to the installation of Windows XP (the update took me about one hour).

The first start of Windows Vista is quite predictable - the problem with the driver for the Audigy 2 immediately pops up, about which the Windows Vista Upgrade Advisor warned us about.

Stored in advance fresh driver from Creative is safely installed (there were no problems with other devices), the notification about the start of the countdown 30 days before the blocking of Windows functionality in the absence of activation is in appearance, and after the reboot we are eagerly going to check if everything remains in place?
Desktop wallpaper - carefully preserved.
All icons on the Desktop are saved.
All icons in the quick launch area are saved.
After completing the Outlook Express to Windows Mail ("Windows Mail") ...

... We see the complete preservation of mail accounts and archives of e-mail correspondence.

All Favorites links in the Internet Explorer web browser are saved.
Documents in the My Documents catalog - saved.
The entire history of opening documents in applications such as Word and even third parties such as PaintShop Pro 9 has been preserved.
After a few hours of normal full-fledged operation - no problems were found, the update went smoothly and painlessly. PaintShop Pro 9, Microsoft Office 2003, a number of other applications like the KeePass Password Safe password manager, and even the Guild 2 game worked without problems. We put "plus".
Part 2. Change of system hardware
Initially, I devoted a whole section to the upgrade process, but it will turn out to be relatively small. The reason is trivial - there is nothing to write about the problems that have arisen due to their absence.
The author of these lines changed almost the entire hardware part of the computer (it's easier to say what was left by me - sound card, hard disk, DVD-RW drive and power supply). And Windows Vista calmly swallowed it! Of course, new devices were found, but the installation process was quick and painless. I will only note a defect with the ATI Radeon X1950XT video card driver.

There is no information about the video card yet - it is in the process of "identification"
At first the device was identified as ATI Radeon X1900 series (it worked without problems), and only after installing a fresh set of ATI Catalyst "healed" under its real name. This, of course, is a trifle, and I have no choice but to put the second "plus" ...
Conclusion
The operating system Windows Vista as a whole left a pleasant impression, and first of all - due to the absence of pitfalls where the sophisticated user always expects them (for example, updating the system when installing over an old one or correctly recognizing devices).Update from working version Windows XP Professional SP2 on Windows Vista Business ran correctly, the system is fully functional, time losses are minimal, the author did not find any problems.
The hardware change was smooth and transparent to the user. Obviously, there is a database with up-to-date drivers for a wide range of "hardware" components inherent in the latest version of the operating system. However, it has always been so.
Without a doubt, I do not pretend to issue an objective verdict - my personal experience applies to a specific version of the operating system, with specific third-party applications and specific hardware components (motherboard and processor from Intel). Specific configurations and applications are a dime a dozen, and how everything will go in your particular case - I do not presume to say. Nevertheless, it is obvious that if you have a completely ordinary system, without any specific hardware and software components, tested for compatibility windows utility Vista Upgrade Advisor - You can safely upgrade to Windows Vista now with minimal risk. The product was created for five years, and passed long-term testing - perhaps this factor had a sufficient impact on the absence of "raw" places directly in the operating system itself. The biggest problem at the moment I see the lack of high-quality and comprehensive driver support for Windows Vista by manufacturers of various peripheral devices and "hardware" components, as well as temporary incompatibility (for example, Outpost Firewall) with a number of applications.

useful links
Windows Vista Upgrade Advisor: link
Windows Easy Transfer: link
Windows Marketplace Upgrade Options Tool (about 1.35 MB): link
Related entries:
 What is Unicode and Emoji Standard?
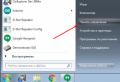 Setting a password on the computer when logging in or turning on
 How to clear the cache in contact
 Basic operations on matrices (addition, multiplication, transposition) and their properties Addition subtraction of matrices matrix multiplication by a number
 What is oldfag. Oldfag - who is this? The meaning, origin and use of the word. Variants of meaning of Oldfag


