How to create a virtual computer in Virtual PC
A virtual computer or "Virtual Machine" is installed on a real computer using various emulation tools. In this lesson we will look at creating a virtual computer using the Microsoft Virtual PC 2007 software product.
Before we start creating a virtual machine, we need to install it. How to do this is described in the article.
Let's start creating a virtual computer in Virtual PC.
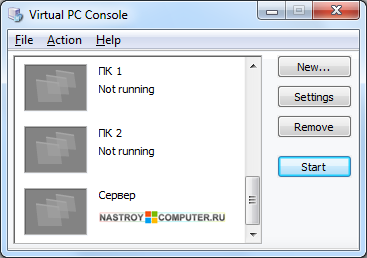
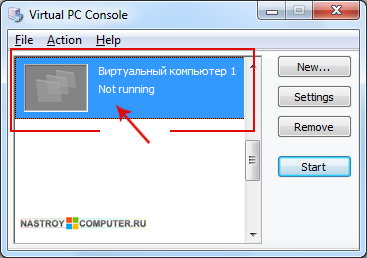
Step 1. Launch Virtual PC 2007 by double-clicking on the icon. A window will appear Virtual PC Console. The Computer Control Center consists of three areas. In the center is a list of used virtual computers. On the right are frequently used commands:
- New... (Wizard for creating a new virtual computer).
- Settings (Settings of the selected virtual computer).
- Remove (Deletes the selected computer).
- Start (Start a virtual computer).
So, in order to create a new virtual computer click on the button New...
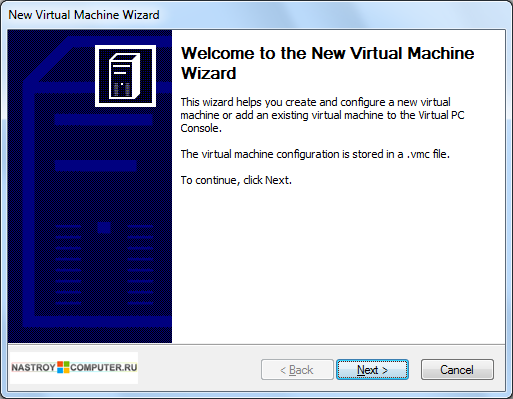
Step 2. In the New Virtual Machine Wizard window, click Next.
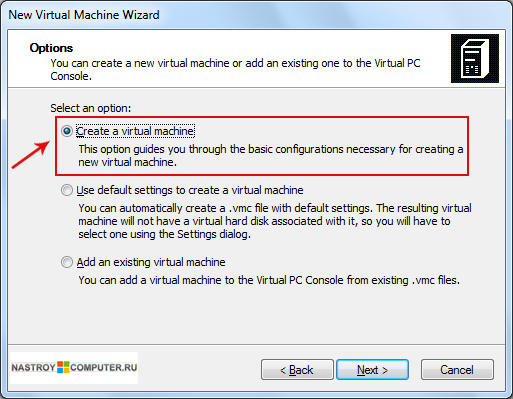
Step 3. In the new window, select the option Create a Virtual machine(Create a virtual machine). Click to continue Next.
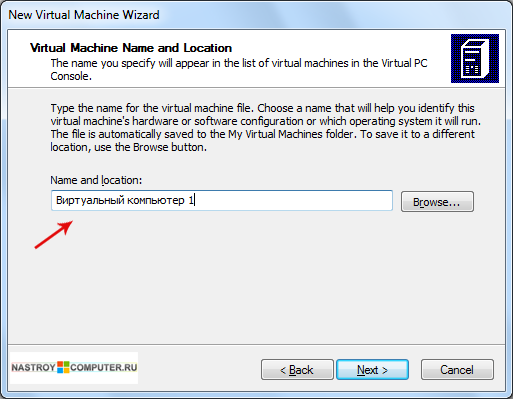
Step 4. Enter the name of the new computer in the field Name and location. Then click Next.
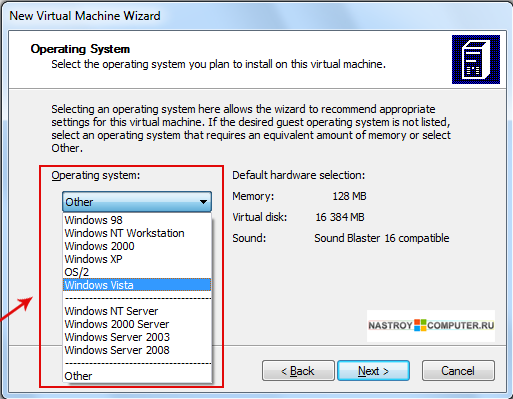
Step 5. In the operating system selection window in the section Operating system Click on the drop-down list and select the operating system that you will install on this virtual computer. Having selected the OS, click Next.
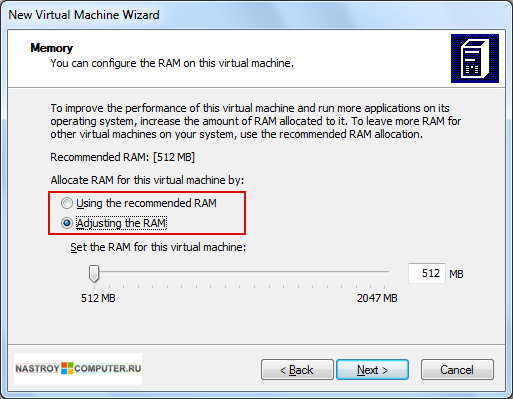
Step 6. Next, you need to configure the amount of RAM. You can use the recommended amount of memory by setting the switch to Using the recommended RAM or change the memory size by setting the switch to Adjusting the RAM. I advise you to use the installation wizard’s recommendations and click Next.
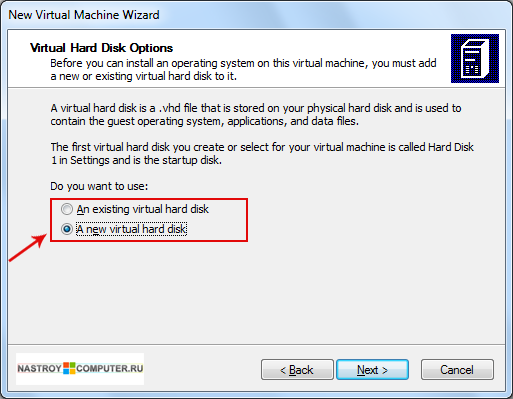
Step 7. Next in the virtual hard disk creation window, in the section Do you want to use set the switch to mode A new virtual hard disk.
(An existing virtual hard disk- this is connecting an existing hard drive with the installed system).
Click to continue Next.
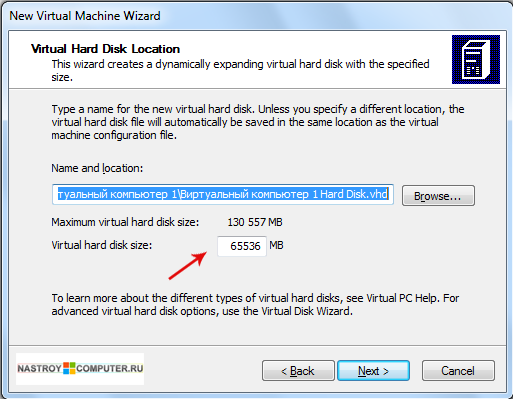
Step 8. In the window virtual disk settings you can specify its future location by pressing the button Browse, and set hard drive size in field Virtual hard disk size. Leave the default settings and click Next.
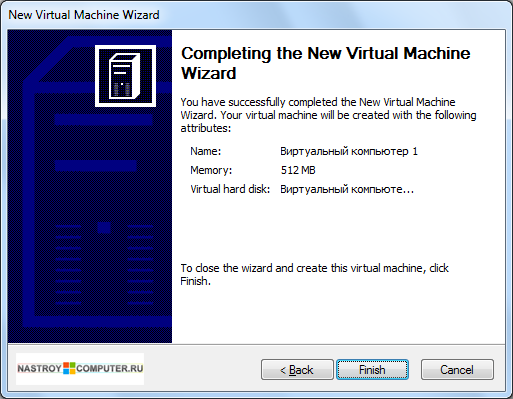
Step 9. All. Creating a virtual computer in Virtual PC completed successfully. Press to exit Finish.
Now we start setting up the created virtual computer in Virtual PC 2007. To launch the created virtual computer, right-click on it once and then click Start. The computer will start, but nothing will appear, since there is no operating system installed on it.
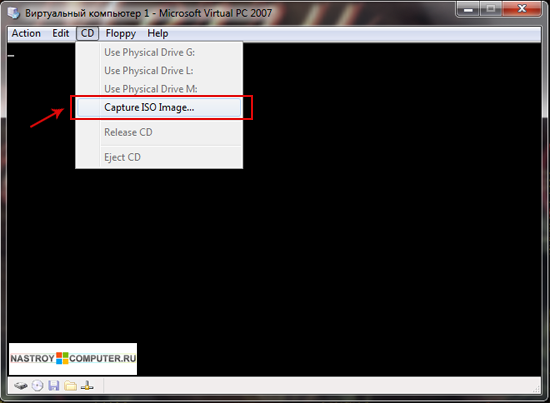
In order for our computer to start working on it we need .
To do this, in the running window, in the top menu, click CD and select Capture ISO Image...
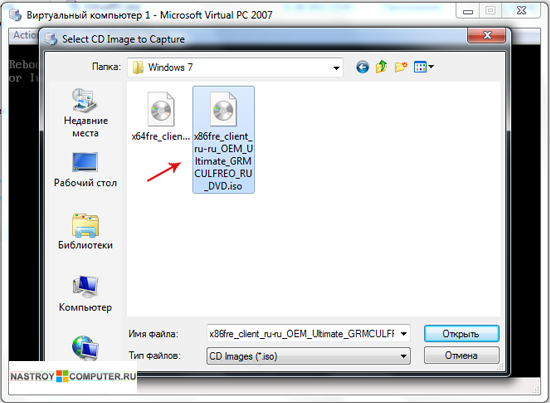
In the window that appears, specify the path to ISO operating system image. Double click on the iso image. After this, reboot the virtual computer by clicking on the cross and selecting Turn Off.
After the next start of the virtual computer, the operating system will automatically load into the virtual CD drive.
After which the standard installation of the operating system will begin. You can see how to install the Windows operating system in the section.
Before installing the add-ons, the mouse cursor will remain stuck on the virtual computer screen.
After the operating system installation is complete, you will need to install add-ons for the virtual computer.
In the window that appears autostart click Run Setup.exe.
The add-on installation procedure is standard. In the first and subsequent windows, click Next. When installation is complete, click Finish. After this, reboot the virtual computer by clicking in the window that appears Yes.
Related posts:
 How to clear the browser on Android
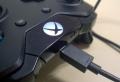 How to connect an Xbox 360 or One gamepad to your computer
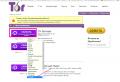 How to install Tor browser on your computer?
 MTS Unlimited - weaning off greed: paid wifi distribution - bypass
 Programs for watching TV over the Internet: the best applications for desktop and mobile systems


