Setting up nginx, php-fpm, php-apc on Debian
 A bunch of nginx, php-fpm, php-apc allows you to speed up the site when properly configured compared to apache and reduce the load on the server. This is especially true when setting up sites with a large number of visits. This combination of components has become more and more popular lately, but the setup is quite simple and done quickly. Let's see an example setup on Debian. Set up nginx with cache + php-fpm + php-apc.
First, let's remember what these components are. Nginx is a fast and flexible web server that also allows you to use caching. Php-fpm is PHP FastCGI Process Manager, a FastCGI process manager for PHP. FastCGI is a binary client-server communication protocol that allows requests to be processed in multi-threaded, as opposed to single-threaded CGI. And php-apc is Alternative PHP Cache, a free framework for caching PHP bytecode in memory, which can significantly speed up PHP execution, with repeated use of the code, of course. Thus, the acceleration must be in several places. The first is the nginx cache, the second is faster static serving with nginx compared to apache, the third is PHP bytecode caching, the fourth is faster php code execution with php-fpm compared to apache + mod_php5 .
Installing packages
Installing packages:
apt-get install nginx php5-fpm php-apc php5-mysql
Everything you need will be installed according to dependencies
Setting up nginx
After installing the packages, you need to set the settings for nginx. Create an nginx settings file for our site, let's call it "site"
Touch /etc/nginx/sites-available/site
Let's write the following to the file:
Server ( # Listen on IPv4 port 80 listen 0.0.0.0:80; # Site name (domain name) server_name site; # Index file index index.php; # Root directory of the site root /var/www/site; # Deny access to files .htaccess and .htpasswd location ~ /\.ht ( deny all; ) # Serving static files location ~ \.(jpg|jpeg|ico|gif|css)( # Disable static file serving records # This will help reduce the number of write operations by drive access_log off; expires max; root /var/www/site; ) location ~ \.php ( include /etc/nginx/fastcgi_params; fastcgi_pass unix:/var/run/php-fpm-site; fastcgi_index index.php; # Enable nginx cache, enable zone my-cache proxy_cache my-cache; # Timeouts for storing pages in cache depending # on server response. 200 and 302 - 60 minutes, 404 - 1 minute proxy_cache_valid 200 302 60m; proxy_cache_valid 404 1m; # Directory for temporary storage proxy_temp_path /var/cache/nginx/tmp; ) )
Ln -s /etc/nginx/sites-available/site /etc/nginx/sites-enabled
In the /etc/nginx/nginx.conf file, we need to add the cache that we have already written for use. Insert the following line at the beginning of the http section:
Proxy_cache_path /var/cache/nginx levels=1:2 keys_zone=my-cache:8m max_size=128m inactive=600m;
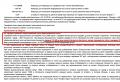
This line means the following: the cache storage directory is /var/cache/nginx. levels - caching levels 1:2, these are the nesting levels of directories in the directory for storing the cache. The keys_zone parameter defines the name and size of the cache zone (there may be several zones). A 1 megabyte zone can store 8,000 keys. The max_size parameter specifies the maximum cache size, when the cache reaches this size, then old files from the cache will be deleted to free up space. If the data is not requested from the cache within the time specified in the inactive parameter (600 minutes in our case), then it will be removed from the cache. If the inactive parameter is not specified, the default time is 10 minutes.
php-fpm setup
The php-fpm settings are located in the /etc/php5/fpm directory. This directory has a pool.d subdirectory, which stores files for working with sites. We need to create a file for our site. Let's call it site.conf
Touch /etc/php5/fpm/pool.d/site.conf
In this file we write the following:
# Socket file for communication with nginx listen = /var/run/php-fpm-site.sock # Maximum number of connections available in the system listen.backlog = -1 # Socket owner and ownership group listen.owner = www-data listen .group = www-data # Privileges set when the socket is created listen.mode = 660 user = www-data group = www-data # The number of processes will be controlled dynamically pm = dynamic pm.max_children = 30 pm.start_servers = 2 pm.min_spare_servers = 2 pm.max_spare_servers = 5 pm.max_requests = 50 env = site env = /usr/local/bin:/usr/bin:/bin env = /tmp env = /tmp env = /tmp
Now you can start php-fpm with the command
Service php5-fpm start
And after that also run nginx
Service nginx start
Let's create the /var/www/site directory if it's not already there:
mkdir -p /var/www/site
And in this directory we will create a file /var/www/site/index.php with the following content:
Now in the browser we will open our server by domain name. For example, "http://site". The server information page should open. It also lists all the modules that are used. The apc module must be present in this list, and its status must be "Enabled".
Setting up php-apc
The apc configuration file is located at the following path: /etc/php/fpm/conf.d/20-apc.ini
In principle, with the default settings, this module can already be used, but if you want to fine-tune it, you can see the description of all parameters.
In general, the configuration is ready, you can deploy the site and configure all these components in more detail, depending on how the site is arranged and what statistics will be accumulated during its operation.
Related posts:
 How to clear the browser on android
 How to connect an Xbox 360 or One controller to a computer
 How to install Tor browser on a computer?
 MTS Unlimited - wean from greed: paid distribution of wifi - bypass
 Programs for watching TV over the Internet: the best applications for stationary and mobile systems


