Virtualbox virtual machine. How to create a virtual computer.
Virtual machine(VM, from English. virtual machine) -
- a software and/or hardware system that emulates the hardware of a certain platform (target - target, or guest platform) and executes programs for the target platform on the host platform (host - host platform, host platform)
- or virtualizing a certain platform and creating environments on it that isolate programs and even operating systems from each other (see: sandbox).
Interesting moment! When I clicked on this link and tried to download the file VirtualBox-4.1.12-77245-Win.exe using Internet Explorer (IE), the browser told me that there was no such file. I had to install the Google Chrome browser and continue writing this article with it.
We go to the site at the specified address, hover the mouse over the installation file for our platform (), and press the right mouse button. In the window that opens, move the mouse pointer to the “Save link as...” menu item and press the left mouse button.
In the window that appears, select where to save. Let's choose for clarity“Desktop” by moving the mouse pointer to it and clicking once with the left mouse button.
We run our file to install the program. To do this, move the mouse pointer to our shortcut and press the right mouse button. In the menu that appears, move the mouse pointer to the “Open” menu item and press the left mouse button.
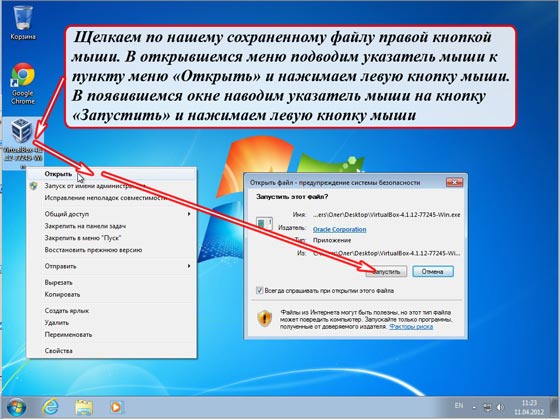
In the window that opens, hover the mouse pointer over the run button and click on it once with the left mouse button.
The program installation window will open. Let's do this, since buttons in windows are always clicked with only one click, I will say this: “Click on the button.” And I won’t bother you and it’s easier for me.
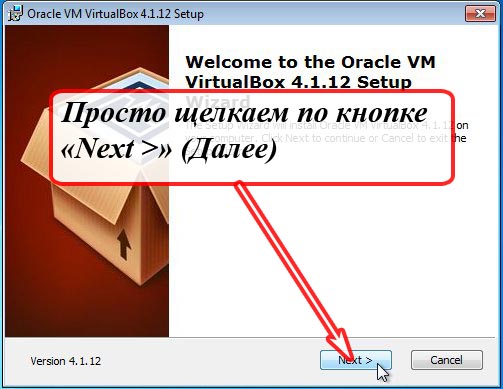
Here we simply click on the “Next >” button (translated into Russian as “Next”).
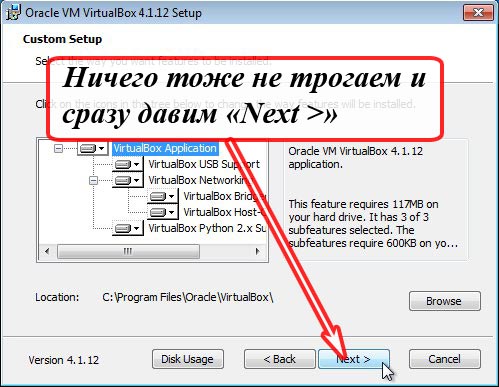
In the next window, we also don’t touch anything and click on the “Next >” button
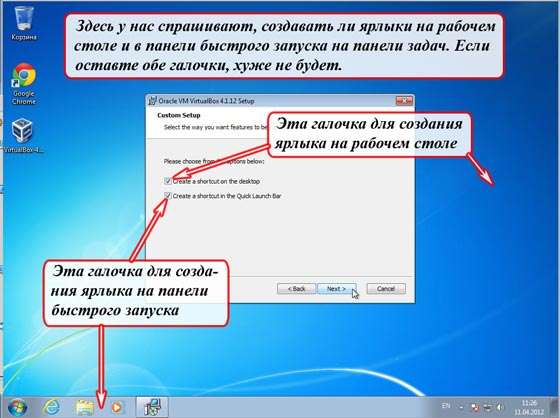
In the next window we are asked to create shortcuts to launch the program (when it is already installed) on the desktop and in . You can leave both, i.e. leave both checkboxes. (I usually uncheck the “Create a shortcut in the Quick Launch toolbar” checkbox).
Click on the “Next >” button.
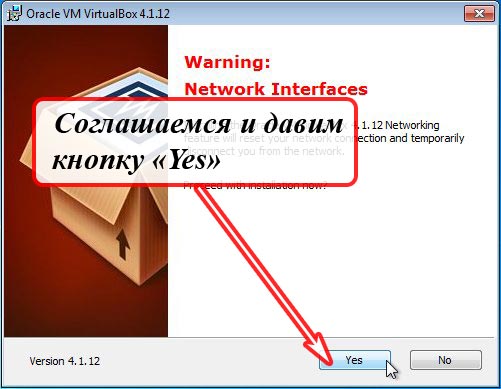
In the next window, we agree with what is written and click the “Yes” button

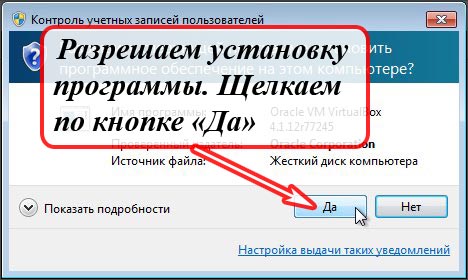
Allow the installation of the program to start. Click on the “Yes” button
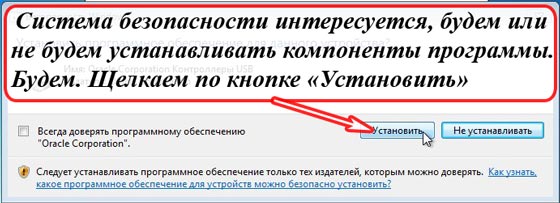
A similar window opened again. To avoid answering the same question dozens of times, check the box “Always trust Oracle Corporation software” and click the “Install” button.
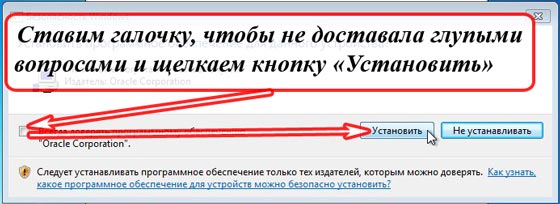
The program continues installation without any stupid questions. After installation is complete, the following window will appear:
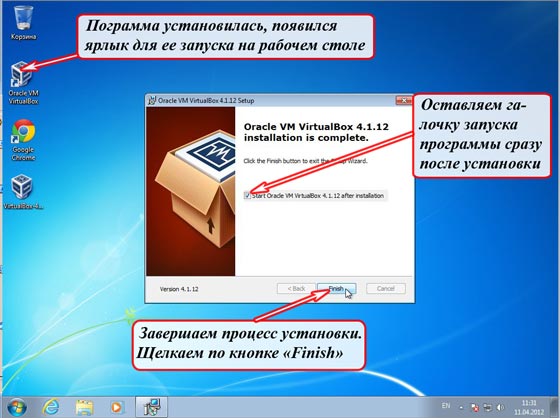
We see that the shortcut on the desktop is already installed (by the way, the installation file can be moved somewhere). We leave the checkbox to immediately launch the program, well, and click on the “Finish” button.
A virtual machine manager window will open.
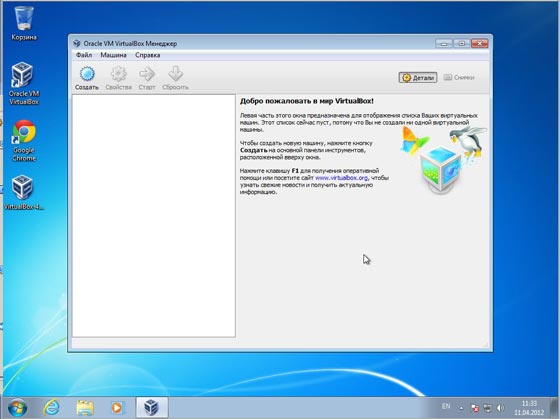
All. Now you can create any quantity virtual computers for any operating systems available in this program, install these operating systems and experiment with them.
How to install windows on a virtual machine
Since I have the Windows 7 distribution at hand, let me use it as an example to show how it’s done “Creating a virtual computer for the Windows 7 operating system” .
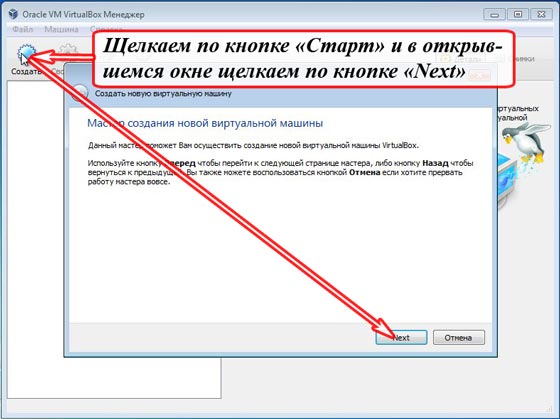
Click on the “Create” button.
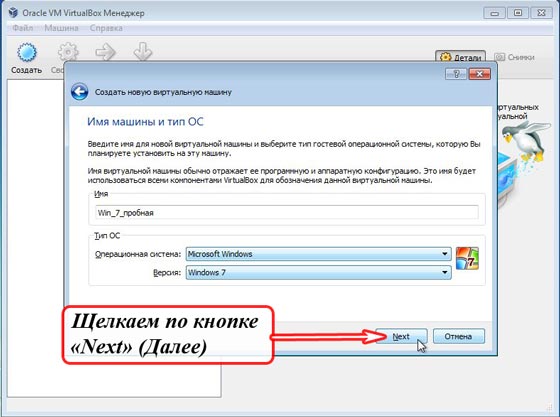
A window opens where we must write what we will call the virtual computer and select the operating system for which we should create it.
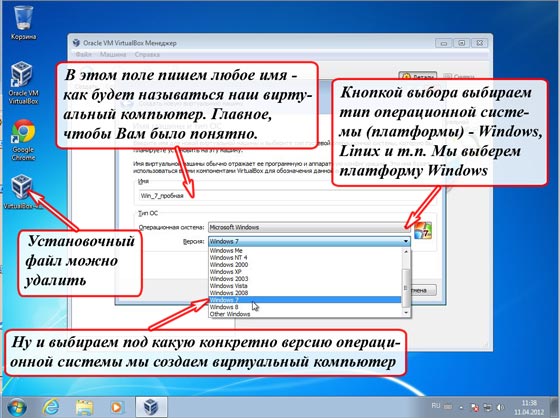
In the name field we write the name of the virtual computer. It is better to immediately write a name that is close in meaning. Since if you have more than a dozen virtual computers, then you may not immediately figure out which one you need to run to research, for example, some program.
We choose the Microsoft Windows platform, since we are going to .
Well, we choose specifically under which Windows we will create a virtual computer - Windows 7.
After all our manipulations, the window should look like this:
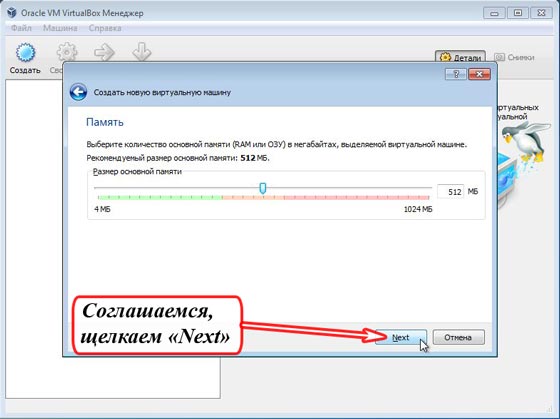
My advice to you on this matter. At first, leave the settings suggested by the installation wizard. You can change it to your liking at any time after installation.
And so, we are offered to allocate 512 MB of memory for the RAM (RAM) of the virtual computer. We agree, click “Next”.
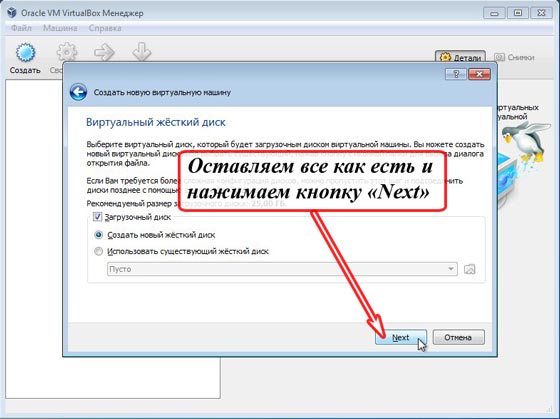
In the next window we leave everything as is. Be sure to leave a checkmark next to “Boot disk”. We will create a new disk, since we do not have virtual disks at all yet. Well, click on the “Next” button.
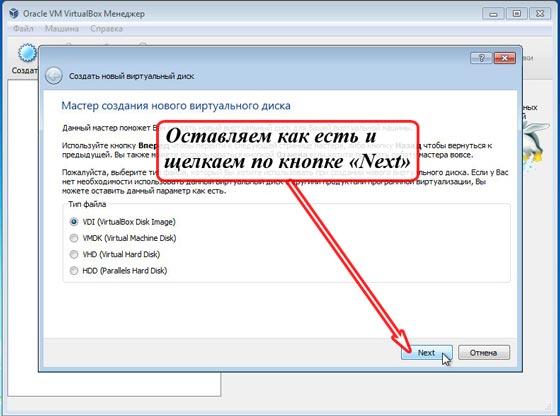
We will see a window for creating a virtual disk file type. Don’t bother here at all, but immediately click on the “Next” button.
The next window asks you to select a dynamic or fixed virtual disk. Leave it as dynamic.
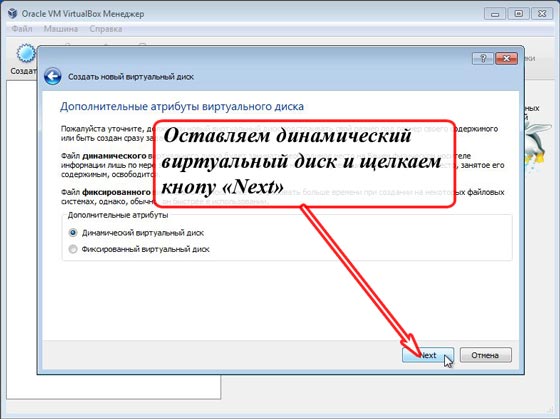
The deeper meaning of this choice is as follows.
If, for example, you chose a virtual disk size of 25 GB. If the disk is selected as dynamic, then when installing the operating system the program will “take away” from your real disk exactly as much as it needs for the operating system, for example 2GB. The remaining 22 GB will remain on your real computer and you can use these 22 GB on your real computer. As programs are installed, your virtual disk will gradually eat up gigabytes from the real one until it reaches 25 GB.
If you select a fixed virtual disk, the program will immediately “eat up” 25 GB from your real physical disk.
But the advantage of a fixed virtual disk is that the virtual computer with this disk runs much faster.
So, click on the “Next” button.
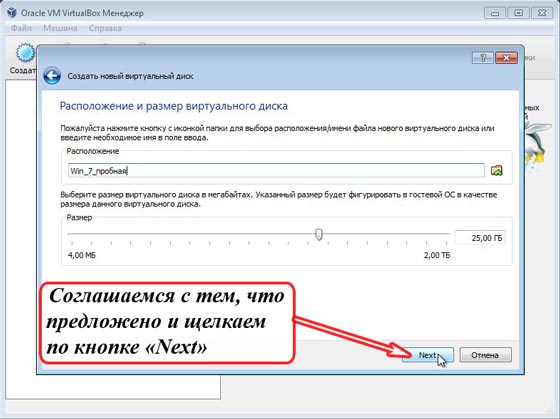
The next window prompts you to select the actual size of the virtual hard disk. Agree with what he suggests. Just click on the “Next” button.
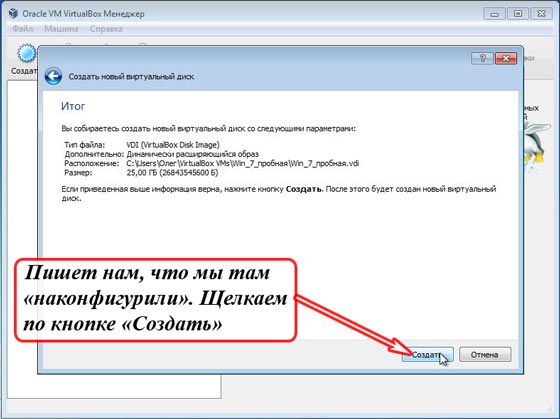
In the next window it writes to us about the virtual hard disk parameters we have selected. We agree and click “Create”.
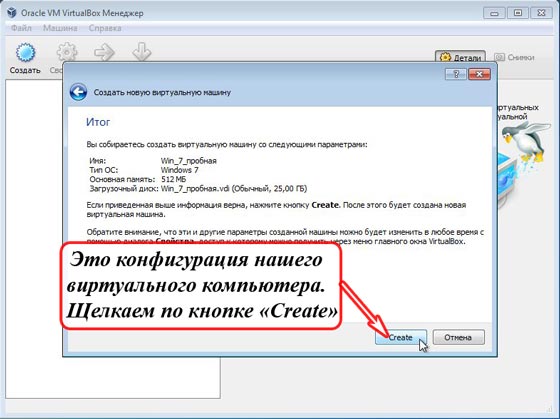
In the next window it tells us in full what the configuration of our virtual computer is. Click on the “Create” button.
All. The first virtual computer for the Windows 7 operating system has been created.
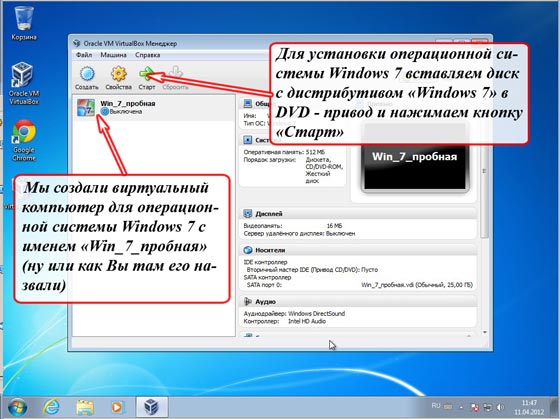
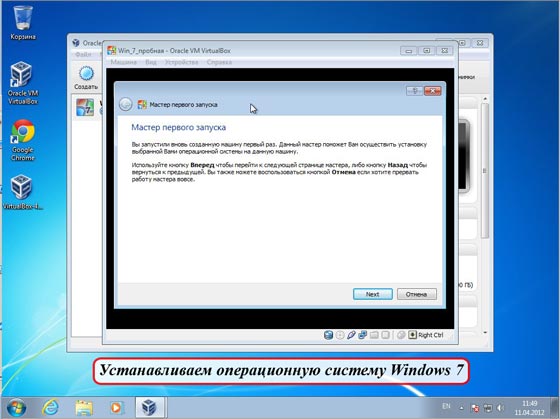
Now all that remains is to “turn on” the virtual computer and begin training with installing the operating system.
Attention! There is one tricky point. Virtual computer window "captures" mouse when you work with this mouse in this window. To make a virtual computer window "let go of the mouse", you must press "Right Ctrl".
I want to show you what this program looks like on my computer running the Ubuntu (Linux) operating system. Under these virtual computers, I actually do all these lessons that you see.

That's all. Good luck and creative success to everyone. ????
Related posts:
 How to clear the browser on Android
 How to connect an Xbox 360 or One gamepad to your computer
 How to install Tor browser on your computer?
 MTS Unlimited - weaning off greed: paid wifi distribution - bypass
 Programs for watching TV over the Internet: the best applications for desktop and mobile systems


