The windows 10 lock screen turns on. Disable and customize the lock screen window
The lock screen is one of the few visual components that Windows 10 inherited from the previous version of the system without undergoing major changes. Being a purely cosmetic addition to the login screen, the lock screen does not carry much functionality, and therefore can be disabled without any consequences for Windows.
There are two ways to disable the lock screen in Windows 10: by using the Local Group Policy Editor and by editing the registry. The second method is useful if the policy editor is not available in your version of the system.
Method one
Press Win + R and execute the gpedit.msc command in the window that opens, and then in the left column of the editor window, sequentially expand the following items of the tree-like list of parameters:
Computer Configuration -\u003e Administrative Templates -\u003e Control Panel -\u003e Personalization

Accordingly, in the English version of the "ten" it will look like this:
Computer Configuration -\u003e Administrative Templates -\u003e Control Panel -\u003e Personalization
Now look for the option "Do not display the lock screen" on the right side of the window and double-click on it. In the opened window for changing the parameters, switch the radio button from the "Not configured" position to the "Enabled" position and save the new settings.

It's all. You can check the result by pressing the combination Win + L.
Method two
Use the regedit command to open the registry editor and follow the chain:
HKEY_LOCAL_MACHINE / SOFTWARE / Policies / Microsoft / Windows / Personalization
In the last subsection, you need to create a new 32-bit NoLockScreen DWORD parameter and set its value to 1. (If the Personalization subsection does not exist, create it manually).

The changes should take effect immediately, but it is quite possible that you still need to restart your computer.
Update 08/03/2016
For Windows 10 Anniversary 1607 users
As you probably already know, in the home and professional editions, Microsoft has removed the function to disable the screen lock. Now, if you want to disable this component for yourself, you will have to work around it. Fortunately, this procedure is simple and does not take much time.
Note: the new version of Windows 10 does not allow you to disable the lock screen completely. Both methods, which will be discussed below, allow you to prevent the display of the lock screen when you wake up from sleep and after locking the system by pressing the Win + L keys. Unfortunately, you cannot prevent the appearance of the lockscreen when you turn on or after restarting computers.
The easy way
Go to C: \\ Windows \\ SystemApps and rename the folder Microsoft.LockApp_cw5n1h2txyewy... You can simply add any character (exclamation mark, for example) to the original folder name. Renaming requires administrator rights.

Renaming shouldn't entail any undesirable consequences, but if you still prefer to avoid any manipulation of system folders, then the second method is for you.
The method is more complicated, but 100% safe
Use the taskschd.msc command to open the Task Scheduler, select the scheduler library with the mouse and click the "Create task" link in the right column. In the window that opens, in the "General" tab, specify the name of the task, in the security settings, check the "Run with highest rights" box, and in the "Configure for" drop-down menu, select Windows 10. Now switch to the "Triggers" tab and click "Create ".
Next, in the trigger creation window, select "At logon" from the "Start task" menu, and at the same time make sure that the "Any user" and "Enabled" settings are active. Click OK. Create another trigger in the same way, only this time from the Start Task menu select the On Workstation Unlocked option. After that, go to the "Actions" tab, click "New", in the field of the "Program or script" window that opens, enter reg.exe, and in the "Add arguments" field, enter the following command:
Add HKLMSOFTWARE / Microsoft / Windows / CurrentVersion / Authentication / LogonUI / SessionData / t REG_DWORD / v AllowLockScreen / d 0 / f
By turning on the computer, the user plans to do a lot of things. Therefore, it is important for him to quickly get all the necessary information from various applications even before entering the system. The Windows 10 lock screen will help provide this information, as well as provide primary protection for your computer.
What is Windows 10 lock screen
When you start the operating system, the first thing you see is the lock screen. This is a window where you can get some information from applications against a beautiful background. The lock window has the following features:
- shows time, weather and other information from applications; what kind of information will be displayed in this window depends on the specific settings;
- provides primary protection of the system - to enter, you must enter a password in the lock window;
- allows you to customize the wallpaper of the window itself, including making an automatic change of images; a bright and nice-looking picture on the lock screen will help the user to tune in to a pleasant working day.
The lock screen is present natively in every Windows 10 system. Therefore, the only question is how to set it up correctly.
How to customize the Windows 10 lock screen
The lock screen has quite flexible settings that allow you to make it convenient to work with, as well as have good tools for customizing its appearance. And, of course, you can simply turn off the lock screen if necessary.
Turn on the lock screen
The lock screen in Windows 10 is always on by default. You can enable the lock screen pattern as follows:
After completing these steps, the lock screen will work as expected and the wallpaper will return to it.
Video: customize your lock screen and personalize
Image change
You can install absolutely any images on your lock screen. Someone sets there photographs of loved ones, while others put beautiful views of nature. And this setting is performed in the following way:
- Navigate to the Personalization Settings menu via Windows Options.
Go to the personalization menu via Windows settings
- Go to the lock screen settings section and click “Browse” under the row of pictures.
Click on the "Browse" button to select an image for the lock screen
- Select one or several photos (if you select several, they will change automatically) and press "Select pictures" to confirm the action.
Highlight the required image and click "Select Image"
- Your image will appear in the lock screen wallpaper preview area.
You can see how the selected image will look as a background in the preview window
- You can also set the dynamic change of pictures. To do this, in the drop-down list of the "Background" item, select the line "Slideshow".
Select "Slideshow" as the type of background image so that the pictures are constantly changing each other
- The Slideshow mode has a number of additional settings. To see them, click on the corresponding line.
Select "Advanced Slideshow Options" to customize the image sequence
- In the advanced parameters, you can change the settings based on your interests and needs. After you save your changes, the wallpaper or pattern settings are complete.
Configure slideshow settings in the advanced settings window
You can add an image to the lock screen in another way without opening the personalization settings. For this:
- Open the picture with a standard image viewer.
- In the program menu, select "Install as", then left-click on the "Install on lock screen" option.
In the menu of any image viewer, you can select the option to set the pattern to the lock screen
Enabling Windows Highlights
There is another interesting feature associated with the lock screen. It's Windows Highlights or Windows spotlight. When this option is activated, pictures on the lock screen will be selected automatically from Microsoft servers. The option can be enabled as follows:

Now the pictures will change every time you turn on the computer and are selected by an intelligent system for analyzing your work at the device.
Adding display apps
The lock screen allows you to add a lot of applications - it can display the time, weather, exchange rates and much more. Setting up this feature is easy:

The next time you see the lock screen, the new app will already be displayed on it.
Displaying applications on the lock screen allows you to get the information you need before you start working on your computer. This will save you time and improve efficiency.
Setting automatic blocking
The automatic lock function is that after a certain period of inactivity of the computer, the lock screen is displayed. Automatic blocking is configured as follows:

Disable the lock screen
Disabling the lock screen completely isn't easy. There are 2 ways to do this.
First, let's look at how to disable the lock screen using the Group Policy Editor:
- Press the Win + R keyboard shortcut to open the Run window. Then enter the gpedit.msc command and click OK.
Enter the command gpedit.msc in the Run window
- Open the folders "Computer Configuration", "Administrative Templates", "Control Panel", "Personalization" one by one.
- On the right side of the window, select the setting to prevent the display of the lock screen.
Find the option "Prevent displaying the lock screen" in the Group Policy Editor window
- Turn on the blocking of the display of the lock screen using the appropriate marker.
Turn on the option to prevent the display of the lock screen
- After restarting your computer, you should be able to verify that the lock screen no longer appears.
The second way to disable the lock screen is through the Registry Editor. Always remember that only experienced users are allowed to make changes to the registry. You should not open the registry editor if you are unsure of your knowledge, as changes to the registry can lead to damage to your computer. To turn off the lock screen, you need to take the following steps:
- Open a Run window, but this time type regedit and click OK.
Enter the command regedit in the Run window and confirm the entry
- In the registry editor, go to the path: HKEY_LOCAL_MACHINE - Software - Policies - Microsoft - Windows - Personalization. Create a 32 bit parameter.
Create a parameter named NoLockScreen in Registry Editor
- Set the name to NoLockScreen, and set the value to hexadecimal unit.
Specify unit as value when creating parameter
- After restarting the computer, the lock screen will disappear completely.
If you need to get your lock screen back, just turn off the Group Policy service you turned on earlier. If you have disabled through the registry, you need to delete the parameter you created.
Video: how to turn off the lock screen
Removing the lock screen
If disabling the lock screen is not entirely satisfactory, you can remove it completely from your computer. To do this, it is enough to delete the application that is responsible for it. Follow path C: - Windows - SystemApps and delete the Microsoft.LockApp_cw5n1h2txyewy folder.
You can simply delete the application folder to make it stop working
Instead of deleting the application folder, you can simply change its name. This will allow you to get your lock screen back if you need it.
Customizing your lock screen: possible problems and solutions
Let's take a look at the problems you may have when customizing your lock screen:

Programs for customizing and changing the lock screen
There are several programs for customizing your lock screen. Usually they are used either to turn off the screen itself, or to adjust the background image. Let's highlight some of them:
- Windows 10 Logon Background Changer is a program that allows you to change the background of your lock screen. It works without installation on a computer and is very easy to use (there is a version in Russian). It is enough to select a picture and the background image will be changed;
One of the biggest differences between iterations of Windows 10 and earlier versions is that you can personalize the login page and computer desktop. However, unlike other versions of Windows, some users may experience certain difficulties at first. To help you customize your personalization, we've created this step-by-step guide to changing your lock screen and login screen.
Go to Windows 10 personalization settings.
First open the app "Options"clicking the gear icon in Action and Notification Center in the lower right corner of the screen, or press the Win + I key combination on your keyboard. In the application "Options" go to section "Personalization".
Windows 10 users can also right-click on the desktop, and select from the context menu "Personalization" and the required section will open in the Windows Settings application.
Note: Please note there is a little confusion, technically there are two login screens, one for entering a password ( Login screen) and one for Lock screen... To change the login screen, find the switch on the page: Show lock screen wallpaper on login screen and switch it to position "On"... This ensures that the lock screen image appears on the login screen for a smoother transition.
In this article, we'll look at how to change the background image for the Lock Screen.
Change the background of the Lock Screen in Windows 10
- Open Windows 10 Settings.
- Go to section Personalization → Lock Screen.
In this section, you can customize images for the lock screen:
- Windows: Interesting
- Slide show
If you intend to change only the login screen image - On this page, users can select Photo for the lock screen from your computer's hard drive, or install Slide show different images. Users can also choose the option Windows: Interestingthat displays a randomly generated image from the Bing search engine. Once selected, the change occurs automatically.
- On the right in the section Background, select one of the following:
Windows: Interesting- will display various backgrounds automatically downloaded from the internet.
A photo - here you can set one image to be used as your lock screen background.
You can select any custom image using the Browse button. Click on it and select the desired image:

Slide show - use this option to display a slideshow as your lock screen. It will display images from the folder you specify. Click the "Add Folder" button to add a new folder with images that will be cyclically shown on the lock screen.

In Windows 10, the lock screen image is shown in a number of cases. For example, if you locked a user's session with Win + L or by clicking on the user's image in the Start menu and selecting Blockby clicking on the user icon in the menu "Start", a lock screen background image will appear on your PC screen. When you log into Windows 10, you also see the lock screen.
Advice: You can also use the app Photosto set your favorite images as your lock screen background. Open the desired image in the Photos application and press the menu button three dots.

Select item " Install as"A new menu appears on the screen with the command" Set to lock screen", this will set the current image as the lock screen background.
There is a keyboard shortcut Ctrl + L for the same action. You can click it to set lock screen background with photos app directly.
This element is one of the few that remained in the operating system from previous versions (you can find out about what's new in Windows 10 in the article "What is Windows 10?"). But not every user is ready to use it, since it is not always convenient to enter a password when starting a computer. In this case, you need to know how to remove screen lock on Windows 10 to speed up PC startup.
Disconnection
Enabling and disabling the lock screen in Windows 10 is not directly performed, since there is no such item in the user settings.
In the Local Group Policy Editor
- Open the Local Group Policy Editor with the command gpedit.mscby writing it in the Run window.
- Computer Configuration → Administrative Templates → Control Panel → Personalization → select the "Prevent display of the lock screen" option.
- Set the switch to the "On" position → confirm the changes.

In Registry Editor

Video
The video shows in detail how to turn off the lock screen.
Customization
If you use a lock screen, you can customize it to suit your needs.
Change the pattern

Create slideshow
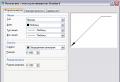
Windows 10 supports the create slideshow lock screen feature. To do this, select the Slide Show item from the drop-down list in the Background block. After that, specify the folders with the original images. When you click on the "Advanced Slide Show Options" button, a window will open in which you can customize the slide show "for yourself." 
Application selection
You can add applications to the lock screen (Mail, Weather, Store, Xbox, and others) that will allow you to get the information you need without logging in. In the "Lock screen" section in the "Select applications, brief information on the status of which will be displayed" section, select applications from the drop-down list, after they will become available. 
Important! Go to Settings → System → Notifications & actions → the “Show notifications on lock screen” switch must be on for apps to appear on the lock screen.
Conclusion
In Windows 10, the lock screen can only be disabled using the Registry Editor and Local Group Policy Editor. You can also customize it to your liking: set a new background image or slide show, display applications. This is done using the Settings application.