Check the entire system for availability. Checking system files for errors. Using the standard windows utility
Unfortunately, it is not immune from problems with the hard drive. old computernor new. Errors during reading and writing can appear on any of them with equal probability. The Windows 10 operating system has a couple of built-in tools that allow you to check your disk for errors and fix them successfully in most cases.
Method 1. Open the list of local drives on your computer and click right click on the one with read or write errors. IN context menu it is necessary to select the item "Properties".
In the window that appears, select the "Service" tab and click the "Check" button. The Windows 10 operating system may issue a warning like this:
Ignore it and click the Check Disk button. Start scanning the hard disk partitions, finding and eliminating errors.
If during the scan errors or problematic or damaged sectors are found, then upon completion of the process you will receive additional information about them.
Method 2.The second option is to use the console utility chkdskwhich since Windows 2000 is standard programchecking hard hDD disk, or removable storage (USB flash drive or memory card) for errors file system... To use its functionality, you need. After that, enter the command:
Chkdsk X: / F / R
Here X: Is the drive letter and the keys / F and / R tell the application to look for bad sectors for errors and, if they are found, to fix them without fail. For the logical partition C: \\, where the system is installed, the command will look like this:
If you want to scan the partition on which Windows 10 is installed for errors, then when you start the process you will see the following message:
Do not be afraid of this - just press "Y". Run check hard disk for errors:
It can take from 10 minutes to a couple of hours - it all depends on the volume. At the end you will receive a detailed report on the problems found on the HDD.
If there are a lot of damaged sectors, then you should think about urgently replacing the hard with a new one. Otherwise, you run the risk of losing all available information if it crumbles.
No one likes it when the familiar configured Windows 10 starts to crash and freeze. Let's figure out the reasons for this, and learn how to identify and fix the problems that have arisen.
Check Windows 10 for errors
Errors in the operation of computer devices are of two types:
- hardware - physical damage to the hardware of the device is to blame for their appearance;
- software - associated exclusively with a software component.
Let's figure out how to identify these failures and fix them using various means.
If hardware errors can be "cured" only by replacing or repairing the damaged part, then software failures are corrected using special built-in or third-party utilities.
Diagnose Windows 10 with SFC
SFC.exe - system utilitybuilt into Windows 10, which is responsible for checking the integrity and health system files... If any of them are damaged, the program automatically repairs them. SFC is not omnipotent: it is recommended to use it in conjunction with DISM, which will be discussed later. However, using this utility is practically the first thing to do in case of system crashes.

For some (sometimes quite long) time, the utility will check system files for integrity. After completing the work, it will give the user the result.
Some of the system files SFC cannot repair while Windows is running because they are currently being used by the system. If the SFC check showed that there are problems, but it cannot solve them, the utility must be run again, but not from the system, but from the Windows recovery tool.
You can open Windows Recovery Tool in the following ways:
- follow the path "Start" - "Settings" - "Update and security" - "Recovery" - "Special boot options" - "Restart now";
The Update and Security item in windows settings allows you to enter the menu special options download
- select the "System Restore" option when booting from the installation media (or from the recovery disc);
Click on the "System Restore" button when booting from the installation media
- click instead of the start button on special buttonto enter recovery mode. It is available on some laptops, such as Lenovo. As a rule, such a button is located either next to the system start button or next to the charger connector.
Some laptops have a button that opens the recovery menu
In the recovery menu, do the following:

This time, the SFC utility will be able to repair all files, even those that are usually inaccessible to it.
Video: How to Run the SFC Utility
Scan and Repair Windows 10 via DISM
DISM is another utility for recovering damaged files. Its scope is much wider than that of the SFC. You can even do with it backups systems. DISM and SFC are responsible for different groups system files, and their sharing more effective than using alone.
Diagnostics and repair of system files using DISM are also performed through the "Command Line". How to enter it is described above. There are several options for using the command:
- dism / Online / Cleanup-Image / CheckHealth - no check is performed, the utility displays the last saved data on the state of files;
Dism / Online / Cleanup-Image / CheckHealth shows the results of the disk check last time
- dism / Online / Cleanup-Image / ScanHealth - enables file integrity check without "fixing" found problems;
The dism / Online / Cleanup-Image / ScanHealth command runs the check of all system files via DISM without "fixing"
- dism / Online / Cleanup-Image / RestoreHealth - starts a file integrity check followed by restoring damaged files.
Checking system files in DISM followed by repairing damage is started by the dism / Online / Cleanup-Image / RestoreHealth command
Checking and recovering files takes quite a long time. Also a completely normal feature of the DISM utility is the status bar freezing at 20%.
Video: how to check the integrity of Windows 10 using SFC and DISM
Checking the hard drive for failures
In addition to physical damage to the hard drive, there are also errors that can be "cured" using built-in tools windows diagnostics 10. To fix more serious problems (for example, bad sectors), you can use third-party utilities, but after a while the disk will still have to be changed.
Using the "Command Line"
Using the "Command Line", you can run the built-in Check Disk utility, which checks the disk for errors and corrects them if possible. IN windows environment this program will not be able to check system disk (drive C): it will prompt you to reboot and check during reboot before starting the OS.
If chkdsk receives the system drive as input, it prompts you to reboot the system to check it
The utility is launched in the "Command line" (how to enter it, described above) using the chkdsk command<имя диска с двоеточием> with the given parameters:
- / f - auto-correction of found errors;
- / r - check for bad sectors and attempt to recover damaged information;
- / offlinescanandfix - offline check, in which the program first "disconnects" the disk from the processes in the system, and then checks it. It is used if the disk is in use, a “simple” launch of Check Disk cannot fix errors;
- /? - command help.
Executing a command with the / r parameter can take up to several hours.
As a result, chkdsk will display disk data obtained during the check
Video: how to check a hard drive for failures using chkdsk
With StorDiag
The Storage Diagnostic Utility is present only in Windows 10 and does not apply to other versions of the system. Just like Check Disk, it is launched through the "Command Line" using the command stordiag.exe -collectEtw -checkfsconsistency -out<путь к папке, куда сохранится отчёт>.
StorDiag does not fix the errors found, but only diagnoses them and writes the received data to a report file. However, the scope of its diagnostics is wider than that of Check Disk, and if you are an advanced user, you can use this program to more accurately determine the cause of problems with the device.
Checking the disk using the StorDiag storage diagnostic utility will diagnose problems and write the resulting data to a separate file
Using PowerShell
Windows PowerShell is a Command Line shell used by Windows as another management tool. It differs from a conventional console by a wider scope, the ability to use scripts and other improvements.
PowerShell is located under the path "Start" - "All Programs" - "Windows PowerShell". The console can also be found by simply typing its name in the Start menu search.
To check the disk, type one of the following commands in the PowerShell Command Prompt running as administrator (right-click on the PowerShell icon - Run as administrator):
- Repair-Volume -DriveLetter<буква диска без двоеточия> - routine check with recovery;
- Repair-Volume -DriveLetter<буква диска без двоеточия> -OfflineScanAndFix - offline scan (what it is, described above).
The above commands, typed in PowerShell, will run the Disk Diagnostic and Cleanup Tool
Using "Explorer" and "Control Panel"
You can diagnose the hard disk for errors by running the diagnostic utility through "Explorer". To do this, follow the path: "My Computer" - the right mouse button on the disk that needs checking - "Properties" - "Service" - "Check for errors". The check performed is similar to Check Disk.
Diagnostics and error correction can be started from the disk properties window
In addition, through the "Control Panel" you can activate system maintenance, which includes checking the hard drives. It is located along the path "Start" - "Control Panel" - "Security and Service Center" - "Maintenance". In the maintenance window, you can view the results of the previous check or start it again using the "Start maintenance" button.
To start disk maintenance, you need to click on the corresponding button
Video: how to check a hard drive for errors using the built-in diagnostic utility
Windows Registry Diagnostics
The registry is another windows componentwhich gets corrupted frequently resulting in crashes, glitches and freezes. To prevent this from happening, you need to periodically clean it up, removing obsolete branches, the consequences of failures and erroneous entries.
Manual registry cleaning is very time consuming and time consuming. In addition, it is easy to make mistakes during its implementation, which can lead to negative consequences (up to a system crash). Therefore, we will touch on the topic of manual cleaning in passing.

If you don't want to waste time on manual cleaning, use one of the special programs, which will automatically clean the registry of unnecessary and erroneous entries. The most popular of these is CCleaner - free utility, which not only fixes registry errors, but also cleans the computer of debris and accumulated temporary files. Let's figure out how to work with it.

You can download CCleaner from the developer's official website.
Video: How to Clean Windows 10 Registry Manually and Using CCleaner
When the system crashes are fixed, Windows starts to "fly" and delight the user with its flawless work. Check the system for errors in a timely manner so as not to miss the problems that have begun, and it will serve you for a long time.
). In this case, some begin to worry and look for all sorts of reasons and ways to eliminate freezes.
I will not repeat myself and write why this is happening, because the article is not about this and I have already given a link to solving the problems above.
I'd rather show you one interesting way to help check the system for errors.
Few people know, but in Windows there is one useful "trick" that can itself look for and correct errors in the system itself. Moreover, it will not touch third-party programs, but only check its system files. This is useful and interesting because many do not think about the fact that the reason may be hidden in the system itself, but start feverishly, and so on. Generally . Yes, this is useful and can lead to good results, but with all these actions it is good to remember what I will write about below.
I already wrote a little about this function in the article, which can also arise due to a failure in system files, which are often forgotten. But still, within the framework of this article, I will repeat ...
So, let's run:
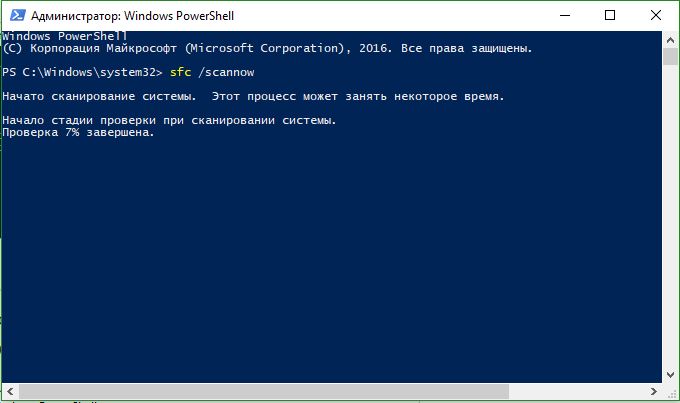
and enter into it sfc / scannow:

The system check will start:

You just have to wait.
Who cares, here is a description of the command and keys.
sfc
where:
/ scannow - performs an immediate scan of all protected system files.
/ scanonce - a one-time scan of all protected system files at the next system boot.
/ scanboot - check all protected system files on every boot
/ REVERT - Sets the original default options.
/ ENABLE - Enables the normal operation of Windows file protection
/ PURGECACHE - Clear file cache and check files immediately
/ CACHESIZE \u003d x - Sets the size of the file cache
In the command line (Start -\u003e Run -\u003e cmd), write the sfc / command and the required key.
After completing the check, the system will report the results and ask you to reboot.
That's all for me. Thank you all for your attention.
Checking drive C for errors in Windows 7 and XP
There are times in the life of a computer when logical errors of the file system on the hard disk occur. Errors on the disk can accumulate and not make themselves felt until a certain point. They can contribute to minor system glitches, and can lead to complete destruction of the structure of logical drives and loss of information. Errors on the disk most often occur as a result of incorrect access to the disk by any program, incorrect power off, or freezing of the computer during the data recording process. To avoid the sad consequences, you should check the disk for errors.
There are two global cases: in the first case, it is possible to boot Windows at least in safe mode, in the second case, Windows does not boot, cursing about the absence of system files, or by giving blue screen death with error 0x000000ED (most often, but there may be another error).
Let us first deal with the simplest first case.
Checking a disk in Windows 7 is no different from checking a disk in Windows XP, so I will use XP as an example.
To check the disk run My computer, there right-click on the disk you want to check and select from the menu that appears Properties... In the window that appears, go to the tab Service and run the program to check the disk by clicking the button Check.

Check the box in the program window Automatically fix system errors and run the test by clicking the Run button.
The disk will be checked for errors and corrected, after which the program report will appear. If the report in paragraph In damaged sectors the value is different from zero, then you should check the disk using the Victoria program for the presence of bad sectors.
However, if the drive is the system drive, you will receive the following message: " The disk check could not be performed because it requires exclusive access to some Windows files on that disk and requires a reboot. Schedule a disk check on next system reboot?"and you won't be able to scan the disk right now. However, you can schedule the scan by clicking Yes.

After that, you should restart Windows. During boot, it will check the disk for errors and fix them.
How to check your hard drive for errors if Windows won't boot
If Windows does not start, you can still check the disk for errors. But for this you need special software. We need a disk or flash drive with ERD Commander. The disk image can be downloaded. You can write an iso image using the program Deepburner... If you want to use bootable USB flash drive, then here are the instructions for creating a bootable USB flash drive ERD Commander.
So the preparatory work is over, let's get down to business. Download ERD Commander for your windows versions , although in this case the version is not very important. Disk check can be performed in any version of ERD Commander, so here I will tell you how to check a disk for errors in ERD Commander for Windows 7.
Download ERD Commander, in the window that appears, refuse to connect to the network. In the next window agree to reallocate the drive letters so that they match the system ones. Select your operating system from the list. In the Commander menu that appears, select Command line... Now you need to enter the command to check the disk chkdsk c: / f (in case of checking drive C) or chkdsk d: / f (if you need to check drive D for errors) and press Enter. If a message like the one below appears " Would you like to force a dismount on this volume? ", which translates as" Do you want to unmount this partition? ", enter from the keyboard Y and press Enter, thereby agreeing to unmount the disk.

The disk will start checking and fixing errors, and then an error and fix report will be displayed.

Please note that the value in the bad sectors is equal to 0. If it is greater than zero, then the disk contains damaged sectors and you should check the hard disk for bad sectors.
After completing the scan, the computer can be turned off or restarted.
Whenever something goes wrong with your computer or laptop, there are a number of troubleshooting tools that you can follow to try and fix the problem. Windows 10/8/7 has several built-in commands that can be used to check and repair corrupted system files that cause problems over time when changed. One of the ways to troubleshoot Windows-related problems is System Check and System File Restore. It can help with all types of problems like slow system, blue screen of death, sudden power failures and system crashes.
Let's take a look at how to run the System File Checker tool on Windows using command line CMD and PowerShellcommands such as sfc / scannow and tool DISM. Note that for the Anniversary update Update Windows 10, it will be better to use methods with PowerShell.
Checking and restoring system files via CMD
System File Checker scans your computer for any damage or changes to system files that might otherwise prevent your PC from working properly. From there, it replaces the file with the correct version to keep it running smoothly. Using the command line, you can try to scan and repair system files of late operating systemslike Windows 10/8/7 / Vista. Let's analyze two commands sfc / scannow and DISM using CMD.
1.
- Run Command Prompt (CMD) as administrator. Click "search" and just write "cmd" or " command line", then right-click on it and launch as an administrator.
- Set command sfc / scannowand wait for the process to finish.

Note:After scanning your system, you will get one of three results:
- There will be no system file errors.
- There will be system file errors and Windows will repair them automatically.
- Windows has encountered errors but is unable to repair some of them.
If option 3 shows you that an error was found and the system cannot recover, then repeat the procedure. I advise you to turn off encryption and, if they are available at the time of verification. Nothing succeeded? Moving on below.

2. (DISM)
If the above doesn't work in safe mode, there is one last way to check for corruption in system files and fix them. We use the Deployment Image and Service Management (DISM) tool. The team works with windows systems 8 / 8.1 / 10. Open back and use the following command:
The process can take a long time with the percentage scale freezing. When finished, restart your computer and start back sfc / scannow, to make sure there are no errors or the error is gone.

Checking and restoring system files viaPowerShell
We'll be using Windows PowerShell to show you how to use the Servicing and Management Service DISM to scan and fix corrupted system files in Windows 10. This method will be more effective for updating Anniversary windows 10 than the command line.
1. Using the System File Checker (SFC) Tool
- Run PowerShell as administrator. Click "search" and type windows powershell, then right-click and select as admin.

- Enter the command in the PowerShell window sfc / scannow.If the scan finds any problems, Windows will try to fix them. If Windows cannot fix them, it will warn you that further research and action is needed. Move down if errors are found.
2. Using the Deployment Image and Service Management Tool (DISM)
DISM scan detects corrupted system files and Windows will try to fix them and give you a progress report at the end. If Windows cannot find the files it needs to repair corrupted system files, you will also be provided with information on what to do next, with a link to the Microsoft website and troubleshooting options. Run below command in PowerShell window.
DISM / ONLINE / CLEANUP-IMAGE / RESTOREHEALTH
If DISM fixed everything or did not find errors, then restart the laptop, computer and run it back to check sfc / scannow.