How to archive. How to zip files. How to zip a folder using WinRAR
By compressing objects into a ZIP archive, you can save not only disk space, but also provide more convenient data transfer via the Internet or zip files for sending by mail. Let's find out how to package objects in the specified format.
It is not only specialized archiving applications that can create ZIP archives, but this task can also be dealt with using the built-in tools of the operating system. Let's find out how to create compressed folders of this type in various ways.
Method 1: WinRAR
Let's start analyzing the options for solving the problem with the most popular archiver - WinRAR, for which the main format is RAR, but, nevertheless, can create ZIP.
- Navigate with "Explorer" to the directory where the files to be placed in the ZIP folder are located. Select these items. If they are located in a solid array, then the selection is made simply with the left mouse button pressed ( Paintwork). If you need to pack disparate elements, then while selecting them, hold down the button Ctrl... After that click on the selected fragment right click mice ( PKM). In the context menu, click on the item with the WinRAR icon "Add to archive…".
- The WinRAR archive settings tool opens. First of all, in the block "Archive format" set the radio button to position "ZIP"... Optionally in the field "Archive name" the user can enter any name that he sees fit, but he can leave the default one assigned by the application.

You should also pay attention to the field "Compression method"... Here you can select the level of data packing. To do this, click on the name this field... A list of the following methods is presented:
- Normal (default);
- High-speed;
- Quick;
- Good;
- Maximum;
- Without compression.
You need to know that the faster you choose the compression method, the less the degree of archiving will be, that is, the resulting object will take up more disk space. Methods "Good" and "Maximum" can provide more high level archiving, but will require more time to complete the procedure. When choosing an option "Without compression" the data is simply packed, not compressed. Just choose the option that you see fit. If you want to use the method "Usual", you can leave this field alone, as it is set by default.

By default, the created ZIP archive will be saved in the same directory as the original data. If you want to change this, then press "Overview…".
- A window appears "Search archive"... Move in it to the directory where you want the object to be saved, and click "Save".
- After that, there is a return to the creation window. If you think that all the necessary settings have been saved, then to start the archiving procedure, click "OK".
- The procedure for creating a ZIP archive will be performed. The created object itself with the ZIP extension will be located in the directory that the user has assigned, or, if he has not done this, then where the sources are located.


You can also create a ZIP folder and directly through the internal file manager WinRAR.


Method 2: 7-Zip
The next archiver that can create ZIP archives is the 7-Zip program.

As in the previous method, you can also act through context menu "Explorer".


Method 3: IZArc
The next way to create ZIP archives will be done using the IZArc archiver, which, although less popular than the previous ones, is also a reliable archiving program.
- Start IZArc. Click on the icon that says "New".

You can also apply Ctrl + N or sequentially click on the menu items "File" and "Create archive".
- A window appears "Create archive ..."... Move in it to the directory where you want to place the created ZIP folder. In field "File name" write in the name you want to call it. Unlike previous methods, this attribute is not automatically assigned. So in any case it will have to be entered manually. Push "Open".
- Then the tool will open "Add files to archive" in the tab "Select files"... By default, it is open in the same directory that you specified as the storage location for the finished compressed folder... You also need to move to the folder where the files that you want to pack are stored. Select those elements according to general rules the selections you want to archive. After that, if you want to specify more precise archiving settings, then move to the tab Compression settings.
- In the tab Compression settings first of all, make sure that in the field "Archive type" the parameter was set "ZIP"... Although it should be installed by default, anything can happen. Therefore, if this is not the case, then you need to change the parameter to the specified one. In field "Act" parameter must be specified Add.
- In field "Compression" you can change the archiving level. Unlike previous programs, in IZArc this field is set by default not to the average indicator, but to the one that provides the most high degree compression at the highest time costs. This indicator is called "Best"... But, if you need faster execution of the task, then you can change this indicator to any other that provides faster, but less high-quality compression:
- Very fast;
- Fast;
- Normal.
But there is no possibility of archiving in the studied format without compression in IZArc.
- In addition, in the tab Compression settings you can change a number of other parameters:
- Compression method;
- Folder addresses;
- Date attributes;
- Include or ignore subfolders, etc.
After all the necessary parameters are specified, press to start the archiving procedure. "OK".
- The packing procedure will be carried out. The archived folder will be created in the directory designated by the user. Unlike previous programs, the contents and location of the ZIP archive will be displayed through the application interface.


As in other programs, archiving in ZIP format using IZArc can be done using the context menu "Explorer".


You can also specify complex settings in the archiving procedure via the context menu.

Method 4: Hamster ZIP Archiver
Another program that can create ZIP archives is Hamster ZIP Archiver, which, however, can even be seen from its name.
- Launch Hamster ZIP Archiver. Move to section "Create".
- Click on the central part of the program window, where the folder is displayed.
- The window starts "Open"... With its help, you need to move to where the original objects to be archived are located and select them. Then press "Open".

You can act differently. Open the file location directory in "Explorer", select them and drag them to the ZIP Archiver window in the tab "Create".

After the dragged elements fall into the area of \u200b\u200bthe program shell, the window is split into two parts. Elements should be dragged in half, which is called "Create a new archive ...".
- Regardless of whether you act through the opening window or by dragging and dropping, the list of files selected for packing will be displayed in the ZIP Archiver window. By default, the archived package will be named "My archive name"... To change it, click on the field where it is displayed or on the pencil icon to the right of it.
- Enter whatever name you want and click Enter.
- In order to indicate where the created object will be located, click on the inscription "Click to select the path for the archive"... But even if you do not follow this label, the object will not be saved in a specific directory by default. When you start archiving, a window will still open where you should specify the directory.
- So, after clicking on the inscription, the tool will appear "Choose the path for the archive"... In it, go to the directory of the planned location of the object and click on "Select folder".
- The address will be displayed in the main window of the program. For more precise setting of archiving, click on the icon "Archive parameters".
- The parameters window starts. In field "Way" if desired, you can change the location of the object being created. But, since we indicated it earlier, we will not touch this parameter. But in the block "Compression ratio" you can adjust the level of archiving and the speed of data processing by dragging the slider. The default is the normal compression level. The far right position of the slider is "Maximum", and the far left is "Without compression".
Be sure to make sure that in the field "Archive format" was set to "ZIP"... Otherwise, change it to the one indicated. You can also change the following parameters:
- Compression method;
- Word size;
- Dictionary;
- Blok, etc.
After all the parameters have been set, to return to the previous window, click on the icon in the form of an arrow pointing to the left.
- You are returned to the main window. Now we just need to start the activation procedure by clicking on the button "Create".
- The archived object will be created and placed at the address specified by the user in the archive settings.


The simplest algorithm for performing the assigned task using said program is to use the context menu "Explorer".


But the option is also possible when the user, acting through the menu "Explorer", when performing the packaging procedure with the Hamster ZIP Archiver, certain archiving settings can be configured.


Method 5: Total Commander
You can also create ZIP folders using most modern file managers, the most popular of which is Total Commander.
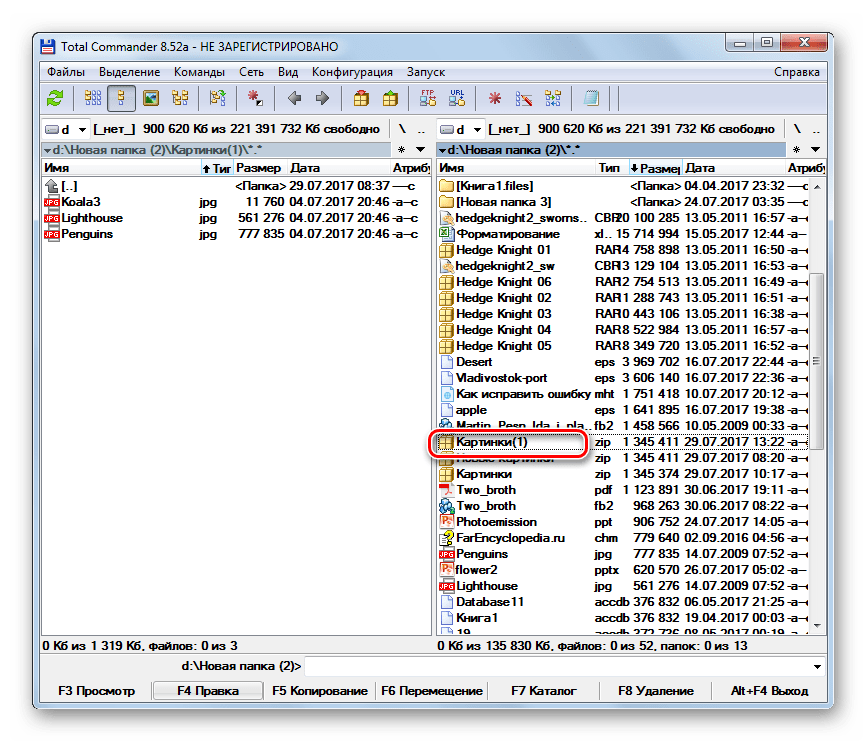
- Launch Total Commander. In one of its panels, move to the location of the sources that you want to pack. In the second panel, navigate to where you want to send the object after the archiving procedure.
- Then you need to select the files to be compressed in the panel containing the sources. You can do this in Total Commander in several ways. If there are few objects, then the selection can be made simply by clicking on each of them PKM... In this case, the name of the selected elements should be colored red.
But, if there are many objects, then in Total Commander there are group selection tools. For example, if you need to pack files only with a specific extension, you can select by extension. To do this, click Paintwork on any of the items to be archived. Next click "Selection" and from the drop-down list choose "Select files / folders by extension"... Also, after clicking on the object, you can apply the combination Alt + Num +.

All files in the current folder with the same extension as the marked object will be highlighted.
- To launch the built-in archiver, click on the icon "Pack files".
- The tool starts "Packing files"... The main action in this window that needs to be done is to move the radio button switch to the position "ZIP"... You can also add additional settings by checking the boxes next to the corresponding items:
- Preservation of paths;
- Subdirectories accounting;
- Removing sources after packaging;
- Create a compressed folder for each individual file, etc.
If you want to adjust the archiving level, then for this purpose click on the button "Setting ...".
- The window of general settings of Total Commander is launched in the section ZIP Archiver... Go to the block "Compression ratio of the internal ZIP-packer"... Three compression levels can be set by rearranging the radio button switch:
- Normal (level 6) (default);
- Maximum (level 9);
- Fast (level 1).
If you set the switch to position "Other", then in the field opposite it you can manually drive the degree of archiving from 0 before 9 ... If you specify in this field 0 , then archiving will be performed without compressing data.
In the same window, you can set some additional settings:
- Name format;
- Date;
- Opening incomplete ZIP archives, etc.
Once the settings are specified, click "Apply" and "OK".
- Back out the window "Packing files", press "OK".
- The files are packed and the finished object will be sent to the folder that is open in the second panel of the Total Commander. This object will be named the same as the folder that contains the sources.


Method 6: Using the Explorer context menu
You can also create a ZIP folder using the built-in Windows tools using the context menu for this purpose "Explorer"... Let's see how to do this using the example of Windows 7.

Thus, we found out that a ZIP folder can be created not only with the help of a specialized softwarebut also by applying internal Windows tools. However, in this case you will not be able to configure the basic parameters. If you need to form an object with clearly defined parameters, then third-party software will come to the rescue. Which program to choose depends solely on the preferences of the users themselves, since there is no significant difference between various archivers in terms of creating ZIP archives.
In this tutorial, you will learn how to zip a file on Windows. Windows is the most popular operating system for PC. File archiving software is always built into Windows, so you don't have to download and install third-party programs... Archiving can also be useful for creating your site, if you want to transfer a large number of files, it is recommended to archive them for easier, faster and more secure transfer.
What do you need
Before we start this tutorial, you need the following:
- Windows operating system
Step 1 - Archiving Files or Folders
- First, you need to find the files you want to zip and highlight them. You can select all files by pressing the keyboard shortcut CTRL + A... If you want to select individual files, hold down the key CTRLand select each file individually.
- Once the files you want to zip have been selected, right-click, select Send → Compressed ZIP folder... A new archive will be created in the same place where these files are located.

- You can rename your new archive. Highlight the created file, right-click on it, select Rename and enter the name you want.
Step 2 - Unzipping files or folders
Using the Extract All function
It is very easy to extract files from a .zip archive in Windows:
- To extract (unzip) files or folders, find the directory containing these files.
- Right-click on it and select Extract files.

Extracting files using Windows Explorer
On some versions Windows function Extract files may not be available from the context menu. In this case, you can use WIndows Explorer:
- Find the file or folder you want to unzip.
- Right click and select Open with -\u003e File Explorer

- A new window will open Windows Explorer ... Select the files you want to extract, or simply drag and drop them to another folder.

Conclusion
After completing this tutorial, you have learned how to zip a file on Windows. This is great if you need to quickly send multiple files at once, since uploading many individual files through will take much longer than a zip archive.
Not sure how to compress a folder with files to ZIP? You have come to the right place! Read this article and you will learn how to do it quickly, easily, effectively.
—Mail is not always likely to reach the recipient. First, many postal services there are restrictions, and it is not always possible to send even files weighing 100 MB. Secondly, if user traffic is charged (and this is not uncommon even today - for example, on mobile internet), every megabyte counts. And when the data is well packed, you can save a little on shipping.
Let's figure out how to archive content to a folder with a ZIP extension. Why zip? Because this is the most popular type of archives. In addition, even staff funds Windows.
Zip using OS WINDOWS
You can apply such compression on personal computers from different versions Windows. The standard features of the Microsoft operating system involve the creation of zip archives.
- Select the file / folder to be archived and right-click. A system window will appear
- See the Send item? Hover over and then click on the Compressed Zip Folder:

- As soon as you click on it, compression starts:

- The zipped file / folder will appear next to the original in ZIP format:

- Do you think there will be more explanations on how to make a ZIP archive in the traditional way? Nothing of the kind - on this the procedure can be considered complete. Does it allow you to significantly compress information? Judge for yourself. The size of the original folder with files is 6.26 MB, after compression - 5.15 MB.
ZIP archiving by WinRAR
If you compress bulky materials and want to do it as efficiently as possible, you should use our help special utilities... For example, WinRAR is very popular in our country.
By the way, it not only quickly and efficiently compresses materials, but also can be used completely free of charge. So let's get started!
- After WinRAR has been installed on your computer, right-click on the selected files. You immediately see 4 new items with the image of packed books. We are interested in the first item "Add to archive":

In the window that appears, there is a wonderful opportunity to configure the following parameters:
- Format. Which format should you prefer? It's up to you, but when you need a ZIP, it is also in the list of extensions.
- Update method. For example, you can select "Replace".
- Compression type. The higher the quality, the longer it will take to work. But the result will also be maximum.
- Access to the file (setting a password, if necessary).

The WinRAR program also offers several additional parameters. For example, backing up in the background, shutting down the PC after archiving is complete, creating a backup, adding a comment, and so on.
- And don't forget to click "OK" to start the process:

- It is quite expected that our compressed file will appear in the folder next to the original:

As you can see, there were no issues with archiving files here either.
Archiving with 7ZIP
And here is the third way of processing files, which boils down to archiving materials using 7zip. Many users will agree with the statement that it is one of the most advanced archivers to date. There is only one drawback - rAR archives this program does not create. But since we are interested in the ZIP format, the application is just right for us.
- Download 7ZIP on our website. After installing the software, the 7-Zip item will appear in the context menu. He will help us archive the files we need.

- We select "Add to archive". It will help us launch the settings window. As in the case of WinRAR, it is possible to specify the compression level, password, and make other settings. To start archiving, just click "OK".

We've covered 3 ways to archive ZIP files. Now you can not only do this without outside help, but also teach this simple craft to your friends. We wish you pleasant use!
AT modern world data exchange has become an integral part of working at a computer, both for business purposes and for personal. But we all know that the volume of this very data is sometimes large enough and send them, for example, by e-mail it is simply impossible, therefore, archiver programs come to our aid, which compress our data and thereby significantly reduce the amount of this data, so today we will consider one of such programs. 7-zip... Let's install it, learn how to archive files and unzip them.
And we will start by saying why do we need to archive data? As already mentioned, in order to reduce the amount of this data. But I will immediately make a reservation to get a significant reduction in the size of the data is possible only with some types of files. For example, you won't be able to compress video, music or photos strongly, since these files are already compressed, so if you are going to archive movies, do not expect that your file size, for example, will decrease from 2 gigabytes to 500 megabytes, it may decrease, but not at all significantly. It's another matter if you are going to archive a large amount of documents in Word, Excel or PDF format, here you will get a decrease in the amount of data several times, for example, I had to archive a large amount of data in PDF format, I don’t remember exactly, but something about 2 -2.5 gigabytes, and with the 7-Zip program, which we will consider a little later, I compressed this data to about 250-300 megabytes! In my opinion, this is just fine, especially since I had to transfer this data via the Internet, and as you know, transferring a volume of 300 megabytes is much faster than 2 gigabytes, even if you have a good Internet speed.
Well, enough of the introduction, let's move on to the topic of the article itself, i.e. 7-Zip program.
7-Zip - a free program for archiving (compressing) data. Download this program can be found on the official website.
And the main advantage of this program is not that it compresses data well, but that it is free, i.e. I want to say that similar programs are paid, although the work is no better than 7-zip.
Installing the 7-Zip software
Note! We will be installing 7zip version 9.20 on Windows 7.
We launch the installer, and on the first window we will be asked to choose the installation path for this program, I leave it by default, and click install
Now let's just run this program to have a look at it and find out where you can change the settings. To do this, click Start-\u003e All Programs-\u003e 7zip-\u003e 7-Zip File Manager

And you will see the next window, a kind of file manager, in which you can move around your file system, in order to zip something or unzip it.

Also here you can set the program settings, for example, which file types to open by default 7zip or, for example, the program language, to do this, just go to the menu Service-\u003e Settings


How to zip a file
Here the program offers several options for archiving, for example, through the 7-Zip File Manager, we examined it just above and, of course, through the context menu of a file or folder. In general, as it is more convenient to whom. Let's consider the option without launching 7-Zip File Manager, but simply zip the file through the right button.
Let's say we have an Excel file of 35 megabytes
We right click on this file i.e. we call the menu for working with this file, and select 7zip-\u003e Add to archive

Then a window will open in which we will set some compression settings. Since we are beginners, we will not go into particular details, only let's compress the file with the maximum compression ratio and for this we select “ Compression level» « Ultra", You can also set the name of the future archive, I will leave it as it is

After you click OK, the archived file will appear in the same folder (if you have not changed the path).
As you can see the file has shrunk several timeswhich, in my opinion, is very good.
And if you need to send the zipped file by e-mail, and if you have installed any mail program (for example Mozilla Thunderbird), then you can immediately select the item “ Compress and send by email"And in this case the compressed archive will be immediately attached as a file to the sent letter.

How to unzip an archive (extract data)
In order to unzip the archive, we right-click on the archive file (in our case, the Test file.7z) select 7zip-\u003e unzip here this is if you want to unpack in the same folder as the archive itself

And if you want to unpack to another folder, then just select “ Unpack", And in this case you will be presented with a window for selecting the location where you want to unpack.


Also, if you just need to just look at the data in the archive, you can, as usual, open the file with the archive by double click left mouse button and in this case you will open 7-Zip File Manager, where you will see all the data in this archive. You can also extract them here.

This is enough for the basics, the program is not complicated, so even a novice computer user will not be difficult to understand it. Good luck!
Archiving documents to a zip file. Very convenient way for important but rarely used files, as zip files reduce the space occupied by documents on the hard drive.
- Just highlight the files you want to convert to zip format.
- Right click and select Submit.
- You send the files to the "Compressed ZIP Folder".
- Verify that all files are indeed there by double clicking on the zip folder. If so, you can delete the original files.
Record your documents on separate media. A popular option for digital archiving is external drives on magnetic tape, external hard drives or flash drives.
Back up your documents to CD or DVD if you have a CD writer or DVD recorder. Backups are another method of archiving, although you probably know this method under a different name - disc burning. For example, Windows uses the "Live file system" and "Mastered" formats (better for compatibility with other devices) to copy files to CD or DVD.
- Insert a recordable CD or DVD into your computer's drive or DVD recorder to file system Live.
- When the dialog box appears, click "Burn files to data disc."
- Enter a name for the drive, and then click Next.
- Open the folder with the documents you want to archive and drag the files to an empty folder on the drive.
- For Mastered format, insert a recordable CD or DVD into your computer's drive or DVD recorder.
- When the dialog box appears, click Burn Files to Data Disc.
- Enter a name for the drive and click Show Formatting Options.
- Select "Mastered" and click "Next".
- Wait until appears empty folder disk. This means that the disk is formatted and ready to copy files.
- Open the folder with the documents you want to archive and drag the files to an empty folder on the disk.
Send documents to external storage.
- In addition to functioning as a place for archive files, secure off-site storage protects information from accidents such as fire and hard drive failure.
- With so many companies offering this service, you should contact the firm directly to clarify how they work and what guarantees are included in the remote archiving of documents.
Use digital archiving software.
- One of the most famous conservation methods appearance document is to create a PDF file. Proposed by Adobe, known as adobe program Acrobat, makes it easy to convert documents to pDF format of various programs... There are also several free softwarethat can create these files.
- Future versions of Adobe software will be compatible with documents from earlier versions.
- You can also download a PDF reader for free from the Adobe website.


