How to change the default icon of any Windows folder. Ways to customize your Android device
In Windows it is possible to change the default folder icon to any other. This is convenient when there are a lot of folders and you need to select some for a faster visual search, or if you are already tired of old icons. Some applications also like to change the icons in the folders in which they are installed. Information on how to change the icon is not some kind of secret; some have even stuck entire multi-megabyte programs for this, some of them even paid. And here is my instruction for beginners and advanced users.
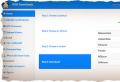
I'll start with illustrated instructions for the little ones. Select in Explorer Windows needed folder, click on it right click mouse, in the menu select "Properties", and in the properties window find the tab "Settings".

Click the Change Icon ... button. By default, a list of icons from system file shell32.dll... You can look for an icon there, but the selection there is not the largest, and the icons are ugly, many have not changed since the days of Windows 95. Therefore, it is better to look on the Internet for free or available sets of beautiful icons and choose something from them. Besides graphic files icons, you can select any executable file and then select any icon that is stored in it.

Save your changes. The folder icon will immediately change to the selected one. It will be displayed in Explorer in the folder list, in address bar when opening a folder and in the status bar when selecting a folder with the cursor.

And on the "General" tab in the properties window, you can change the name of the folder. On the disk, the folder will not change in any way and will be named as before, but in Explorer it will be displayed as you named it.

As you can see, nothing complicated. Further will be technical informationso beginners can stop there.
Now a little about how the system changes icons. When you select the icon icon, a file is created (or updated) in the target folder desktop.ini... Usually it has the attributes "hidden" and "system", so to display it you need to enable display hidden files... If you open the file for editing in some Notepad, then inside you will find something like the following:
[.ShellClassInfo]
If, in addition to the icon, the folder name has been changed, then another line will be added to the description file:
[.ShellClassInfo]
IconResource \u003d C: \\ Windows \\ system32 \\ shell32.dll, 115
LocalizedResourceName \u003d Toon for Big and Small
We activate the mind. If the system creates this file to change the folder icon, then what prevents us from creating the same file ourselves, but with the values \u200b\u200bwe need? That's right, nothing gets in the way. Open Notepad, write the following there:
[.ShellClassInfo]
IconResource \u003d icon.ico, 0
LocalizedResourceName \u003d Vasya was here
And save it to a file named desktop.ini... We transfer the newly created file to the folder we need, put the file there too icon.ico with our own icon. And then a bummer awaits us. Neither the icon nor the name of the folder has changed. Okay, maybe it's the file's attributes (if you remember, the original desktop.ini files had them "system" and "hidden")?

Set the attributes "Hidden" and "System"
It wasn't like that. Instead of our icon, we continue to observe the national Indian hut "figvam". What's the matter? It turns out that in order for the system to start processing desktop.ini descriptor files in folders, the folders themselves must have the read-only attribute set, and the descriptor file attributes do not matter at all. Set the read-only attribute on the folder.

Setting the attribute "Read Only"
Now the order is complete, the icon has changed to ours, the description too.

Finally, there are a few more features that must be taken into account when manually generating descriptor files. If the file with the icon is located in the same folder as desktop.ini, then the absolute path to it in the parameter IconResource it is not necessary to register, it is enough to specify only the file name. Otherwise, you need to write the full path. Description text in parameter LocalizedResourceName must be written in windows-1251 encoding.
Although modern smartphones have long ceased to be simple telephones, in terms of functionality, is much closer to some notebook models, however, the ability to make voice calls is still a priority. To ensure the owner's interaction with the transceiver device of the gadget, a special software module is used - the so-called dialer, or, in a simple way, a dialer.
On the one hand, this is a common application with a graphical interface, through which the desired number is dialed, and on the other, a special interpreter that converts the numbers and characters dialed by the user into modem control commands. In general, the dialer for "Android" from "Google", from the point of view of the principle of operation, is completely identical to the solutions used in devices from other manufacturers (the same Apple).
Modular principle
As mentioned earlier, the dialer is a regular program that runs in one or another operating system. Thanks to this, it can be easily replaced with an alternative one. True, this is true only in relation to "Android".

Apple's iOS operating system is proprietary, so any changes / modifications to software modules are made only through official updates provided by the company itself. But replacing the standard dialer in "Android" is within the power of even a novice user. Perhaps the main difficulty that you will have to face is the abundance of offers. It is important to understand that the vast majority of third-party dialers are, in fact, an add-on to the base software solution. That is, in them only the interaction with the user changes, and the command converter for controlling the transmitting-receiving unit remains the same. This ensures 100% compatibility and, as a result, the absence of any problems. Thus, replacing the dialer on "Android" consists in installing the desired software solution from a third-party developer, while maintaining the base dialer. It is impossible to make a mistake and in any way disrupt the functioning of the gadget with such an operation.
The best dialer for Android
Experienced users know how difficult it is sometimes to opt for a particular program. The reason for this lies not at all in excessive requirements, but in the abundance of solutions.

For example, a user may like the call interface in one of the dialers, but the way of working with contacts implemented in it is inferior in convenience to some other. How not to recall the famous film in which the main character, choosing a robe, was looking for "the same, but with mother-of-pearl buttons." Thus, we can rightfully say that the best dialer for Android, alas, does not exist. Each person has his own opinion about convenience, his own requirements for the interface. Below, we will consider some popular applications of this class as an example.
Source selection
Thus, if the owner of the smartphone, for some reason, decides to replace the dialer offered by the manufacturer, then the first thing to decide with is to choose where the corresponding software modules will be downloaded from. At the moment there are two of them - the official source provided by the Google store, to which everyone who registered in PlayMarket has access, as well as many third-party resources on the Web.

The advantage of the first is the guarantee of the absence of viruses in applications, which is provided by Google itself, as well as the ease of selection and installation. It is enough just to type in the search box of the "Market" the words: "Dialer application for Android". Having decided to use the second option, the smartphone owner can even pick up those programs that are distributed on a paid basis, which for many is undoubtedly an advantage, although not entirely legal. True, in this case the question arises of how to replace the dialer with Android. In this case, the user must find a resource on the Web, upload the desired APK file from there to the gadget and install it. Since such an installation is prohibited by default, you must first activate it. In the popular version "Android 5.1.1", for this you need to go to the main menu, select the "Security" section there and find the item "Unknown sources".

Here you need to move the switch to the "Allowed" position and confirm your choice. After these steps, installation of the downloaded APK file will be allowed. Thus, there is nothing difficult in how to replace the standard dialer with Android. This is a common program designed to run under the Google system.
Program selection
In order for the third-party dialer for "Android" to be correctly registered in the system, after installation it is necessary to activate it. To do this, click on the image of the handset, as in a normal call. Depending on the installation method (“Market” or third-party sources), you may need to select the desired one in the displayed list of installed dialers, additionally checking or ignoring the item responsible for its permanent use. If such a menu does not appear, then the dialer for "Android" must be called manually by launching the installed program through the appropriate shortcut. Subsequently, you can simply replace the main launcher icon so that the desired dialer is immediately turned on.

True Phone Program
Perhaps this dialer for Android can rightfully be called one of the best, if only because its discussions take hundreds of pages. It is worth noting the high speed of work, low consumption of smartphone resources, the ability to work with the contact book, correct processing of requests on devices with 2 or more SIM-cards, etc. After starting, the user sees a call list on the screen. If you swipe on any of them to the left (perform a swipe action), then a window for dialing SMS will open, and if to the right, then the call menu. This principle is very convenient as it makes it easy to operate the interface with one hand. If the firmware does not provide a mechanism to ignore unwanted calls, then True Phone has a built-in "black list". Sometimes this feature is in demand. This dialer has only one drawback - the need to write off the developer 7 days after the start of use (possibly for payment). If this is not done, then unobtrusive advertising links will be displayed, which can be easily closed immediately. Completely unobtrusive, so in fact True Phone is free. Support is provided in full, as is the release of new versions.
Miniature dialer
Another project with the memorable name Pixel Phone is no less interesting. The principle of interaction is almost completely similar to the previously reviewed True Phone application. The difference lies in a more convenient display, which allows you to immediately see the number of calls, their date and direction. It is also worth noting the support for plug-ins that extend the basic capabilities. Anyone who is seriously thinking about how to change the dialer on Android and decided to use Pixel Phone should remember that in this case it is necessary to pay for the application or stop using it after 7 days. Finding free options for new versions anywhere will not work.

"Apple" laurels
Not all owners of Android devices buy them voluntarily. Sometimes a person simply does not have enough funds to purchase fashionable iPhones, which are much more expensive. However, one of positive sides systems from Google are openness and opportunity flexible customization, which makes it easy to modify the GUI, turning it into a copy of iOS. In particular, the dialer for iPhone for Android can be easily found and installed in the system. There are many similar proposals. So, fans of the Apple interface should try Hi Contacts, iOS 7 Dialer, or look in the modules of the Espier project, which is just created to replace the shell.
Summing up
Perhaps only the lazy owner of an Android smartphone did not try to install third-party dialers. Still, the basic functionality implemented in the "native" dialer cannot be considered the height of perfection and requires improvement. Continue using it without worrying about fees, advertisements or possible problems with compatibility, or choose something more convenient - choose the user himself.
Some of the main features Google android OS - free customization options. There is no other mobile platform today that can change the interface so much as in Android. Changes require only some system skills and desire. If you are new to Android, this tutorial will guide you through the basics of change. appearance Android.
Ways to customize your Android device
Sometimes installing a custom visual installation, also called a launcher or launcher, is not difficult. And sometimes, in order to change the standard interface of the entire system as a whole, you have to resort to root (administrator rights), that is, you can replace and delete any wallpapers, icons and images by default. Don't like how the settings look because of the icons? No big deal, they can be easily cut out if the device is popular enough and has custom firmware.
Before you start
Any changes to the appearance and original android settings lead to performance changes. Things like built-in live wallpapers, clocks, weather widgets and others will have a very negative impact on the speed of Android in general and on battery consumption. It depends on the number of additional features and animation, so be careful when choosing a visual shell. Think a few times before installing live wallpapers, widgets and more. The more beautiful and cooler the visual effects on live wallpapers, the more they "eat off" the resources of the smartphone and waste battery power.
Also, do not forget that free apps such a plan is often bundled with intrusive ads. This is a necessary evil, since developers need to live on something. However, it is quite possible to get rid of it using our instructions.
Change the background on Android
Changing the background image is very easy. It is enough to open through the menu of the launcher or with a long tap on the display context menu, choose a picture you like from the list of default wallpapers or use your own photos or pictures from the gallery.
Alternatively, one can use free programs - online or offline wallpaper catalogs specially optimized in terms of form factor / image volume for mobile devices... It is also recommended to use the following applications:
- Coveroid Wallpapers HD.
- Bless Wallpapers HD.
- HD Wallpapers.
- Wallpaper application.
- Zedge.
In some of them, besides the usual static wallpapers, there are also live wallpapers, Android games and ringtones.
Set live wallpaper for Android
Live wallpapers are the most beautiful way to change the look of your Android smartphone. Our site has a fairly extensive catalog of live wallpapers for Android.
- Material Designs are great for styling a pure Android version.
- Circulux LWP will appeal to lovers of round shapes.
- Sky Islands LWP will make the background of your smartphone meditative, offering you to admire the islands soaring in the clouds.
- Weatherback Weather Wallpaper offers live, right on the desktop, to observe the weather outside the window.
- Awesome-Land Live wallpaper HD will appeal to nature lovers.
How to set live wallpaper on Android for different versions Read the OS and launchers at the link.
Customizing the lock screen
The lock screen is also an important part of the interface. And it is not only possible, but also needs to be configured so as to make the empty space as informative and useful as possible. To do this, there are many software that allows you to display a huge number of useful things on the screen of a locked device - from displaying a news feed using Simple RSS, to an unlimited number of informative widgets when using the Extended Controls application.
Changing icons on Android
A set of app icons that match all icons on the desktop and menus to a consistent visual style can be a great way to transform a smartphone's interface. For example, you can use these:
- Rondo transforms more than 3,500 app icons into stylish Material Design counterparts and also offers background wallpapers.
- TAY will add shaded volumetric icons to 1800 apps to match dark themes.
- MIUI 5, as the name suggests, converts icons to similar ones to those used in the shell from Xiaomi.
- Soul contains 2300 icons and is perfect for those who like to combine bright colors with dark frames.
At the same time, unlike full-fledged launchers, even the largest package of icons for programs will not use a large amount of system resources.
Installing widgets on the Android desktop
5) Deep change of the interface
Now the rest of the Android interface or skins. For complete change graphical interface will be required custom firmware, root rights and a pre-installed theme changer (it can be located both in the applications section and in the main settings).
The interface from samsung, original interfaceMIUIand Touchwizwhich will not be difficult to find. They are not in the Android store, but these themes are available on most popular devices. They are ported by fairly experienced users.
This question is too broad to cover in this article. In addition, the firmware methods depend on the device. You can find popular firmware and shells on Internet forums related to your device.
Attention!
Any changes to the stock's appearance and the original Android settings will change performance. Things like built-in live wallpapers, clocks, weather widgets and others will have a very negative impact on the speed of Android in general and on battery consumption. It depends on the number of additional functions and animations, so be careful when choosing a visual shell and think several times before installing live wallpapers, widgets, etc. The more beautiful and cooler the visual effects on live wallpapers, the more they "eat off" the resources of the smartphone and waste battery power.
The exception is live wallpapers without animation, which simply change the static background daily (this is what I use), for example
IN latest version his operating system Microsoft has done a lot to improve the external windows view 7. However, everything, even the best, gradually gets bored and users start looking for an opportunity to change their usual working environment. The banal change of the desktop wallpaper does not count - today we will talk about a deeper change in the "windows".
Themes and styles
The program does not require installation, but it must be run as administrator ( Right click - Run as administrator). After that, the utility will automatically patch your system, making it available to install various themes. Then you need to specify the path to necessary files from the theme you downloaded and click on the Install Theme button. The topic will appear on the right in the list established themes... Now it is enough to select the desired design option from the list and click Apply Themeto change the look of your system.
Start button
To change the appearance of the Start button, use the program Windows 7 Start Button Changer... The utility comes with ten design options for the start button. After choosing the appropriate option, Explorer will restart and you will see an updated Start button.

Program icons
You can also change the icons of installed applications with standard windows tools - by selecting the desired picture in the file properties. But for everyone installed programs it takes a long time to do this, so it's better to use the application 7conifier, which not only allows you to change many icons in one fell swoop, but also contains several eye-pleasing themes.

You can easily switch between icon sets in the program interface, as well as restore the default set if you followed the program's advice and did backup on first launch. With the help of 7conifier it is possible to create your own sets of icons.
Well, as a result, after applying all of the above programs, your system will acquire completely the new kind... For example, this.