Setting up outlook express mail. Main features of MS Outlook
Consider the process of setting up Yandex mail in.
By using the mail manager, you can easily organize all your emails without the need for a web interface.
What is Outlook Mail Manager for?
In addition to its main task - working with mail data, the application is a convenient organizer.
With it, you can work with notes, calendar, task scheduler.
Main features of MS Outlook:
It is important not to confuse Outlook Express with full-fledged MS Outlook.
The first program is free and standard for everyone versions of Windows an email client that does not support work organization functions.
The manager is very convenient to use for work purposes or simply to always have access to e-mail without having to regularly visit its web page. Next, we will consider all the features of setting up a mail account and how to bind your own in MS Outlook for versions 2003, 2007, 2010, 2013 and 2016.
Using IMAP and POP3 protocols
To further bind a mail account in the Outlook manager, you need to select which type of protocol to configure. To make it easier for you to choose the option you want, let's figure out what is the difference between the most common protocols are IMAP and POP3.
POP3 Is a protocol that is designed to easily receive letters from the server email.
IMAP Is an improved protocol for connecting to a mail server. Its distinctive feature is the function of managing your account directly on the server.
In simple words, when using POP3, the manager will download letters, after which they are automatically deleted from the data server.
All operations on letters are carried out exclusively on the user's side.
This binding option will be useful if you are the only user of the computer and prefer to work with only one mailbox.
- Unstable internet connection;
- The selected mail manager does not use other accounts;
- The computer has only one account and nobody else uses the device.
IMAP allows you to quickly upload letters to the mail manager, at the same time, all data is stored on the server. This protocol is convenient if you want to use the same account on your computer and.
All actions on letters will be synchronized between all gadgets.
This way you will not lose important information.
Use IMAP if:
- Stable is available on the device;
- You plan to use the webmail interface from time to time;
- There is a need for automatic data synchronization on all devices that are logged into email.

Step 1. Configuring Outlook
2003-2007 versions
The interface of versions 2003-2007 differs from newer versions of MS Outlook.
After starting the program, wait until the main window is fully loaded and do the following:
- At the top of the window, click on the "Service" tab and select the item "Accounts";
- Next, the mail account setup manager will appear. Select item "Add new entry" and click on "Next";

- At this point, select the required connection protocol based on the difference between custom POP3 and IMAP as described in the previous section. Note that Exchange Server and HTTP are not designed to work with.

MS Outlook 2010
Open MS Outlook 2010 and follow the instructions:
- Select the "File" tab open the details field;
- On the right side of the screen, you can see information about all linked mail accounts. To work with a new account, press the button "Adding a record";

- In the new window, select Manual Server Configuration... This will allow you to add the domain of any mail and select the required protocol;

- Click on "Next";
- Then, in the new action list, select "Internet mail registration" and go to the next window;

Instructions for assemblies 2013-2016
If you are using Outlook 2013 or 2016, follow the instructions:
- Open the "File" window and in the "Details" tab click on the button for adding a new record;

- In a new window, you can choose automatic connection mode or manual mail settings. In the first case, the protocol will be selected by the program automatically, depending on the mail domain;
- For automatic tuning just enter your first and last name, email address and password... Then Outlook to connect to the server and in a new window of the program you will be able to access your mailbox;

- If configured manually, the application will first ask you to select a communication protocol and in a new window you will need to link Yandex mail.
Step 2 - Linking Yandex mail
After defining the protocol type, Outlook opens a window for further mail settings.
The binding process is the same in all versions of the program. Follow these steps:
- Configuring a specific mail domain begins when the server settings window appears on the screen.
It needs to be filled in Name - person or company name. This name will be displayed to other users with whom you will correspond. Address - your Email with domain name. For instance, [email protected].
Account type - this field will be determined automatically, depending on the selected communication protocol. Incoming and outgoing mail server - these two fields are also set automatically for the domain specified in the address. If you link, the Yandex.com server will be determined. Basically, using this configuration method, you can connect any mailbox to Outlook.
For the program to be able to access your account, be sure to enter the password

- Click "Next";
- Specify the time that mail will be stored locally on your PC... After the expiration of this period, you will need to re-enter your account;
- Click on "Other settings";

- Settings will appear in a new window mail server. Activate the authentication option. That will help to avoid interaction with. The connection will always be secure.

- Next check the box "Similar to the server ..."so that the program independently re-authorizes and you do not have to re-enter the username and password;
- Then open the Advanced Options tab and check if the numeric codes for IMAP and SMTP appear. If not, click on the "Default" button;
- Select the SLS encryption type for all servers;

- If you want emails never to be deleted on the server, check the box "Leave copies on the server";

- Now close the preferences window. To continue installing mail in the window "Add account" click "Next". Wait for account verification - the application will connect to the incoming mail server and send a verification message. The status of the operations will be indicated in the next window:

- If all settings are correct, you will see a message about successful connection completion... If errors appear, we advise you to re-configure the settings. You may have missed one of the steps.
Close the binding window new mail and start using.

In the picture below you will find a short guide to all the main functions of the program:
- To view letters go to the "Folders" tab;
- To manage folders, use the toolbar on the left side of the window that opens;
Today, dozens of companies offer e-mail services, and these are only the largest in the Russian Internet. All of them are equipped with web interfaces that allow you to work through a browser, but it is too early to discount universal email clients, they are still in demand.
Setting up Outlook
Microsoft Outlook is a popular, easy-to-use application that makes it easy to organize personal and group work on the Internet. The program is used for exchanging mail, scheduling business meetings and assignments, maintaining a list of necessary contacts. It is one of the most popular, which is well deserved. It was developed by Microsoft Corporation, the author of the well-known set of office applications and many other programs and digital technologies. But for correct operation, the program must be configured depending on the used mail service. Setting up Outlook is quite simple, even an inexperienced person can handle it. The article provides examples of configuration for Mail.Ru and Yandex. But first, a few words about other features of this program.
Outlook features
Business is not limited to the usual work with mail. In fact, it is a multifunctional organizer.
- Contacts. A convenient folder where all the necessary email addresses and phone numbers are stored. Often users enter birth dates here for contact persons.
- The calendar. Used for planning important events and meetings.
- A diary. Information about Outlook is automatically saved here.
- Tasks. With this function, you can save important tasks, tasks and assignments.
- Notes. The program resembles a loose-leaf notebook. Suitable for recording reminders and various information. As you can see, the program has many interesting and useful options besides the usual receiving and sending mail.
General setup
If you use specialized mail, for example, corporate work or from a provider, Outlook setup consists of the following items:
- Open the application, find "Accounts" in the "Service" menu and click on them.
- Click the "Mail" tab, then "Add". A window will appear on the right where you need to select "Mail".
- Enter the last name and first name of the owner mailbox.
- Add the required address in the "E-mail".
- Specify POP3 in the "E-mail servers", and write the required mail domain in the lower fields.
- In the "Login to the Internet mail" in the "Account" write the username and specify the password on the appropriate line.
- Save all actions with the "Next" and "Finish" buttons.
Ordinal setting
The sequential configuration of Outlook is as follows:
- Switch on the program. In the window that opens, select "Email Accounts".
- Then click on "Add new", then "Next".
- Select POP3 from the server list.
- In the line "Enter your name" enter your personal data, in the "Email address" enter your email address, opposite the "User" and "Password" specify the full name of the mailbox, the password for accessing it. On the empty fields of the server of incoming and outgoing mail, type mail / your domain name... Confirm the changes with the "Next" button.
- Then click on "Other settings", select "Outgoing mail server" and check "SMTP server requires identity verification".
- Save by clicking "OK".

Setting for Yandex
Yandex began to provide e-mail services in 2000. Since then to this day this post service - one of the most popular in runet. Yandex easily provides its customers with the ability to exchange emails, regardless of the provider and the connection to the network of their opponents. Most often, Outlook for Yandex is configured using the POP3 protocol. This is done quite simply. So, setting up Outlook mail is done as follows:
- Start Outlook.
- Go to "Service", select "Account Settings".
- In the window that appears, click on "Create".
- When "Create an account" opens, mark "Manually configure server settings or additional server types", then "Next".
- In the new window, select "E-mail", then in the "Internet e-mail settings" type the following: your name, which the recipient will see when he receives a letter from you, his mail address. In the required fields, specify pop.yandex.ru as incoming, smtp.yandex.ru as outgoing. In the "User" indicate your username on this provider. For example, if the address [email protected], then only the first part needs to be entered. Enter your own in the password line.
- In the "Internet e-mail settings" on the "Outgoing mail server" mark "SMTP server" and the bottom line "Similar to the server for incoming mail".
- Then in the "Advanced" select an encrypted connection and the function of saving a copy of the correspondence on the server.
Save with the "OK" button. Setting up Outlook for Yandex is complete.

Setting up for Mail.Ru
Mail.Ru, another leading company in the Russian segment of the Internet, like many others, started out with just a simple email and search engine. Setting up Outlook for Mail.ru is not difficult. Follow the instructions below carefully. Setting up Outlook mail shouldn't take long.
- The entry type is IMAP.
- In the incoming mail "Hostname" - imap.mail.ru, "User" - the full address of the personal mailbox. Enter the password in the required field.
- In outgoing mail everything is the same, smtp.mail.ru in the line "Hostname".
- IN " Additional settings"Activate" Use SSL ", in" Server port "dial 993 - for incoming letters. For outgoing, change only "Server port". You need to write 465.

Outlook Express
It is believed that Outlook Express is a kind of light version of the classic Outlook. This is partly true. They have one developer, and Express was shipped with the OS from Microsoft until 2003. With the release of Windows 7, distribution stopped.
Their differences are that the classic was part of microsoft package Ofice, while Express was preinstalled on the operating system. The latter also lacks various additional functions. Setting up Outlook Express consists of the following steps:

- Launch the application, open "Service", "Accounts".
- Select the "Mail" tab.
- In "Add" we click on "Mail".
- Specify the name or alias that the recipient will see in the From line.
- Enter your e-mail and "Next".
- Select POP3 in the list of servers for incoming mail.
- Specify parameters for outgoing mail.
- In the "Account" type your mailing address.
- Enter your password.
- Click "Next" to complete the settings.
Until recently, Outlook Express was the standard email program for Windows computers. With the emergence of competitors represented by The Bat! and Thunderbird, and with the advent of web-based interfaces for email servers, their former positions were lost. But even now Outlook Express is considered one of the most respected email clients among users, especially in the corporate segment.
Configuring Outlook Express for Popular Mail Services
Let's dwell on the three most famous webmail services: ukr.net, yandex.ru and mail.ru. Any of these services can be operated using both POP3 and IMAP protocols. Since IMAP is user-friendly, in this article we will be configuring mail accounts in Outlook Express using this particular protocol.
Configuring Outlook Express to work with ukr.net
In order for mail programs to collect mail from the ukr.net server, you must first enable this action in the mailbox settings:
- Click the settings icon to the right of the mailbox address.
- In the drop-down panel, select the "Mail programs" item.
- Set the Use IMAP and SMTP switch to ON.
- Click the Save Changes button.
Allow mail clients to access the mailbox via IMAP and SMTP
You can now customize Outlook Express.
- In the "Service" menu, select "Accounts".
 From the "Service" menu, you can call the account editor window
 - On the right side of the account editor is a vertical row of buttons. Click the Add button, and then select the Mail… type.
 In the account editor, you can add data for both mail and newsgroups
 - The New Mail Account Wizard will open. Enter your name and click Next.
 Enter the first and last name that will be displayed in the "FROM" field of outgoing messages
 - Enter your email address on the ukr.net server and click Next.
 Enter the address of your mailbox on the ukr.net server
 - In the window for entering information about email servers, fill in the fields as follows:

- In the new window, enter the information about your mailing address. The address must be entered in full, indicating the ukr.net server. In this case, the mail address should not contain capital letters. Also enter the password in the corresponding field. If you want Outlook Express to remember your password and not ask for it every time you access the server, check the box next to Remember password.
 Here you can enter your password for Outlook Express to remember it
After clicking the Next button, a window will open congratulating you on the successful data entry. Click Finish to save the mailbox information to your mail program accounts. Outlook Express will connect to the server and offer to synchronize its folder structure. After that, you will be able to receive and send messages via ukr.net mail.
We pick up and send letters through mail.ru
On mail.ru, you do not need to pre-configure the mailbox settings on the server in order to allow mail programs to work with it. Instead, we need to change the account properties in Outlook Express.
Creating an account for a mailbox on mail.ru is completely similar to how we created it for ukr.net. Only instead of the mailbox [email protected] we specify the mailbox [email protected]. The difference is also in the other names of the servers for incoming and outgoing messages. In the corresponding window, select the IMAP protocol, but for the incoming mail server we write imap.mail.ru, and for outgoing mail - smtp.mail.ru.
 For incoming mail, imap.mail.ru is used, and for outgoing mail, smtp.mail.ru
After saving the data of the new account, it remains only to configure some additional properties. To do this, in the window of the account editor, select the line with the mail.ru mail, click the "Properties" button and perform the following settings:

After that, Outlook Express will request a tree of your mailbox folders on mail.ru and will be ready to work with this mail server.
We work with yandex.ru mail
Setting up an account for yandex.ru is carried out in the same way as we did for mail.ru:
- Create an account for the mailbox [email protected].
- In the window of information about servers, we indicate, respectively: the IMAP protocol, the server of incoming messages - imap.yandex.ru, the server of outgoing messages - smtp.yandex.ru.
- In the properties of the account on the "Advanced" tab, select ports 465 and 993 and check the boxes that SSL connection protection will be used.
- On the "Servers" tab, we specify that our server requires authentication and configure its parameters.
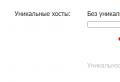
There is one nuance - you need to allow mail clients to access messages in the mailbox settings on the Yandex-mail server itself. Click on the settings button and select "All settings".
 To get into the settings for mail programs, click on "All settings"
In the menu on the left, select "Mail programs". Check the "From imap.yandex.ru server via IMAP protocol" checkbox. By default, this checkbox is enabled for IMAP and disabled for POP3. After checking the box, Outlook Express is completely ready to work with Yandex-mail.
 In the item "Mail programs", permissions to work with the server are removed for mail clients
Video: Configuring Outlook Express for Yandex Mail
How to determine where the message base is located
To determine where the mail program message base is located, you need to:
- Open Outlook Express settings.
- Go to the "Service" tab.
- Press the button "Message bank ...".
 The button "Message bank ..." will show the location of the message database
By default, messages are stored in the program settings of the user profile. But by clicking the "Change ..." button, you can select and save any directory on your computer as a folder with Outlook Express mail.
 Usually emails are stored in the user's profile
Where Outlook Express Accounts Are Stored
In contrast to the message base, the data of configured accounts are saved by the program in the system registry in the HKEY_CURRENT_USER \\ Software \\ Microsoft \\ Internet Account Manager \\ Accounts section.
 Each account has its own branch with parameters
For each account there is a separate subsection, which lists the parameters of incoming and outgoing servers, names of mailboxes.
How to disable compression of messages in the mail client
If you use your mail client for a long time, then be prepared that after a while Outllok Express will persistently offer you to compress messages to free up space on your hard disk. This usually happens as soon as the number by running the program exceeds one hundred. If, in response to this offer, you click "Cancel", the program will intrusively offer to do this every time you close the client. If you agree, then for a while she will calm down, but then she will ask again to repeat this procedure.
 If you click "Cancel", then this window will appear every time you exit the program
In the fifth version of Outlook Express, it was possible to cancel the compression request from the settings window in the "Maintenance" tab by unchecking the "Compress messages" item. But Microsoft removed this feature from the settings in version 6. The only way to get rid of the compression suggestion is to change a parameter in the system registry that counts the number of starts and is called Compact Check Count.
 The Compact Check Count indicates that Outlook Express has been launched 3 times on this PC
To in automatic mode reset the counter, you must create text file with an arbitrary name (in our case, resetcount) and the reg extension, in which to write the following lines:
- Windows Registry Editor Version 5.00;
- ;
- "Compact Check Count" \u003d dword: 00000000.
Then you should create a bat file that will make changes to the registry from the resetcount.reg file. This is also a regular text file, in which you should place the line: regedit / s (path to file) \\ resetcount.reg.
Add this file to autoload and it will reset the Outlook Express start counter to zero every time the OS boots, thereby saving you from a window with a message about compressing messages.
Outlook Express is not without its drawbacks. But at the same time, it remains a simple and successful aggregator of messages from multiple mailboxes. It is easy to install and easy to set up accounts, which means it is too early to write it off.
Setting up Outlook Express
The e-mail program, without exaggeration, provides your connection with the entire world of computers and their owners. Apparently, this is why there are slightly more settings here than in the previous programs that we studied. But that shouldn't scare you. For the purpose of this book, I describe only the most necessary operations out of all the many possible, assuming that you will never need all of them.
Well, what you want to use, you will learn for yourself based on the knowledge and skills that you acquire by reading this book and using the built-in help of the program. For initial work, you can not configure anything at all, using already existing settings, the so-called settings default. I will describe the settings that allow me to work better with mail.
So, setting up Outlook Express.
This is done using the window Options, which is called from the menu Service? Options (fig.5.5).
Figure: 5.5. Outlook Express Options window
General tab
On startup, immediately open the Inbox folder - a very useful checkbox that allows you to see all your incoming emails at once. However, switching between folders in the area Folder list is very simple - by clicking on desired folder (This action is called selecting a folder).
In the area of Posts you will see all the letters that are in the selected folder.
Attention!
Select a folder, letter, message - click on the folder, letter, message.
Notify when there are new newsgroups - in this case, the program, using a special window, will inform you about the arrival of new information from various subscription sites.
By default, Outlook Express itself already has a subscription to some Microsoft servers. And whenever you use the services of any resources on the Internet, you will be offered a subscription to news and mailings.
This is one of the aspects of online business.
I recommend that you be very selective about such subscriptions. Experience has shown that subscribing to them is really easy. Alas, it is difficult to unsubscribe later, that is, to refuse these subscriptions. And they go to you due to your traffic, and therefore, for your money.
Personally, when interacting with Internet resources, I always carefully look out for the text "Subscribe to the newsletter" and remove the check mark already standing in front of such a text. Not sure if it always helps, though.
In frame Sending and receiving messages everything seems clear.
Deliver mail at the start of work means checking your mailbox when loading Outlook Express.
Check for new messages every ... allows you to set the time period for checking your mailbox. Here we need to clarify something. The connection between your computer and your ISP can be via a telephone line or a dedicated one.
A dial-up connection is the cheapest, but it involves the seizure of this line for the entire time of working with the provider. In the case of such a connection, it is more reasonable to carry out the function of checking your mail on your own, without relying on the initiative of the computer.
Reading tab
I think that the default parameters will suit most program users. You can only pay attention to the button Fonts. It allows you to choose the font that displays all the messages that you read. If you check here Read all messages in text format, then, apart from the text in the letter, you will not see anything, but you may be sent some kind of multimedia letter with a picture (Fig. 5.6).

Figure: 5.6. Outlook Express options. Reading window tab
Tab Notifications
This tab defines the behavior of the program in cases when you receive letters with a read receipt request. If you yourself want to know whether your letter has reached the addressee, that is, you want to receive a notification that it has been read, you can also configure this function here (Fig.5.7).

Figure: 5.7. Outlook Express options. Window Notification Tab
If you would like to receive a read receipt for your letter, select this option. But you need to keep in mind that you will receive a notification only if your subscriber has not prohibited this operation (paragraph Never send a read receipt). If you check the operation Display notification requests, then Outlook Express will ask for your permission to send such a notification and only after your permission to send it.
Sending messages tab
This tab allows you to define the actions of the program when sending your messages (Fig. 5.8).

Figure: 5.8. The Sending messages tab of the Options window
In frame Sending messages there are such parameters.
Save a copy in the Sent Items folder - saves copies of your sent emails. This way, you can always see which of your emails really went to their destination. You will have to periodically clean this folder, that is, remove copies of sent letters to other folders or delete them.
Send messages immediately - when this item is included, immediately after writing outlook emails Express tries to connect to the ISP and send a message. It makes sense to enable this option when you have a permanent connection to the provider. If you are connecting using a telephone line, then it is better to disable this option. In this case, you will have to use special tool Deliver mail on the toolbar. Using this tool will allow you to simultaneously check your mailbox with the provider and send all letters prepared for sending.
Automatically enter recipients into the address book whose letters the user answers - after being included in your address book, all addresses will be entered to letters from which you reply. Highly useful function... We will talk about the address book in the "Address Book" section.
Include original message text in reply - this checkbox allows you to insert the original message text into your reply, which you can edit. With intensive correspondence, it is easier to follow its content. The format of the original message that is included in your letter, you can choose yourself in the frame Format of messages sent team Setting up plain text? The indentation of the original text by ... characters when replying and sending. The character used to mark the lines of the original message is selectable.
Create message tab
This tab allows you to define the font, that is appearance your messages (Figure 5.9).

Figure: 5.9. The Create message tab of the Options window
In frame New message font you can customize the type of font used to type your message. In principle, you can do this while typing your message, but setting the font in this field will save you time later.
In frame Business Cards you can ensure that your business card is included in outgoing emails.
A business card is a vCard file with your contact information from the address book. To create a business card, create an entry in the address book with your own data, in the menu File point to Export and select Business card (vCard).To add a business card to a message, while editing in the menu Insert select Business card.
Signatures tab
Checkbox Add signatures to all outgoing messages allows you to do exactly what it says: add a basic signature to all your outgoing messages (Figure 5.10).

Figure: 5.10. The Captions tab of the Options window
Checkbox Do not add signature to replies and forwarded messages allows replies and forwarded messages handle in a special way, which is sometimes very useful.
To create a signature, click on the button Create. The signature name will appear in the signature field as Signature # 1.
Since such a name for a signature requires a strong memory and lack of a vivid imagination, it will be useful to rename it to a vivid and better memorable one. To do this, select the formal name, click on the button Rename and type a new name for the signature.
You can have several signatures for different occasions. But in order for the computer to be able to figure out what's what, you must declare one of them as the main one. It will be inserted into emails by default. To do this, select any signature and click on the button Use as default.
After all this, you can use the buttons Apply or OK.Let me remind you, the button Apply allows you to fix all the settings made on this tab without removing the window Options. Button Additionally will allow you to match your signatures to your accounts if you have more than one.
Spelling tab
Frame Options - includes a spell check before sending a message, unlike Word, in which spelling can be included directly when typing.
I find this mode very useful and regret that mail servers do not have such a service, which leads to situations of increased blood circulation - especially when you read your already sent emails. But this is exactly the situation about which the proverb says: "What is written with a pen cannot be cut out with an ax" (Fig. 5.11).

Figure: 5.11. Spelling tab of the Options window
Suggest replacements for misspelled words turns on the mode when you can see options for replacing an incorrect word in the context menu if the computer recognizes this word. In addition to the general dictionary, the computer creates the Custom.dic user dictionary during operation. In it, you can include words that you think are correct, but which are not in the main dictionary. This is especially true of proper names. To edit this dictionary, use the button Edit user dictionary. You can replenish the dictionary from context menu team Add.
Frame Always skip when checking spelling allows you to cancel the spelling check in some cases, which allows you to save your nerve cells, but also excludes situations of self-assertion, when you with good reason can say: "Well, this machine is stupid, it doesn't know such simple things!" Joke.
Connection tab
Frame Internet connection usually configured when configuring the browser Internet Explorer... If you use the button Change ..., you thereby change and internet settings Explorer, what is better to do directly in it (Fig. 5.12).

Figure: 5.12. The Connection tab of the Parameters window
The Prompt on connection change check box remote access - indicates that if there are multiple dial-up connections, Outlook Express will display a message prompting you to disconnect the broken connection. This item is only meaningful when connecting using a telephone line.
Checkbox Break the connection after sending and receiving messages - Forces the computer to disconnect the Internet connection after you click on the toolbar button Deliver mail and the mail will be delivered. Makes sense when connected using a telephone line.
Security tab
Frame Virus protection allows you to at least to some extent protect yourself from viruses (Fig. 5.13).

Figure: 5.13. Security tab of the Options window
However, this defense is very illusory.
Rather, Outlook's antivirus capabilities can be described as ways to detect viruses on your machine.
This includes the Warn if applications try to send mail on my behalf setting.
The idea behind enabling this option is that the earlier you find a virus on your computer, the better: the more likely you are to get rid of it with the least amount of loss.
A very important rule - do not be overly curious.
Do not disclose unknown attachments (these are letters with paper clips).
And adhere to the rule yourself: if you attach something necessary to the letter, do not be too lazy to mention it in the body of the letter so that your recipient does not solve the problem: did you send it or did the virus catch on?
Many no longer even think about it: it is attached, but a friend does not write anything about it, which means that it must be deleted.
Well, if at all a stranger sent something in the attached file - kill without regret!
From the book People's Tips and Tricks author Klimov A From the book Working on a laptop author Sadovsky AlexeyOutlook Express Outlook Express is the most simple program of all. It is free and installed on the system by default along with Internet Explorer. When you first start Outlook Express, it will automatically prompt you to set up an account. It should be noted that this is easier to do than any other
From the book Windows Registry author Klimov AlexanderOutlook Express Replace Title in Outlook Express Find or create the string parameter WindowTitle under HKCUIdentities (** Identity ID **) SoftwareMicrosoftOutlook Express5.0 where (** Identity ID **) is your
From book 200 best programs for the Internet. Popular tutorial author Krainsky ISpam Bully 4 for Outlook / Outlook Express Vendor: Spam Bully (http://www.spambully.com) Status: commercial Download page: http://www.spambully.com/download.php Distribution size: 5 MB. The utility uses a filter based on more than 35,000 typical spam messages. Spam Bully 4 allows
From the book Working on the Internet author Makarsky DmitryMail program Outlook Express There are many mail programs. Let's begin our acquaintance with them with Outlook Express (Fig.4.4), which is part of the operating windows systems and is most likely already installed on the user's computer. By the way, one of the disadvantages of postage
From the book Windows Registry author Klimov AConfiguring Outlook Express Before configuring Outlook Express, you need to find out certain parameters that need to be set: address of the user's mailbox; incoming message server; outgoing message server; account (this is the name of the mailbox
From the book Self-study guide for working on a computer author Kolisnichenko Denis NikolaevichOutlook Express Replace title in Outlook Express For Outlook Express 4 Find or create the following string parameter: HKEY_CURRENT_USERSoftwareMicrosoftOutlook ExpressWindowTitle. Create new line or change existing record to yours. By removing the WindowTitle section, you will set the default title value for
From the book Popular tutorial for working on the Internet author Kondratyev Gennady Gennadievich17.4. Using Outlook Express Outlook Express, like the Internet Explorer browser, is included with Windows, so it is installed on any computer with the specified operating system. No matter how scolded this program, it should be noted that it is quite convenient, especially for a beginner
From the book Yandex for everyone the author Abramzon M.G.Outlook Express This is me, mail client Pechkin, I downloaded letters for your boy. Only I will not open the attachments for you, because you do not know the settings. From the animation of the future The most significant inconvenience of web-based mail servers is the senseless loss of
From the book With a computer on you. The most necessary author Egorov A.A.2.5.1. MS Outlook and MS Outlook Express To work with the mail server, you need to set up an account. Run the program, select Accounts from the Tools menu. Next, you should fill in the following fields (Table 2.1). In addition, in the properties of the account (Internet Accounts) on
From the book Undocumented and Little Known windows capabilities XP author Klimenko Roman Alexandrovich7.2.1. Configuring a mailbox in Outlook Express (Windows XP) Mailbox properties are configured in Outlook Express using a special wizard. It usually appears when you first start the program, and you can also call it by selecting the Accounts option in the Tools menu. In the opened window
From the book Computer - It's Easy! author Aliev ValeryOutlook Express Like Internet Explorer, Outlook Express is included as standard operating system Windows and is a mail client designed to send and receive letters from a mail server, such as, for example, www.mail.ru. Outlook Express has much fewer rundll32.exe options,
From the book How to tame your computer in a few hours author Remneva IrinaOutlook Express Another program, the settings of which will be considered, is the standard mail client Outlook Express. Like the section about Internet Explorer, this section will only contain information about settings that cannot be accessed using the standard
From the author's bookOutlook Express passwords Passwords for all Outlook Express identities are stored in the registry. This is done under the HKEY_CURRENT_USERSoftwareMicrosoftProtected Storage System Provider "your account security identifier (SID)" Data branch. By default branch access system registry
From the author's bookSetting up Outlook Express The e-mail program, without exaggeration, provides your connection with the whole world of computers and their owners. Apparently, this is why there are slightly more settings here than in the previous programs that we studied. But that shouldn't scare you. Within the
From the author's bookOutlook Express Outlook Express is one of the most famous mail programs, i.e. programs that are used to work with mail in in electronic format... The majority of advanced e-business users (apparently, this does not apply to us) use The Bat. This
After you have registered your mail account for an efficient and comfortable work with your correspondence, you need to use special mail programs that make our life much easier.
In this article, I will walk you through the process of setting up the Microsoft Outlook Express mail program and describe in detail all the steps required for this.
When we start Outlook Express for the first time, we see the following window:
The first thing we need is to enter our name in the name input field, here you can enter any name or nickname you like. It will be displayed in the From field of this letter.
After the name field has been filled in, the "next" button will light up, click on it and see the following window:

here, in the field for entering the e-mail address, we enter the e-mail you registered, here it is important to enter it accurately. After entering the address, click "next" and get to the next window:

In the field for selecting the server of incoming messages (1), as a rule, the POP3 protocol is most often used. So, first, select it, in case of an error, try to select another protocol, IMAP for example. POP3 is used to store the mailbox on the user's computer, and IMAP is used on the server.
In the field (3) server of outgoing messages, you must also enter the address of this server.
In my case, the data for the incoming and for outgoing server the same, but this is not always the case, as a rule they are different.
After entering all these data, go to "next". Please note that all these three fields are required, moreover, the performance of your mailbox will depend on how correctly you fill them in. Therefore, here you need to correctly enter all these data.
After the transition, we get to such a window:

In the field "account" we enter the username of your choice, to enter the mail, as a rule, you basically only need to enter a username here, but in some cases it is also necessary to enter a domain, for example: [email protected]site, here it is already individually. But first, I recommend trying to just enter the login, without any domains.
In the "password" field, enter the password you invented, you can also check the "remember password" checkbox so as not to enter it constantly. Let's move on. The following window appears in front of us:

where we are congratulated on successful mail setup. We press "done". And we check the efficiency of the mailbox. To check the mailbox, you must press the key combination Ctrl + M or press the key:

or select the menu item "Tools"\u003e "Deliver Mail"\u003e "Deliver Mail".
Any difficulties, questions? Write in the comments. How can I help.
Related entries:
 PageRank: what it is, types, features, how to check and increase
 How to learn to maintain a page on VKontakte so that it looks beautiful and solid?
 Basic filters of search engines Yandex and Google: diagnostics and treatment of PS sanctions Yandex filters how to check
 Tips and tricks for setting up traffic
 What you need to know about Periscope and why is it important?


