How to open pictures from an iPhone to a computer. How to copy photos from iPhone to Windows computer, Mac. Using Image capture
Because the Apple iPhone does not allow expanding internal memory, many users have to periodically clean it from unnecessary information. As a rule, most of all the places on the phone are occupied by the photos, which can be deleted from the device by first transferring them to the computer.
Today we will talk about a variety of ways to transfer digital photographs from your phone to your computer. Each of the presented solutions is simple and allows you to quickly cope with the task at hand.
Method 1: Windows Explorer
First, let's talk about the standard method for transferring pictures from a phone to a computer. An important condition: iTunes must be installed on the computer (although it is not needed in this case), and the phone is paired with the computer (for this, on the smartphone, at the request of the system, you will need to enter the password code).

Method 2: Dropbox
Absolutely any cloud service very convenient to use for exporting images both from iPhone to computer and vice versa. Consider further actions using the example of the Dropbox service.


Method 3: Documents 6
Such a useful type of application like file manager, allows not only to store and run on iPhone different kinds files, but also quickly access them on your computer. The method is suitable if both the iPhone and the computer are connected to the same Wi-Fi network.
- If you have not yet installed Documents 6 on your smartphone, download and install it for free from App Store.
- Start Documents. In the lower left corner, open the tab "Documents"and then the folder "A photo".
- Click the ellipsis icon next to the image, and then select "Copy".
- An additional window will appear on the screen in which you need to select which Documents folder the image will be copied to, and then complete the transfer. Thus, copy any images that you want to transfer to your computer.
- Now you need to enable Wi-Fi syncing on your phone. To do this, click in the left upper corner by the gear icon, and then open the item "Wi-Fi Drive".
- Set the slider to about "Enable" in the active position, and then pay attention to the URL that appears - it is on it that you will need to go in any web browser on your computer.
- When you click the link on your computer, you need to give permission on your phone to share information.
- On the computer itself, a folder will appear where we transferred our photo, and then the photo itself.
- By clicking on the file, the picture will open in full size and will be available for saving (click on it right click mouse and select "Save Image As").


Method 4: iCloud Drive
Perhaps the most convenient way to transfer images from an iPhone to a computer, since in this case the export of images to the cloud will take place entirely in automatic mode.
- First you need to check if the photo upload is active on the phone. To do this, open the settings, followed by selecting your Apple ID at the top of the window.
- In a new window open the section ICloud.
- Select item "A photo"... In the new window, make sure that you have activated the items ICloud Music Library, and "My Photo Stream".
- Download and install iCloud for Windows on your computer.
- A folder will appear in Windows Explorer "ICloud Photos"... In order for the folder to be replenished with new photos, the program will need to be configured. Click on the arrow icon in the tray to open the list of running applications, right-click on iCloud, and then go to the item Open iCloud Settings.
- Check the boxes next to the items ICloud Drive and "Photos"... To the right of the second item, click on the button "Parameters".
- In the new window put checkboxes next to the items ICloud Music Library and "My Photo Stream"... If necessary, change the default folders on the computer where the images will be uploaded, and then click on the button "Done".
- Make changes to the program by clicking in the lower right corner on the button "Apply" and close the window.
- After a while, the folder "ICloud Photos" will begin to replenish with images. The download speed will depend on your internet connection and of course the size and number of images.


Method 5: iTools
If you are not satisfied with iTunes, there are wonderful functional analogs for this program, for example, iTools. This program, unlike software from Apple, is able to transfer the photos contained on the device to a computer in almost no time.


We hope, with our help, you were able to find the best way to transfer images from Apple iPhone or other iOS device to your computer. If you still have questions, ask them in the comments.
To free up device memory, files must be transferred to a different type of storage. It is more difficult to download photos from iPhones to a PC due to the individuality of the operating system. The instructions below offer several ways to clear the phone memory by freeing up the built-in storage. This will transfer data from the iPhone using five main methods. Each of them will be optimal for different types devices for apple products.
USB connection, via cord
The method offers to transfer files from your iPhone to a PC. To do this, you must use a USB cable from the charger. When connected to a computer, a standard window will pop up, which appears when connecting such devices.We select the function of viewing files and find ourselves in the phone menu. One or more disc-folders are presented. To download a photo from an iPhone, you need to select the files that you want to save on your hard drive. Unplug the cord through the "safely remove hardware" button in the lower right corner of the computer.

Important! Copying photos in this way is only possible "one way", and downloading them back to the phone, as on Android OS, will not work.
ITunes Assistant
There is an iTunes program for syncing with an Apple device. The download takes place from the official website https://www.apple.com/ru/itunes/download/, after which the installer.exe is launched. The user's language is also selected there. After opening the program, connect the device via USB cable. The program will ask for permission to access - on the phone, answer with consent.
After detecting the phone, click on its icon (in the top panel) and in the menu on the left, select the items in the settings section that you want to download.

A reminder will appear that tells you where to save the pictures from your phone.

Detailed information is offered by the website https://support.apple.com/ru-ru/. From here, install the iCloud Music Library. You will need it to import the data, and you can also transfer it using another option for the PC. It has several nuances, depending on windows versions.

The folder data appears in the center area. You can select multiple pictures or upload them in folders. On the phone, they are displayed as indelible photos in "from my computer". You can delete them by canceling the synchronization by unchecking the box next to this action, or by downloading an empty folder to your iPhone. It will not be reflected in the photo library.

If you need to copy documents or other files, use iCloud Drive without syncing. To do this, go to the section " common files”And select the ones you want to save by clicking“ Add ”. The adjacent window will display the list of documents. Thus, you can copy data from your computer to your phone.
To transfer photos to your computer using the program, go to the tab with photos. In the center window, specify the type of synchronization. The highlighted lines mean that the phone has already been connected to the program on another device, and synchronization with it has been established. When connected again, all files will be displayed. The "apply" function means enabling the sync function with the selected parameters and the type of download.

When reconnecting, you must synchronize manually to transfer required files on computer. If iMedia Library is installed, then the download is carried out in the background immediately after connecting the phone to the computer and starting the program.

By the way, you can listen to music in the program, even if it has not been downloaded to your phone, but you have once dried it online, for example, through social networks... From the media library, you can individually download it to your iPhone without buying it from the App Store.
WI-Fi sync
This “one less cord” method is interesting for those who want to transfer files purchased from the App Store to others. apple devices... Also, the method is convenient for quick copying of photos. Install iTunes on the device you want to pair your phone with. Connect, in the menu on the left in the browse item, select the type of Wi-Fi synchronization.
FIRST sync your phone back with your PC, and only then turn it off. Apply the settings on your PC and disconnect from it. On iPhone, select photos to display on your computer. Next, observe the process of wireless synchronization when connecting to one wi-Fi networks both devices.

Every time you just plug your phone into power, turn on iTunes and watch the automatic data transfer. If you disconnect the power supply, syncing will continue: note the battery icon (it is not charging) and the sync icon (it is still present).

iCloud storage
Apple's own disk storage. You can sign in to your account at https://www.icloud.com by entering your Apple ID and password. They are the same as when entering the App Store on iPhone. In the phone settings, the top line will remind you of your login, and the password can be restored on a PC or reset via the phone. This method is convenient in that, being anywhere in the world, you can show the landscape of the images to your family, who have access to your iCloud.
To transfer files, install iCloud by downloading it to your phone from the App Store. 5 GB available for storage. Sync your phone to disk or manually copy the pictures you want. All phone data will be displayed on the PC, and the gallery can be downloaded at hDD.
On the site, in the iCloud Drive and "Photos" tabs, you can view the available files, upload pictures from your PC to the cloud, etc. In the iCloud "Photos" section, you can view the galleries you have taken with your iPhone that have not yet been transferred to the cloud. The function works with the media library, which must be activated in the phone settings.
For those to whom the phone offers to buy additional storage, an important tip. Since it is impossible to delete the downloaded pictures from the iPhone, they will have to be replaced with freshly downloaded ones. Therefore, the storage is constantly increasing and data transfer from the phone is not possible. Especially cunning users download via sync empty folderswith no images inside. They are also empty on the phone and take only 13 Kb, which is optimal for working with storage.
Yandex.Disk with unlimited space
It's virtual storage, just like iCloud, but with extended storage space. The drive must be linked to a mailbox. Download Yandex.Disk in the App Store, enter your login and password from the mail. Open the vault and select the photos to upload, or choose automatic sync, then all the pictures will be automatically uploaded to virtual disk Yandex. You can create multiple folders for sorting.
It will be displayed on the phone as mobile version browser. On a PC, go to mail and open disk storage. From there, you can view and upload photos from your iPhone to your computer. For example, the following image shows a screen of the moment the disk was installed on the phone. He was thrown into storage and viewed on a PC. Yes, there is no limit for your photos, even upload two thousand to the cloud.

By the way, disk spaces can be switched between each other by sliding your finger. If there are more than one, just swipe left or right from the screen.
The method and process of downloading pictures is affected by the software version, so make sure that the update is installed on your device and the latest version programs. With a parallel update (connected from a PC), the phone will not temporarily shut down. Some functions are displayed on the screen in different ways: synchronization can occur in the background, displayed in iTunes, or not at all. It is also important to keep track of the actions performed earlier - some devices do not support new versions of applications, they conflict due to the OS.
In recent years, it has made tremendous progress: even the very first models of smartphones from Apple took very decent pictures - the latter are quite impressive in photographic capabilities. What is at least technology worth Live a photoavailable on iPhone 6 and 6S?
However, users have to pay for the outstanding quality of photos with free memory of the gadget. One live photo alone weighs about 4 MB, and users bring hundreds of them from vacations. Every now and then, iPhone owners have to transfer photo albums from the device memory to their computer. Fortunately, this is fairly easy to do.
Users who frown in disgust at the word “ iTunes ", should be satisfied with the fact that you can transfer photos from iPhone to computer without using this program. Actually, most iPhone owners use this method - there is no need to alarm iTunes for no good reason.
To download a photo to a PC, you need a USB cable. After you prepare it, follow the instructions:
Step 0 (preliminary). Create a folder on your computer where you will upload the photos and remember its location.
Step 1... Connect your smartphone to your PC with a cable.
Step 2... Wait a few seconds for the computer to detect the iPhone. After you hear the sound characteristic of a USB connection, you can proceed.
Step 3... Select the photos that you want to upload to your computer and drag them into the prepared folder.
You can transfer images to Mac through other programs, for example, iPhoto or Aperture, however, this software is not built-in - it must be installed separately.
We drop the photo through iTunes
Transfer to computer via iTunes you can only those photos that were uploaded to the device in the same way. In the application " A photo"Albums with such pictures are marked with the caption" From my computer».
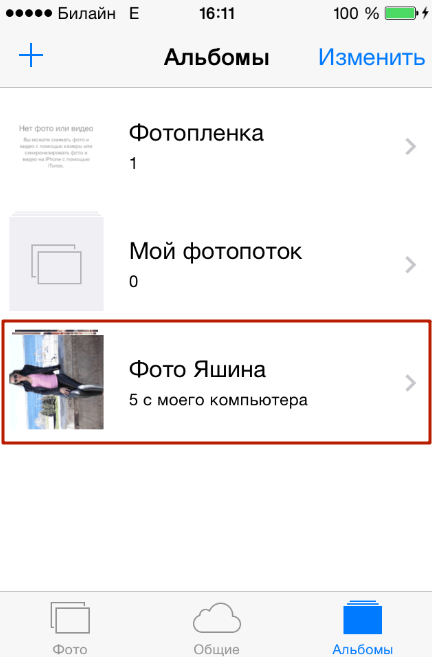
Camera images cannot be exported via iTunes.
If necessary, upload the photo back to the computer using iTunes proceed like this:
Step 1... After connecting the iPhone to the PC, run iTunes.
Step 2... Go to the gadget control menu - to do this, click on the icon with the smartphone image.

Step 3... In the block " Settings"Select the tab" A photo».

Step 4... Make sure that opposite " SynchronizeThere was a check mark. If not, put it on.

Step 5... In field "Copy photos from:"press on " new folder "(Someone will have -" Images"). In the drop-down menu, select the item " Select folder».

Step 6... Find on the computer the folder from which you downloaded the photos to the iPhone memory, and select it.
Step 7... Click the " Synchronize”And wait for the operation to complete.
There is another, unpopular way to get through iTunes photos stored on iPhone - extract from backup .
All local copies of data are stored in the computer memory: for example, on Windows 7 they are located at StartUsernameAppDataRoamingApple ComputerMobileSyncBackup.and on Mac - at usernameLibraryApplication SupportMobileSyncBackup.Backups in a computer folder look something like this:

To work with backups iTunes need a special software - a utility will do, say iPhone Backup Extractor, which you can download. The need to master new software is the reason for the low popularity of this method.
We drop photos through cloud storage
Usage (such as Google drive , Yandex.Disk, Dropbox) Is the fastest way to upload a large number of photos from your device to your computer. However, this method has a significant flaw: mobile applications of almost all cloud storages are installed only on iPhones with an iOS version older than 8. Owners of iPhones of the 4th modification cannot count on this method, because on iPhone 4 iOS 8 is not installed at all, but on 4S - works with a creak.
The method is very simple - let's look at an example Dropbox:

This should be the result:
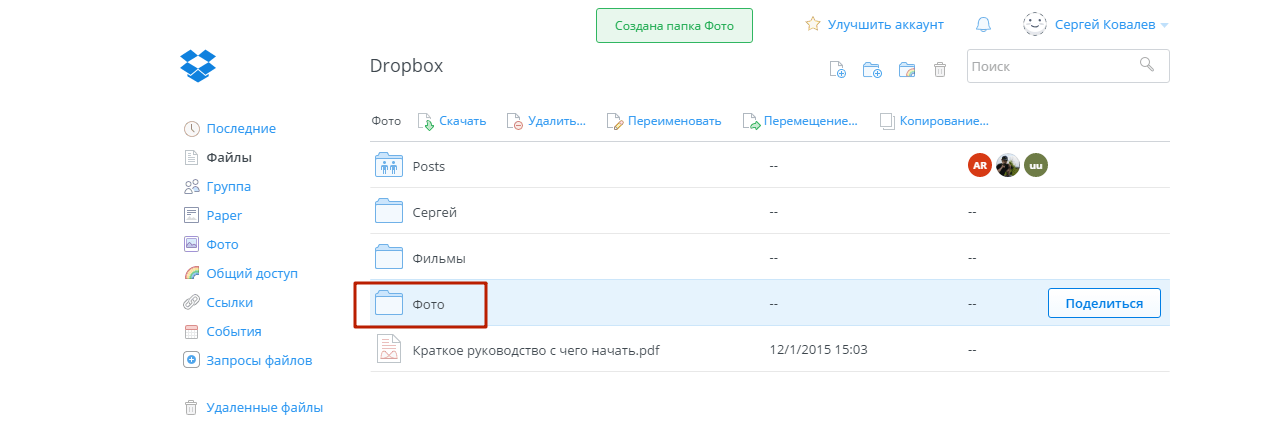
Step 2... Download Dropbox from the App Store and log in with the same registration data.
Step 3... Open the folder " A photo" at mobile application and through the button " Download»Upload photos there.
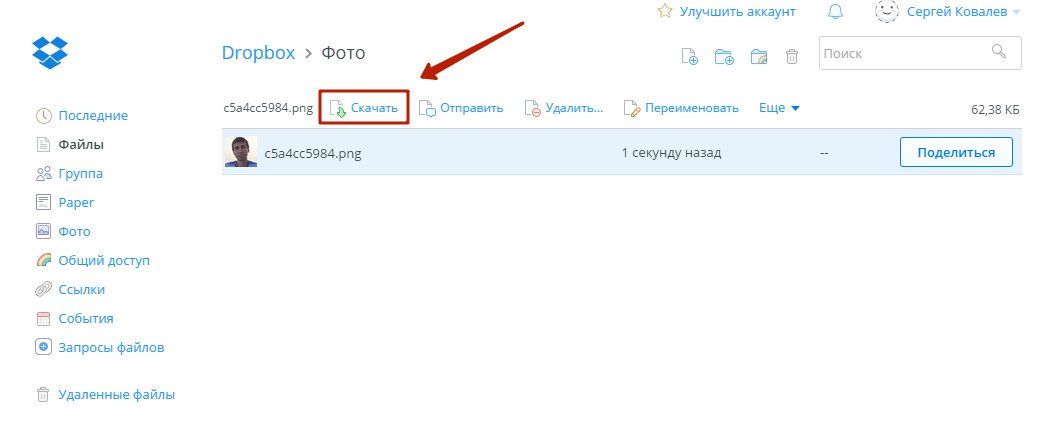
Step 4... Go back to your computer and open the folder " A photo" On him. You will see the iPhone photo is inside.
Step 5... Click the " Download»And wait a couple of seconds for the download to complete.
About cloud storage Google drive and Dropbox is described in more detail. Users of devices with iOS 8.1 can consider the application as a "middleman" iCloud Drive, which is installed in iPhones by default, however, this application has a significant disadvantage compared to other storages - there is very little free space.
Uploading photos via mail and other methods
If your iPhone is configured email, then you can transfer a photo to a computer in just a few elementary steps:
Step 1... Go to the application " A photo»And find the picture you want.
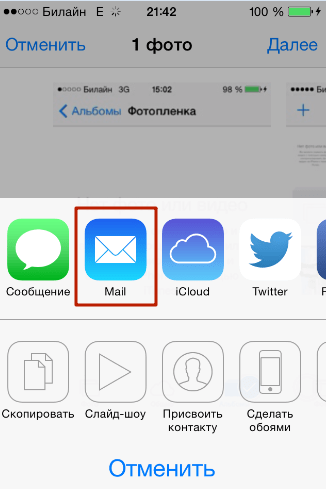
Step 2... Click on the arrow icon located in the lower left corner.


Step 4... In the menu that appears, click on the icon " Mail". The photo will be attached to the email.
Step 5... On the next screen, enter the email address to which you will send the email. You can use a mailbox that belongs to you, but is registered on another service - now it is in the order of things when one person has several mailboxes.

Step 6... Click " Send message».
Step 7... A message will appear to remind you that you are sending a letter without a subject - confirm your intention by pressing again " Send message».

Step 8... Go to mailboxwhere you sent the photo from your computer and download the image.
In addition to e-mail, in a similar way, you can use any of ( In contact with, Facebook): you just need to send an image from your smartphone as a message, then open the message history on your computer and upload the image to your hard drive. However, this method is suitable only when you need to download a small number of images - in one message “ In contact with»Fits a maximum of 10 photos.
Conclusion
Transferring photos and videos is the only operation related to the exchange of data between iPhone and computer, which does not require launch iTunes... When the "apple" gadget is connected via USB, the iPhone is defined as a digital camera, which gives the user the opportunity to copy pictures from the device's memory to the hard drive directly. However, even in the absence of a USB cable at hand, an iPhone user has a lot of options for how to upload a photo to a computer - for this he can use his email or social network account.
iPhone can take high-quality pictures and videos, so the device is often used as a complete replacement for a digital camera. To free up phone memory, you need to transfer your photos to your computer regularly. And how to transfer photos from iPhone to computer, now we have several convenient ways moving photo.
1. How to upload a photo via iCloud to a computer
Each iPhone comes with 5GB of free storage cloud storage in Apple's iCloud. This memory space can be used for reserve copy options such as phone settings, contacts, and of course photos and videos.
Step 1. Download iCloud for Windows. Open the iCloud for Windows app.
Step 2. Click the "Options" button next to "Photos". Select iCloud Music Library.
Step 3. Click the "Finish" button, and then - "Apply". Turn on iCloud Music Library on all your Apple devices.
After you turn on iCloud Music Library, you can add the iCloud for Windows icon to the status bar to track your upload and download progress. Right click on the status bar in Windows Explorer and turn on iCloud for Windows.
2. Transfer photos from iPhone 6/7/8 / X to computer via iTunes
ITunes itself is not designed to work with photos. However, it is possible to synchronize photos using the "Photos" program.
Step 1. Launch iTunes. Connect iPhone. Click on the icon of the connected device in iTunes.
Step 2. On the panel on the left side of the iTunes program window, click "Photo". Check the "Synchronize" item. Activate the Selected folders item. Check the box that we created earlier and put the photo there
Step 3. Select a directory for synchronization. Run the "apply" command. And carries out the transfer of photos.

3. How to transfer photos from iPhone to PC via mail
You can send to your e-mail photos, and then save them on the computer by opening the sent letter. This method does not require a third utility. And you need an internet connection. Secondly, it is inconvenient to send a lot of photos in this way.
Step 1. Go to the Camera Roll and press the Select button. We select the photos to be sent by mail.
Note. You can attach only 5 photos at a time.

Step 2. Press the button in the lower left corner (square and up arrow) and select Mail from the menu that opens. Now it remains to enter your email address and send a letter.
4. Synchronizing a photo using the "My Photo Stream" function
Apple has released a very useful functionwhich can directly access your photos without connecting the iOS device directly to the computer. However, you should pay attention to the fact that this method works exclusively with photographs. To transfer the captured videos, you will have to use another method.
To access this function, you must first activate it. To do this, click "Photo Stream" on your smartphone or tablet through "Settings" - "Photos and Camera" - "My Photo Stream".
Now, to view your photos on a Windows computer, download the iCloud for Windows software and sign in with your account.
An iCloud folder will appear on your computer, in which all photos taken with your smartphone will automatically appear.
5. The easiest way to transfer photos from iPhone 6/7/8 / X to computer via Tenorshare iCareFone
Tenorshare iCareFone software has 5 parts, the user will be able to transfer to the "File Manager". Very simple and easy. While the software will scan data on iPhone 6/7/8 / X by file type, you can quickly find the data you want to sync. Not only so, if you want to move to your computer from the iPhone and not all the data in use, this is the right and free choice.
Step 1. Download and install iPhone program Care Pro from the official website. Run it. Connect your iPhone to your computer with a USB cable.
Step 2. In the main window of the program you will be asked to select the type of data transfer. Of the 9 data for transfer, you need to select "Photo" by putting a tick in front of this item. You can transfer photos, music, iBooks, videos, notes, and calendars.

Step 3. Next, click "Export". Data export to PC / Mac will start, first you need to select the required files and click "Export". By default, these files are saved to a folder on your hard drive. You can also create a save folder yourself.
Apple phones are famous for their cameras.
It's no surprise that their owners are constantly taking thousands of photos. It is physically impossible to store them all on the device, so you have to copy them to your computer's hard drive.
Due to the nature of Apple products, this procedure is not so obvious. This article will give instructions on how to transfer photos from iphone to computer. It will also highlight the specifics of copying photos on OS X, Windows and using iPhoto.
How to Transfer Photos from iPhone to Mac
Operating iOS systems and OS X are different high degree integration. However, the connected device does not appear as a physical storage medium. For those who do not want to use the iPhoto service, the opportunity will come to the rescue Capture Images.
This utility is built into OS X and allows you to move photos and other images from your phone, both to a specific directory and to the required application. We find using the search SpotLight... To do this, just start typing the name in the search bar.
The program will show all the photos and actions available on the device. It is possible to set up automatic actions when the device is connected (copying to a hard disk and deleting originals, for example). Otherwise, this is actually an ordinary folder with which you can do all the same actions.
How to Transfer Photos from iPhone to Windows 8, 7 and XP Computer
On a computer by windows management freely installed iTunes... However, you can copy photos without synchronization, because this OS is able to recognize the phone as a physical medium.
We connect the device to the computer using our USB-wire. The system will offer a quick way in automatic mode.
In the startup menu, just select the item "Import images and videos"... The illustration shows the steps from iPad, transferring pictures from iPhone is no different.
In my opinion, it is easier to open the device after detection as soon as you see windows window Explorer, which prompts you for a number of actions to take. For this we choose "Open device to view files".
However, the message may not appear, or the user may automatically close it.
In this case, you can use windows Explorer... First you need to open "Computer»And double-click on the icon of the connected device.
In addition, when the computer "sees" your iPhone, then in the "My Computer" section, in the left column under the list of your displayed hard drives your device will be displayed by the name you awarded the iPhone when setting up in iTunes. It will appear as a media device, with its own camera icon. If for some reason you did not open the device with the paragraph above, you can do it now by clicking on it with the mouse.
This will open up access to the built-in data storage (Internal storage).
It will contain the root directory of the DCIM device and then to a specific folder for each name (I have this “860OKMZO”, in which the images will be stored.
You can treat these files the same way you would any others. Copy to disk, email or delete.
How to Transfer Photos from iPhone to Computer with iTunes
iTunes itself does not involve working with photos. Usually for such purposes they use the programs built into OS X - iPhoto. The program opens automatically after the connection to the PC has been made. It can also be opened using the dock panel. In the main window, just select the photos you need to import and click Import Selected.
You can import one or all photos at once. After the transfer, the program will offer to save or delete photos from the device.
Deleting the original images will free up space on the device and speed up the creation of a backup. All photos in iPhoto are sorted by date added, album, and device.
How to transfer photos from iPhone to computer over Wi-Fi
In addition to connecting by wire, photo transfer can also be done wirelessly. The process of transferring photos using Wi-Fi is not fundamentally different from other methods. That is, it happens the same. Just before starting the transfer, you need to sync via Wi-Fi. This is done as follows.
First you need to connect your device with a cable and open iTunes. On the left side of the window, in the block "Devices" you must select the iPhone or iPad to sync. In the tab "Overview" in the block "Parameters"You will need to put a checkbox opposite "Synchronization. devices via Wi-Fi ".
Now the gadget will automatically sync when it is on the same network with a computer with iTunes installed. Synchronization can be started from the phone via the device settings. For this in the menu "Basic" need to select an item "Sync with iTunes over Wi-Fi".
Data synchronization will occur automatically if certain conditions are met:
- Computer and iPhone are connected to the same internet network
- iPhone is on and the battery is charged or connected to charger
- iTunes launched on PC
The presence of synchronization is indicated by the icon in the phone's tray.
The device now appears as connected. Consequently, all actions on it can be performed in the same way as when connecting using a conventional cable - twisted pair.
Note! If there are any problems with the connection, then you should first restart the computer, and then the device itself. If no progress is found, then the reason may lie even in the router itself. To do this, you need to restart it.
How to transfer photos from iPhone to computer via e-mail
If the iPhone is configured with email, then photos can be sent via e-mail, and then transferred to a computer.
Open the app "A photo"located on your iPhone's home screen.