Change the hard drive with the operating system. How to replace a hard drive without replacing the OS. What HDD are used in a laptop
- Replacement steps hard disk computer should be performed in the following sequence:
- Step 1. Disconnect the power cable from the computer's power supply; if the power supply is equipped with a switch, put it in the "off" position.
- Step 2. Remove the left and right covers system unit (in old blocks, you must first unscrew the 4 bolts with which the cover is attached to the block; in new blocks, latches or special fasteners are used).
- Step 3. First, disconnect the power from the hard drive, then the ribbon cable.
- Step 4. Unscrew the bolts that hold the hard drive. Sometimes the hard drive is held in place using special clips.

Advice
Some types of system units provide special mounting compartments hard drives... In this case, you should first disconnect the hard drive compartment itself and only then unscrew the bolts holding hDD.
- Step 5. Carefully remove the hard drive from the mounting bay, taking care not to damage or scratch its case.

Installation of a new hard drive occurs in the reverse order.
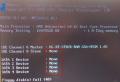
When connecting multiple hard drives, you need to pay attention to the connection of the SATA cable: the order of determining hard drives in the system is carried out depending on the number of the connected connector.
Many active laptop users faced a breakdown of the hard drive or simply wanted to replace it with a more capacious or faster one. Replacing a hard drive on a laptop is not something impossible, a regular Phillips screwdriver is enough and no more than 20 minutes of free time.
Often, when a hard drive breaks down, it is impractical to repair it, and after saving or restoring the necessary information from it, it is better to replace it.
Signs of an imminent hard drive breakdown:
- Clicks and strange noise appear. This nuisance indicates a quick breakdown of the reading head or damage to the device chip. Physical damage or power surges could be the cause.
- A message appears on the screen that the disk is not formatted. One of the sectors may be destroyed or damaged. The reason may be a virus, power surges or important system files deleted due to inexperience.
- Unintentional system reboot. The system may be affected malwarewhich returns to the boot sector.
- An alert appears that the device was not found. It is possible to erroneously change the boot priority in the BIOS or infect the system with a virus.
You can find out where the hard drive is located by turning the device upside down. There is often no need to completely disassemble a laptop. In most models, the hard drive is accessed by opening the cover on the back of the case.
Let's take a step by step how to remove a hard drive from a laptop:
- Copy everything important files on removable media;
- Disconnect the laptop from the network and turn it off;
- We take out the battery;
- Turn over and find a rectangular cover (sometimes, but very rarely with the inscription HDD or the hard drive icon);
- We unscrew the bolts (usually 4 pieces) and remove the plastic cover;
- We find the hard drive located in a metal basket and secured with a pair of bolts;
- We unscrew them;
- Before removing the hard drive from the laptop, we find a special tab. Pull gently on this tab, removing the disc from the connector, then unscrew the bolts and take the disc out of the basket.
Installing the HDD in a laptop is carried out by performing the procedure in the reverse order. If you are lazy to read or do not understand anything, then watch the video.
HDD vs SSD
According to statistics for 2016, one of the most popular procedures in service centers is replacing an HDD with an SSD. Increasingly, laptop owners are replacing outdated magnetic hard drives with modern solid state drives. Solid State Drive was launched in 2009 and immediately gained popularity. The SSD differs from the usual Hard Disk Drive, whose job is to rotate, in a fundamentally different operation based on microcircuits.
Before installing an SSD on a laptop, it is useful to weigh the pros and cons.
Advantages of SSD over a conventional hard drive:
- lower power consumption;
- improves the speed of work several times;
- improved ergonomics;
- does not make noise and does not heat up;
- there is no vibration.
Among the disadvantages are:
- higher cost;
- small capacity;
- less MTBF (number of write / rewrite cycles) relative to old HDD.
Before removing the hard drive from the laptop, make sure that you have copied the necessary information from it, otherwise you will need to connect the old hard drive separately.
And here is a short video that clearly shows what the replacement of a conventional hard drive with a solid-state drive will give.
Change the hard drive to the iMac
Replacing a hard drive with an iMac has some differences, but installing an SSD yourself is not difficult. Rumors that aimags have special drives that can only be replaced in a specialized service are greatly exaggerated.
Before starting work, stock up on T8, T10 screwdrivers and a pair of suction cups. Apple does not use the usual screws and bolts, but prefers hex sprockets.
Step-by-step process of replacing HDD to SSD in iMac:
- Unplug the cord from the socket;
- The monitor glass is held in place by magnets. We attach the suction cups to the glass at the top of the screen and detach it with a smooth motion;
- We unscrew the matrix. Use a T10 screwdriver to unscrew the side hexagons, there should be 8 of them. The sides of the aimag are magnetized, so tweezers can be used for the convenience of removing the stars;
- We carefully detach the matrix. Lift up, disconnect the wire from the motherboard, then lift it a little higher and disconnect the ribbon cable and another wire;
- Using a T8 screwdriver, unscrew the hexagons holding the HDD;
- We take out the old HDD and detach it from the holder;
- We install a new hard drive and assemble everything in reverse order.
The screwdrivers can be magnetized for easier removal and tightening of the hex.
The subtleties of working with MacBook Pro
Replacing HDD with SSD in MacBook Pro has recently become widespread among users. This is not surprising, because replacing HDD with SSD in a laptop is due to the desire for faster and more comfortable work of your favorite, and Apple fans are no exception.
For esports players, installing an SSD in a laptop is a must.
After the upgrade, you will receive:
- productivity increase;
- noise reduction;
- weight reduction;
- increase in operating time;
- the device will heat up less.
To replace an SSD on a MacBook, there may be various reasons, breakdown or lack of space, and it is not at all necessary to contact service centres... Anyone who can work with a screwdriver can replace the hard drive on a MacBook Pro. Below you can see very detailed video to replace SSD diskbut on a MacBook Pro.
We prepare the PH0 and T6 screwdrivers and get to work:
- We turn the device over to the back side and unscrew the screws.
- Carefully lift the lid and remove it.
- The hard drive is held by a 2-piece mount, unscrew the one closer to the HDD.
- Since it is necessary to carefully remove the hard drive from the laptop without damaging it, the manufacturers have provided the device with a special tongue. Pulling the tab, raise the hard drive and remove the second part of the mount.
- Replacing a laptop hard drive requires caution. Carefully detach the cable connecting the hard drive to the board.
- We unscrew the hexagons located on the sides and screw them into the new SSD.
- We install the new media and reassemble everything in the reverse order, the replacement of the hard drive in the laptop is completed. Old hard HDD can be used as an additional external drive.
Before installing the SSD in the laptop, please turn off the power and remove the battery.
Do not forget to copy the necessary files from the old hard drive. If the new SSD is empty, you will need to reinstall the system.
Before changing the hard drive on a laptop, check the warranty for it. If the warranty period has not yet passed, then you should clarify whether you will lose the warranty in the event of self-replacement.
Before removing the hard drive from the laptop, carefully examine it for any cables and wires. The train going to motherboard, is very thin and tends to break at the most inopportune moment.
Before replacing the hard drive on a laptop, decide on the dimensions of the new drive. If they are much smaller than their predecessor, then for a more convenient installation of the SSD in a laptop, you can drill several additional holes in the mounting bracket.
Back up important files from time to time and don't forget about diagnostics.
The bottleneck in laptop performance is usually a 2.5-inch 5600 rpm hard drive. Therefore, there is no better upgrade for a laptop than replacing its mechanical drive (HDD) with solid state drive (SSD). The task is not trivial, but it raises many questions for the average user. If the thought of reinstalling Windows and all your programs, and then their fine tuning, confuses you, don't worry. After reading this article, and after an hour of work on replacing the disk, you will be able to enjoy the positive results of the upgrade.
Checking laptop before upgrading to SSD
The process of upgrading a laptop to replace a hard drive with an SSD is pretty simple. You just need to remove the installed HDD from the laptop and replace it with an SSD. If your laptop has a removable bottom panel, then you are the luckiest. If you have an Ultrabook or your laptop does not have a removable bottom panel (for example, it can be sealed), then the process of removing the hard drive becomes somewhat more complicated. In your laptop manual, you can usually find the right way to replace the hard drive. Removing a hard drive can sometimes be very difficult, but I'm sure these laptops already have an SSD installed. Laptops where you can't just remove the back cover are hardly lower or mid-range laptops. This is most likely a premium tier, which in most cases does not need such an upgrade.
Removed laptop back cover
For all other cases, the process of removing the back panel and removing the hard drive from the bowels of the laptop should not raise questions. Let me touch a little on the theory that you may need to remove the disk.
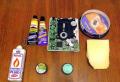
What do we need
SSD... Well, first of all, you need the SSD drive itself with the correct form factor for your laptop. The SSD must be large enough in case you want to clone your current HDD. I advise you to choose a disk with a capacity of 250 GB or more, and preferably 500 GB, if the price tag of 10,000 rubles does not scare you. For most people, 250GB on a laptop should be enough for all tasks. Do not assume that this volume will be enough for you to store your personal video archive or music collection. The laptop is not for these purposes.
Adapter for HDD / SSD connection to the laptop. If you want to clone your hard drive, then you cannot do without an external adapter. For this, the following is suitable:
- Adapter for SSD / HDD 2.5 "to CD / DVD drive;
- External adapter adapter controller for connecting hard drives HDD / SSD and optical drives CD / DVD. USB 2.0;
- Adapter for connecting HDD / SSD SATA III to uSB ports 3.1.
Such an adapter will be useful not only for connecting an SSD and organizing the cloning process, but also turns your current hard drive into external storage, for example, to save your personal video archive or for backup.
Small Phillips screwdriverto take off back cover laptop and free up the hard drive, then mount the SSD.
Separate external hard disk (optional). You may need a hard drive of the same size or larger to store folders that will not fit on an SSD. It can also store complete backup system just in case something goes wrong.
Preparing your HDD for cloning
We'll do a little prep work on the current disc while it is still in production.
1. Make a full system backup. How to create a system image backup in Windows 10 is as follows. In the control panel, open the section system and safetythen open the section Backup and recovery... On the left, follow the link System imaging... Decide where you will store the image and go through all the steps of the wizard.
 System imaging
2. Moving large folders... Chances are, your hard drive is larger than a brand new SSD. Therefore, we move large folders that contain photos, videos, games and personal documents to an external drive or another location in order to try to leave as much disk space as possible for cloning to an SSD. I usually copy to hard drives on a computer that has much larger hard drives than a laptop. If you do not have a computer or adapter with external drive, then I advise you to copy to network drives on the Internet, for example, Google Drive or.
3. Delete unnecessary files. Extra space to be occupied installed programs, we do not need anything. If you can easily reinstall them on the SSD in the future, then feel free to remove them from the HDD. Large files that you no longer need, but they are just because there is space, it is also better to delete. The cloning operation will be much faster. Additionally, I recommend cleaning the system from unnecessary system junk and temporary files free program CCleaner.
We connect the SSD
We are now ready to connect the SSD to the laptop for the first time for the cloning process.
1. We connect the SSD to the adapter. Depending on the type of adapter, install the SSD into the CD / DVD adapter case, or connect to the USB to SATA adapter, and then connect to the laptop.
 We connect the SSD to the USB adapter
2. Initializing SSD. If Windows after installing the driver does not display the new drive letter in Explorer, open Control Panel and run the snap-in Disk management... In snap Disk management You should see the SSD as a new drive under your current drive. If it is not initialized, click right click mouse on disk and select Initialize disk.
 SSD initialization
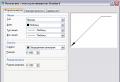
3. Resize the current disk partition... We need to reduce the size of the current disk if it is larger than the SSD. Let's bring it to equal or smaller size. In snap Disk management check the primary partition of your current drive (usually it is C: drive, or another with installed system Windows) so that it is no larger than the SSD. If it is not, then you need to compress it. Right click on the section with operating system and select Shrink Tom... A window to compress the current disc will open. Push Shrink.
 Compress C:
This operation will resize the primary partition to leave the reclaimed disk space as unallocated space. But you shouldn't worry about the unused space, during the cloning process we will resize the partition and include this unallocated space in the SSD volume.
After all operations, you must restart the laptop.
Clone HDD - 3 ways
Finally, the time has come for the most important operation, for which we have already gone so much.
Choosing a disk cloning program.
We have several ways here.
1 way
For this, I use the EaseUS Todo Backup Free utility, which is free for personal use, has a user-friendly interface, and also optimizes migration to SSD. Download the utility and run it. Selecting the button Clone, specify the source and target disk, then follow the instructions of the wizard and get a copy of the hard disk on the SSD.
 EaseUS Todo Backup Free
Please note that you must check the option Optimize for SSD when selecting the target disk. This will ensure that the sectors are aligned on your SSD and improves your chances of booting from the SSD after the cloning process.
On the next window, you can compare the original drive with the SSD. As you can see below, EaseUs automatically adjusts the unallocated space on the current disk for different disk sizes.
 Starting the cloning process
Click the button Proceedand then turn off the laptop when the operation is complete.
2 way
Since the release of the operating room windows systems 7, a built-in utility has appeared, using which you can clone the system to a new disk. We have already made a system image, in the chapter I described the process of creating a system image. Then you need to select the link Create a system recovery disc.
 Create a system recovery disc
We need this disk to load the System Restore Wizard. After the recovery drive is ready, we change the HDD to an SSD (we'll go over this process in the next section) and boot from the recovery drive. We select the image that was created earlier and indicate that we will restore the current disk. After this operation, you will have a copied hDD disk to your SSD.
3 way
I want to offer a utility that is a whole combine for copying disks and partitions - Macrium Reflect... Opportunities free version we have enough for the eyes, so go to the official website and download the utility. If you want to get acquainted with all the capabilities of the utility, then right on the site there is a comparative table of versions and their capabilities.
Launch the downloaded agent and start downloading WinPE components.
 Agent Macrium Reflect
After installation, we start the program window and create a system image or clone a disk, depending on whether you have an adapter for connecting external hard drives and extra hard the disk needs the volume in question. If so, then we clone the current disk to the new SSD. If not, then create a disk image and restore it to the SSD.
 Macrium Reflect
To perform all these operations, we need to create a recovery disc in the Macrium Reflect application itself. This is very easy to do. In the application menu, select Other Task - Create Rescue Media... We will open the disk creation wizard, in which you need to complete all the operations step by step and create a disk with WinPE on board. This disk will boot and perform a system image restore.
 Rescue Media Wizard
Replacing HDD to SSD
1. Turn off the laptop and remove back panel. Turn off your laptop and then unplug the power cable and other connected cables, including the SSD. Then unscrew the back cover of the laptop and remove it to access the hard drive.
2. Remove the screws that secure the drive. You need to unscrew 2 or 4 screws before you can remove the drive.
3. Lift the hard drive up to 45 degrees and pull it out to myself.
4. Install the SSD in its place and put the laptop back in order.
SSD Boot Test
Moment of Truth: Turn on your laptop. It should load an order of magnitude faster and at the same time you will see all the contents of the desktop as it was before the upgrade. Moreover, all heavy applications should also now load almost instantly.
If you received a screen of death or a screen maintenance, choose Diagnostics – Extra options – Boot options... If after that the system does not boot, then the disk was cloned unsuccessfully, try to repeat all the operations again.
Now connect your repository with the archive folders created in the step and copy everything back. At the same time, you will be pleasantly surprised by the copying speed.
On budget computers, even with a good processor and other components, manufacturers sacrifice hard disk speed for the sake of economy, relying on volume.
Replacing the HDD in a laptop with an SSD will speed up the computer and, if desired, you can get additional storage if you purchase a special adapter.
What you need to know
- Before carrying out a replacement, you can attend to the transfer of the system. If you are planning to install a new OS, you can skip this point. Just drop important files to cloud service or a USB flash drive.
- If you want to change the drive while maintaining the system, then the new memory storage must be large enough to contain all the necessary information.
- If you have a new laptop with a valid warranty, you will lose it after opening the laptop yourself.
How to keep a copy of Windows
When replacing an old HDD with a new SSD in a laptop, many users think about how to transfer the system to a new drive. For this, special programs from laptop manufacturers.
Some of them:
- Acer provides the "Acer eRecovery Management" utility;
- at Sony, VAIO Recovery Center;
- Samsung has Samsung Recovery Solution 5;
- Toshiba satellite - "Recovery Disc Creator";
- HP Recovery Manager;
- Lenovo solution center;
- Asus has Backtracker;
- MSI Recovery Manager;
The list may grow over time. You can find and download new versions of programs from the official sites.
You can also use universal ones: Macrium Reflect Free, Macrium Reflect. They are supported on all Windows operating systems.
Each program has detailed instructions on the developer's website, but basically all the functionality is the same: launch the program, choose what and where to copy, wait until the process is complete. After replacing the disk, you will see the desktop as it was.
We start replacing the hard drive
Below we will look at an example of replacing a hard drive with an SSD in laptop Asus... If your laptop is from another manufacturer, that's okay, most models always have the same principle.
Before proceeding with the disassembly of the laptop, be sure to turn it off and remove the battery. And when working, try not to touch the components on the motherboard with a screwdriver or hands, even the slightest scratch can damage it.
Getting started:

If you decide to put new system, then use Windows 7 or higher, Windows xp and Vista are not designed to work on an SSD drive and there may be a drop in write speed. Also, the 10th and 8th versions of the system are most optimized for working on a solid state drive.
Otherwise, after you have installed the SSD, the OS installation will be no different from the usual one.
What to do with an old hard drive

1) The HDD can be installed as additional storage instead of a DVD drive. They have long lost their popularity and are practically not used.
To do this, you need a special adapter that is inserted into the drive seat. When choosing, pay attention to its height and width, since the dimensions disk drive depends on the thickness of the laptop itself. Also, the width of the adapter can also be different. The discrepancy between dimensions will not hurt work hard disk, but if you are a perfectionist, then this disadvantage will get on your nerves.
Connecting a hard disk instead of a drive is not difficult, usually an instruction is included with the adapter and necessary tools... This method of use will be optimal for replacing the hard disk without reinstalling the system.
2) Or, you can buy outer case with a USB adapter and use the hard drive as a portable storage device.
For people who deal with a computer at the user level, the diagnosis of "operating system replacement" often sounds like a synonym for wasting time.
You need to install Windows from scratch, reinstall everything required programs, waste time configuring them, and also debug the desktop for your convenience.
Developers computer systems thought out a clever way not to resort to reinstalling the axis in the event of fatal errors that make it impossible correct work systems.
This method is called "Create a system image". It allows you to copy a system image to an external medium (disk, flash drive) and, if necessary, revive your operating system in half an hour, regardless of the reason for resuscitation, be it replacing a hard drive or a fatal system failure.
Archiving
First, open the "Control Panel". Further on the tab "Computer data archiving". We head to "Create a system image". Next, choose the place where you want to write the image (hard drive, flash drive).
Then the choice is given - automatic archiving or at the user's choice. Dummies are advised to give the choice to the computer. Such archiving will take more time and space on the media, but it is guaranteed to transfer all settings to the image.
System recovery from an archived image.
Recovery can be done in two ways:
- 1.If the image is on a hard drive that is on the computer, then you need to go to the control panel, then use the "Recovery" tab, select "Advanced recovery methods". In the "Use a system image" tab, specify the location where the archive is located.
- 2.If the image is on a USB flash drive or DVD disc then you need to insert the disc into the drive and reboot. When the system boots, select the "Recovery" option and specify the path to the removable media.
Afterword
As you can see, thanks to this article, an ordinary user will be able to make a backup copy of the system, and, if necessary, restore his operating system, or transfer it to another hard drive without resorting to the help of a specialist.