Creating a FTP server client on a computer. Use FTP client FileZilla. Video: Working with the TFTP server - Emergency Recovery of the Firmware Routher
Most often users for sharing in network files large sizes Use mail or skype. However, when you need to send a photo archive or a movie, a few gigabyte, you cannot use these services. A public file sharing also creates some difficulties, such as waiting timer and speed limit. The best solution in this case is to create your own FTP server.
FTP (FILE TRANSFER PROTOCOL) is a data transfer protocol on the Internet and local computer networks. This is a program that executes the deleted connection to the selected folder to view and sharing files, including large sizes. Data exchange is possible from a computer to a remote server and between other FTP servers.
Data is transmitted without traffic encryption, so access to login and passwords can easily get attackers. To secure file transfer, it is recommended to use a TLS-protection protocol - FTPS, encrypting data.
Own FTP server has certain advantages:
- allows you to manage the server and its resources;
- provide users with different permissions;
- for it, it does not need a static IP address.
- no speed limitations;
- lack of payment by the host for its placement;
In accordance with what complexity will be access, software is selected. To create an FTP server for private use with minimal settings, free software packages will be fully suitable.
Microsoft In Windows 7, Internet Information Services (IIS) has been added to Microsoft, which provides sharing from the network to the folder highlighted for this purpose. Therefore, to create an FTP server for Windows 7, you do not need to additionally install software.
Install FTP Server
Some standard featureswhich are not as often used in Windows 7 are disabled by default. Therefore, to activate them, you need to perform a number of steps.
To create a FTP server on Windows 7, it is necessary:
- Press "Start" and open the section "Control Panel". For convenience of viewing, you can select "Minor Icons" mode.

- Go to "Programs and Components" section, where to select "Enable or disable Windows components".

- In the list of the opened menu, you need to mark the components that should be activated by putting a tick. This is the folder "FTP server", in it two items: "Extensibility FTP" and "FTP service", as well as the "Website Management Tools" folder, and in it- "IIS Management Console". To start clicking OK.

Configuring FTP Server
- Now you need to go through the "Start" in the "Control Panel".
- Find the Administration section and open in this section "IIS Service Manager".
- Go to the "Sites" tab by clicking on the name right-click, Select from the Add FTP Sites list.
- In a new window, you need to specify the name of the future FTP server, and the path to the catalog with its data. By the next setup step, you can go by pressing the "Next" button.
- The server parameters are now installed. In the IP address field, select the desired from the list. You can bind it to a specific address or make advanced access by selecting "All Free" item. This should be marked by the standard port-21. If you plan to constantly use the FTP server, you should put a check mark "Run FTP-Site automatically". Select the "without SSL" option, you can enable it if necessary later. Press "Next" again.
- The new window sets the type of authorization. In the "Authentication" item, you can allow the input for ordinary or anonymous users. Here you can configure the right for them. Press "ready."
After the installation is completed, a new FTP server will appear in the Sites section.
Configure Windows Firewall
Now it is necessary to configure Windows Firewall to open ports and operating services.
Log in to the "Control Panel" again, then "Windows Firewall". Find the "Advanced Parameters" section.

In it select "Rules for incoming connections". It is recommended to install passive mode for them. To do this, click on and enable FTP Server Passive and FTP Server (Incoming Traffic) rules. In the same way, for outgoing connections, enable in the corresponding section of the FTP-Server rule.

Connecting users
To enter the server users, they must be connected.
- In the Control Panel tab, open the Administration folder.

Administration section
- Find a section "Computer Management", then go to the "Local Users" folder. By right-clicking on the group string, select the "Create Group" function. In a new window, specify the name and short Description Groups, click "Create".
- Now you can connect users to the created group. In the "Local Users" folder, you right-click on the "Users" string and select the "New" menu list. Fill in the fields by entering the name and password, here you should check the ban on the password shift.
- To connect the user, you right-click on its account and select the "Properties" item from the list list, then the group membership tab and the Add button. Find the created group, add and press OK. This procedure must be executed for all server users.
- At the next stage, the rights of access rights to the working catalog are determined. To do this, go to the "Site" directory, click on the name right-click and open the "Properties". Next - the Safety Tab, in the Change item, specify the name of the group and click OK. Then you need to configure the rights for users.
- Log in to the IIS Manager by right-clicking on the FTP Authorization Rules, add the resolution rule. You can allow users to record and delete data, and you can only read.
Installing and configuring the server is complete. However, now you need to know how to go to the FTP server.
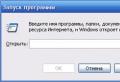
Standard windows functions Allow it easy. Just open the "My Computer" folder, then in address line Specify the path to the server.
Another way is to create a connection shortcut to the FTP on the desktop of the computer.
To do this, open the "Control Panel" for this, right-click the "Network Surroundings" section. In the tasks, select "Add a new item to a network environment", then click on the "Select other Network Placement" and "Next". Now in the "Network Placement" section there will be a label that you just need to drag the mouse to the desktop.
In this post, I will tell you how to install and configure protected FTP. Server (protocol Ftps.) on Windows Server 2003 (Installation and Setup for Others operating systems No different).
Do not confuse the protocol Ftps. with protocol SSH FILE TRANSFER PROTOCOL (SFTP.), Protocol Ftps. incompatible with the protocol Secure Shell (SSH).
Please make sure that you do not run on the server IIS FTP. service. If the service is running, then disconnect it because it uses standard ports FTP. Protocol.
Download the latest version of Filezilla Server. At the moment, the latest version is 0.9.39.
After you downloaded the file, run the installation of the program.
In the menu that appears, select the installation type "Standard" on click "Next\u003e".
The FileZilla and GUI Administrator Server Service will be installed.


After installing the server, we begin to configure it. Run the administrator console and connect to 127.0.0.1, which is LocalHost, to port 10050 (you specified it during server installation). 

Specify the server in accordance with the pictures. They speak for themselves.
As a result, we will receive a protected FTP server installed on port 21, which is used by default FTP servers. 
Set your greeting message to be displayed when connecting a new user. Turn on the option "Hide Welcome Message in Log". This option disables the recording of the welcome message in the server logs, which will reduce their size.
Note. When writing your welcome message, you can use special symbols and variables: % V. - The variable contains fTP version Server, and design %% - will be replaced by %

Use the "*" symbol in order for the FTP server to listen to all IP addresses in the system. If you have several IP addresses, then specify only those you want to listen.

To ensure greater security of the FTP server, block all incoming addresses by adding only those addresses from which connections are expected. IP addresses should be separated by a space. AT this example I allowed the connection with local address and from Google.com (209.85.229.103).

The following settings are in line with pictures:


Enable connections logging. You can also turn on automatic removal Connection log upon expiry of a certain period and establish a limit on its size.


Here you can set the limit on the speed of downloading and downloading. These settings are global and can be reconfigured for each user separately.


This is the main part of the instructions in which we will configure the SSL certificate to use FTPS. You can use a public certificate that needs to be purchased separately. But in this manual, we will use the built-in certificate generator.

Fill in all fields with your data by analogy with the pattern.
In the "COMMON NAME" field, specify your IP address or domain name if you have. And then click on the button "GENERATE CERTIFICATE"

Return to the SSL / TLS settings and specify the path to the certificate file and the key file.

Finally, set the settings for the promotion of suspicious users.

IMPORTANT! Before checking the connection, make sure that the ports 21, 990 and 3000-4000 are given exceptions in Firevol.
According to the numerous requests of readers, in this HOWTO we will consider in detail the installation and setting FTP. (File) Windows server on the example of the most popular - Filezilla Server.
The choice of FileZilla Server is due to the fact that it is one of the fastest and most reliable (when proper setting) FTP servers with graphic module Settings. The server is regularly updated and has good documentation in English.
Read more Installation and configuration Consider under the cut. Attention, traffic (many screenshots)!
Server Installation
Download the server installation program from its official site and run to execution. The first steps of the master are standard for most Windows applications, therefore consider in detail only the last two.
On the page Startup settings You will be prompted to choose how to start the FTP server:
- Install As Service, Started WITH Windows (Default) - Run the server as windows service while loading. This option is offered by default. The FTP server will be running automatically even if no user has logged into the system. It is recommended to choose this particular option;
- Install AS Service, Started Manual- The server will be set as a service, but will not start automatically. To start, you will need to enter the following command in the Windows administrator console: NET START "FILEZILLA SERVER"
- Do Not Install AS Service, Start Server Automatically - The server will not be installed as a service, but will run on behalf of the current windows User.. This option is not categorically recommended, because In the case of hacking, the attacker will receive the same rights and can harm the system.
It is also proposed to select the port that will listen to the administrative server interface. Default specified 14147 .
On the page Startup settings It is proposed to select a way to start an administrative interface:

- Start If User Logs ON, Apply ATO All Users (Default) - Run the administrative interface when entering any user in the system as a icon in the system tray. This item is selected by default;
- Start If User Logs ON, Apply To Current User - run an administrative interface when entering the current user system;
- Start Manually - Run manually. We recommend choosing this particular item.
Checkbox checkbox Start Interface After Setup Completes It will automatically launch the administrative interface of the server at the end of the installation. Do not remove the checkbox from here.
This is completed on this server. We begin to configure it.
Setting up FTP server
So, run the server and administrative interface if they are not launched.
You can start the server like this: Start — (All programs — Filezilla Server — Start Filezilla ServerOr with the help of the command:
NET START "FILEZILLA SERVER"
You can run the administrative interface like this: Start — (All programs — Filezilla Server — Filezilla Server Interface..
After starting the administrative interface, you will see a window with an offer to enter an IP server (leave for local 127.0.0.1 ), Administ port (if you changed it during installation, specify the correct option here, otherwise leave the default value) and password.

The default password is empty (it can be set in the server settings on the page), so immediately click OK. To go to the main window (click to enlarge):

Most of this window occupies a FTP server log, which will display detailed records of connected users and the transmissions initiated by them. At the bottom of the window, you will see the logins of all connected users, their IP addresses and the progress of downloading / downloading files. When you press the right-click login, you can disable the user from the server ( Kick User.), or block it access by IP ( Ban User.).
Open the server settings by selecting in the menu Edit. paragraph Settings.
General Settings

On this page you can replace the main port of the FTP server with 21 On any other if your provider blocks incoming connections on it. Here you can specify the timaouts in seconds, after which the user will be automatically disabled from the server. To turn off the timaouts set the value 0 . If you want to limit the maximum number of connected users, it can be done in the row Max Number of Users (by default installed 0 . There are no restrictions).
General Settings -\u003e Welcome Message
 General Settings - Welcome Message
 Here you can replace the standard greeting sent by clients when connecting to your FTP server. It is allowed to enter up to 1024 characters, each string must be no longer 75 characters.
Check the Checkbox checkbox Hide Welcome Message in LogTo reduce the size of log files by turning off the record of this message.
General Settings -\u003e IP Bindings
 General Settings - IP Bindings
 On this page you can specify the IP addresses of the network interfaces that the FTP server should listen. We recommend left * . Listening to all possible interfaces.
General Settings -\u003e IP Filter
 General Settings - IP Filter
 On this page, you can control the list of stolen IP addresses, i.e. Addresses accessing from which to the server will be closed (top field), as well as addresses that cannot be banned through the administrative interface (lower field).
Each address is entered from new String. On our example, the three of these IP addresses will not be able to connect to the server, and 192.168.98.187 it will be impossible to block.

If you have a router with NAT, then this is one of the most important pages for you. Check the Checkbox checkbox Use Custom Port Range And specify the port range (are allowed from 1024 to 65535), which will be used in the passive FTP mode to connect customers to your server. The minimum range is 100 ports, but it is recommended to specify at least 400. This range of ports you must arouse in the settings of your router (router). It is recommended to specify ports in the range from 30,000.
Here you must specify your external IP address. It is allowed to specify the host name, with which the server will independently determine your external IP address. Our example uses Dyndns.org service. If you have static external ip, just enter it in the field Use the favoring IP. If the IP is dynamic - use the dyndns.org service or the like and in the field Use the favoring IP Enter the received host name (as on our example).
Check the Checkbox checkbox (if it was not standing) DON'T USE EXTERNAL IP FOR LOCAL CONNECTIONS To prohibit the use of external IP with local connections. This will solve problems with NAT LOOPBACK on most routers.

On this page, you can enable the use of the FXP protocol, which allows you to transmit files between two FTP servers directly. By default, it is prohibited (flags are installed). If you need FXP support, uncheck flags from all checkboxes on this page.

Paragraph DON'T SHOW PASSWORDS IN MESSAGE LOG Allows you to hide user passwords from server logs.
Start Minimized Enable the start of the administrative interface in the twisted in the three mode.
The remaining settings of this page are not recommended.

Here you can change the port that listens to the administrative interface, as well as the administrator password.
Check the Checkbox checkbox Change Admin Password. And ask new password Administrator. Latin letters and numbers are allowed.

On this page you can enable logging logs (logs) of the server to the file by checking the Checkbox checkbox Enable Logging to File. Checkbox checkbox Limit Log File Size To give the maximum permissible file size. If the file exceeds the specified number, it will be cleaned.
Paragraph Log All to Filezilla Server.log Allows you to write all server logs in one file, and USE A Different Logfile Each Day Creates every day new file. magazine, so we recommend that this item. Chekbox DELETE OLD LOGFILES AFTER Includes automatic cleaning from old logs.
All logs will be stored in subdirectory Logs. Filezilla Server Installation Catalog.

Here you can set global loading and unloading limits. These limits will be applied by the server for all users.
To set the speed limit, put the point to the item Constant Speed \u200b\u200bLimit Of And specify a value in kilobytes per second.
In addition to this page, you can specify limits for each user individually in the user management module.

Some FTP clients support data transmission with compression. Compression can be enabled by checking the checkbox in Chekbox Enable Mode Z Support. Here the minimum and maximum compression coefficients are indicated. Be sure to check the checkbox in Checkbox Exclude Private IP Address Rangesthat turns off the compression when transferring files inside local networkOr with a local connection to the server.
Attention! Enabling compression may adversely affect the performance of the FTP server.

On this page you can enable automatic blocking on IP for users who misused password a certain amount of time. To enable these features, select the Checkbox checkbox. Enable Automatic Bans., in line Ban IP Address After Specify items permissible number incorrect password input attempts (minimum - 10), and in the string Ban For - Time in the clock that the intruder will be banned.
FileZilla Server allows you to create an unlimited number of users. For each user, it is possible to set your operating folder, access parameters, speed limits, etc.
To manage users in the menu Edit. Administrative Interface Select Item Users..

When you first start you in the section Users. It will be empty, so we have to create a user. To do this, click Add..

In the window that opens, specify the desired login (only Latin letters and numbers are allowed). Here you can also specify the group if they are already created. Just enter login and click OK..
Select Most this user In chapter Users.. You will be prompted to specify a working folder for it, so the page will automatically open.

Press the button Add. In the section and specify the directory on the disk to which the selected FTP user will receive. After that, highlight it in the list and click Set As Home Dir. This action will prohibit exit from this directory to the right to safety.
For each added directory, you can specify read / write rights, installing, or removing checkboxes from checkboxes.
Rights for files:
- Read. - Allow read, download files from the catalog;
- Write - Allow file entries to the directory;
- Delete. - Allow the deletion of files from the catalog;
- Append. - Allow file proof to the server.
Rights for catalogs:
- Create. - Allow the creation of subdirectories;
- Delete. - Allow the removal of directories;
- List - Allow Listing (View File List). Never prohibit this action (the checkbox must always be installed);
- Subdirs. - Disseminate the rights to subdirectories.
Now go to the page GENERAL. Set the password for the user by putting the checkbox in Chekbox Password. And prescribing a password.
Chekbox Enable Account Allows you to enable / disable the selected FTP account. Here you can set limits to the maximum number of connections for the user. Speed \u200b\u200blimits for the user are set on the page.
To delete the user, select it in the section Users. and press Delete.. Button Rename. allows you to change the username of the selected user (rename), and Copy - Cloning, i.e. Create a copy with another login.
After making the necessary changes, click OK.. User parameters come into force immediately.
Enabling anonymous access to the server
If you need anonymous access to the server, open the User Management window, add a user with login anonymous., Remove the checkbox from Chekbox Password. To disable the password request, on the page, select Home Catalog, which will be available to all, and set the right rights (do not forget to disable recording, software and deletion of files and directories). After clicking OK. Anonymous access to the server will be opened for everyone.
If you need to create an external FTP server, you can use the FileZilla program. If the FTP server is needed within the network easier to make sharing some folder using standard services.
If you have not downloaded the program, then do it right now. After installing and running on your screen, a small window will appear to log in.

The host for connection must be as 127.0.0.1, port 14147, password - empty.
Now we need to go to the settings of our future FTP server.
1. You must create a user to connect to the server from outside. Go to the "Edit" menu, then select the "Users" item

2. Jump the "Add" button and specify the username of the user (account) in the first field

3. Now you need to add a folder to which the user will connect. Click the "Add" button in "Shared Folders". I added a folder with wallpaper for desktop.

Password
If you want to specify a password for a user, just check the box next to "Password", and enter it.

Data transfer rate
If a specific user needs to limit the data transfer rate, go to the Speed \u200b\u200bLimits section.

IP filters
In order for other users to be able to connect to your server, create your own blacklist on the "IP Filter" tab.

Now press the OK button, and we try to connect to the server using any FTP client. I have passed the connection without problems, and I got into the folder with wallpaper.

But how to be if your friend wants to want, or some of the acquaintances? On the IP address 127.0.0.1 you can only connect you, which means you need to specify your current IP address. If no one and even you cannot connect along the real IP address, there are two options for which an error occurs.
Connection problems
1. Windows Firewall is enabled. By the way, because of it, the connection from the outside did not pass
2. The Internet works through the router. To do this, you will need to register the route to your local IP indicating 21 ports.
Turn off firewall
In Windows XP you need to go.
Register route in router
Unfortunately I do not know all the settings of various routers, but on the example I can show how it is done on ZyXEL. We go into the shell at 192.168.1.1, and then find the NAT section. In this section, you must specify the "FTP" service, as well as the local IP address of your computer with the FileZilla program (for example, 192.168.1.33 you can have another), do not confuse with real.

What happens after adding the rule? When you call the user to your real IP on the 21st port, the router will connect the user with the Filezilla Server program.
If the connection passed successfully in the log you can see a connected user, as well as look for what reason, one or another user could not connect.
GENE6 FTP Server v3.10.0.2
Developer: Gene6 SarlDistribution size: 4.01 MB
Spread: Conditionally free Gene6 FTP Server - one of the best FTP servers with advanced administration and high levels Safety of transmitted data. The program allows you to open data access for specific users or user groups through their accounts, manage access rights for files and directories and restrict access by IP addresses. In this case, several FTP virtual nodes can be created and the number of connections (for IP, domain, user) is limited, as well as the validity period of accounts. The possibility of more subtle configuration of access rights of specific users, for which it is easy, for example, to determine the maximum size of the files being downloaded to the FTP server, make some files in the open folder blocked or vice versa available, to determine the speed limits when downloading and downloading files, Set the intervals of the availability of the FTP server, etc. There is support for ODBC databases, it is possible to compress the transmitted data (MODE Z), and for exchanging important files 128-bit SSL encryption can be used. In real time, detailed activity statistics on the FTP server recorded in LOG files and visually displayed in text and graphic form. A remote administration tools are provided that allow you to add, modify, delete user accounts, as well as change all available domain settings remotely (as if the administrator was at the computer on which the server is running). It is possible to delegate administration to another administrator by creating a new account User with limited administrator rights. Connecting remote administration is encrypted using SSL and starts on its own custom port. The program (there is a Russian-language version) is presented in two editions: Standard and Professional. Home users are calculated by the standard edition, which allows the use of two domains with 25 parallel compounds. The demo version of the program is fully functional within 30 days, the cost of the commercial version Standard Edition It is 59.95 dollars on the developer's website you can download Russian-speaking documentation. The program includes two modules - the FTP server engine and the FTP administrator. The ftp server engine works like system service (that is, on the machine runs when download windows) The interface does not have and is responsible for switching on / disable the server, the FTP administrator provides access to the server settings and starts through the Start menu. The FTP server icon is always in the system tray, and by type of this icon it is easy to understand when the server is turned on when it is turned off, and when some user came into it.
To configure the FTP server, you need to run the FTP administrator and enter the administrator password (it is specified when installing the program). The admin window includes two panels - on the left, contains a list of custom elements, the structure of the selected element is revealed on the right. First of all, you need to create a domain by activating the Domains tab on the left pane, by calling the "New Domain" command from the context menu and entering the domain name. If an external IP address on the Internet is static and a domain name is assigned to him, then it is recommended to enter it as a domain name, otherwise you can specify any name. Here you can limit the maximum number of customers connected simultaneously to the FTP server (for example, five) and the number of connections from one of them (usually recommended to limit one or two connections from one IP address).
In the following two windows, where it will be about the IP address (by default there is a "*", which means for all IP) used by the port (the default 21st port is involved) and the types of logs, in the case of dynamic IP Address You need to leave the default settings. However, if there is a static IP address, you must enter it instead of the "*" symbol - exactly this address will be used by the domain. If you do not know your IP address, you can see it using the ipconfig command that runs from command line (Start\u003e Run\u003e CMD, press the Enter key, and then enter the command). If the IP address field remains "*", then each time you start the FTP server will automatically determine the address and assign the 21st port to it.
As for the last window, if you plan to open anonymous access to the FTP server, you should specify a home directory in it - that is, a directory on your computer, which will see anonymous users.
Theoretically immediately after that the FTP server will already be ready for receiving anonymous users. At the same time, you can conduct a more subtle configuration of the server. In particular, it is easy for it to determine the list of personal users (or user groups) with passwords, logins and advanced access rights. This is done using the "New User" command caused from the context menu after activating the "Users" tab - at a minimum for the user, a name with a password is entered and a home directory is specified. If necessary, for individual users, you can also limit the life of their accounts, set the access rights, determine the access time and transfer rate, enter the mask on the available and blocked files, for security purposes, specify the IP addresses from which these users will connect, and etc.
In addition, you can use support for virtual folders and besides the home directory to allow the user with access to a number of other your folders (they can also be on different disks), which in this case can be copied to the home directory, it is not necessary to simply install virtual and real paths for them. . As a result, the user entering your FTP will see all the folders available for it, as if they were all lying in one home folder. If desired, it is easy to configure for individual users blocking access to specific file types.
In terms of security, it may make sense to enable the transfer blocking between two FTP servers (for specific users - section "Advanced" on the Users tab), limit the number of input attempts and configure the use of SSL to encrypt the transmitted data (through the specific domain properties). And also disable access to the FTP server with specific IP addresses ("Information"\u003e "Temporary Prohibition") and others. Well, if you have an IP dynamic, and you do not inspire you every time after connecting to the Internet to inform friends your new IP You will have to register at one of the Dynamic DNS services (for example, No-ip.com). And then create a host there, which will indicate your FTP server - let it be, serghome.myftp.org, since the domain itself we called in a similar way. You will also have to download, install and configure a dynamic update client (this operation will be offered during the registration). At the next step, you will have to adjust the server settings by stepping in the domain properties ("domain"\u003e "Properties"\u003e "Binding IP") parameter "Redirect PASV IP", where you need to enter the resulting domain name and set the range of passive mode ports. After that, users will be able to get to your FTP server, pointing to the FTP client as the address string of the type serghome.myftp.org.
The activity of users is clearly logged and saved in the logs - so you can check who is currently connected to the server, and what it does, evaluate the domain traffic, view the history of connections, etc. All this data are presented on the Information tab.
SERV-U 8.0.0.7
Developer: Rhino Software, Inc.Distribution size: 8.76 MB
Spread: Conditionally free SERV-U is a powerful, stable and relatively simple in installing and configuring an FTP server that provides flexible administration. The program allows you to open access to the FTP server to specific users or user groups, set the right to record / read / change for directory and files, as well as monitor access by IP addresses. It is possible to simultaneously work several users, the maximum allowable number of which is not difficult to limit. For each of the connections, it is easy to set the maximum update speed of Upload / download. Support for compression "On the fly" ZLIB, providing an increase in the data transfer rate, and the Dynamic DNS function is supported, which allows you to automatically determine the external IP address and change it for pseudo-server. Detailed activity statistics on the FTP server, recorded in logs, where you can find out the name under which the user entered, the IP address of his computer, of its folders, implemented operations, etc. The program (there is Russian-speaking localization) is presented in several editions, among For a home user, only the editorial office of Bronze can represent interest. The demo version of the program is fully functional for 30 days, after which it will have to pay $ 199.95, or to use for free as a version of Personal, but then you will have to restrict ourselves to one domain, two parallel connections and five user accounts, which, in Principle, enough, for example, to exchange data with friends. In the editorial office, the bronze domain may also be one, but already 25 parallel connections and up to 50 accounts are already.
The program includes two modules - an FTP server agent and the control console. The agent of the interface does not have, works as a service and is responsible for switching on / disable the server, which is performed through the system tray. The control panel provides configuration of the FTP server settings and starts through the Start menu. After starting the agent, the FTP server icon appears in the system tray and its species signals the server status (enabled / disabled) and the presence or absence of users on it. Setting up the FTP server passes under the control of the wizard (it starts automatically after installing and starting the program), which will avoid errors. First of all, the program will ask the domain name - if an external IP address on the Internet is static and a domain name is assigned to him, it is recommended to enter it, otherwise the field can be left blank or write any name. If the address is dynamic, and this does not suit, the developers are recommended to use the DNS dynamic change system on the DNS4ME.com website. After its configuration, the FTP server will learn to automatically change the IP address issued by the provider and compare it with domain name. Then it will be necessary to define the protocols and ports that will be used by this domain, and enter the IP address of the server.
At the next stage, the program will ask if the owner of the FTP server wants to immediately create user accounts, and if so, whether the master is needed for this purpose. If you choose in favor of the wizard in the window that opens, you will need to specify the username, password and the directory accessible to it with access rights to this directory - here are only two options: "read only reading" and " full access"After executing all the instructions of the Wizard, the FTP server SERV-U will automatically start.
Naturally, you can add users and later - directly from the control console by activating the "Users" section and clicking on the Add button. This requires not only all of the above data, but you can also clarify many more varied parameters. For example, prohibit / enable recording, adding, deleting and run files from the directory, limit the size of the contents of the directory and install access to this user only from a specific IP address. Configure virtual ways to access directories outside the user's home directory, enter a greeting sent to it after authorization, etc. The settings of user group parameters are proceeded in about the same way.
In addition to adding users and regulate their rights, many other parameters are also corrected in the management console. So, in the "Limits and Server Settings" section, you can establish various kinds of restrictions that can act in a certain time Days or a certain day of the week: limit the maximum number of sessions, download / discharge speed (generally either for a specific user), block anti-timeout methods and too often connected users, etc.
During the operation of the FTP server, detailed user activity statistics are conducted - in particular, information about the current status of the user, files or directories, to which he addressed, duration of sessions, loading / unloading speeds, etc. It is worth noting that on our subjective view, the previous versions of the SERV-U were more convenient, intuitively clearer and shunter in work. Latest versionthat we tested during the preparation of the material did not cause much delight. More precisely, I did not please new Console Control, capital inhibiting and having a completely different and, as it seemed to us, not a very well thought out interface, rather than the old versions.
Filezilla Server 0.9.31
Developer:Distribution size: 2.72 MB
Spread: Free FileZilla Server is an FTP server with SSL encryption support and advanced administration. It provides the creation of anonymous or password (for individual users or groups) of data access and allows you to manage access rights for files and directories, as well as restrict access by IP addresses. It is provided for introducing restrictions on access to the FTP server as a whole, or for each user separately, as well as limiting the total number of connections and the maximum download speed. There is support for the compression of the transmitted data (MODE Z), and 128-bit SSL encryption can be used to exchange important files. Real-time is a detailed activity statistics on the FTP server, which is easy to control the connection occurred, which will always be aware of what users connected to it specifically on the server. Perhaps remote administration. The program is completely free and, like most other FTP servers, it consists of two main components. The first is the FTP server itself, working as a system service (that is, it does not have its own interface), configuring when installed on automatic launch. The second is the control console intended to configure the FTP server settings.
When you first start, the program will prompt enter the server data to which it is assumed - you should leave the proposed IP address (127.0.0.1 - this is an IP address by which the computer can contact the network to yourself) and the port number without changes.
In order for users to come to your FTP server, the first thing you need to create at least one account - for example, for anonymous access to the server (that is, for the user named Anonymous). You can do this through the Edit\u003e Users menu. In the accounting editor window that opens, you first click on the Add button and enter the username.
To provide a user access to specific folders, you need to activate the Shared Folders tab, click the Add button, specify a home folder and determine access rights to it. At the same time, it must be determined as a root directory for the user by clicking the Set AS Home Dir button. This is already enough to visit the anonymous users of your FTP. Creating an account for a specific user does not differ in principle, except that it is necessary to specify not only login, but also the password.
On access to the server, it is easy to introduce restrictions - both in general and for each individual user. Overall restrictions are installed in the Edit\u003e Settings server settings window, restrictions for individual users - in the EDIT account settings window\u003e Users. For example, for individual users on the Speed \u200b\u200bLimits tab, you can establish access speed limits (separately on downloading and downloading) - permanent or on schedule. And on the IP Filter tab, it is easy to establish restrictions on resolving / prohibiting access to specific IP addresses. You can specify both separate IP addresses and their ranges, which allows, for example, to prohibit access to a whole subtreth, allowing it, however, a separate trusted user inside it. Similar installations can also be specified in relation to all users as a whole, but already in the server settings window.
For the server as a whole (edit\u003e settings) on the General Settings tab, you can set a limit on the number of users connected simultaneously, set the timeouts to break the connection in cases where the connected user does not respond, and establish restrictions on specific IP addresses. On the Security Settings tab, to block the interrogorer files without user participation, on the Speed \u200b\u200bLimits tab, limit the overall download / download speed, and on the Autoban tab, block multiple user connections in a short period of time.
In the case of a dynamic IP address for mapping it with a domain name in server settings (Edit\u003e Settings), you will need to activate the Passive Mode Settings tab, enable the Use The Following IP checkbox and specify the domain name in the appropriate field.
User activity is fixed and reflected in the main window of the program where you can see the names of the connected users, their IP addresses, the connection time and the operations produced by them.
Related records:
 The graphic image of the hierarchical file structure is called how the graphic image of the hierarchical file structure is called
 International Aviation Emergency Signal
 Text Information - Hypermarket Knowledge Text Informatics
 Alphabetical approach to information measurement
 Entering, editing and formatting data in Microsoft Excel


