The bluetooth device does not work on a stationary computer. How to turn on bluetooth on a laptop under different versions of Windows. Solving possible problems
One of the most important issues in creating a security system for a home or premises is how to connect a wi-fi camera to a computer. You can do this yourself by studying the detailed instructions.
Connecting via a router
Just before starting to perform wi-fi connection cameras to the computer, you need to familiarize yourself with the existing device model and the important points of the process. One of them is represented by the hardware configuration for software integration, which is impossible without changing the virtual address.
How to connect a wi-fi camera to a computer via a router? When familiarizing yourself with the device, you should pay attention to its ip-address, which looks like this 192.168.0.1, but basically it will have different digital values... You can find it on the box, the back of the equipment, or in the instructions.
After that, we connect the camera to the computer via wi-fi. To do this, go to any browser and open the page with the ip number. In most cases, nothing will happen, and the page will not open, which indicates that the domain mismatch prevents the software from docking.
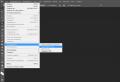
You can fix this problem by visiting the "Control Panel", which is located in the "Start" menu. Next, the tab "Network management and general access", And already in the dialog box that opens, you need to click on the hyperlink for connecting by wireless network.

Setting up a new connection

Setting an individual IP address

Password and SSID input
When the next window appears, click on the "Details" button. The user will see all the characteristics of the current connection, and the most important of them is "Default gateway", which has ip-addresses. Next, the driver with the software is installed, and the application is launched.
To connect a wi-fi camera to a computer, the service is driven in correct settings addressing.
How to set up an ip address on a computer:
- IP address: where we enter the data of the tracking device;
- Mask: the subnet mask always remains the default 255.255.255.0;
- Gateway: This is the valid data of the router.

Enabling the virtual server

Once all the cells are filled, the user will be able to see the images from the existing device. It should be understood that such integration is possible only in the case of devices that have a built-in wifi adapterthat allow you to receive a signal and integrate with the router's network. To make sure of this, you should read the instructions or see the corresponding logo on the box.
Connecting without a router
An important point is how to connect a wi-fi camera to a computer without a router, which requires the user to directly connect the device to a switch. To do this, you can use a UTP cable, one end of which connects to the device, and the other to the router. After that, you need to determine the data of the gateways of the router connected to the PC.
How to connect a wi-fi camera to a computer without a router? To do this, you can go through a similar operation, how and when you need to connect the camera to a computer via wi-fi. In the "Control Panel" select the item "Network and Sharing Management", but already in it you will need to select the item "Connect by local network". In the window that will open, you can also open "Information", where the required values \u200b\u200bwill be indicated. Next, the drivers are installed on the PC, and the application opens.
An IP camera is a digital video camera that can transmit data over Internet protocols on a network. This is a handy device, but in order to get full access to all of its options, you will need to make certain settings.
An IP camera (outdoor or indoor) can also be described as a camera and a computer combined in one unit. Main components this device includes a lens, an image sensor, one or more processors, and memory. Processors are used for image processing, video compression, and network function analysis. The memory is used to store the firmware ( computer program) and for local video recording. Thus, it is not necessary to connect the IP camera to the computer to ensure smooth operation.
Like a computer, a network camera has its own IP address, connects directly to the network, and can be placed wherever there is an available connection. The IP camera, which is slightly more expensive, independently provides the functions of a web server, FTP (File Transfer Protocol) and emailand also includes many other networking and other IP protocols. This differs from a webcam, which can only work when it is connected to personal computer (PC) via USB or IEEE 1394 port. Moreover, her software must be installed on the PC.

The modern wireless IP camera can be configured to transmit video over the network for live and / or recording, or continuously, by schedule, by event, or by authorized users request. The captured images can be uploaded in Motion JPEG, MPEG-4 or H.264 video using various or uploaded as separate JPEG images using FTP, email or HTTP (Hypertext
In addition to video recording, some brands' network cameras provide event management and smart features such as video motion detection, sound detection, active tampering alert and auto-tracking. Most devices also offer I / O ports that allow you to connect to external devicessuch as sensors and relays, and IP camera recordings can be broadcasted. Other features may include audio capabilities and built-in Power over Ethernet (PoE) support. Many gadgets also support advanced security and network management features. A modern outdoor IP camera allows you to capture high definition images even in poor visibility conditions.

Connection features
Some IP cameras require additional device for recording, while others can record their videos directly to a NAS (Network Attached Storage) or PC that is configured to function as a server. Some of them even have built-in Micro SD card slots, and can save content directly to this physical medium. They may even have built-in servers, so sometimes you can access the recording remotely. How to configure the IP camera correctly? How should synchronization with the Internet be performed?
Where to begin?
If you are creating your own server, the IP camera software must be selected and you will need to install it yourself. You can connect multiple recording devices to get a more complete picture of what is happening in the monitored area.

Can alternative gadgets be used?
Instead of using a classic IP camera, you can use a simple webcam and connect it via USB to a computer running the appropriate recording software. This device is generally less expensive than an IP camera (which is an order of magnitude higher), although it may lack some important features (such as the ability to use night vision to record what is happening in absolute darkness).
Another difference is that the "webcam" must be connected directly to the computer via USB, while the IP camera can be located in a completely different place and synchronized via Wi-Fi.
First of all, you need to choose some kind of webcam surveillance software. These applications are used to capture and record video that enters the lens. You should keep in mind that the IP camera software (which can also manage regular "web" ones) may be paid, but you can still achieve some savings.
If you do this, you will need to keep your computer running 24/7, at least if you want to record all day events.

Smartphone as a capturing device
If you have an old unused android phone, you can turn it into a camera for. After all, any such gadget has a camera, Wi-Fi, and built-in - all this should shoot, save and record video.
Network or IP cameras, in turn, are designed to work in a local area network (LAN) and over the Internet. On the LAN, they are managed within computer networkto which they are attached. With the additional configuration of this local network, you have the ability to allow cameras to monitor not only local, but also remote, as well as via the Internet. How to set up an IP camera in LAN?
Local access
Before you can configure your camera to work over the Internet, it is recommended that you enable all the required options for local access first. Review the technical documentation that came with your device for instructions on initial setup. After the camera is configured for local access, you are ready to start configuring it to access it remotely over the Internet.

Remote access
Before configuring the IP camera on the LAN to allow remote shooting, it is recommended that you examine the properties of the network administrator to ensure that you have the appropriate authority. Otherwise, you cannot execute remote access to the camera.
In order to configure the camera to work over the Internet, you will need to configure the Port Forwarding service. It allows you to access the camera from a remote location by forwarding the network ports used by the Internet. These ports are usually forwarded to your network router to forward the ports used by the camera.
Obtaining an IP address
In order for the IP camera to transmit data over the Internet, you need to correctly configure the network protocols. To access your network router to set up port forwarding, you will need the IP address of the router to which the camera is connected. You can get this information by asking your network administrator for your network or by opening command line in Windows and entering a command. To open a command prompt window, you will need to click on the "Start" button and then proceed to click on "Run."
After doing one of the above, you will get the IP address of the router. You will need it in order to access your router to set up port forwarding. The IP address of the network router will be displayed as the default gateway.

Accessing your network router
You will now need to navigate to an accessible router by entering its IP address in your web browser. Then you need to go to the configuration section, where port forwarding is configured.
You must enter the local IP address of the camera as well as its unique name associated with the specific port to be forwarded. Typically, port 80 is used by default. However, it is advisable to ask your device manufacturer for additional configuration details. For example, a wireless IP camera with advanced settings may require more data to enable all options.
Some devices require more than one port to be routed in order to take full advantage of the gadget's functionality. You will also be given the option to select the protocol to use. General parameters are UDP or TCP. Your router may also have additional options... In most cases, you will need to select the "Both Simultaneously" protocol option. This will allow UDP and TCP to bind to forwarded ports. Once you have completed entering all of the configurable options, click on the Apply button to save your selections.
After the settings have been saved in the router configuration, you should be able to see this information displayed in the list. There may be other entries configured by default (will be present in the same list). The settings for your connected device will be at the bottom under the IP Network Camera heading.
Internet access
Now that you have configured port forwarding on your network router to allow the camera to access over the Internet, you can start configuring control access. It is recommended that you initially try to get it from a remote location and not on your local network. This is desirable to confirm that it is configured correctly.
How to set up an IP camera permanently?
When in a remote location, you will need to enter the public IP address provided by your Internet Service Provider (ISP) to be able to access the camera. If you don't know it, contact your ISP's technical support or online services that allow you to determine the details of your Internet connections. You will not be able to access the camera using a private IP address as it cannot be seen on the Internet (it is only available within the local network where the device is connected). In addition to entering a public IP address, sometimes you need to enter a port in address bar... In most cases, port 80 will be forwarded automatically and therefore this line can be left blank when trying to access the camera. However, there are times when the IP camera will not use port 80. If this happens, you will need to enter the full IP address, followed by a colon and the port number to be used for the connection.
Being more high-tech devices in comparison with regular webcams, IP Cameras enclose an internet server, a network interface, and can directly connect to the internet. Connecting an IP camera via a router is possible via Wi-Fi or by wire (over long distances), power is supplied via the ETHERNET connector.
About the features of the device
IP cameras use a web protocol to transmit video signal. These devices are used mainly for surveillance and control systems when guarding various premises, transmitting a video signal through world wide web... The cameras have a digital proximity function and a motion sensor.
Video captured by the IP camera can be viewed from any computer connected to the network. The use of IP cameras is justified when there are a number of video surveillance devices.
Differences between an IP camera and a regular webcam and advantages:
- Autonomy of work (without the obligatory connection to a PC).
- Constant monitoring of the protected premises.
- Full functionality requires a router and an IP address.
- To see the camera image from any PC on the network, you just need to enter the camera's IP address in the search bar of your browser.
- High quality video resolution with zoom capability.
Usually, the installation process takes place simultaneously with the planned repair of the premises, which makes it possible to lay a cable (at large distances between cameras), but if you are not upset with wires in a conspicuous place, connecting and configuring an IP camera to a computer through a router is possible at any time, here is a choice After you.
It is possible to completely abandon laying wires using a Wi-Fi router for IP cameras, but there will already be limitations associated with the distance from the router to surveillance cameras, the presence of obstacles in the form of walls, furniture, because quality and strength Wifi signal is directly dependent on these factors.
Remember that most routers do not distribute Wi-Fi over long enough distances, so in order to avoid problems with picture or sound quality Wi-Fi setting IP cameras through a router make sense in small rooms in the area of \u200b\u200breliable signal reception by network devices. In all other cases, a wired connection is required.
How to configure an IP camera via a router
So, we got an idea about IP cameras, now let's figure out how to connect an IP camera to a router.
Choosing a connection method: without using a wire or wired.
If we choose the second method, we need a special UTP cable in order to connect the router to the camera. Next, go directly to setting
- We connect all the elements of the future surveillance system:
- We enter a special panel for controlling the camera.
- For this step, we need the IP address assigned to our camera to set the same subnet to the configuration computer (in most cases, you will find the IP address on a special sticker on the bottom of the device or in the product passport). Let's say the value of the address is 192.168.0.20.
- Open the "Network Control Center" on your computer ("Start\u003e Control Panel\u003e Network and Internet"). In this menu, go to "Local Area Connection" and then to "Properties". In the window "Internet Protocol version 4" make the following settings.
- So, we have done the subnet setup. The next step is to launch the browser.
- In the search bar, we drive in the address of the IP camera (192.168.0.20) and enter the necessary data for a successful login (you will also find the data either on the device itself or in the passport).
With just one camera, nothing else is needed. If there are more cameras, move on.
- We change the IP address depending on the spread of the local network values.
Knowing the address of the router (we are looking for it in a similar way), we set it for our camera, changing the fourth value in it. Let's say: the address of the router is 192.168.1.2. For example, let's select the address for the camera 192.168.1.11 by checking the box next to “FIXED IP” and entering the corresponding values.
- Having saved all the changes, we disconnect the computer and the IP camera.
- We connect the camera and router via the LAN connector. We set up a LAN connection (if we use a wired connection between a computer and a router). In this step, we set up auto-acquisition of an IP address and DNS.
- We find in the WIRELESS menu to ensure a wireless network connection in an automatic manner. Here we need the SSID and password. After that, we save the process and restart.
- We disconnect the first camera from the router and connect the rest in order. Their characteristics will be identical, with a difference only in IP addresses and ports. After completing this process, you can start configuring the router itself.
How to connect an IP camera to a router
Different manufacturers have different setting menus, but the general course is about the same: we need a Forwarding menu item (or something similar). To do this, turn on the virtual server and make data entry (see fig.). If there is more than one camera, then such actions must be performed for each individual camera.
Quite often, novice users are faced with the problem of setting up an IP camera through a router. All these instructions have been made, but the camera is only accessible via the local network, and there is no access to it via the Internet? This common problem lies in the settings of the router itself, which is called port forwarding.
|
Port forwarding or, in other words, port forwarding must be configured if it is necessary to gain access from the Internet to an IP video camera connected through a router to the local network of a home or office. The need for port forwarding is quite obvious, because each user will one day express a desire to monitor an office or home not only directly from the location of the IP camera, but also from other places via the Internet, for example, while on a business trip to observe the office, subordinates or being at home to have the opportunity to observe the situation in the country. But getting access to a camera connected via a local network via a router is not as easy as it might seem at first glance. It is in such cases that forwarding or a virtual server (another name for this function) can help. The principle of operation of the function is to forward ports externally arriving at local addresses. Thus, being at any distance of the video camera, you enter the address of the router, the port to which the forwarding was assigned, you get access to the internal network, so you can go to the web interface of the IP camera. Speaking simple language, forwarding will allow access to elements of the local network environment from the Internet. Port forwarding is configured in the router through which the connected devices access the Internet. The router allows you to combine many devices into an internal network, provide everyone with communication with each other, as well as access to the Internet. A modern router makes it possible to connect devices via internal cable network, over a wireless Wi-Fi network, organize a print server, as well as other opportunities that different models routers can be different. The virtual server is one of the few such features. |
|

Instruction on the example of Asus WL-500 Gp V2
The instructions below assume that your existing router is already connected to the Internet, configured correctly and working correctly. The IP camera is also connected to the router, and configured with basic configurations, according to the user manual.
- To make settings, you need to go to the web interface of the router. With basic configurations, web page the router is available at 192.168.1.1. On home page a map will be displayed, where the connected devices, in fact, and the IP video camera will be displayed.

- Go to the tab “ Additional settings", Where a large number of secondary sections are located, such as wireless network configuration, WAN, local network, administrator options, etc.

- Go to the "WAN" section, the "Virtual Server" subsection, from where we get to the "NAT Settings - Virtual Server" configuration page. Specifically on this tab, all the necessary settings are entered that will provide access for the IP camera from the outside.

- Since our router is already configured to work with an internal network and the Internet, let's assume that the IP video camera has the address 192.168.0.135. With the help of any computer within this network environment, you can easily go to the address of the camera, access it, view the broadcast video, make configuration. But in this case, we need to configure the IP camera through a router to access it from the Internet. To do this, you need to enable the virtual server, which is done by checking the "YES" checkbox against the corresponding option. We leave the rest of the functions on this page unchanged.

- The next step is to add values \u200b\u200bto the list of virtual servers: Service name - any name, for example IPCameraOffice, or IPCamDom. Port range - an external port (or port range) through which we will navigate from the Internet. Since the IP camera is signed with the IP address 192.168.0.135, port 10135 is the best option for quick learning. The port must be greater than 5000 to avoid overlaps with the ports used by the underlying services and protocols. Local IP-address - the IP-address of the connected IP camera, we have 192.168.0.135. Local port - port of the IP camera. The default value is port 80 Protocol is TCP. It is over of this protocol our video camera works. Protocol number - remains without values.

- The example image below shows all the values \u200b\u200band their locations. Next, you need to click the "Add" button to add the virtual server to the list. If you have several connected IP cameras, then make the same settings for each device. After entering all the values, adding servers, click the "apply" button at the bottom of the window to save the changes.

- Now it remains to reboot the router and check access to the camera from the Internet. To do this, enter http: // in the browser of the remote computer.<внешний ip-адрес роутера или DDNS имя>: 10135, then the web page of the IP camera should be displayed.
Team leader technical support Benedict Maksimenko.
IP camera are devices that combine a camcorder and a mini-computer. The features of the IP camera include the transmission of a video stream in digital format over an Ethernet (Wi-Fi) network that uses the TCP / IP protocol. Ethernet is a packet-based data transmission technology for local area networks. The device receives an IP address in the network through which you can get to the web interface, through which the camera is configured and where the image from the camera is displayed. But sitting at home or in the office and watching what is happening within the premises is not as interesting as if you organize access to the IP camera via the Internet, i.e. from any place on Earth with Internet access, see what is happening at home or in the office. How to configure access to an IP camera via the Internet that's what this article is about.
In order to access your IP video camera from the external (from global network Internet) you must have a unique name (unique IP address) in the global network. First, I will clarify what IP addresses are:
White IP- a unique address in the global network. Public "white" addresses are used on the Internet. The public IP address is the IP address that is used to access the Internet. A device with a public IP address can be accessed from anywhere on the global network, since public (global) IP addresses are routed on the Internet, as opposed to private (gray) IP addresses.
Gray IPis the internal IP of the local network, directly accessible only within this network.
Private "gray" addresses include IP addresses from the following subnets:
10.0.0.0 to 10.255.255.255 with 255.0.0.0.0 mask (class A network)
172.16.0.0 to 172.31.0.0 with mask 255.255.0.0 (class B network)
192.168.0.0 to 192.168.255.255 with 255.255.255.0 mask (class C network)
Static IPis a fixed Internet address;
Dynamic IP- an address that changes over time.
ISPs generally provide either a dynamic gray IP address or a dynamic white IP (much less common). You can determine the address if you connect the provider's cable directly to a computer / laptop using online services:
http://2ip.ru
http://smart-ip.net
http://speed-tester.info/ip_location.php
http://hideme.ru/ip
Or go to the web interface of the router and see what IP address you received from the provider. If you have a dynamic gray IP address, you need to contact your provider and order a "white" IP address service from him. If you use dynamic white IP, you need to go to the IP camera settings and see which DDNS services (DynamicDNS service allows you to match domain name from dynamic IP address network device) is supported by your camcorder (if it does). After that, you need to go to the service website to register account DDNS by setting a unique domain name. Then register this name in the IP camera settings in the DDNS settings. Camcorder via certain time will check your IP address and update the ddns record (please note that the update does not occur at the same time, there may be a delay due to the caching of the address from your provider or you).
Setting up the Internet connection in the IP camera itself.
First, let's take a look at the easiest way to access the camera via the Internet. Modern IP video cameras can do without a router, i.e. can be directly connected network cable provider to the camera, configure the Internet via the web interface and voila. After that, you enter http: // (your white IP address) in the address bar, for example http://95.110.64.7 and connect to your IP camera.
This method has a significant disadvantage - use only one IP camera.
Configuring Internet connections for multiple IP cameras.
If you want to use several IP cameras, in addition to the "white" IP address or the configured DDNS function and several IP cameras, you will also need a router. So, the principle is as follows - after setting up the Internet on the router, connect all IP cameras to the router, no matter which way using an Ethernet cable or wireless wi-Fi networks... After that, go to the web interface of cameras and change the connection port, instead of 80, change it to any value from 1000 to 65000. In this case, the ports should be different on different cameras, for example, for camera1 - port 1000, camera2 - port 1001, camera3 - port 1003. Next save the settings on all IP cameras. The next step is to forward ports on the router, to do this, go to the router's web interface, find the "Port forwarding" item or similar, and specify the camera port and its IP address, save the settings, for more details about port forwarding, see the article Port forwarding on Asus, D-Link, TP-Link, Zyxel routers ... If you did everything correctly, enter http: // (your white IP address) :( video camera port) in the address bar of your browser, for example http://95.110.64.7:1000. Thus, you can connect to your IP camera1 from anywhere with Internet access.

In addition to a computer and laptop, you can connect to the IP camera using a tablet and smartphone. To do this, you can use the browser installed in the gadget or install the application from the store: for Android devices from the store Play Store, for Apple devices from the Apple Store. Start the store and in the search bar enter the manufacturer of the IP camera and the word camera, for example "D-link camera" or "TP-Link camera". In the list of applications, select an application, install it, write down the settings, usually it is enough to specify the connection name, IP address, port and login and password for connection.