What to do if the computer does not turn on. The processor is not working. The computer turns on only after pressing the button multiple times
Your computer won't start? There could be a lot of reasons for this, but the most likely is a lack of power in the system. Do not rush to call technical support and call a technician; you can fix the problem yourself.
External factors
The first thing to do is check the condition of the wires. See if the power cord is connected to the network or the system unit - it is likely that you touched it and it jumped out of the socket. As a rule, a pulled cord is the most common answer to the question of why the computer does not start. So, in order not to look stupid in the eyes of the master, first inspect the wires. It is also possible that there is simply no current in the outlet. How to find out? Try connecting any other device to it, such as a night light or hair dryer. If they don't work, then that's the reason. Check if it is enabled system unit(the switch is at the back). Is your PC connected to an uninterruptible power supply? In this case, try connecting it directly to the outlet. If after this the computer does not start, you should proceed to a more detailed inspection.

Guarantee
If you carefully store all documents and you still have a warranty, the best option would be to contact a specialist - he will carry out diagnostics completely free of charge. The warranty period has long passed, or you just can’t find the right piece of paper? No problem. You can determine the cause of the problem yourself.
System unit
Your computer won't start? Remove back cover from the system unit and look inside. First of all, you need to check whether the standby voltage LED is lit (usually when normal operation PC it flashes green or red). If the lights go out, we can say with confidence that the problem lies in the power supply. It should be emphasized that during any actions aimed at independent work with PC parts, precautions must be taken: all wires must be disconnected from the network, otherwise you risk receiving an electric shock.

Checking the power supply
Have you done all the above steps, but your computer won’t start? This means it’s time to move on to more active actions. Check the standby voltage (this can be done using a tester, of course, provided that you have one). Disconnect the contact connector from motherboard, move the tester to the voltage measuring position and connect the red end to the purple wire and the black end to any black wire. In this case, the voltage should be about five volts. If the tester readings differ from this number, the power supply will have to be replaced.
Why won't my computer start?
Don't have a tester? No problem. Close the green and black pins of the connector using tweezers. After all these manipulations, the power supply should turn on (you will understand this by the fan working inside). If this does not happen, it means that the power supply has outlived its usefulness and needs to be replaced. It is also possible that it is too weak and the computer does not have enough energy to start. To test this hypothesis, you will need to disconnect all devices: mouse, printer, scanner, keyboard, etc. Only the processor with the cooling system should remain on the motherboard. Now try starting your computer. Did he turn on? This means that the power supply does not have enough power.
The situation when the computer does not turn on is, of course, not pleasant. Sooner or later this can happen to any PC. But if you want, you can find a way out of any situation, the main thing is not to panic, soberly assess the situation and begin to act.
Let's figure out how the problem of the computer not turning on can manifest itself, what the reasons may be, and how to find a way out of this situation.
She can manifest herself in different ways:
- When you click on the “Start” button, the computer is completely silent;
- It starts up, but it doesn’t go beyond the black screen and a beep is heard;
- After a seemingly successful switch-on, it turns off after a few seconds;
- Everything seems to be working, but only a black screen is visible;
- At the stage it would seem successful download, a blue screen suddenly appears with many incomprehensible codes, and the situation is not corrected.
The causes of these problems may be:
- Lack of 220V voltage in the network;
- Power surges;
- The power button is out of order;
- Problems with the power supply;
- Problems with hardware devices (faulty, device conflicts);
- The CMOS battery of the BIOS memory is dead;
- Not correct settings BIOS;
- Overheating of the processor and video card;
- The system board has failed;
- Problems with cables;
- Windows has crashed or there is a conflict at the software level with device drivers;
Now let's look at each situation in more detail.
The computer is completely silent
When the computer does not react at all to the power button, and yesterday it was still working, then you need to go from simple to complex. And you need to start from the outlet.
Make sure that it is 220 V, and not 360 or 150, there have already been precedents, so don’t laugh.
The computer may not start even at a voltage of 210V, it all depends on the quality of the power supply.
There are power supplies (PSUs) that have a special switch on the back side.

Check if it is enabled.
There are also models where you can switch the input voltage level - 127 and 220 V.
127 V, this is for countries where such a voltage is provided in the network, for example the USA. These types of devices are typically used by people who frequently change jobs while moving around the world.

If everything is fine and 220 V is suitable for the computer, then the latter will have to be disassembled.
Power button
Button task START - POWER short-circuit the wires coming from each other for a short time motherboard.
View of the button with the front cover removed.


At the end of the wires there is a chip that fits onto the contacts. Find these contacts along the wires, see.

Check that the chip is tightly put on and well fixed on the contacts.
Take it off and put it back on. If this does not give any results, carefully close the contacts together with a screwdriver. Don't be afraid, there is no 220V, but the screwdriver should still have an insulator. God protects those who are careful.
Watch the video at the end of the article.
If the computer starts up, then check the wires going from the system board to the button and if everything is fine with the wires, then change the button.
If you have a tester to check Power button, you can go an even simpler route.

Set the tester settings as shown below.


And press the START button – POWER. If everything is normal, then you will hear a characteristic sound from the tester, which means the circuit is closed; if there is no sound, then there is a break somewhere.

power unit
If the computer does not turn on, then one of the main reasons for this may be a faulty power supply.
The main sign that the power supply is producing at least some voltage is the glow of the indicator lamp, which is located on the system board.

Modern power supplies are connected to the motherboard via 20 or 24-pin ATX connectors.
In our case, the connector is 24 pin.

And the plug is 20-pin - it would be correct to say an ATX connector.

There's nothing wrong with that. Simply, such a plug is connected to a 24-pin connector with an offset to the extreme left position. In this case, 4 contacts remain unused.


When the computer is connected to the network, a voltage of 5 V is supplied to the system board through the auxiliary power supply converter. The indicator lamp on the motherboard “tells” us this.
But it happens that there is no such indicator, so you need to check whether at least some voltage reaches the system board.
Take a tester and set it to the settings shown below.

Disconnect the ATX connector from the system board and connect power to the computer.
Using the diagram indicated above, we are looking for a voltage of 5 V that should reach the system board.

We also find out whether 5 V voltage is supplied to the PS_ON contact.
Again, using a tester, we check if there is voltage at certain contacts of the ATX connector.

If in at least one of the cases there is no voltage, or it is not significant, then the problem is in the power supply.
If you want to figure it out yourself, then look for the reason in the resistor of the unit itself. It has a resistance of about 1 kOhm and the so-called standby voltage of 5 V passes through it.


Power supply resistors are different. Replacement must be carried out only with an identical brand. Some characteristics of resistors can be seen below.

To avoid any doubts, if possible, install a different power supply on the computer, in 99% of cases this clears up the situation.
What is PS_ON
PS_ON is a signal that unlocks the start of the main power supply converter to turn on the computer.
When the computer is turned off, as we have already found out above, there is a voltage of five volts at the PS_ON contact.
When you press the START - POWER button, a signal of the same name is sent from the system board to the PS_ON pin.
This signal resets the voltage at the PS_ON pin to zero (0 V) by shorting it to ground, thereby signaling the power supply to turn on the main converters.
The power supply begins to produce current of the specified parameters, powering all computer systems with it.
If given parameters voltages for some reason exceed the permissible values, for example, as a result of a short circuit, then the main converter stops working and the computer turns off.
It is worth mentioning the PW_OK signal, without which the computer cannot operate. When the computer is turned off, the voltage at the PW_OK contact is 0.

The power supply receives the PS_ON signal from the motherboard to start the main converters.
At this moment, two voltages 3 and 5 V are formed in it, which, in turn, begin to increasingly form a signal PW_OK having a final voltage of 5 V + - 0.5 V.
Signal formation time is from 0.2 to 0.5 seconds. This is the time during which a stable voltage will be generated in the power supply to start the processor and other devices.
After the required voltage indicators have been generated, the PW_OK signal is sent to the contact of the same name and then to the motherboard, where signals are already generated to set the initial parameters of the processor, and then the computer is fully turned on.
The 5 volt PW_OK signal always exists as long as the PC is running. It seems to tell the system that the voltage is “OK” and you can work.
If the network voltage drops or rises and the power supply cannot cope with these surges, the PW_OK signal changes its performance.
Usually the voltage decreases to 3 volts or less, making it clear to the system that the voltage is not stable and operation is not possible.
Then starting the computer will not be possible or it will safely turn off due to the fact that the signal to stop the processor will arrive before the main voltage is lost.
How important is the PW_OK signal?
The first attempt to turn on the computer was unsuccessful, what is the reason?
First, let's figure out how the PW_OK signal can affect freezes and errors when turning on the computer?
What do you think when a car has high fuel consumption, when it is just starting to drive or when driving on the highway at the recommended speed?
The answer is obvious, of course at the start.
The same thing happens when you start the computer. In the first seconds, the starting current is much greater than that consumed during its further operation.
For example, at startup a computer can consume up to 300 W, and in operating mode 150 - 200.
At the moment of start, all transistors, capacitors, chokes are switched on, and the process of filling the circuit with energy is underway.
In this situation, the power supply tries to stabilize the voltage as best as possible and reduce the current ripple, which is very large.
If at this moment you apply the PW_OK signal to turn on the processor, then malfunctions may occur in its operation, and therefore in the memory CMOS BIOS.
For this purpose, a delay is provided in the formation of the signal (command) PW_OK.
The first sign that this command is formed very early, this is when the first attempt to turn on the computer fails, and when it is restarted with the Reset button, the boot process returns to normal.
You can also use hotkeys Ctrl+Alt+Del.
There are several results:
- A low-quality power supply unit is installed on the computer;
- It needs to be repaired or replaced.
Restarting the computer
Let's say an attempt to turn on the computer is successful, but after a while it starts to reboot.
What could be the reason?
As we said above, the PW_OK signal is constant when the PC is running. It is equal to 5 V, provided that the network voltage is standard, for our country it is 220V.
If the mains voltage drops, the PW_OK signal may disappear or decrease. This stops the PC before its systems notice any problems on the network.
When the network voltage normalizes, this problem will go away by itself. Therefore, it is recommended to use uninterruptible power supplies for PCs to stabilize the voltage.
Let's check the power supply further
In this situation, it is necessary to check whether voltage is supplied to other PC devices, in addition to the motherboard, through the ATX connector.
Common types of connectors on the power supply, in addition to the ATX connector.

We check the presence of power at the connectors, starting with the most important ones.

With the computer de-energized, disconnect the processor power cable from the system board and connect the tester probes to its connectors.
Connect your PC to the network and press the START – POWER button.


In both cases, the DC voltage should be within 12 V.
If there is no voltage, or it is significantly less (5.7V), then you should think about the health of the power supply.
Using the same method, we check the motor power connectors. hard drives, disk drives, etc.


If the voltage is below standard, then the power supply is clearly faulty.
The computer turns on but there is a beep
If you hear that the computer is working, but the system does not boot, and beeps are heard, then there are problems with the hardware devices.
If there are no signals, then check whether there is a special speaker on the motherboard.

If it is not there, then try to get one and connect it to the Speaker connectors on the system board.

There are situations when the speaker burns out, then you just need to replace it.
The signals emitted from the computer may vary. It all depends on the BIOS version that is flashed into the CMOS memory.

It is advisable to have such data on hand, or look it up in the documentation for the motherboard.
You can also, if your computer is still working, go into the BIOS and write out its version from there.

Common BIOS versions:
- Phoenix;
- Award;
- Compaq;
- Dell;
- Quadtel.


For example, when you turn on the computer, you hear 1 short and 1 long beep. BIOS version Award.
We look at the table and see that there is an error RAM.
We open the computer, pay attention to the RAM strips and see.

One strip is installed incorrectly.
We are correcting the error.

The bracket is inserted correctly, and as a result, the computer starts without problems.
There are situations when one of the RAM strips fails. It will not be possible to detect it by sight. It is necessary to remove each strip in turn and try to start the PC.
If there is only one strip, then it must be replaced with a similar one (DDR, DDR2, DDR3, DDR4), don't get confused. It is advisable that all RAM sticks be from the same manufacturer.
Incorrect BIOS settings
BIOS settings are a separate, very extensive topic. If the computer has stopped loading and some message appears on the black screen, then it does not just appear.
Study it, then the picture will become more or less clear.
A common problem when turning on the computer is that the boot source is incorrectly set in the BIOS. operating system.
There may be several of them: with hard drive(HDD), s DVD, from a USB source and from the network.
Check how these settings are set. If the system, for example, is not installed from scratch, then the first boot source should be the HDD.
This often happens when a USB drive is set as the primary boot source, and a regular, non-bootable flash drive is inserted into the computer. This may cause an error.
Many PC users do not even know that there is a battery on the motherboard, due to which the computer may not start due to its low voltage.
The CMOS memory in which the BIOS resides is not non-volatile. For her stable operation A 3 volt battery is provided. It is easy to find on the system board.

Its working time is up to 5 years. The first sign that the battery is running low is that the time on the computer constantly lags for no reason.
Typically, the battery model CR2032, it costs a penny and changes in a few seconds.
But the problem may be different. As a result of blackout CMOS memory in BIOS, even for a short time, all BIOS settings can be reset.
Therefore, you will have to set them again. If you don’t understand, then just set the factory default settings.
To do this, depending on the BIOS version, look for “Load Optimized Defaults” or Load Default Settings. Keywords"Load Defaults".
Overheating of the processor and video card
The importance of a computer cooling system can hardly be overestimated, especially when it comes to cooling the processor, video card, north and south bridges system board.
The processor is protected from overheating by a special cooler, which you need to know how to use.
But as a result of incorrect selection of the latter, its failure or heavy dust, the processor may overheat.
To prevent the CPU from burning out, it is protected, which turns off the computer when this danger occurs.
Therefore, if you notice that a few seconds or even minutes after turning on the PC, it turns itself off, look into the system unit.
Most likely you will see a picture like this there.

After cleaning the system unit from dust, the situation can be corrected, but not always.
If the computer shuts down continues, you will have to remove the cooler and get to the processor.
Remove the latter and look at the condition of the thermal paste.

Over time, it dries out and does not perform the function of improving heat exchange between the CPU and the cooler radiator.
Using alcohol or cologne, remove the old layer of thermal paste and replace it with new one.

In the case of a video card, the PC will not restart. Most likely you will only see a black screen or hear beeps.
If you are sure that the monitor is working properly, remove the video card and clean it from dust.


Don't forget to remove the old thermal paste and apply new one. She's there too.

Also, the failure of the video card is the reason that the monitor screen is black and the boot process can only be seen at the BIOS boot. But we'll talk about the monitor next.
Other devices
We have already briefly touched on problems with RAM memory sticks. All copper contacts of any devices tend to oxidize, especially if the room has high humidity.
Therefore, they need to be cleaned periodically. To do this, you can use a regular hard eraser.

Also don’t forget about network cards, TV tuner, WI-FI adapter and other devices, if they are on the computer.
If after cleaning the contacts the computer still does not turn on, then remember what device was recently installed on the system board. Dismantle it.
If this does not help, then use the method of elimination. Starting with the least significant devices, remove them from their slots and try to turn on the computer. If this does not help, move on to the next subsection.
System board
The presence of dust on the motherboard can lead to overheating of the north and south bridges, as well as other microchips.

Therefore, you need to clean your computer from dust at least once every 4-6 months.
The culprit for the failure of the motherboard may also be a poor-quality power supply.
Conclusion, you shouldn’t skimp on the power supply.
It is difficult to visually determine that the motherboard has failed. Although if you look closely, you can find the reason.

Replacing the motherboard can lead to a complete upgrade of the computer, and that's not cheap. It is worth repairing only when its repair does not exceed 50% of the cost of a new one. But everyone makes the decision themselves.
Loops
Loops rarely fail and, as a rule, the problem lies not in them, but in the places where they are connected.
It is especially worth paying attention to the cables: a seven-pin data cable and a fifteen-pin additional voltage cable.
Their disadvantage is weak fastening. Have you moved the system unit? Did you hit it with your foot or cleaning equipment? After this your computer won't boot?
Check the SATA cables to see if they have come loose from the hard drive and motherboard. Disconnect and reconnect them. As a rule, this solves the problem.
Blue screen
Subject blue screen when loading Windows is very extensive and it is impossible to cover it in this already quite small article.
The problem with this may lie in the plane of both hardware and software failure.
As a rule, it is solved by dismantling some hardware devices. For example, you have a motherboard from MSI and a video card from ASUS.
But not compatible devices from different manufacturers Although it does occur, it has recently been extremely rare.
Also the latest installed drivers may cause the system to crash, etc.
This problem is solved by rolling back the system, through safe mode boot, system restore from boot disk or a specially created Windows recovery disc.
But we will definitely talk about this in another article.
Of course, the monitor cannot directly affect the problem with turning on the computer. But when a black screen appears, it is still worth paying attention to.
Its unexpected failure can mislead you even against the background common problem, there is a high probability that you will take a different path to find its causes.
The classic operating voltage for monitors is 12V. If the device’s power supply is external, then checking the output voltage with a tester is not difficult.

There were cases when the monitor showed signs of its operation (LEDs of the connected network), but when checking the power supply with a tester, the latter produced only 7 volts.
As a result, the problem was solved by replacing the monitor's power supply.
Bottom line
We looked at the main reasons why the computer refuses to turn on and the operating system refuses to boot.
You need to understand that the main problem is not how to eliminate them, but how to identify them.
Hello dear readers!
We continue our theme of repairs computer equipment. Our article today will be devoted to what to do if your computer (or rather the system unit) does not turn on. Or it happens like this - the system unit turns on, the fans are noisy (the coolers are working) as usual, but the monitor is quiet and dark... It’s just a black screen and the speaker doesn’t beep.
So, in our last article (), we looked at problems with operational windows systems 7 and windows 10 in software terms, and also touched on the following possible problems, which relate more to technical issues related to peripherals and hardware. And which we didn’t have time to sort out in the last article.
Subscribe to the blog to not only know, but also understand computer issues. We try to help exclusively with your problem. But please note that symptoms and causes may vary. And if you have a special problem, then write below in the comments.
So, the common reasons that occur are as follows:
Well, today we will talk exclusively about problems with starting the computer. And at the same time I’ll tell you how to solve a whole series other problems.
The article turns out to be long, because there are actually many reasons, but the symptoms are the same, I have already listed them.
In general, today I will try to combine these reasons and problems into one solution. Because we have a reason for this - we will perform an autopsy...
We will open the system unit! This is a bold decision, so why don't we touch on the basics today - you will learn when it is necessary and when it is not so much. And learn to do it yourself.
« But can we open it ourselves - it’s dangerous!"- the cautious reader will exclaim.
I hasten to reassure our readers...
Of course, if the computer is still under warranty, you cannot open it!
But in other cases it is possible. I’ll tell you why now. At the dawn of development modern computers(this is approximately the beginning of the 80s of the 20th century) most companies produced their personal computers(to put it in one word) - “disposable”. The most famous representative that has still maintained this trend is the corporation Apple. When such a computer becomes outdated, it is quite difficult to update its hardware. It's easier to buy a new one. Here's the company IBM long ago proposed a different principle. The case contains removable filling - from different manufacturers. And the user can assemble his own computer like a construction set - as long as the parts are compatible. And if a “part” breaks, you can throw it away and replace it with a working one. Or more productive .
This principle is called " Open Architecture Principle" Thanks to him, “IBM PC compatible” system units quickly ousted Apple and other computers from the market. And because of this, you and I use Windows, not MacOS. And the “designer” trend is still relevant for us.
Except laptops! Laptops (and all-in-one PCs) are a separate class; their hardware depends entirely on the manufacturer and specific model. This principle does not work for them.
Solution:
When the computer turned into a “patient”.
We are preparing him for the “operation”. First you need to disconnect everything from it - keyboard, mouse, monitor, power, webcam– we turn everything off, put the “patient” on the operating table. To carry out the “operation” we first need: good lighting, a Phillips screwdriver, a small brush, wet alcohol wipes, and if there is a lot of dust, a vacuum cleaner..
We place the system unit with the top cover facing us, look for two metal bolts and unscrew them.
We pull from the side of the unscrewed bolts - we pull the cover until we pull it out, and this is approximately what we see:
So, the autopsy showed that death was caused by an autopsy...Hm.... What am I talking about?
We begin to solve problems in order.
Problem 1: The computer does not start. The system unit does not emit a short squeak when starting up. Black screen; the fan and the system unit are working... But the computer does not turn on the first time, only after a reboot (Hmm... and what are the reasons?)
And the reasons are usually as follows:
- static electricity;
- CMOS or, in common parlance, BIOS has failed;
— equipment connected through slots to the motherboard does not work. These include video cards, network adapters, modems, RAM, recording, transmission, storage devices, as well as USB connectors, card readers.
The power supply is faulty
Computer motherboard is faulty (severe but relatively rare case)
Despite such a frightening list, you can handle it on your own; it’s not as difficult as you might think.
Read carefully and do everything slowly - and you will succeed!
Warning. All actions must be performed with the power completely turned off. If these requirements are not met, the motherboard may fail; the author of the article is not responsible in this case!
Let's carefully inspect the connectors from which you just disconnected everything. peripherals; carefully inspect the connectors on the front panel.
Very often the reason lies in them - the plug from the headphones was broken - it remained inside; A flash drive broke the USB connector(s), the contacts are bent, sometimes there are foreign objects, dirt, dust inside. We inspect all connectors - keyboards, network card, monitor, card reader. There should be no damage, bent or closed contacts
This is what good connectors look like:

In case of damaged connectors, use a thin needle to straighten the contacts so that they do not touch; We seal the faulty connector with tape or tape and don’t use it anymore.
If everything is in order, we proceed to inspect the motherboard.
We continue our inspection...
The first thing we see is dust. There is no dust in my photo anymore, but you have it. Dust is a source of static electricity. Accumulating inside, it settles on conductive elements and accumulates electric charge. The power supplies “see” its presence, go into protection, and here’s another reason for you - the computer works, but does not start (does not start). Use a brush to brush off the dust. When there is a large accumulation of dust, we actively use a vacuum cleaner and remove dust from the fans. Carefully wipe off a thin layer of dust with an alcohol wipe wherever you can reach it.
We use the vacuum cleaner carefully, it is better to turn it on for blowing, and in any case keep it at a distance from the board. You just need to get rid of the dust. And often, it’s enough to just lower yourself and blow hard with your mouth so as not to damage anything! Also try not to use wet wipes or wipe the boards under any circumstances. Only wiping outside and inside the case is allowed.
You need to act carefully, and under no circumstances use fanaticism or force.

Use a thin screwdriver to remove the round battery from the socket.
We check its voltage.
If it is lower than what is written on the battery, replace the battery. By removing the battery, we completely deprive the board of power, and at the same time some BIOS settings will be reset to factory settings. Replacing the battery also solves some problems starting the system unit - here’s another one possible problem eliminated.
By the way! Even without checking the battery for charge, you can simply replace it with the same one. Just take it and buy the same one at the nearest computer store in your city. A dead battery is one of the common reasons when a computer does not start. There's just not enough tension! The problem rarely occurs on computers less than 3 years old. Typically, the battery lasts for 3-5 years, in my experience. If you have encountered the same problem, please write a comment below.
We continue to solve the problem with starting the computer...
Disconnect all cables from the motherboard - hard drive(s), power supply:
 This is how the power supply connectors are disconnected:
 And here:
 Hard drive(s); disconnect the power (the same connector on the DVD drive):

If a removable video card is installed, disconnect it too. We unscrew the screw, take out the card, and inspect it. We remove dust, we also wipe the video card slot from dust wet wipe. We inspect the video card fan - remove all the dust from under it; Let's check if it's loose. If everything is in order - good, if not - read on.
Warning: Wires going to the system unit buttons and to external ones USB ports do not touch unnecessarily; Removing them takes much less time than putting them back in place!
If there are more devices in adjacent slots, take them all out and repeat the steps.
We take out the RAM sticks:

Press the latches and pull the strips out of the slot. We carefully remove dust everywhere with a damp cloth.
We use the vacuum cleaner and napkins diligently- to all slots.

Having freed the motherboard from the equipment, carefully remove any remaining dust from it.
Hooray! The system unit and motherboard are clean! If dust is to blame, we have fixed the problem. If not yet, we still did some general cleaning and preventive maintenance.
Problem 2: The fan is running full (the cooler is humming or making noise), but the computer does not turn on or freezes
Now is the time to consider a solution to this problem. While all organs are removed and the patient is “under anesthesia” for operating table. It's time!
We are talking about a processor or CPU fan. Who remembers the movie "Terminator 2"? It was a cool story!

Hooray! Now we will also get to the processor))
Warning! On various types Motherboard mounts for CPU radiator fan are different! As an example, fastenings on Intel processors. They are cunning, more cunning than AMD. It's easy to remove, but more difficult to install without damaging it. Be careful, careful and don't rush.
Why do we remove the radiator and fan? This must be done when replacing them, to clean the radiator from dust and to apply fresh thermal paste to the processor. All these measures designed to protect yourCPUfrom overheating.
We will also add the following symptoms of overheating:
Problem 3: The computer turns off by itself during the game (which is independent)
Other problems can also be included here. Namely:
Sudden shutdown of the computer after turning on and fully loading Windows;
The computer does not turn on, but the coolers work, the screen is black and the speaker does not beep (and this happens...);
The fan in the computer is humming. The cooler is so noisy in the system unit that it is impossible to work...
Warning! These symptoms may fully apply to a malfunction of the video card, including the one on which the fan is installed.
Sometimes, if settings are made when the processor overheats, the system unit emits prolonged squeaks (more often during hot weather) and turns off after a short time, or it beeps for a long time immediately after startup.
On older models there are noisy processor-cooler connections. Over time, noise arises from wear and tear on the fan bearings. In these cases, the radiator with fan must be replaced with a more modern and less noisy one. Before continuing the repair further, write down the name of your motherboard, it is almost always on the board itself (photo below) and in the store select a suitable cooler for it. It always comes complete with a radiator and the price is low. At the same time, buy thermal paste.

We turn in the direction of the arrow (which is pushed aside) all four latches one by one. We lift the clamps one by one, then lift the radiator too. Don't forget to disconnect the power supply to the fan.

Removing the remnants of old thermal paste from the processor and cooler

Carefully apply the new one, a small amount of paste is required. As shown in the image below. Next, just gently smear it with your finger (the main thing is not to overdo it...).

Carefully put the radiator in place.
Attention! Insert the latches into the board very carefully, without using force, until you hear a characteristic click. Only after making sure that they have become correctly - carefully press down, otherwise you will break them. Afterwards, do not forget to turn the latches into place.
If the radiator stands firmly and does not jump out or dangle, then that’s it! Life has been made easier for the processor.
Problem 4: The monitor does not turn on when the computer starts (does not show an image, but the light blinks and the computer works)
This is one of the symptoms of a video card failure. There is a video card - built-in (looks like this)

...and not built-in 🙂 (discrete), it...

...inserted into the motherboard slot.
In our example, there are two cards. If you also have two installed at the same time, it’s very easy to check which one is not working. Usually, if the “discrete” one stops working, we disconnect the monitor from it, be sure to pull it out of the slot, and connect the cord from the monitor to the built-in one. Otherwise, you need to do the opposite. As a rule, an image from one of the cards will definitely appear.
In some cases, video cards begin to fail when their fan is broken or “erased.” You can also try to change it by picking it up in the appropriate store. We replace the faulty video card. If you only have a built-in video card on your computer, you need to buy a new one - discrete; compatible ones are selected for the motherboard based on your preferences.
In general, if the problem already arises in replacing computer parts, but you have no experience, then it is best to contact service center, where you will be consulted for free, and also recommended to improve and upgrade your computer or laptop.
Motherboard marking:

Problem 6: RAM
A malfunction of RAM modules or sticks can also prevent the computer from starting, causing failures and freezes. If we see that the PC starts without RAM sticks, but not with the RAM sticks, it means poor contact due to incorrect installation, or one of the sticks has failed. We select a new bar again - according to compatibility with yours motherboard, volume and price.
Installing more RAM will significantly speed up your computer!
Problem 7: Power Supply
The last malfunction that we will consider today concerns the power supply.

Power supply failure is a common occurrence. All the symptoms listed above can also apply to the power supply when it fails. He also has a fan that can make noise and fail. There are electronic components that fail over time.
If you have completed all the above steps, installed everything in place, and the computer still does not start, check the power supply. I do this by connecting a working unit to the motherboard (not necessary to other devices yet). I don't remove the old block yet. If the computer starts successfully, I replace it with a new unit, of the same power and with the same number of connectors (there are different numbers, this must be taken into account).
The power supply is very easy to change. After you have completely disconnected its connectors from all devices, unscrew several screws on the case:
...we install a new block, fix it with screws and that’s it.
Warning! If you plan to install more powerful equipment on the board - (for example, an additional video card or additional hard drives) the power of the new block should be higher than that of the old block. The higher the better!
After we've finished everything, we carefully put all the devices in place - first the processor cooler, the new power supply; then RAM, then video card; connect the power supply to the motherboard. We put all other devices in the slots. Connect the monitor.
Don't forget to put the coin cell battery back in place.
After everything has been checked, we connect the power. The computer should start with a short, triumphant squeak. There is no noise. A picture appeared on the monitor. Hooray!
Turn it off, replace the cover from the system unit, and secure it with screws.
So, wait, what kind of detail is this?Oh, this is from another TV!:):):):):)
We connect all the wires in their places. That's it, our “patient” came to life and recovered.
In this article I have consistently tried to familiarize you with the process self-diagnosis and troubleshooting - from start to finish, but you can start, for example, right away with the power supply if you are sure that the problem is in it. This is a matter of a specific case. The principle “Don’t interfere with the machine’s work” must also be observed. 🙂
This article is for you, decide for yourself. In it, I did not touch on the repair of motherboards and hard drives. Because this is a separate big “sore” topic.
If you have specific questions, write in the comments, they will definitely help you.
That's all for today. To all readers - more health and good mood. Bye!
For a long time I have been planning to write a short article on the topic - the computer does not turn on, what to do and what to do? This is one of the most frequently asked questions on the topic of computer repair. I hear this question at least a couple of times a week, each time I had to find out the symptoms and only then give some advice. I will try to describe in as much detail as possible why the computer does not turn on and how to restore it on your own.
First, you need to figure out what’s wrong with your computer, whether the screen doesn’t turn on or the system unit itself doesn’t turn on. Since I often hear in response to my question “What do you mean the computer doesn’t turn on?”, something like “well, the screen doesn’t light up” or “the Internet doesn’t work” (although how this can be related to turning on the computer, I still understand I can’t 🙂).
If you yourself cannot determine the problem with turning on your computer. The problem will be diagnosed quickly, professionally and efficiently and the problem will be resolved.
But let's try it on our own first. First, let's look at common problems that may prevent your computer from turning on.
1. The computer power cord is faulty or the 220V socket is faulty
This is the most common malfunction due to which the computer does not start. Although the cable has very environmentally resistant characteristics, it often fails.
For example, the cable may be broken; due to poor contact, the plug may “burn”; It’s trivial that the cable may not be plugged into the socket well.
It is also necessary to check whether the 220V outlet is powered. Especially if the power plug of the system unit is powered from a multi-outlet extension cord. Individual sockets in an extension cord often burn out.
2. The monitor or monitor cable is faulty
The second most common reason for a non-working computer is the monitor does not turn on, or the monitor cable is faulty. It is very common to mistakenly believe that the computer is broken when the monitor does not light up. But a monitor is just a device for displaying information; accordingly, with a faulty monitor, the system unit itself can work normally.
Check the power cable (220V) of the monitor, as in the case of the system unit, and also check whether the cable from the monitor to the system unit is plugged in. If the monitor's power light comes on and goes off, there is a problem with the monitor's power supply.
3. The power supply of the system unit is faulty
The third reason why your computer may not turn on is a faulty power supply. This is one of the most capricious elements of the system unit.
Cheap power supplies, as well as power supplies that operate in an unstable electrical network, fail especially often.
In order to check the functionality of the power supply, open the cover of the system unit, disconnect all power supply cables from the motherboard and from the equipment (hard drive, DVD drive, etc.). On a wide connector with a large number wires, close the green and black contacts (located nearby), for example, with a paper clip. If the power supply cooler starts spinning when it shorts, then it is most likely working. If you have a multimeter, check the output voltages.
4. Motherboard is faulty
 This is the most difficult part of the computer to diagnose and repair. If the monitor and power supply are ok, then the problem is most likely in the motherboard.
There are a lot of options why a computer won’t boot when the motherboard fails, but I won’t describe them in this article, since the article is intended for an inexperienced user. I’ll only tell you what you can do with your own hands.
First of all, check whether the LED on the motherboard lights up when power is supplied to the system unit. If it lights up, then all is not lost.
The next step is to check the BIOS battery, it may be completely discharged and because of this the computer cannot start. If possible, buy a new one and replace it, it is not expensive, about 150 rubles.
The next step is to disconnect the RAM sticks, wipe the contacts with a rubber school eraser and put them back in place.
If these methods do not help, it is better to send the system unit for repair to a service center.
5. Windows does not load when turned on
If, when you turn on the computer, a table with Latin characters appears on the screen (bios check), and after it Windows does not load, then the problem is not with the system unit, but with the installed operating system.
Alternatively, try using a boot disk, or reinstall the system again.
6. Clean your computer from dust!
As the last point, I decided to remind you that the system unit needs to be cleaned not only from the outside, but also from the inside. Due to the accumulation of dust and cobwebs, heat exchange between computer elements is disrupted, which leads to overheating, and often to combustion of the components of the system unit.
It is necessary to clean the computer from dust at least once every six months, and if the computer is used in warehouses and other industrial premises, at least once every two months.
When cleaning the system unit from dust, you should remove the side cover of the system unit, disconnect all wires from the motherboard and removable elements (hard drive, DVD drive, etc.). Then blow out the system unit case from the inside using a can of compressed air (or using a low-pressure compressor). Hard to reach places brush with a soft bristle brush.
These are the most common reasons why a computer does not turn on. There are still a lot of different diagnoses and problems. If after reading this article you still have questions, I’m ready to help you in the comments
For many years now, the computer has been an integral part of the lives of people of all ages and social status. Therefore, it is not difficult to understand the panic caused by situations when the computer does not turn on at all when you press the power button, and there is no signal from any indicator. There could be many reasons for this. When such cases occur, it is important, without delay, to figure out why the computer does not turn on and what needs to be done to fix this problem.
The source of malfunctions in the operation of such a complex device can be any factor that ensures its functioning.
The computer may not turn on, or when you turn it on, the operating system does not load, or the monitor does not work.
Understanding which one is relevant to a particular case is not always easy. Especially if the computer does not respond to the start button at all and does not beep. In this case, you may need the help of a specialist, but every user should know and understand what can cause problems in operation and what to do about it. The main reasons when the computer does not turn on include:
- Failures in the 220V power supply (malfunction of the socket, kinked cable, problems with the UPS).
- Malfunctions in the computer power supply.
- The battery on the motherboard is low.
- The degree of dust interferes with the operation of the computer.
- Malfunctions of components or cables.
- The power button is installed poorly or the contacts in its connection are broken.
- Faulty motherboard
- Processor faults
- Problems with the video card or RAM.
It is quite simple to identify the reason why a particular user’s computer does not turn on if the problem is one of the standard ones. The only thing you shouldn’t do is use physical force where intelligence is needed. If, after all the advanced versions and manipulations performed, the computer still could not be brought back to life, you should not knock on it, as this will provoke even greater problems and can lead to data loss - a more serious problem in terms of solution. It is best to contact specialists.
Power failures
The most simple version The reason why the computer does not turn on immediately and not a single light is lit (button backlight, LED indicators on the motherboard) is due to the power supply. This is why the power supply problem tops the list of problems. Before you panic and brainstorm, check to see if there is any voltage at all at the outlet where your computer is plugged into. To check the serviceability of the outlet, just connect any electrical appliance that comes to hand.
There are situations when there is only one outlet in the room, but there are many devices that need to be connected to the electrical network. In this case, extension cords and splitters come to the rescue. And this, if the maximum load on one outlet is exceeded or in the event of a voltage drop, can cause the computer to not receive the required share of energy. To check if this is the case, you need to unplug all electrical appliances from the outlet and leave only the computer. Also make sure that the outlet in the extension cords to which the computer is connected is in good working order.
The computer cable may be to blame for poor power supply (especially if the monitor lights up when turned on and the lights on the speakers are on). What to do: unplug the cable from the socket and socket and firmly insert it into place again.
If your computer is connected through an uninterruptible power supply (UPS), to check whether it is the culprit of the problem, simply connect the cable from the system unit directly to the outlet.
The power supply is faulty
When you are convinced that the above is working, the next link in which failures may occur if power is properly supplied to the computer is the power supply. In general, power supplies fail due to drying out (swelling) of the capacitors. In addition, if a low-quality power supply fails, it can cause damage to other computer components, especially expensive parts such as the processor and motherboard. This problem is faced primarily by owners of cheaply assembled computers, in which low-quality power supplies are installed in order to save money.
It is very important to monitor the operation of the power supply fan. If it does not rotate, this device will overheat, the protection will trip and the computer will turn off.
If this part does not work, the solution to the problem is quite simple: replace the power supply with a new one. It is advisable that it be a high-quality unit, thereby extending the life of your computer.
To understand that this is the problem, you will need a tester (multimeter). When measuring the voltage in a working power supply, there should be 5V between the black and red wires, and 12V between the black and yellow wires. A slight deviation of the indicators, 7% maximum, is allowed - in this case the unit is operational. If not, then the problem is in the block, and the question “what to do?” The only answer is that it needs to be changed.
The battery on the motherboard is dead
A low battery will make itself known with the following message on the black screen CMOS checksum error – Defaults loaded. Press F1: to continue. After pressing F1, the download will continue, but a lot of problems may arise in the operation of the computer.
Every computer motherboard is equipped with lithium battery at 3V, which supports volatile CMOS memory parameters. This memory is responsible for BIOS settings.
If the computer system unit is used for a long enough time (3-5 years), the battery runs out. In this case, settings are lost, which can be noticed in advance if the date and time are lost when you turn on the computer. In this case, when the system boots, the BIOS may request a settings update.
When the battery is completely discharged, the computer will turn on, but will not load beyond the POST procedure, that is, it will not get to the point of starting the operating system. If the computer does not turn on, you should reset the BIOS settings using the Clear CMOS jumper.
You can also check if the battery is working using a multimeter.
High degree of dust
In cases where during the entire period of working with the computer the user has never cleaned it of dust, one should not be surprised that after a couple of years the system unit will not be able to turn on at all. When a significant amount of dust accumulates, the computer gives appropriate signals: it overheats, reboots, and begins to freeze.
What to do in this case? As you might guess, thorough cleaning with brushes and a vacuum cleaner eliminates the problem. Moreover, it is necessary to go through all the working components of the system unit, RAM contacts and boards.
Pay special attention to cleaning coolers (fans). If, when turned on, the cooler spins and then stops or does not spin at all, this gives rise to further malfunctions in the operation of the system unit and overheating of the computer. We pay special attention to the operation of fans central processor, graphics on the video card and hard drive cooling systems. When critical temperatures are reached on these components, the computer turns off spontaneously - overheating protection is triggered. The next time you turn it on, it will turn off immediately, you need to wait until it cools down a little, and it is better to clean the dust at this time. It should be remembered that prolonged operation at extreme temperatures significantly reduces the service life of these expensive components.
It also doesn't hurt to renew the thermal paste after cleaning the fan on the processor. A layer of thermal paste improves contact with the cooler, protects against overheating and ensures reliable operation.
Malfunctions of PC components and cables
The most difficult stage in finding the reasons why the computer refuses to turn on. Each of the components can influence the activation and operation of the system as a whole.
What to do, how to find out what exactly the problem is? First, we disable all components of the system unit that do not affect the process of initially turning on the computer. Leave connected:
- motherboard with processor;
- RAM;
- video card;
- keyboard.
If the computer does not turn on with the above configuration, do the following:
- we check by replacing or reinstalling RAM in another slot;
- to check the video card, disconnect the cable from the monitor and connect it to one of the VGA, DVI or HDMI inputs (if available) on the motherboard, or install a known working video card;
- If the computer does not turn on after assembly or cleaning, check whether the wire from the power supply to the processor voltage supply socket has come loose.
If we were able to turn on the computer, we connect the cables to the hard drive and analyze how the operating system loads and works. If at connecting hard disk, everything works and all the lights are on, one by one we connect the remaining components (TV tuner, sound card, external devices). This exclusion method will make it clear which part of the unit does not work and leads to a violation of the system startup. Then the solution to the problem will be to replace the component or repair it.
Important. All operations should be carried out only with the computer turned off. When disconnecting the cable from the video card, be sure to turn off the monitor, otherwise disable this expensive component.
Poor power button
The computer power button often plays an important role in a situation when the computer does not turn on. If the power button does not close properly, the computer will not respond when pressed. In this case, the backlight often does not work.
You can check whether the power button is involved in the problem by finding the Power connector on the motherboard and removing it. After this, carefully closing the wires, you need to make sure whether the switching result changes. If yes, then this is a signal that the problem is really in the button; if not, the search is not over yet.
Faulty motherboard
As always, the most undesirable scenario is considered last. So it is in this situation, because if the computer does not boot when this version is confirmed, such an important working component of the system unit as the motherboard will have to be replaced. And this is a rather expensive process (it makes sense to repair it only if the cost of a technician’s services does not exceed a third of the cost of a new component). Damage to the motherboard can be caused by malfunctions of the power supply, exceeding temperature conditions its components, excessive efforts when installing the processor and its fastening in the system unit, due to the appearance of microcracks. If you notice swollen capacitors, then this also indicates its inoperability.
It is worth noting that if during assembly all, even minor, parts were connected to the motherboard, then most likely it is equipped with a speaker that will signal a malfunction. On in simple language, this is the sensor that sound signals(squeaks disgustingly) makes it clear that the problems are in the operation of the motherboard, and the set of combinations of such squeaks (different for different versions BIOS) even allows you to accurately determine the coordinates of the failure.
What to do if nothing beeps during a failure? Most likely, such an insignificant part is simply not connected, since the user was assured that it was of no use. You can connect it yourself. This will take, with the right amount of intelligence, a little time. To carry out such an operation, you will need the instructions for the system board. The instructions will not only tell you which connector on the motherboard to connect the speaker to, but will also decipher the signals it beeps. Depending on the type of board and BIOS, the set of signals with which the speaker beeps may be different and mean one of the options:
- processor malfunctions;
- problems with the connection or operation of the video card;
- faulty RAM sticks or poor contact.
It happens that when purchasing, the user does not pay attention to the compatibility of the motherboard with other components. If a person has decided to replace the motherboard and has found the means to do so, he will certainly be attracted to new, improved models (if, of course, he understands this). Then, during the purchases, the processor, RAM, and video card are added to the motherboard. This madness can be stopped by a zero balance on the card account or in the buyer’s wallet, or a completely assembled and equipped new computer.
But, if a limited budget restrains the user’s desire to completely upgrade the computer, when choosing a new motherboard, it is important to pay attention to a number of key details so that the new component fits perfectly into the system unit. So, the purchased board should have:
- processor socket (socket) identical to the old “motherboard”;
- the required number of RAM slots of the same type as on the faulty motherboard (DDR, DDR2, DDR3, etc.);
- the same interface for connecting an existing hard drive (IDE, SATA);
- corresponding PCI-Express video card slot (PCI-E 1x, PCI-E 4x or PCI-E 16x);
- the number of expansion slots for existing PCI cards is sufficient for the user’s needs and identical to the old board.
In case the set system logic If the new motherboard is different from the faulty motherboard, you will most likely need to reinstall the operating system. But, in the overall scale of the problem, this will not be difficult or costly. Remember, no matter what the problem is, the light will not converge on it like a wedge. Everything has a solution, it is important to approach it correctly.
Related posts:
 Leonid Grokhovsky - promotion of portals and online stores The master class is adapted to the needs of the participants
 Where are iOS firmware stored in iTunes? How to remove firmware from iTunes
 3 zup deleting marked objects
 Distributed information base
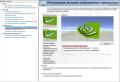 Adjusting video card performance for games through the NVIDIA control panel How to enter nvidia settings


