Step-by-step installation of MSWS 3.0 from disk. Guarding confidential information. Partitioning your hard drive
This chapter covers the following topics:
Users;
Differences between privileged and non-privileged users;
Login files;
File /etc/passwd;
File /etc/shadow;
File /etc/gshadow;
File /etc/login.defs;
Modification of password aging information;
WSWS security is based on the concepts of users and groups. All decisions about what a user is or is not allowed to do are made based on who the logged-in user is from the perspective of the operating system kernel.
General view of users
WSWS is a multitasking, multi-user system. The operating system's responsibility is to isolate and protect users from each other. The system monitors each user and, based on who the user is, determines whether it can be given access to a particular file or allowed to run a particular program.
When a new user is created, it is assigned a unique name
NOTE
The system determines user privileges based on the user ID (userID, UID). Unlike a username, a UID may not be unique, in which case the first name found whose UID matches the given one is used to match the username.
Each new user registered in the system is assigned certain elements systems.
Privileged and non-privileged users
When a new user is added to the system, he is allocated special number, called user ID(userID, UID). In Caldera WSWS, the allocation of IDs to new users starts at 500 and continues upward, up to 65,534. Numbers up to 500 are reserved for system accounts.
In general, identifiers with numbers less than 500 are no different from other identifiers. Often a program requires a special user with full access to all files to function properly.
The numbering of identifiers starts at 0 and continues up to 65,535. UID 0 is a special UID. Any process or user with an ID of zero is privileged. Such a person or process has unlimited power over the system. Nothing can be a prohibition for him. The root account (an account whose UID is 0), also called the account superuser, makes the person who enters using it, if not the owner, then at least his authorized representative.
That leaves UID equal to 65535. It is also not an ordinary one. This UID belongs to the user nobody (nobody).
Once upon a time, one of the ways to hack a system was to create a user with the ID 65536, as a result of which he received superuser privileges. Indeed, if you take any UID and convert the corresponding number into binary form, you will get a combination of sixteen binary digits, each of which is equal to either 0 or 1. The vast majority of identifiers include both zeros and ones. The exceptions are the superuser UID, which is all zeros, and the UIDnobody, which is 65535 and consists of 16 ones, that is, 1111111111111111. The number 65,536 cannot be placed in 16 bits - to represent this number in binary form, you need to use 17 bits. The most significant digit will be equal to one (1), all others will be equal to zero (0). So what happens when you create a user with an ID that is 17 binary digits long - 10000000000000000? Theoretically, a user with a zero identifier: since only 16 binary bits are allocated for the identifier, there is nowhere to store the 17th bit, and it is discarded. Consequently, the only unit of the identifier is lost, and only zeros remain, and in the system appears new user with an identifier, and therefore privileges, of a superuser. But now there are no programs in WSWS that would allow you to set the UID to 65536.
NOTE
Users with IDs greater than 65,536 can be created, but they cannot be used without replacing /bin/login.
Any hacker will definitely try to gain superuser privileges. Once he receives them, the further fate of the system will entirely depend on his intentions. Perhaps he, satisfied with the very fact of hacking, will not do anything bad to her and, having sent you a letter describing the holes he found in the security system, will leave her alone forever, but perhaps not. If the hacker's intentions are not so pure, then the best that can be hoped for is to disable the system.
File /etc/passwd
Anyone wishing to log in must enter a username and password, which are checked against the user database stored in the /etc/passwd file. Among other things, it stores the passwords of all users. When connecting to the system, the entered password is checked against the password corresponding to the given name, and if there is a match, the user is allowed into the system, after which the program specified for the given user name in the password file is launched. If it is a command shell, the user is able to enter commands.
Let's look at Listing 1.1. This is an old style passwd file.
Listing 1.1. Old-style /etc/passwd file
root: *:1i DYwrOmhmEBU: 0:0: root:: /root: /bin/bash
bin:*:1:1:bin:/bin:
daemon:*:2: 2: daemon:/sbin:
adm:*:3:4:adm:/var/adm:
lp:*:4:7:lp:/var/spool/lpd:
sync:*:5:0:sync:/sbin:/bin/sync
shutdown:*:6:11:shutdown:/sbin:/sbin/shutdown
halt:*:7:0:halt:/sbin:/sbin/halt
mail:*:8:12:mail:/var/spool/mail:
news:*:9:13:news:/var/spool/news:
uucp:*:10:14:uucp:/var/spool/uucp:
operator:*:11:0:operator:/root:
games:*:12:100:games:/usr/games:
gopher:*:13:30:gopher:/usr/1ib/gopher-data:
ftp:*:14:50:FTP User:/home/ftp:
man:*:15:15:Manuals Owner:/:
majordom:*:16:16:Majordomo:/:/bin/false
postgres:*:17:17:Postgres User:/home/postgres:/bin/bash
mysql:*:18:18:MySQL User:/usr/local/var:/bin/false
silvia:1iDYwrOmhmEBU:501:501:Silvia Bandel:/home/silvia:/bin/bash
nobody:*:65534:65534:Nobody:/:/bi n/false
david:1iDYwrOmhmEBU:500:500:David A. Bandel:/home/david:/bin/bash
The password file has a rigidly defined structure. The content of the file is a table. Each line of the file is a table record. Each record consists of several fields. The fields in the passwd file are separated by colons, so colons cannot be used in any of the fields. There are seven fields in total: username, password, user ID, group ID, GECOS field (aka comment field), home directory, and login shell.
Learn more about /etc/passwd
The first field contains the username. It must be unique - no two system users can have the same name. The name field is the only field whose value must be unique. The second field stores the user's password. To ensure system security, the password is stored in hashed form. The term "hashed" in this context means "encrypted". In the case of MSWS, the password is encrypted using the DES (DataEncryptionStandard) algorithm. The length of the hashed password in this field is always 13 characters, with some characters such as colon and single quote never appearing among them. Any field value other than the correct hashed 13-character password will make it impossible for that user to log in, with one extremely important exception: the password field may be empty.
The second field contains nothing, not even a space, which means that the corresponding user does not need a password to log in. If you change the password stored in the field by adding a character, such as a single quote, the account will be locked and the user will not be able to log in. The fact is that after adding an illegal character to a 14-character hashed password, the system refused to authenticate the user with such a password.
Password length is currently limited to eight characters. The user can enter longer passwords, but only the first eight characters will be significant. The first two characters of the hashed password are seed(salt). (The seed is the number used to initialize the encryption algorithm. Each time the password is changed, the seed is chosen randomly.) As a result, the number of all possible permutations is large enough that it is impossible to find out whether there are users on the system with the same passwords simply by comparing hashed passwords.
NOTE
A dictionary attack is a brute force method of cracking passwords and involves the use of a dictionary and a known seed. The attack consists of enumerating all the words in the dictionary, encrypting them with a given seed, and comparing the result with the password being cracked. Moreover, in addition to words from the dictionary, some of their modifications are usually considered, for example, all letters are capitalized, only the first letter is capitalized, and adding numbers (usually only 0-9) to the end of all these combinations. Quite a lot of easy-to-guess passwords can be cracked this way.
The third field indicates the user ID. The user ID does not have to be unique. In particular, in addition to the root user, there can be any number of other users with a zero identifier, and all of them will have superuser privileges.
The fourth field contains the group ID (GroupID, GID). The group specified in this field is called user's primary group(primarygroup). A user can belong to several groups, but one of them must be the primary group.
The fifth field is now called the comment field, but its original name was GECOS, for "GEConsolidatedOperatingSystem". When requesting user information via finger or other program, the contents of this field is now returned as the user's true name. The comment field may be empty.
The sixth field specifies the user's home directory. Each user must have their own home directory. Usually, when a user logs in, he ends up in his home directory, but if one does not exist, he ends up in the root directory.
The seventh field specifies the login shell. Not every shell can be specified in this field. Depending on your system settings, it may only specify a shell from the list of valid shells. In WSWS, the list of valid shells is located by default in the /etc/shells file.
File /etc/shadow
The owner of the /etc/shadow file is the root user and only he has the right to read this file. To create it, you need to take the usernames and hashed passwords from the passwd file and put them in the shadow file, while replacing all the hashed passwords in the passwd file with x characters. If you look at the system passwd file, you can see that there are x symbols in place of hashed passwords. This symbol indicates to the system that the password should not be looked up here, but in the /etc/shadow file. Transition from simple passwords to the shadow and back is carried out through three utilities. To access shadow passwords, first run the pwck utility. It checks the passwd file for any anomalies that could cause the next step to fail or simply get stuck in a loop. After pwck runs, the pwconv utility is launched to create /etc/shadow. This is usually done after manual update file /etc/passwd. To return to normal passwords, run pwuncov.
A shadow password file is similar to a regular password file in many ways. In particular, the first two fields of these files are the same. But in addition to these fields, it naturally contains additional fields that are not present in the regular password file. Listing 1.2. shows the contents of a typical /etc/shadow file.
Listing 1.2. File /etc/shadow
root:1iDYwrOmhmEBU:10792:0:: 7:7::
bin:*:10547:0::7:7::
daemon:*:10547:0::7:7::
adm:*:10547:0::7:7::
lp:*:10547:0::7:7::
sync:*:10547:0::7:7::
shutdown:U:10811:0:-1:7:7:-1:134531940
halt:*:10547:0::7:7::
mail:*:10547:0::7:7::
news:*:10547:0::7:7::
uucp:*:10547:0::7:7::
operator:*:10547:0::7:7::
games:*: 10547:0: :7:7::
gopher:*:10547:0::7:7::
ftp:*:10547:0::7:7::
man:*:10547:0::7:7::
majordom:*:10547:0::7:7::
postgres:*:10547:0::7:7::
mysql:*:10547:0::7:7::
si1via:1iDYwrOmhmEBU:10792:0:30:7:-l::
nobody:*:10547:0::7:7::
david:1iDYwrOmhmEBU:10792:0::7:7::
Learn more about /etc/shadow
The purpose of the first field of the shadow file is the same as the first field of the passwd file.
The second field contains the hashed password. The WSWS implementation of shadow passwords allows hashed passwords from 13 to 24 characters in length, but the crypt password encryption program can only produce 13-character hashed passwords. The characters used in the hash are drawn from a set of 52 alphabetic letters (lowercase and uppercase), numbers 0-9, a period, and a backslash (/). In total, there are 64 characters allowed in the hashed password field.
The seed, therefore, which, as before, is the first two characters, can be selected from 4096 possible combinations(64x64). Encryption uses the DES algorithm with a 56-bit key, that is, the key space of this algorithm has 2 56 keys, which is approximately equal to 72,057,590,000,000,000 or 72 quadrillions. The number looks impressive, but iterating through all the keys from a space of this size can actually take a very short time.
The third field begins with information about password aging. It stores the number of days that have passed from January 1, 1970 to the day last change password.
The fourth field specifies the minimum number of days that must pass before the password can be changed again. Until the number of days specified in this field has passed since the last password change, you cannot change the password again.
The fifth field specifies the maximum number of days during which the password can be used, after which it must be changed. If this field is set to a positive value, an attempt by the user to log in after the password has expired will result in the password command not being run as usual, but in mandatory password change mode.
The value in the sixth field determines how many days before the password expires a warning about this should begin. After receiving a warning, the user can begin to come up with a new password.
The seventh field specifies the number of days, starting from the day of the mandatory password change, after which this account is blocked.
The penultimate field stores the day of blocking account.
The last field is reserved and is not used.
Learn more about /etc/group
Each entry in the /etc/group file consists of four fields separated by colons. The first field specifies the group name. Similar to username.
The second field is usually always empty, since a password mechanism is not usually used for groups, but if this field is not empty and contains a password, then any user can join the group. To do this, you need to run the newgrp command with the group name as a parameter, and then enter the correct password. If you do not set a password for a group, only the users listed in the group membership list can join it.
The third field specifies the group identifier (GroupID, GID). Its meaning is the same as that of the user ID.
The last field is a list of usernames belonging to the group. Usernames are listed separated by commas without spaces. The user's primary group is indicated (mandatorily) in the passwd file and is assigned when the user connects to the system based on this information. Accordingly, if you change a user's primary group in the passwd file, the user will no longer be able to join his former primary group.
File /etc/login.defs
There are several ways to add a new user to the system. The following programs are used in MSVS for this: coastooL, LISA, useradd. Any of them will do. The COAS utility uses its own file. And the useradd and LISA programs take information about the default values for the fields of the passwd and shadow files from the /etc/login.defs file. The contents of this file are shown in abbreviated form in Listing 1.4.
Listing 1.4. Short file /etc/login.defs
#Maximum number of days during which a password is allowed to be used:
#(-1 - password change is not required) PASS_MAX_DAYS-1
Minimum number of days between password changes: PASS_MIN_DAYSO
#How many days before the password change date should a warning be issued: PASS_WARN_AGE7
#How many days must pass after the password expires before the account is locked: PASS_INACTIVE-1
#Force password expiration on a given day:
# (date is identified by the number of days after 70/1/1, -1 = do not force) PASS_EXPIRE -1
#Values of the fields of the created account for the useradd program
#default group:GROUP100
#user home directory: %s = username) HOME /home/%s
#default shell: SHELL/bin/bash
#directory where the skeleton of the home directory is located: SKEL/etc/skel
#minimum and maximum values for automatic gid selection in groupaddGID_MIN100
The contents of this file set default values for the passwd and shadow file fields. If you do not override them from the command line, they will be used. How starting point, these values are fine, but some of them will need to be changed to implement password aging. A value of -1 means no restrictions.
Caldera's COAS program uses a graphical user interface (GUI).
To change password aging information for one or two users, you can use the chage (changeaging) command. Unprivileged users can only run chage with the -l options and their own username, meaning they will only be prompted for aging information for their own password. To change the obsolescence information, simply specify the user name; the remaining parameters will be requested interactively. Calling chage without parameters will give a short help about usage.
COAS can be used to change password aging settings on a per-account basis. In this case, the values are indicated in days. The program interface is obvious.
NOTE -
To obtain information about user password expiration or force this process, you can use the expiry command.
RAM security system
The basic idea of RAM is that you can always write a new security module that accesses a file or device for information and returns the result of the authorization procedure: SUCCESS, FAILURE, or IGNORE. And RAM, in turn, will return SUCCESS or FAILURE to the service that called it. Thus, it does not matter what passwords, shadow or regular, are used in the system if it has RAM: all programs that support RAM will work fine with both.
Let us now move on to consider the basic principles of RAM operation. Let's look at Listing 1.6. The /etc/pam.d directory also contains configuration files for other services such as su, passwd, etc., depending on what software is installed on the system. Each restricted service has its own configuration file. If there is none, then this service with limited access falls into the “other” category, with the configuration file other.d. (A restricted service is any service or program that requires authorization to use. In other words, if the service normally asks you for a user name and password, it is a restricted service.)
Listing 1.6. Login service configuration file
auth required pam_securetty.so
auth required pam_pwdb.so
auth required pam_nologin.so
#auth required pam_dialup.so
auth optional pam_mail.so
account required pam_pwdb.so
session required pam_pwdb.so
session optional pam_lastlog.so
password required pam_pwdb.so
As you can see from the listing, the configuration file consists of three columns. Lines beginning with a hash character (#) are ignored. Therefore, the pam_dialup module (fourth line of Listing 1.6.) will be skipped. The file contains lines with the same third field - pam_pwd.so, and the first - auth. The use of several lines with the same first field is called stacking of modules and allows you to obtain multi-step authorization (stack of modules), including several various procedures authorization.
The first column is a type column. The type is determined by one of four character tags: auth, account, session, and password. The contents of all columns are considered case insensitive.
The auth type (authentication) is used to determine whether the user is who he claims to be. As a rule, this is achieved by comparing the entered and stored passwords, but other options are possible.
The account type checks whether a given user is allowed to use the service, under what conditions, whether the password is outdated, etc.
The password type is used to update authorization tokens.
The session type performs certain actions when a user logs in and when the user logs out.
Control flags
The second column is a control flag field that determines what to do after returning from the module, that is, the RAM response to the values SUCCESS, IGNORE, and FAILURE. Allowed values: requisite, required, sufficient and optional. The value in this field determines whether the remaining lines of the file will be processed.
The requisite flag (required) specifies the most restrictive behavior. Any line with the requisite flag whose module returns a FAILURE value will be terminated and the service that called it will return a FAILURE status. No other lines will be considered. This flag is used quite rarely. The fact is that if the module marked with it is executed first, then the modules following it may not be executed, including those responsible for logging, so the required flag is usually used instead.
The required flag does not interrupt the execution of modules. Whatever the result of the execution of the module marked by it: SUCCESS, IGNORE or FAILURE, RAM always proceeds to process the next module. This is the most frequently used flag, since the result of module execution is not returned until all other modules have completed their execution, which means that the modules responsible for logging will definitely be executed.
The sufficient flag causes the string to immediately complete processing and return SUCCESS, provided that the module it marked returned SUCCESS and there was no previously encountered module with the required flag that returned FAILURE. If such a module is encountered, the sufficient flag is ignored. If the module marked with this flag returns IGNORE or FAILURE, then the sufficient flag is treated in the same way as the optional flag.
The result of executing a module with the optional flag is taken into account only if it is the only module on the stack that returns SUCCESS. Otherwise, the result of its execution is ignored. Thus, the unsuccessful execution of a module marked by it does not entail the failure of the entire authorization process.
In order for the user to gain access to the system, modules marked with the requisite and required flags must not return FAILURE. The result of executing a module with the optional flag is taken into account only if it is the only module on the stack that returns SUCCESS.
RAM modules
The third column contains the full name of the module file associated with this row. In principle, modules can be located anywhere, but if they are placed in a predefined directory for modules, then only the name can be specified, otherwise the path is also required. In WSWS, the predefined directory is /lib/security.
The fourth column is intended for passing additional parameters to the module. Not all modules have parameters, and if they do, they may not be used. Passing a parameter to a module allows you to change its behavior in one way or another.
Listing 1.7 contains a list of RAM modules included in the MSVS.
Listing 1.7. List of RAM modules included in the MSVS
pam_rhosts_auth.so
pam_securetty.so
pam_unix_acct.so
pam_unix_auth.so
pam_unix_passwd.so
pam_unix_session.so
More about modules
The pam_access.so module is used to grant/deny access based on the /etc/security/access.conf file. The lines in this file have the following format:
rights: users: from
Rights - either + (allow) or - (deny)
Users - ALL, username or user@node where node matches name local machine, otherwise the entry is ignored.
From - one or more terminal file names (without the /dev/ prefix), host names, domain names (starting with a dot), IP addresses, ALL or LOCAL.
The pam_cracklib.so module checks passwords using a dictionary. It is designed to validate a new password and prevent the system from using easily cracked passwords, such as common words, passwords containing repeated characters, and passwords that are too short. There are optional parameters: debug, type= and retry=. The debug option enables logging of debugging information to a log file. The type parameter followed by string changes the default NewUnixpassword: Unix word prompt to the specified string. The retry parameter specifies the number of attempts given to the user to enter a password, after which an error is returned (by default, one attempt is given).
Let's look at Listing 1.8. It shows the contents of the /etc/pam.d/other file. This file contains the configuration used by the PAM engine for services that do not have their own configuration files in the /etc/pam.d directory. In other words, this file applies to all services unknown to the RAM system. It contains all four types of authorization, auth, account, password and session, each of which calls the pam_deny.so module marked with the required flag. Therefore, the execution of an unknown service is prohibited.
Listing 1.8. File /etc/pam.d/other
auth required pam_deny.so
auth required pam_warn.so
account required pam_deny.so
password required pam_deny.so
password required pam_warn.so
session required pam_deny.so
The pam_dialup.so module checks whether a password is required to access the remote terminal or terminals, using the /etc/security/ttys.dialup file. The module is applicable not only to ttyS, but to any tty terminal in general. When a password is needed, it is checked against the one written in the /etc/security/passwd.dialup file. Changes to the passwd.dialup file are made by the dpasswd program.
The pam_group.so module performs checks in accordance with the contents of the /etc/security/group.conf file. This file specifies the groups of which the user specified in the file can become a member if certain conditions are met.
The pam_lastlog.so module writes information about when and where the user logged in to the lastlog file. Typically this module is marked with a session type and an optional flag.
The pam_limits.so module allows you to impose various restrictions on logged-in users. These restrictions do not apply to the root user (or any other user with a null ID). Restrictions are set at the login level and are not global or permanent, only affecting a single login.
The pam_lastfile.so module takes a record (item), compares it with a list in the file and, based on the results of the comparison, returns SUCCESS or FAILURE. The parameters of this module are as follows:
Item=[terminal user | remote_node | remote_user | group| shell]
Sense= (status to return; when an entry is found in the list, otherwise the opposite status is returned)
file=/full/path/and/file_name - onerr= (what status to return in case of an error)
App1y=[user|@group] (specifies the user or group to which restrictions are applied. Only meaningful for entries of the form item=[terminal | remote_node | shell], for entries of the form item=[user | remote_user | group] is ignored)
The pam_nologin.so module is used for auth type authorization with the required flag. This module checks whether the file /etc/nologin exists and if not, it returns SUCCESS, otherwise the contents of the file are shown to the user and the value FAILURE is returned. This module is usually used in cases where the system has not yet been fully commissioned or is temporarily closed for maintenance, but is not disconnected from the network.
The pam_permit.so module is additional to the pam_deny.so module. It always returns SUCCESS. Any parameters passed by the module are ignored.
The pam_pwdb.so module provides an interface to the passwd and shadow files. The following options are possible:
Debug - writes debugging information to the log file;
Audit - additional debugging information for those who do not have enough regular debugging information;
Use_first_pass - never prompt the user for a password, but take it from previous modules of the stack;
Try_first_pass - try to get a password from previous modules, if unsuccessful, ask the user;
Use_authtok - return the value FAILURE if pam_authtok was not set, do not prompt the user for a password, but take it from previous modules of the stack (only for a stack of modules of the password type);
Not_set_pass - do not set the password from this module as a password for subsequent modules;
Shadow - support a shadow password system;
Unix - put passwords in /etc/passwd file;
Md5 - use md5 passwords the next time you change passwords;
Bigcrypt - use DECC2 passwords the next time you change passwords;
Nodelay - disable the one-second delay when authorization fails.
The pam_rhosts_auth.so module allows/denies the use of .rhosts or hosts.equiv files. In addition, it also allows/prohibits the use of "dangerous" entries in these files. The parameters of this module are as follows:
No_hosts_equiv - ignore the /etc/hosts.equiv file;
No_rhosts - ignore the /etc/rhosts or ~/.rhosts file;
Debug - log debugging information;
Nowarn - do not display warnings;
Suppress - do not display any messages;
Promiscuous - allow the wildcard character "+" to be used in any field.
The pam_rootok.so module returns SUCCESS for any user with a null ID. When marked with the sufficient flag, this module allows access to the service without specifying a password. The module has only one parameter: debug.
The pam_securetty.so module can only be used against superusers. This module works with the /etc/securetty file, allowing the superuser to log in only through the terminals listed in this file. If you want to allow superuser login via telnet (ttyp pseudo-terminal), you should either add lines for ttyp0-255 to this file, or comment out the call to pam_securetty.so in the file for the login service.
The pam_shells.so module returns SUCCESS if the user's shell specified in the /etc/passwd file is present in the list of shells in the /etc/shells file. If the /etc/passwd file does not assign any shell to the user, then /bin/sh is launched. If a user's /etc/passwd file specifies a shell that is not listed in /etc/shells, the module returns FAILURE. Only the superuser must have write access to the /etc/shells file.
The pam_stress.so module is used to manage passwords. It has quite a lot of parameters, including the unchangeable debug, but in the general case, of all the parameters, only two are of interest:
Rootok - allow the superuser to change user passwords without entering the old password;
Expired - with this parameter, the module runs as if the user's password has already expired.
Other module parameters allow you to disable any of these two modes, use a password from another module or transfer a password to another module, etc. Here I will not consider all module parameters, so if you need to use special features this module, read their description in the module documentation.
In WSWS, the pam_tally.so module is not used in files from /etc/pam.d by default. This module counts authorization attempts. If authorization is successful, the attempt counter can be reset to zero. If the number of failed connection attempts exceeds a certain threshold, access can be denied. By default, attempt information is placed in the /var/log/faillog file. The global parameters are:
Onerr= - what to do if an error occurs, for example, the file could not be opened;
File=/full/path/and/file_name - if absent, the default file is used. The following parameter only makes sense for the auth type:
No_magic_root - enables counting of the number of attempts for the superuser (not counted by default). Useful if root login via telnet is allowed. The following parameters are only meaningful for the account type:
Deny=n - deny access after n attempts. Using this option changes the default behavior of the reset/no_reset module from no_reset to reset. This happens for all users except root (UID 0) unless no_magic_root is used;
No_magic_root - do not ignore the deny parameter for access attempts made by the root user. When used in conjunction with the deny= option (see earlier), the root user defaults to reset behavior, like all other users;
Even_deny_root_account - allows blocking of the superuser account if the no_magic_root parameter is present. A warning is issued. If the no_magic_root parameter is not used, then regardless of the number of unsuccessful attempts, the superuser account, unlike normal user accounts, will never be locked out;
Reset - reset the number of attempts counter upon successful login;
No_reset - do not reset the number of attempts counter upon successful login; is the default unless deny= is specified.
The pam_time.so module allows you to restrict access to a service based on time. All instructions for setting it up can be found in the /etc/security/time.conf file. It has no parameters: everything is set in the configuration file.
The pam_unix module handles normal WSWS authorization (usually pam_pwdb.so is used instead of this module). Physically, this module consists of four modules, each of which corresponds to one of the PAM types: pam_unix_auth.so, pam_unix_session.so, pam_unix_acct.so and pam_unix_passwd.so. Modules for the account and auth types do not have parameters. The module for the passwd type has only one parameter: strict=false. If it is present, the module does not check passwords for resistance to hacking, allowing the use of arbitrary, including insecure (easily guessed or selected) passwords. The module for the session type understands two parameters: debug and trace. The debug information is placed in the debug log file as specified in syslog.conf, and the trace information, due to its sensitivity, is placed in the authpriv log.
The pam_warn.so module writes a message about its call to syslog. Has no parameters.
The pam_wheel.so module allows only members of the wheel group to become superusers. The wheel group is a special system group whose members have greater privileges than normal users, but less than the superuser. Its presence allows you to reduce the number of system users with superuser privileges, making them members of the wheel group and thereby increasing system security. If the superuser can only log in using a terminal, then this module can be used to prevent users from telneting with superuser privileges by denying them access unless they belong to the wheel group. The module uses the following parameters:
Debug - logging debugging information;
Use_uid - determining ownership based on the current user ID, and not the one assigned to him when he logged in;
Trust - if the user belongs to the wheel group, return the value SUCCESS rather than IGNORE;
Deny - changes the meaning of the procedure to the opposite (return UNSUCCESSFUL). In combination with group=, allows you to deny access to members of a given group.
NOTE -
The /etc/security directory is directly related to the /etc/pam.d directory because it contains configuration files for the various PAM modules called in the files from /etc/pam.d.
RAM entries in log files
Listing 1.9. Contents of /var/log/secure
Jan 11 16:45:14 chiriqui PAM_pwdb: (su) session opened for user root
Jan 11 16:45:25 chiriqui PAM_pwdb: (su) session closed for user root
Jan 11 17:18:06 chiriqui login: FAILED LOGIN 1 FROM (null) FOR david,
Authentication failure
Jan 11 17:18:13 chiriqui login: FAILED LOGIN 2 FROM (null) FOR david.
Authentication failure
Jan 11 17:18:06 chiriqui login: FAILED LOGIN 1 FROM (null) FOR david.
Authentication failure
Jan 11 17:18:13 chiriqui login: FAILED LOGIN 2 FROM (null) FOR david,
Authentication failure
Jan 11 17:18:17 chiriqui PAM_pwdb: (login) session opened for user david
Jan 11 17:18:17 chiriqui -- david: LOGIN ON ttyl BY david
Jan 11 17:18:20 chiriqui PAM_pwdb: (login) session closed for user david
Each entry begins with a date, time, and host name. This is followed by the name of the PAM module and the process ID enclosed in square brackets. Then, in parentheses, comes the name of the service with access restrictions. For Listing 1.9 this is either su or login. The service name is followed by either "sessionopened" or "sessionclosed".
The entry immediately following the "sessionopened" entry is the login message, which tells you who is logged in and from where.
The following questions are considered:
What are default user group and private user groups;
Change user/group;
How changing user/group affects the GUI;
Security and users;
Security and passwords;
Password protection;
Choosing a good password;
Hacking passwords.
Default group
Currently, there is no longer a restriction on a user being a member of only one group at a time. Any user can belong to several groups at the same time. Using the newgrp command, the user becomes a member of the group specified in the command, and this group becomes for this user login group(logingroup). In this case, the user continues to remain a member of the groups to which he was a member before executing the newgrp command. The logon group is the group that becomes the group owner of files user-created.
The difference between the default group and private user groups is the degree of openness of the two schemes. With a default group design, any user can read (and often modify) another user's files. With private groups, reading or writing a file created by another user is only possible if its owner has explicitly granted rights to these operations to other users.
If you want users to be able to join and leave a group without system administrator intervention, you can assign a password to the group. A user can only enjoy the privileges of a particular group if he belongs to it. There are two options here: either he belongs to the group from the moment he logs into the system, or he becomes a member of the group subsequently, after he has started working with the system. In order for a user to join a group to which they do not belong, that group must be assigned a password.
By default, WSWS does not use group passwords, so there is no gshadow file in the /etc directory.
If you regularly use only one of the programs—useradd, LISA, or COAS—to perform routine user administration tasks, the user settings files are more consistent and easier to maintain.
The benefit of the default group design is that it makes file sharing easier because you don't have to worry about file permissions. This scheme implies an open approach to the system according to the principle “everything that is not prohibited is permitted.”
Configuring user defaults is a high-priority task that should be completed immediately after you install the system.
Private user groups
Private user groups have names that are the same as usernames. A private group is made the login group, so by default, that is, if the directory attributes do not specify anything else, it is designated as the owning group of all files for that user.
The benefit of private user groups is that users don't have to worry about restricting access to their files: by default, access to user files will be restricted from the moment they are created. In WSWS, when using private groups, a user can only read or modify files that belong to him. In addition, he can only create files in his home directory. This default behavior can be changed by the system administrator or user, both at the level separate file, and at the directory level.
There are several commands with which the user can control his name and/or group to which he belongs, or the name or group on behalf of which the program is executed. One such program is newgrp.
The newgrp command can be executed by any user. It allows him to join a group to which he did not belong, but only if that group is assigned a password. This command will not allow you to join a group without a password if you are not a member of that group.
The newgrp command can be used on a group that the user is already a member of. In this case, newgrp makes the specified group the login group. A user's groups are divided into two types: the login group and all other groups to which the user belongs. A user can belong to multiple groups, but the owning group for files the user creates will always be assigned to that user's logon group.
In addition to newgrp, you can also use the chown and chgrp commands to control whether a file belongs to a particular user or group.
The scope of the newgrp command in the XWindow environment is limited to the xterm program in which it was executed: only programs launched through that terminal will be executed in the context of the new group, which means that the user cannot use it to change the login group for programs launched through window manager. A program that must always be run in the context of a secondary group can be started through a script that sets it to the required logon group.
The XWindow system always brings additional difficulties to users' lives. In this case, these difficulties are not directly related to X, but follow from the logic of /etc/groups and /etc/gshadow. Those who don't use shadow passwords for groups don't have much to worry about. In the case of X, setting up a password-protected group is not possible from a simple script, but for secondary user groups that do not require a password, changing the group is extremely simple. The following scenario is sufficient:
sg - gifs -c /usr/X11R6/bin/xv &
As a result of running this script, the xv program will be launched, the primary group of which will be the gifs group. That's what we needed to get.
It is more difficult for those who use shadow group passwords, because in this case, when executing of this scenario An error message will appear on the screen. When the /etc/groups file lists the users who belong to a group, any of them are automatically considered a member of the group immediately upon logon. However, in the case of shadow passwords, the list of users of the group is moved to the /etc/gshadow file, so that the logged-in user is not automatically enrolled as a member of the group, but can join it using the newgrp command or run any program on its behalf using the command sg. The problem is that from X's point of view this user(which is not necessarily the user who initiated the X work session) does not have permission to establish a connection. Therefore, for non-password-protected groups, the previous script is modified as follows:
xhosts +localhost
sg - gifs -c /usr/X11R6/bin/xv &
The added line allows you to access the screen new group(gifs). For most workstations, this shouldn't cause any significant security issues since this line just allows screen access to users on the local host (check out a good Linux sysadmin guide for more information on X and xhost).
NOTE
Using an X server (especially in conjunction with xdm or kdm) entails a whole series its subtleties, further aggravated graphic applications, since they can be launched not only through command line, but also using an icon on the graphical desktop.
Change user
NOTE
An ordinary user cannot cause as much damage to the system as a careless superuser can do. The consequences of your typo as a superuser can be quite fatal, to the point that all your system files (or even all files stored on the system) can be said goodbye. Some companies may say goodbye to you after this.
The su command is responsible for converting one user into another. The team got its name from « substitute user » (user substitution), but since most often it is used to become the superuser..
The su command, called without arguments, will ask the user for a password, after which (receiving the correct password in response) it will make you the root user. This command is a restricted service, so all aspects of its security can be configured through the /etc/pam.d/su file.
NOTE -
Calling su without specifying a username (with or without a hyphen) is interpreted as an instruction to make you the root user.
This sudo command allows selected users execute some programs as a superuser, and the user who accesses this command is asked not for the superuser password, but for his own password. Use sudo similar to the sg command. The user enters sudo command_to_execute, then their password, and if allowed, the specified command is executed in the context of root privileges.
Security and users
Users are usually only interested in how to log in and run the programs they need. They become interested in security only after losing important files. But it doesn't last long. Once users learn that measures have been taken, they quickly forget about any precautions.
Generally speaking, safety is not their concern. The system administrator must think through, implement and maintain a security policy that would allow users to do their work without being distracted by security issues that are extraneous to them.
The main danger to a system usually comes from within, not from without. Its source (especially in large systems) can be, for example, an angry user. However, excessive suspicion should be avoided when harm caused out of ignorance is mistaken for malicious intent. How to protect users from unintentional damage to their own and other people's files is described in the first part of the book. As practice shows, the average user is not able to damage the system. You only need to worry about those users who are able to find a loophole in the security mechanisms and are actually capable of causing targeted harm to the system. But such users are usually few in number and become known over time, especially if you know what to look for. The risk group includes users who, due to their position or through their connections, can gain access at the root privilege level. As you master the material in this book, you will learn what exactly should be regarded as signs of impending trouble.
By default, users have full control over their home directories. If you use the default group, all users on the system belong to the same group. Any user has the right to access other users' home directories and the files located in them. When using a scheme with private user groups, any user on the system has access only to his own home directory, and the home directories of other users are not available to him.
If you need to provide all users of the system general access to some set shared files, it is recommended to create a shared directory somewhere specifically for these purposes, create a group of which all users would be members (this could be the users group or any other group you created), and give this group the appropriate access rights to this shared directory. If a user wishes to make some of his files available to other users, he can simply copy them to this directory and ensure that these files belong to the same group of which all users are members.
Some users need to use or simply cannot do without programs that are not included in the WSWS package. Most users eventually acquire a lot of their own files: documents, configuration files, scripts, etc. OpenLinux does not provide much help to users in organizing their files, leaving this task to the system administrator.
The directory structure created in each new user's home directory is determined by the contents of the /etc/skel directory. A typical /etc/skel typically contains the following directories:
These directories are used to store (respectively) binary files, source files, document files, and other miscellaneous files. Many programs by default offer to save files of certain types in one of these subdirectories. Having received an explanation of the purpose of the catalogs at their disposal, users are usually willing to start using them, since it saves them from having to come up with something of their own. Just remember to make ~/bin one of the last directories listed in your users' PATH.
Security and Passwords
They say that where thin comes, it breaks - this saying is often remembered when it comes to the importance of passwords in a security system. Generally speaking, the reliability of a security system is determined by many factors, in particular what services the WSWS system makes available to external users (whether it is used as a web server, whether it can be logged in using telnet, etc.). Another determining factor is user passwords, which brings us to another factor - user compliance with security policies. The average user does not want to know anything about security. If we respect the user and do not want to change his attitude towards security through coercive methods, we should make the security system convenient and understandable for him. The hardest thing to achieve is convenience. Everything that is safe is usually not very convenient (since behind convenience there are predictability and elementaryness that do not combine with safety) and therefore comes into conflict with the usual behavior of people who prefer the most convenient to all possible methods. After all, users work with the system in order to complete the work assigned to them, and not to add new work to themselves. To prevent users from deliberately taking the path of least resistance when dealing with passwords, I usually try to explain to them what passwords are for and why it is so important to keep them secure. It is important not from general positions like “a system with low security can be hacked and stolen or damaged important files”, but from the standpoint of the user’s personal interests.
Most users understand the importance of email to their work. However, they don't realize that anyone logged in under their name has the ability to use their email on their behalf against them. Ask the user if they use email for personal purposes. Most likely he will answer yes. Then ask him if he has ever had to resolve important business issues via email. Those who answer “no” are becoming fewer and fewer every day. But even if the answer is no, some of the business partners may well consider an email transaction to be as binding as a telephone transaction.
Then explain to the user that his emails sometimes have the same importance as his personal signature. And although the header of an email message can be changed, in most cases such a change is as illegal as forging a signature. But if someone, having somehow learned the password of another user, logs into the system under his name, then, figuratively speaking, he will thereby be able to sign with the signature of another person. Any mail sent by him will be technically indistinguishable from mail sent by the user himself. The practice of allowing someone to log in under a different name is undesirable and should be avoided (exceptions include: system administrators(who use this feature to test login scripts and user settings, but do not need to know that user's password to do so). Undesirable phenomena include logging into the system under someone else's name (even with the permission of another user). How undesirable is this? The answer to this question is determined by the severity of the enterprise's security policy.
However, users should understand that there are other equally dangerous ways to gain unauthorized access to their account. The most common case is when the user, fearing to forget the password, makes it easy to remember, and therefore easy to guess, or writes the password on a piece of paper, which is often simply attached to the monitor. A password security system is based on two things: a permanent username and a periodically changing password. Most people won't tell anyone their bank account PIN, but they don't guard their user password as jealously. Although, unlike the situation with bank account, where is the constant part, that is credit card, is a physical object that still needs to be accessed, the permanent part of the password security system, that is, the username, is known to everyone (at least everyone within the company and those with whom the user corresponded via e-mail). Therefore, if the variable part is written down somewhere or is easily guessed or selected by a program searching through words from a dictionary, then such an account cannot be considered well protected.
Finally, users should be aware of the existence of a method called “social engineering” to obtain a password. Most of us have met at least one person in our lives about whom we can say “slippery as hell.” Such people have the ability to convince other people, using logical argumentation, to provide the information they need. But that's not the only thing possible way find out someone else's password. Sometimes just a peek is enough.
A way to counteract such incidents is to regularly change your password. You can, of course, change your password once every ten years, but it is better not to make the intervals between changes too long, just as it is better not to make them too short, for example, once an hour. Not changing your password for too long means exposing yourself to the risk of hacking.
NOTE-
The penetration of an outsider into the system under the guise of an ordinary user can have dire consequences not only for that user’s files, but also for the entire system as a whole, since the more this outsider knows about your system, the easier it will be for him to find holes in its security.
Note that the script does some checks before it starts: whether it's running as root, whether the starting UID is occupied, etc. However, it doesn't check everything.
Hacking passwords
One way to test the security of a system involves putting yourself in the shoes of an attacker and trying to think and act as a person trying to break the security would act. This means that you need to walk among users, spying to see if there is a written down password attached to some monitor, if someone has left a piece of paper with identification data written on it on the table, or “pass by” just at that time in the morning when users log in (you may be able to see one of them typing a password on the keyboard).
This also means paying attention to the orientation of the monitor of the user accessing sensitive information to determine whether it is visible to anyone else. Next, when these users leave their desk, do they launch a password-locked screensaver, log out, or do nothing?
However best way test the strength of the password security system and the attitude of users towards it - try to crack user passwords. Running a password cracking program regularly can give a fairly good indication of the strength of your password protection system.
Surely at least some of our readers have thought about what operating system is used in our Armed Forces. After all, we all understand that Windows cannot be installed on any missile system that is on combat duty. Today we will lift the veil of secrecy a little and talk about the MSWS OS. This is the so-called Mobile System. Its scope of application is indicated by its name, but we will tell you how it is structured in general terms.
Prerequisites for creation
For the first time safety criteria computer systems were formulated back in the late 60s of the last century. In the mid-80s in the USA, all these developments were collected into one document. Thus was born the Department of Defense's Orange Book, the first computer systems security standard. Subsequently, similar documents appeared in European countries and Canada. In 2005, based on them, the international security standard ISO/IEC 15408 “General Security Criteria” was prepared.
In Russia, similar studies were carried out at the 22nd Central Research Institute of the Ministry of Defense. The final result of the development was the introduction of the MSWS OS into the Armed Forces of the Russian Federation in 2002. Option state standard based on ISO/IEC requirements was adopted in 2008.
Why does the military have its own OS?
The operating systems that we use every day are not suitable for use in government agencies in terms of security. The State Technical Commission under the President of the Russian Federation formulated them as follows:
- Information must be protected from unauthorized access, both from inside and outside.
- The system should not contain undocumented features; in other words, there should not be any “Easter eggs” in the OS code.
In addition, a protected operating system must have a multi-level hierarchical structure access and have separated administration functions.

Thus, the task of creating a specialized closed OS is not as simple as it seems at first glance. The lack of undocumented capabilities suggests that source code And technical description All work procedures will be thoroughly studied at the certification center. And this is the area of trade secrets of the owner corporations or the intellectual property of the developers. This paradox forces us to turn our attention to open operating systems, because it is almost impossible to obtain complete technical documentation for proprietary software.
GOST R requirements
FSTEC, as the service responsible for information security nationwide, OS division has been established according to the degree of protection of the processed information. For convenience, all data is summarized in one table.
The table shows that, according to a number of requirements, three groups and nine classes of security against unauthorized access have been established, and based on them, further division is made for access to various types of confidential information.
Based on Linux
Why is Linux so convenient that it is willingly hired into government service? After all, most ordinary users are afraid of it like the devil of incense. Let's figure it out. First, let's look at the license under which Linux is distributed. This is the so-called GPL2 - General Public License, or free license. Anyone can get the source code and create their own product based on it. In other words, no one bothers you to take the best Linux distributions and use them in developing your own secure OS.

The global experience of government agencies shows that the transition to free software is happening everywhere, the idea is in demand and is fully justified. Leading countries of the world, such as the USA, Germany, Japan and China and India, which are rapidly approaching them, actively use Linux in the government sector and education.
WSWS and its contents
The mobile system version 3.0 has worked in the military for a decade and a half; it is now being replaced by a more advanced product, and we can safely take a look “under the hood” of a veteran. So, it is a network OS that runs in multi-user mode using a graphical user interface. Supports hardware platforms:
- Intel.
- IBM System/390.
SPAPC/Elbrus.
It is based on best distributions Linux available at the time. Many system modules were borrowed from RedHat Linux and recompiled to meet the requirements of the Ministry of Defense. In other words, mobile system Armed Forces is an RPM Linux distribution with all the accompanying application programs and development tools.

Support file systems is at the level of the beginning of the century, but since the most common of them already existed then, this indicator is not critical.
WSWS versions
Despite the fact that this is a network OS, it does not have the software repositories familiar to any Linux user. All software is supplied complete on installation CDs. Any program that is used in this system is first certified by the Ministry of Defense. And since the procedure is far from quick, over the entire decade and a half of work, a limited number of versions and changes to them have been released.

The developer of MSVS is the All-Russian Research Institute of Control Automation in the Non-Industrial Sphere. On its official page you can find information about the versions of WSWS that are currently supported and have the required security certificates from the Ministry of Defense.
The mobile system of the Armed Forces for 2017 is represented by two supported assemblies:
- OS WSWS 3.0 FLIR 80001-12 (change No. 6).
OS MSVS 3.0 FLIR 80001-12 (change No. 4).
Version 5.0, located on the VNIINS website, has a security certificate from the Ministry of Defense, but has not been officially accepted for supply to the troops.
Successor to the WSWS
The next secure OS, which was presented as a replacement for the MSVS, which had served for a decade and a half, was the Astra Linux OS. Unlike its predecessor, which received a safety certificate only from the Ministry of Defense, Astra received all possible certificates in Russia, and these are documents from the Ministry of Defense, the FSB and the FSTEC. Thanks to this, it can be used in any government agencies, and the presence of several versions adapted for different hardware platforms further expands the scope of its application. As a result, it can unite under its control all devices - from mobile to stationary server equipment.

Astra Linux is a modern Linux distribution based on deb packages, it uses the latest version of the kernel and up-to-date software. The list of supported processors and their architectures has also been expanded and includes modern samples. The list of officially published versions allows us to hope for the success of this software product, at least in the government and defense industries.
In conclusion
In this article we talked about the MSWS OS - the main operating system of the Armed Forces of the Russian Federation, which has faithfully served “in service” for 15 years and is still at its “combat post”. In addition, her successor was briefly described. Perhaps this will encourage some of our readers to look at what Linux is and form an unbiased opinion about the product.
How to determine whether the operating system supports the hardware of a given computer?
What installation options does MSWS 3.0 OS provide?
Which network protocols does the installer support?
In what cases is it necessary to create boot floppies?
List the main installation steps?
Which bootloader is used to load the OS kernel?
List the main stages of loading a kernel?
What is lilo and lilo.conf?
How to remove LILO and restore original bootloader?
What is the kernel module mechanism used for?
In what cases is it necessary to use a RAM disk?
How to configure the use of RAM disk at boot?
What is the difference between boot, bootnet and drivers boot diskettes? How to create them? How to check them?
What is a software package, package dependencies?
What features do package managers provide?
What package manager is used to manage the software?
How to install a package from a CD over the network?
Installing MSWS 3.0 OS
Basic installation steps
Installation from CD includes the following steps:
installation invitation and documentation reminder;
selecting a mouse;
partitioning the disk;
bootloader setup;
network setup;
setting the computer name;
time zone selection;
selection of complexes for installation;
installing packages;
setting the root user password;
creating boot floppy disks;
setting up the video card and monitor;
When installing over a network using a server, there are a few additional preliminary steps required:
making a set of floppy disks to boot your computer and organize network access to the server;
selecting a network installation option;
setting up a network and organizing network access to the server.
Installation from CD
Before starting the installation, you need to configure the computer's BIOS so that the CD is the first boot device in the list, and insert the CD with the MCWS 3.0 OS boot module into the CD drive.
If the BIOS does not support booting from a CD, you must additionally insert a boot floppy disk into the drive and configure the computer BIOS so that the first boot device in the list is the floppy disk. Modern computers As a rule, they support booting from a CD, so the need for a boot floppy disk may only arise when installing MCWS 3.0 OS on an “old” computer.
Then you should restart your computer. A prompt will appear on the monitor screen:
In the format of this prompt, it is possible to pass additional parameters to the installer. For example, the command:
boot: MCBC mem=128M
tells the installer that the computer has 128 MB of RAM.
To start loading the installation program, you need to press a key. The loading of the MSWS 3.0 OS kernel will begin, accompanied by diagnostic messages, then the installation program will start, which will automatic mode will load CD drive and controller drivers hard drives, present in the computer and supported by MSWS 3.0 OS.
If initialization failed, this means that for of this type CD drive or hard drive requires downloading an additional driver. The installer will offer a list of drivers from which you need to select the appropriate driver and click “Yes”.
If you booted from a boot floppy disk, after you run the installer, a Driver Disk dialog box will appear instructing you to insert the drivers floppy disk into the drive. In this case, the boot floppy disk must be removed and the drivers floppy disk must be inserted.
After loading the required drivers, a prompt will appear on the monitor screen (Figure 9-1).
1.1.41.Selecting a mouse manipulator
The next thing to appear after the WSWS 3.0 OS prompt is the Select Mouse dialog box (Figure 9-2).Select the type of “mouse”, for example, “Regular PS/2 mouse” and, if the “mouse” has two buttons, then you can use three-button mode emulation. To do this, you need to enable emulation of the third button and click the “Yes” button.
1.1.42.Partitioning the hard drive
The Disk Partitioning dialog box will appear (Figure 9-3) and you will be prompted to select a hard drive partitioning utility: Automatic Partitioning, Disk Druid, or fdisk.In most cases, partitioning of hard drives, disk arrays, and LVM volumes occurs in the Disk Druid program. Moreover, the “Automatic partitioning” mode is a special case of working with Disk Druid with automatic calculation of the proportions of disk space in accordance with real installed equipment. If low-level work with hard drive you need to use the fdisk utility.
Select Disk Druid and press the key.
The Partitioning dialog box that appears (Figure 9-4) will display a list of available disks and existing partitions.
Also in this window there are buttons for working with sections: “New”, “Edit”, “Delete”, “RAID”, “Yes”, “Back”.
The bottom line provides hints for using hotkeys: “F1-Help, F2-New, F3-Edit, F4-Delete, F5-Reset, F12-Yes.”
In general, MCWS 3.0 OS is installed on a computer with a blank hard drive. In this case, you can perform partitioning either using the Disk Druid program, or by selecting automatic partitioning.
To successfully install MSWS 3.0 OS, it is enough to create two partitions: the root partition “/” and the swap partition. The size of the root partition must be at least 1200 MB.
You can place the /boot, /home, /var, /tmp and others directories on separate partitions. This allows you to isolate, for example, users' home directories from the root file system.
ATTENTION. In MSWS 3.0 OS, you cannot place the /usr directory on a separate partition!
To move a directory to a separate partition, you need to create a partition with the “ext3” file system and assign it a mount point corresponding to the name of the directory.
To create a section, select the “New” button and press the key. In the “Add Section” dialog box that appears (editing a new section) (Fig. 9-5):
select the file system type (for the swap section – “swap”, in other cases – “ext3”).
partition size in megabytes (if necessary, you can “stretch” the partition to cover the entire disk);
mount point, for the root partition it is “/”; for the swap partition, setting the mount point is not required.
When you are finished creating partitions, click the “Yes” button in the “Partition” window.
The “Save Changes” dialog box will appear on the monitor screen.
Click the “Yes” button.
The next step is formatting the created partitions. A dialog box with the title “Attention!” will appear on the monitor screen. and a list of partitions that will be formatted when you click the “Yes” button (Fig. 9-6).
1.1.43.Setting up the bootloader
The “Bootloader Settings” dialog box will appear on the screen (Figure 9-7). In this window, you must select the option of installing the system with or without a bootloader. The bootloader allows you to have several options for starting the system, or selects the boot OS (if there is more than one). In mode without a bootloader, the MCWS 3.0 OS kernel will be exclusively loaded on this system.
Click the “Yes” button.
Next, a dialog box will appear on the screen (Fig. 9-8) asking you to enter additional parameters that will be used during loading. By default, this window is set to use the LBA32 mode flag (using 32-bit logical addresses of hard disk blocks), since this mode is in most cases required to support large-capacity disks.
If the computer has an IDE CD burner drive, the installation program will place a line like “hdc=ide-scsi” in the parameter entry field (for example, if the drive is connected in Master mode to a second IDE controller).
If you do not need to pass any other parameters to either the LILO bootloader or the kernel, it is recommended that you leave the parameters offered by the installer and click the "Yes" button.
The next procedure in setting up the bootloader is setting a password for access to changing the system’s starting parameters. Since, if there is a bootloader, it is possible to transfer specialized kernel parameters from the keyboard at system startup, this feature is password protected to ensure the necessary level of security. In the next dialog box that appears (Fig. 9-9), enter a password, the size of which should not be less than 8 characters. Confirm your password by re-entering it on the next line of the window.
Click the “Yes” button.
A dialog box for selecting boot partitions will appear on the screen (Fig. 9-10), asking you to specify other boot partitions that can be loaded using the MSWS 3.0 OS boot loader. For example, if your computer has another OS, you can label it and boot it using the MSWS 3.0 OS bootloader.
Enter the required data in the appropriate lines and click the “Yes” button.
The next window (Fig. 9-11) specifies the location of the bootloader on the disk. There are two options: the master boot record (MBR) of the hard drive (recommended in most cases), or boot sector(boot record) of the corresponding partition where installation is performed.
Make a selection and click the “Yes” button.
1.1.44.Network setup
If the installation program detects at least one network card, a sequence of “Network setup for ethX” dialog boxes will appear on the screen (Fig. 9-12), where X is serial number, in which parameters are configured for each network card.
Protocols automatic settings network parameters BOOTP and DHCP are used when there is a special server on the network that provides automatic configuration service upon request of the client machine.
If there is no DHCP server, you must set the network parameters explicitly by selecting “Activate at boot.” After this, several lines will be highlighted in the window in which you need to specify parameters network connection.
Network addresses are represented in dot-decimal format (for example, 192.168.1.1). Information on filling out the fields must be provided by the network administrator.
Network address – IP address of a computer on the network.
Network mask is a parameter characterizing the class of a network segment.
The default gateway is a node that serves communications of this local network with external network segments.
The primary name server is a node that supports the domain name resolution service using the DNS protocol to IP addresses. Enter the IP addresses of additional name servers (DNS) in the appropriate fields. If your network uses a single name server, these fields can be left blank.
Click the “Yes” button.
|
|
| Rice. 9-13. Setting the computer name. |
|
|
| Rice. 9-14. Selecting a time zone. |


Then you need to set the computer name. The following dialog box “Set computer name” will appear on the screen (Figure 9-13), in which you should fill in the corresponding field. The name must also be agreed upon with the network administrator.
Click the “Yes” button.
1.1.45.Selecting a time zone
The following “Select Time Zone” dialog box will appear on the screen, in which you can configure the system time settings. In MSWS 3.0 OS, time is counted in local mode, i.e. The system's hardware clock uniquely determines its time without additional conversion relative to various reference points such as UTC.
In the window, you should select the Russian time zone that most closely matches the location of the computer, indicating the difference in standard time relative to the “zero” zone - Europe / Moscow (Fig. 9-14).
Click the “Yes” button.
1.1.46.Selecting and installing packages
The “Select complexes” dialog box will appear on the screen (Fig. 9-15).
In this dialog box, you are prompted to select the following complexes:
Basic OS configuration;
Graphical interface subsystem;
Development tools.
Selecting the “Basic OS configuration” group is mandatory; it contains all the necessary components for the operation of the MSWS 3.0 OS in the basic version (without additional tools).
The installation mode "All (including optional)" means the installation of all packages of the distribution, including modifications of the OS kernel that are not specific to a given computer and a set of packages necessary for making a boot disk for the MSWS 3.0 OS.
For more detailed selection packages (possibly to save disk space occupied by the OS), you need to check the “Individual selection of packages” option and click the “Yes” button. The “Select Packages” window will appear (Figure 9-16) with a list of package groups and the packages themselves.
A group can be collapsed/expanded by drawing a highlight line to it and pressing a key. To obtain information about a package, you need to draw a highlight line to it and press the key. Including/disabling packages in the list for installation is done by pressing the key.
After completing the selection of packages, click the “Yes” button.
If you have selected a custom list of packages for installation, a situation may arise where unmet dependencies appear among them. This means that the selected list contains packages that require installation of other packages from the WSWS 3.0 OS boot disk that were not selected. Package dependencies will be resolved automatically by the installer.
Once you have completed selecting packages, the Start Installation dialog box will appear on your screen. This window will contain information about the /root/log file, into which the installation program will save a list of installed packages after completion.
The actual partitioning of the disk and installation of packages will begin only after clicking the “Yes” button in the “Start Installation” window. If necessary, you can still interrupt the installation process before this point by restarting the computer. In this case, all data on hard drives will remain unchanged.
To start installing the packages, click the “Yes” button.
The “Package Installation” window will appear on the screen (Figure 9-17).
At this stage, you can observe the installation process of the selected packages, which is performed automatically. For each packet it is displayed brief description, and also displays statistical information about the installation process of the current package and all packages together.
1.1.47.Setting a superuser password
The “Root User Password” dialog box will appear on the screen (Figure 9-18). Set a password in the “Password” line and confirm its entry in the “Confirm Password” line (restrictions on the type and size of the password are determined by the security requirements for the system; by default, the password size is at least eight characters). When setting a password using the keyboard, for security reasons, asterisks are displayed on the screen instead of entered characters. Click the “Yes” button.
1.1.48.Creating boot floppies
The following dialog box “Boot Disk Set” will appear on the screen (Figure 9-19). A set of boot floppies may be required if the boot record on your hard drive is damaged.
To create boot floppy disks, click the “Yes” button. Then follow the instructions offered in the dialog boxes.
If you do not need to create a boot kit, click No. In the future it will be possible to create boot disk using a graphical utility or the mkbootdisk command.
1.1.49.Setting up the video card and monitor
The next step is to configure the graphics system. To do this, follow the instructions in the dialog boxes to enter information about the video card and monitor.
If the installation program automatically detects the type of video card, information about it will appear (Figure 9-20).
 |
| Rice. 9-19. Creating boot floppy disks. |
|
|
| Rice. 9-20. Selecting a video card. |

Otherwise, the Select Card dialog box will appear. Select its type from the list. If the required video card is not in the list, select “Unspecified card”.
In the “Select Server” window, select an X server that your existing video card can work with.
After this, the “Monitor Settings” dialog box will appear (Figure 9-21). If the installer does not automatically detect your monitor type, select the appropriate monitor from the Change list.
If necessary, you can specify monitor parameters manually. To do this, select the “Other” type item in the list and set the operating frequency of image scanning vertically and horizontally (60~100Hz).
Click the “Yes” button.
After selecting the monitor, the “Advanced” window will appear on the screen (Fig. 9-22). Select the required color depth and monitor resolution in the window. In addition, in this window you can select the “Graphic” (recommended) or “Text” login mode. If you select graphical login, the GUI system will start by default. Make a selection and click the “Yes” button.
After setting up the graphics system, the “Installation Complete” information window will appear (Figure 9-23) with the message “Congratulations, installation of MSWS 3.0 OS is complete.”
Click the “Yes” button to reboot. The computer will begin to restart. During reboot, the CD tray will automatically eject. Remove the disc from the tray.
 |
| Rice. 9-23. Installation is complete. |
|
|
| Rice. 9-24. Installation method |

The Armed Forces Mobile System (MSMS) is a secure, multi-user, multi-tasking, general-purpose time-sharing operating system (OS) developed based on the Red Hat Linux OS. The OS provides a multi-level priority system with preemptive multitasking, virtual memory organization and full network support; works with multiprocessor (SMP - symmetrical multiprocessing) and cluster configurations on Intel, IBM S390, MIPS (Baguette series complexes manufactured by Korund-M) and SPARC (Elbrus-90micro) platforms. A feature of MSWS 3.0 OS is built-in means of protection against unauthorized access that meet the requirements of the Guiding Document of the State Technical Commission under the President of the Russian Federation for class 2 means computer technology. Security features include mandatory access control, access control lists, a role model and advanced auditing tools (event logging). MSWS OS is designed for building stationary secure automated systems. The developer of MSVS is the All-Russian Research Institute of Control Automation in the Non-Industrial Sphere named after. V.V. Solomatina (VNIINS). Accepted for supply to the RF Armed Forces in 2002.
The MSWS 3.0 OS file system supports file names up to 256 characters long with the ability to create Russian-language file and directory names, symbolic links, a quota system and access rights lists. It is possible to mount file FAT systems and NTFS, as well as ISO-9660 (CDs). The quota mechanism allows you to control how users use disk space, the number of processes launched, and the amount of memory allocated to each process. The system can be configured to issue alerts when user-requested resources approach a specified quota.
The MSWS 3.0 OS includes a graphics system based on the X Window. To work in a graphical environment, two window managers are supplied: IceWM and KDE. Most programs in the WSWS OS are designed to work in a graphical environment, which creates favorable conditions not only for the work of users, but also for their transition from Windows OS to the WSWS OS.
MSWS 3.0 OS is supplied in a configuration that, in addition to the main control program (kernel), includes a set of additional software products. The OS itself is used as a basic element for organizing automated workstations (AWS) and building automated systems. Additional software (software) can be installed optionally, and is focused on maximum automation of domain management and administration, which allows you to reduce the cost of servicing workstations and concentrate on users performing their target task. The installation program allows you to install the OS from a bootable CD or over the network using FTP. Usually, the installation server is first installed and configured from disks, and then the remaining computers are installed over the network. The installation server in a running domain performs the task of updating and restoring software on workstations. New version is laid out only on the server and then happens automatic update Software in the workplace. If the software on the workstations is damaged (for example, when a program file is deleted or the checksums of executable or configuration files do not match), the reinstallation corresponding software.
During installation, the administrator is prompted to select either one of the standard installation types or a custom installation. Standard types are used when installed on standard workstations and cover the main standard options for organizing workstations based on MSWS 3.0 OS. Each standard type defines a set of software products to be installed, a disk configuration, a set of file systems, and a number of system settings. Custom installation allows you to explicitly set all the specified characteristics of the final system, right down to the selection of individual software packages. If you select a custom installation, you can install MCWS 3.0 OS on a computer that already has another OS installed (for example, Windows NT).
MSWS 3.0 OS includes unified system documentation (USD) with information on various aspects of the system’s operation. The ESD consists of a documentation server and a database containing description texts, which can be accessed through browsers. When installing additional software, the corresponding reference sections are installed in the ESD database. The Unified Data Sheet can be located locally at each workstation, or a special documentation server can be allocated in the MSWS OS domain. The latter option is useful to use in large MCWS OS domains to save total disk space, simplify the management process and update documentation. Access to documentation from other workstations is possible through the Web browser supplied with the MSWS 3.0 OS.
OS MSWS 3.0 is Russified in both alphanumeric and graphic modes. Virtual terminals are supported, switching between them is carried out using a key combination.
The key point from the point of view of system integrity is the operation of registering new users of the WSWS OS, when user attributes are determined, including security attributes, according to which the access control system will subsequently control the user's work. The basis for the mandate model is the information entered when registering a new user.
To implement discretionary access control, traditional Unix mechanisms of access rights bits and access control lists (ACLs) are used. Both mechanisms are implemented at the file system level of the MSWS 3.0 OS and are used to set access rights to file system objects. Bits allow you to define rights for three categories of users (owner, group, others), however, this is not a sufficiently flexible mechanism and is used when setting rights for most OS files that are used in the same way by the majority of users. Using ACLs, you can set rights at the level of individual users and/or user groups, and thereby achieve significant granularity in setting rights. Lists are used when working with files that require, for example, different access rights for several specific users.
Specifications OS MSWS 3.0:
| Parameter | Characteristic |
| Information security system | Built-in |
| Information security model | Discretionary model, mandate model, role model |
| Compatibility of information security with other operating systems | “Omonym-390VS”, “Olivia”, MSVS 5.0 |
| Core | 2.4.32 (2.4.37.9 actually) |
| File system is mandatory | EXT2, EXT3 |
| Support for other file systems | FAT16, FAT32, NTFS (ro), ISO9660 |
| File name length | up to 256 characters |
| Graphics subsystem | X-Window |
| Graphics system | Xorg-x11-7.3 |
| Type | Client - server |
| Window manager | Elk, TWM, KDE, IceWM |
| Graphic shell | Elk-1.9.9 |
| Multiprocessor support | Up to 32 processors |
| RAM | 64 GB |
| Built-in services | DNS, FTP, Telnet, NTP, FTP, TFTP, SFTP, DHCP, RIP, BGP, OSPF, PPP, PPTP |
| Supported buses | ISA, all PCI, SCSI, IDE, SATA, SAS, AGP, USB 2.0 |
| Development tools including: | |
| Programming languages | C/C++, Perl, Python, Shell, Tcl |
| C/C++ compiler | 2.95.4, 3.3.6, 4.1.3 |
| System library | glibc-2.3.6 |
| QT | 4.6.3 |
| Debugger | gdb ver 6.8 |
| Installation options | CD-ROM, HDD, Network |
Installing MSWS 3.0 OS
The practical lesson will cover the process of installing MSWS OS on a PC or server computer network. The installation process for MSWS 3.0 OS consists of the following steps:
- Booting a PC or a computer network server from a storage medium on which the distribution kit with MSWS 3.0 OS is located. After the loading process from the media is completed, the image shown in Fig. 2.1. To continue, you must press the key<Ввод> (
).
Figure 2.1. Launch screen for the MSWS 3.0 OS installation wizard.
- The MCWS OS kernel is initialized and equipment is detected, after which the image shown in Fig. is displayed on the screen. 2.2. To continue, you must click the button<Готово>.

Figure 2.2. Detected devices screen.
- The “Welcome” shown in Fig. is displayed on the screen. 2.3. To continue, you must click the button<Да>.

Figure 2.3. Welcome screen.
- Selecting a mouse model connected to the computer (Fig. 2.4). Due to the fact that the “mouse” manipulator will not be used in further work, you should select the “No mouse” item and press the button<Да>.

Figure 2.4. Selecting the mouse model connected to the computer.
- Hard disk partitioning is one of the most critical moments during the installation of the MSWS OS. Not because partitioning a hard drive is so complicated, but because errors made during it can only be corrected with great difficulty and this process can be fraught with data loss.
In this review, I will try to install a copy of RedHat Enterprice Linux for the needs of the Russian Ministry of Defense to see how it works on modern hardware. The last release of the WSWS was already in 2011, but it still continues to be “useful” in the Russian Army:

Let's start installation
We will install it on a FUJITSU LIFEBOOK N532 laptop, which works stably for me in Linux and Windows. This laptop was released in 2012, just a year after WSBC 5.0.
The boot window is a stripped-down copy of RedHat Enterprice Linux:

They were even too lazy to make a normal loading window, changed the background/logo, removed unnecessary buttons and that’s it.
To continue the installation, simply press Enter:
The retro-style MS-DOS installer loaded, but before the release of MSBC 5, almost all distributions already had a graphical installer. Debian also has a text installer, but it is much simpler and clearer than this one. We are asked whether to check the installation DVD or not. Let's check just in case:


The disc is written normally, there are no errors. Next we are asked to check for additional media, but I don’t have any.

The disk partitioning tool loaded with the option to delete all partitions selected. What if the officer, relying on the intelligence of the domestic IT industry, simply presses Enter?
Now let's start partitioning the disk. There are two other operating systems installed on this computer and I selected "Create your own partition"

We have 30GB of unused unformatted space, select "Use free space and create default partition" and get a partitioning error: unable to allocate the requested partitions
Click "Yes" and get an automatic partitioning error:
Click "Yes" and select "Create your own partition"
Since this “DOS fdisk” does not show how much is occupied and free, so as not to accidentally delete anything, I decided to look at the partitions in another OS and pressed reboot (alt+ctrl+del I remember from MSDOs).
The computer just froze on these words, but responds to CapsLock. We wait another 15 minutes and just press reset. We load another OS, make sure that the free partition is selected correctly, continue the installation and reach the disk partitioning stage. The choice of file systems here is not rich, only ext2, ext3 and vfat (which did not fit on the screen).
Let's leave everything by default, that is, we will use grub:
Just press Enter
Next we are asked to create a password to change grub boot parameters

I had to enter a long password
Now let's start installing the bootloader. Installed on the laptop latest versions Debian and Ubuntu, but the installer did not find them. As a result, after installing MSVS, the selection menu will disappear operating systems and you will have to restore grub via LiveCD.
The list of operating systems slider is at the very bottom, as if to say that there is something else. I tried to move it by pressing TAB, Ctrl, Ctrl+tab and other keyboard shortcuts. But the position the slider was in remains the same:

Click Yes and continue the installation:

We choose where to install the bootloader. In all Linux systems I install the bootloader in the main one. boot entry MBR, that is, on /dev/sda, but for recent Windows users this difficult question. Or do all Russian military personnel know Unix?

Next comes network setup.
None network connections we don’t have one, select “No” and press Enter

A window will open asking you to enter additional network settings:

As you can see, there are no “cancel” and “no need” buttons here. There are only “yes” and “back”. This would be logical if we were installing the system over a network, but we have a DVD with complete set programs. Press Enter.
You left the "gateway" field blank. Depending on your network environment, there may be problems later

We click continue and we are again asked to enter additional network parameters. In general, we return to the first network setup window and indicate that we need to configure the network interface, although we do not have one.
You are asked to enter the network name. Select “Manual” and come up with a network name
Select your time zone:

Select the root user password (at least six characters):

Select a list of packages to install. I chose everything

Next comes the checking of dependencies, after which a window opens with the address of the installation log:

Installation process:

I don’t understand, are these problems with fonts or encodings?
The installation reaches 100% and the installer happily greets us that the installation is complete, asks us to disconnect removable media and press Enter to reboot. We press Enter and the computer just freezes, like last time.
Click Power button, we wait a few minutes and oh, horror, everything is in English. Or is this the Russian language in the Russian army?

Where are our Debian and Ubuntu? There is only one WSWS here. But it's okay, this can be fixed by reinstalling the Grub boot loader via LiveCD.
Just press Enter to load
The system freezes for 15 seconds and shows errors: Memory for crash kernel (0x0 to 0x0) notwithin permissable; unable to query Synaptics hardware (can't query the touchpad)

and continues loading, during the loading process the settings menu opens

Just select "Exit" and press Enter. After 10 seconds, this screen opens, where there is not a single hint of graphics. Enter your login and password and the system is ready to work:
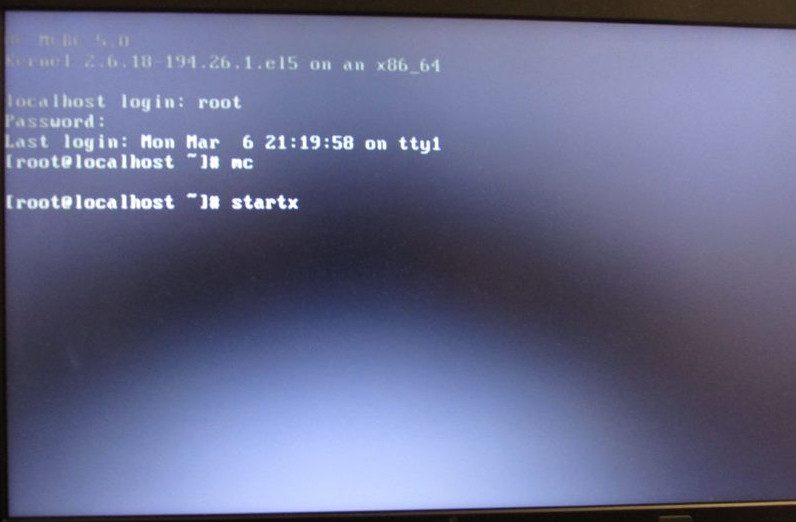
By the way, please note that kernel 2.6.18 is installed here. This kernel was released five years earlier than MSVS 5.0. Yes, in five years it was possible to build entire industries, as in Stalin’s five-year plans, but almost 10 years have already passed! At that distant time, I was just beginning to become interested in Linux. Although maybe they conducted a code security audit for five years.
Okay, let's try to use what we have.
We are trying to launch the graphics. In Nix, to start graphics, you usually need to enter startx, enter startx:
#startx
and we get errors:
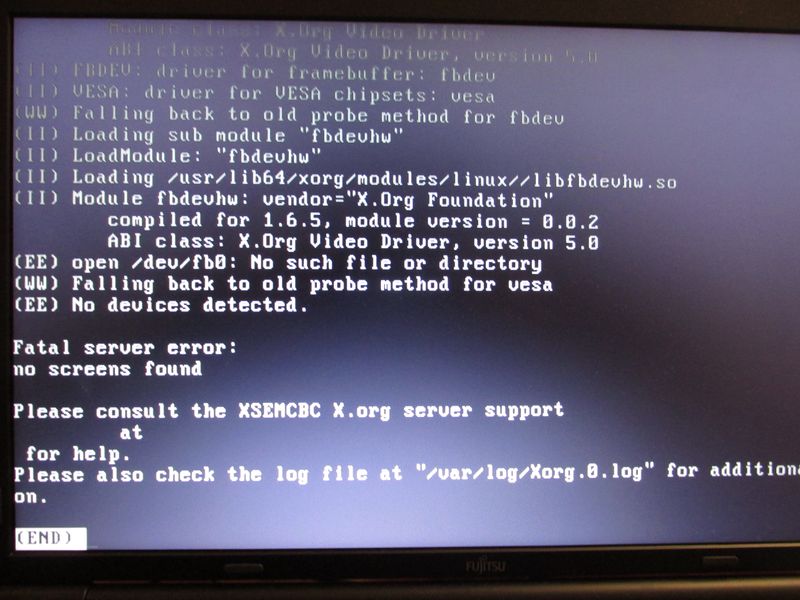
Here I specifically opened the error log /var/log/Xorg.0.log to make it clear what was going on: the system cannot load the standard fbdev and vesa drivers.
All we have to do is reboot the system and return to the working OS, enter reboot and again we get a freeze when rebooting:

Let's try to install via VirtualBox:
We also enter the login root, password and startx
Of course, for security reasons, VNIINS does not recommend running Xs as an administrator. And why then, after the first launch or in the installer itself, was it not suggested to create simple users for security purposes, as in many other distributions?
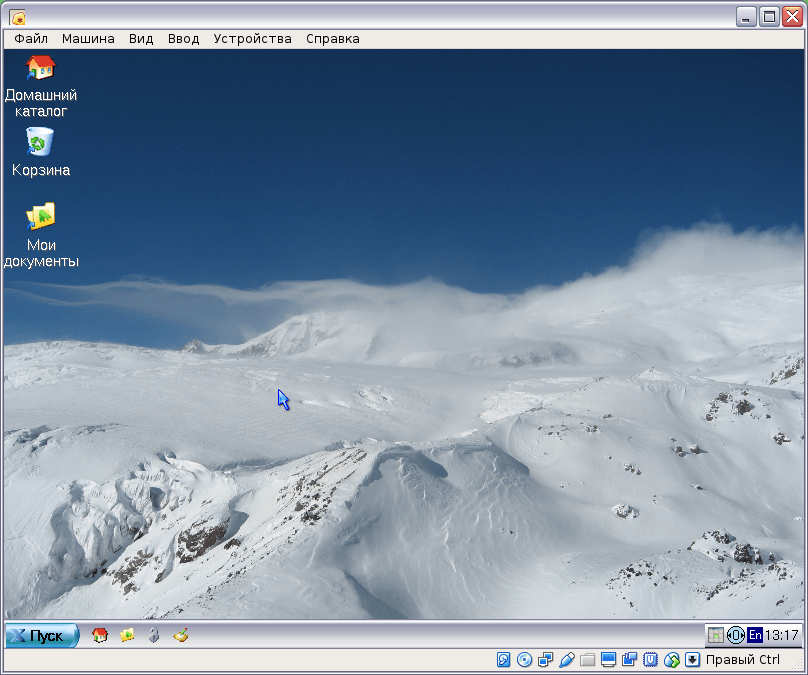
O_o, it turns out it works.
Desktop WSWS 5.0
So what we see is a beautiful lightweight desktop that simulates old Windows and KDE. But this is just an embellished open source desktop
A file manager released 11 years ago looks a lot like a stripped-down konquerror

In the system tray there is a time indicator with a calendar, a keyboard layout switch and an indicator of accessibility levels (but this is more likely from the MSVS developers).
WSWS 5.0 settings
In Linux, some programs (for example Chromium) for security reasons do not run as the root user, so the first thing we will do is create a new user and log into the system through it:Start - Settings - ELK Control Panel, User Management - Add a new user:

The password must be at least 8 characters!
The security attributes are impressive, but we won't touch them:

The user was created successfully. We exit the session and go straight to the root console account, where we are greeted by a bunch of errors:

Log out of this account by pressing Ctrl+D, log in as a new user and run startx. The Xs started up, but did not respond to mouse movements or keyboard shortcuts. Restarting the virtual machine did not help, the Xs in this account also do not work. Okay, you'll have to run as root, which is a security breach.
Our screen resolution is 800x600, we are trying to change it. Go to the "Control Panel" and select the "Monitor" icon. A window opens with a message that we do not have an xorg.conf file and that the screen will be dark while it is being created. Should I create it or not?

Click "Yes"

Error initializing configuration:

After which a window with monitor settings opens. We try to change something but there is no reaction. It is noteworthy that this window shows an example Windows screen 95. And when you click the “Yes” and “Cancel” buttons, the window does not close and nothing happens. You can close the window only by clicking on the cross.

In the "System" menu there is an item "Switch screen resolutions". We select it and a program opens in the tray with only two items: 800x600 and 640x480 and a frequency of 60Hz. But in FreeDOS OS I was able to set it higher and even change the frequency. Hence the conclusion that the graphics in MSWS OS are worse than in DOS!

We look at information about the equipment:

After clicking "OK" the following window opens:

WSWS 5.0 programs
Interestingly, when we move the mouse pointer from EDE to KDE programs, the color of the mouse pointer changes.This is because the WSBC desktop is a mixture of the EDE and KDE desktops.
Net. There are only ten programs in this category, including ELK browser, IRC, Wireshark, GFTP, mail monitor, network monitor and PPP configuration and network device management.

Network device management

The mail client does not start:

The ELK browser is an exact copy of the Aurora browser. Look, they renamed it to ELK, but forgot to change the logo:
ELK browser:
Utilities
The utilities have as many as 4 terminals: ELK-terminal, X-terminal, Console and terminal in superuser mode. Do you know why there are so many of them? Because the WSWS desktop is a mixture of EDE and KDE. They didn’t even think of removing unnecessary utilities; they left everything as it was by default.
For this reason, there are many programs from two different desktops, but with the same capabilities. This especially applies to viewing pictures, documents (PDF, DJVU, etc.) and text editors.
Emacs text editor in WSWS:
Scientific. In scientific only the KDE calculator, which was released in 2005:
Graphics. This section contains all programs from KDE + Xsane released in 2007.
Games. The games include a selection of games from KDE, including the war games Minesweeper and Parachutes:
Multimedia. Simple media player, audio CD player, K3b (CD/DVD burner), volume control and audio recording program.
To check the sound, you need to load into virtual system some movie... Sound and video don't work here at all. I installed Alsa, Oss, SoundBlaster16 in the VirtualBOX settings - nothing works. I tried ogv, ogg, mp4 - in some cases it requires installing codecs, in others it shows an error:
Let's try to install ffmpeg:
Open Start - Control Panel ELK - Program Manager
package lists are checked for a few seconds before launching
let's try to find ffmpeg
This is the Russian language in the Russian army!
ffmpeg was in the list of installed packages. And a search for oss and alsa (sound systems) did not yield any results at all. Office and firefox queries also did not produce any results.
When launched, k3b gives an error that the Mime type cannot be found. You need to click OK 10 times and then it will start:
System shutdown:
Withdraw...
1. MSVS does not work on modern equipment
2. The system kernel, like all software, was released 11 years ago, so modern equipment is not supported
3. Screen resolution is set to 800x600 and does not change
4. The video system only works in the emulator, but shows errors after completion.
5. Sound doesn't work at all
6. Graphics work only for the root user, which is a security violation
7. By default, the shutdown and reboot commands are only available through the console and only work in the emulator.
General conclusions.
MSWS5.0 - copied in 2011 by RedHat Enterprice Linux5.0 (2007), does not work correctly on computers released in 2011. Yes in Russian Army In general, there is a noticeable attraction to deep antiquity, for example, the aircraft-carrying cruiser "Admiral Kuznetsov" with its own springboard instead of a catapult, because of which aircraft are forced to fly with incomplete ammunition and sometimes fall into the water during takeoff for aircraft and with an oil-fired power plant that needs to be refueled during hiking time...
Related posts:
 High magnification monoculars - features and benefits Monocular magnification 50
 World of Tanks crashes on startup - fixing errors World of tanks crashes after every battle
 Server key 1c over the network
 How to turn on WiFi on laptops Add a new wireless network to a laptop
 How to find out iPhone serial number?


