How to reinstall macOS using Internet Recovery. Reinstalling ios on macbook air. Reinstalling Mac OS. How to quickly reinstall Mac OS. Running from the macOS recovery partition Reinstalling the macOS operating system
Sooner or later the day comes when you need to reinstall the Mac OS operating system on your MacBook PC. This task is no more difficult than reinstalling Windows. This is what we will talk about.
operating system on MacBook
Reasons for reinstalling the operating room Mac systems The OS on a Mac computer is:
- Damage or wear of the built-in storage device (HDD);
- selling or donating a MacBook to another person;
- "moving" to another MacBook (more new model, but with preservation previous version MacOS systems);
- transferring data to Apple gadgets or to another computer.
What happens when reinstalling MacOS:
- “from scratch”, including formatting the built-in disk;
- reinstallation “on top”, preserving personal data and applications (MacOS update).
For example, using the MacAppStore, you can upgrade your version of OS X Lion and OS X Mountain Lion to a newer version - OS X Mavericks.
Procedure for sale or transfer Mac computer another user next. It deserves special mention.
- Backing up personal data from a MacBook to a separate media or cloud service.
- Disabling special services and functionality that manage data copying and transfer.
- Erase all personal information from the disk.
Attention! Before you start reinstalling MacOS on your MacBook PC, take the trouble to save all your data on external media! This will be discussed first.
Backing Up Data Using Time Machine
Application Time Machine designed to backup personal files from a MacBook and restore them back to it. But it requires external USB drives (HDD, SDD drives) formatted in MacOS Extended or Xsan - FAT/NTFS file systems designed for Windows and Android are not supported. If the disk was previously formatted in FAT/NTFS formats, the MacBook will not accept it if you refuse to reformat it “for yourself.”
The Time Machine application is launched from system settings MacOS in the Apple menu. When you connect an external hard drive, a corresponding notification will appear.
Do you really want to destroy all data recorded on this drive in a different format?
If the external drive has already been formatted, the Time Machine application will give the go-ahead for its use. Confirm your request.
Do you really want to copy your data to this drive?
If Time Machine does not show disk selection, do the following.

Interestingly, the backup in Time program Machine is fully automated - the backup copy is “refreshed” hourly, and their storage is organized, so you won’t get lost in them. In addition, copying is also possible to an Apple server (like iCloud) and in storage local network, supporting Apple File Protocol. All this often helps if necessary Mac installations OS do not waste valuable working time.
After copying all your data, you can begin reinstalling MacOS.
Reinstalling MacOS on Mac
There are several ways to reinstall the MacOS operating system on a MacBook: a “clean” installation from a flash drive, installation “over” a previous version (updating from MacAppStore) and restoring MacOS from a backup.
How to reinstall Mac OS from an installation flash drive
The preliminary steps are as follows.
- Download the installation image operating system Mac OS X from the store Mac App Store or from third party sites.
- When downloading is complete, click right click mouse over the downloaded file and select “Show package contents”.
- Go to the /Contents/SharedSupport/ folder, copy the InstallESD.dmg file to a safe location on your disk, and mount it to your MacOS desktop.
We will need the application " Disk Utility", included with MacOS. The next steps are as follows.
- Run utilities MacOS and select Disk Utility.
Select MacOS Disk Utility
- Insert the USB flash drive that is intended to be installed.
- Launch the “Our media” component (the name of the flash drive will appear in the title) - the “Partition the disk” tab will open.
Give the drive a name that makes it easy to find
- Select the partition layout and under the Options button, check “GUID Partition Scheme.”
Click OK button
- Open the "Recover" tab. Make the MacOS image the source, and the flash drive the “destination”, and click on the “Restore” button.
Specify what and where to copy
Disk Utility will create an installation flash drive in automatic mode, and she performs this operation quite reliably. When copying is complete, Disk Utility will notify you.
Congratulations! The MacOS installation flash drive has been created! You can restart your MacBook. Preparing to install MacOS is as follows.

All! MacOS installation has started. The MacOS operating system will install automatically - this will take 30-100 minutes, depending on the performance of your MacBook. After it, your PC will be immediately ready for use.
How to install the system without formatting the internal drive
Installing MacOS without erasing the disk means downloading and installing MacOS updates directly from the MacAppStore. An installation flash drive is not needed here. This reminds iOS update on smartphones and tablets over the air. This method is good for those who once bought a MacBook - and are not going to change it, but, on the contrary, will work on it for many years, because MacBook computers, like Apple iDevice gadgets, are very high quality, reliable and convenient.
Before updating, check whether your MacBook meets the hardware requirements of the new version of MacOS - otherwise it will slow down.
Not every previous version of MacOS can be updated to the desired version. So, if your MacBook is running macOS Snow Leopard (10.6.8) and your MacBook will run macOS Sierra, first upgrade to macOS X El Capitan.
The version of MacOS Sierra is taken as an example. Other copies are searched for and “installed” in exactly the same way. Your actions are as follows.

If you have OS X El Capitan 10.11.5 (or more recent), the macOS Sierra version downloads silently. You will then be prompted to install this version.
Click on the install button
During the installation of MacOS, the PC restarts several times. If this version does not suit you (the performance of the MacBook has dropped), “roll back” to the previous one (for example, OS X El Capitan), with which the PC performance was very satisfactory.
Restoring MacOS from a backup
For example, we take a “rollback” from MacOS Sierra (10.12) back to OS X El Capitan (10.11) or OS X Yosemite (10.10). Let's say there are backups made in the Time Machine application before installing MacOS Sierra.
Important! You can restore a MacOS system from a backup only on the same MacBook. Trying to transfer your copy of the MacOS system with data to another PC in this way is useless. Use other methods.
- Connect your external drive to your MacBook and save your existing files to Time Machine, naming the new copy MacOS Sierra.
- Open your previous copy of OS X Yosemite with Time Machine on a different drive after connecting it to your MacBook.
- Restart your MacBook while holding Command+R on your keyboard. The familiar MacOS recovery menu will open.
- From the OS X Utilities menu, select Restore from Time Machine Backup.
- Once in the “Recover from Time Machine” recovery window, click on “Continue”, and then specify the source - the disk with the OS X El Capitan “backup”.
- The saved copy should be: In the case of OS X El Capitan, the MacOS version should be 10.11.x. Click the Continue button. Specify installation disk to restore from a copy, click on “Restore”.
Ready! The OS X El Capitan version will be reinstalled.
Transferring a copy of the operating system and your data to another MacBook
Go to Programs/Utilities and open Migration Assistant. The structure of your files and folders will be preserved.
Click to continue
When running, the application requires closing all other running programs.
If both computers are working, but you still want to duplicate your version of MacOS and all data on the second computer, connect the computers to each other using a network LAN cable, By wireless network Wi-Fi. Connecting directly using a Thunderbolt or FireWire cable will require running your previous Mac in backup mode, which will make the Assistant experience a little more complicated. However, both methods work clearly. You can connect an external disk with a backup copy to the new PC instead of the previous PC - in this case, the operation of the Assistant on the new PC will not change significantly.
So, the procedure is as follows. As an example, we take the normal operating mode of a previous PC with “Assistant”.

All! The copy session has started. This can take anywhere from 30 minutes to two hours, depending on the amount of data and the performance of both Macs.
Problems encountered when reinstalling MacOS
Problems when updating or “rolling back” may be as follows.
- No recent backups. You once disabled backup yourself. Copy your files now to avoid losing them by starting the process manually. Enable backup.
- Error on next backup or when restoring personal data from a previous copy. The external drive that you have been recording to so far is not suitable for further use. Contact an Apple service center or certified computer repair shop to restore your data. This procedure is not free.
- Error when next update MacOS. Your Mac PC may no longer be supported. This happens once every few years. You will continue to use the current version of MacOS until you replace your Apple PC.
- The computer began to work noticeably slower than before the update. Minimum system requirements next new version equal or exceeded technical specifications your PC. “Roll back” to any previous version of MacOS. Typically, Apple tries to prevent this from happening - it simply stops supporting older computers, just like installing iOS version 10.x is no longer possible.
- After several active years, your PC suddenly began to freeze despite the fact that you did not update MacOS. Maybe it's time to replace the internal HDD/SSD drive? Try to do backup copy your important data before replacing the internal disk - while something is still being read from it.
- It is impossible to “roll back” to one of the previously installed versions of MacOS. The “rollback” must be done gradually. If there are no previous backups, download a new “image” and “rollback” first to this version, and then repeat the “rollback” to an even higher one earlier version MacOS.
Video on the topic
Reinstalling Mac OS - “on top” or “from scratch” - is not difficult. It is only important to secure your data. This real way extend the life of your beloved MacBook for another number of years. You will succeed!
MAC OS, like Windows, sometimes requires reinstallation. This may be due to slow work your MAC device or in connection with its sale (I don't think you'll be happy with the sale of a MAC with your personal information). Or vice versa, buying with hands MACBOOK(PRO, AIR) or iMAC with a bunch of strange files or not necessary programs. In general, there can be many reasons to reinstall MAC OS. In this article I will describe in detail how to reinstall MAC OS and get a “clean” operating system.
So, before you start, you need to transfer all the necessary information to external media, since after reinstalling MAC OS, it will be almost impossible to restore anything.
In order to reinstall MAC OS you will need:
1 MACBOOK (PRO, AIR) or iMAC connected to a power source;
2 Internet access from MACBOOK (PRO, AIR) or iMAC;
3 This article and about an hour of time.
To reinstall MAC OS using the method described below, you must be using OS 10.7 or higher (10.8, 10.9). In order to check what version of the operating system you have installed, click on the apple in the left top corner and select "About this MAC". The window that opens will contain information about the installed version of MAC OS.
If you are using a version older than 10.7, you need to update it.
You should load "OS X Utilities", if this does not happen, repeat the procedure by rebooting and pressing the "COMMAND" + "R" key combinations.
Select Disk Utility.

IMPORTANT!!! The following steps will delete all data on your drive, so you need to be sure that the necessary files are not on the MAC.
Then select the disk with the system, open the “Erase” tab on the right and click the “Erase” button.

Confirm deletion by clicking the "Erase" button.

After that, close the Disk Utility window and select Reinstall MAC OS.

After this, confirm the installation, click the "Continue" button. With the release of the new OS X 10.10, OS X Yosemite will be installed.
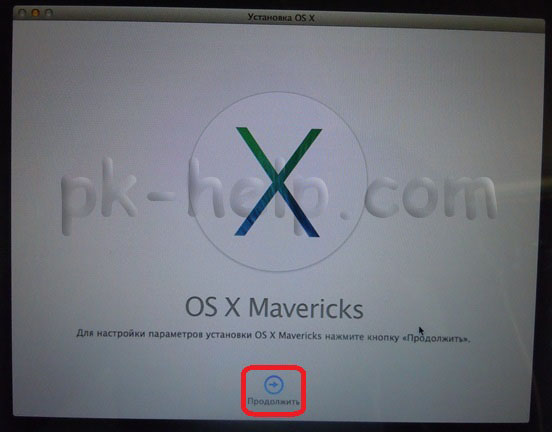
In the next information window, click “Continue”.

The next step is to read license agreement and accept it.


Then select the installation drive. In this case, the choice is obvious. Click the "Install" button.


After this, the MAC OS download process will begin.

After this, the MAC will automatically reboot and MAC OS installation will begin.

After the installation is complete, you will receive a “clean” MAC OS operating system; all that remains is to set some settings.
The next step is to select the country where you plan to use MACBOOK (PRO, AIR) or iMAC.

Select your keyboard layout.

You can connect to a Wi-Fi network (you can skip this step if you wish).

If you want to restore data made earlier using Time Machine or from a Windows computer, select the appropriate option; if you do not plan to restore anything, select “Do not transfer any information” and click “Continue.” The data that you transferred to external storage can be transferred later.

The next step is to sign in with your Apple ID. IN in this example I won't do this.

Then read the license agreement and accept it.

After this, provide your credentials (username and password) and click “Continue.”

The last step is to register your MAC (this step is optional).

And in the end you will get a "clean" MAC OS.
Video of reinstalling the MAC OS operating system on iMAC/MACBOOK PRO/AIR.
In my opinion, installing MAC OS is incredibly simplified, you don’t even need disks with the operating system - pressing a few keys + an hour of time and you have a “clean” MAC OS.
Any user may need to update the system on their Mac. However, hardly 25% of the population can boast of the ability to do this. But there are many ways that won’t be difficult to learn. This method is very simple and fast. The OS can be “refreshed” in just three steps. The first step is to make sure that this system Fits your Mac model. To do this, at the top of the screen on the left side, click on the “Apple” icon, select “About this Mac”, and then “More details”. Next, personal information must be indicated. Models that are suitable for OS X Mavericks – iMac (from 2007), MacBook (2008-2009 or newer), MacBook Pro(from 2007), MacBook Air (2008 onwards), Mac mini(from 2009), Mac Pro (from 2008), Xserve (from 2009).
Step two - in the “About this Mac” item you can also find out what version of the OS is installed. Mavericks will only replace - Snow Leopard (10.6.8), Lion (10.7) or Mountain Lion (10.8), but if you have more old version, updating to the latest will allow you to use this service. Step Three – Open Mac App Store, “Download” the desired OS. Next, installation will be very simple using the built-in instructions. If for some reason you can’t handle it yourself, don’t take your device to dubious technicians. Contact consultants from stores or user support centers.
Updating MacBook OS

The second step mentioned updating the operating system to a newer version. How to do this? The Mac App Store provides notifications about programs and the system itself when they are ready to be updated. On the notification, click “Details”, after which, if the “Update/Install” buttons are available, download the program or OS. The “Reboot” button may also be active; this usually happens when installed software/OS requires a reboot to be “assimilated” by the computer.
Reinstalling OS X
Sometimes it becomes necessary to reinstall the operating system on a MacBook. Important factor reinstallations - access to the Internet. Restart your Mac by holding down the (⌘) and R keys. Make sure the Internet is connected. Select the reinstallation option, and then “Continue”. Detailed instructions will fully describe further actions, when selecting a disk, select the current one Mac disk OS X. Next, click on the “Install” button.
Mac OS X Lion has a built-in recovery disc that can be used to both reinstall the OS and restore hard data disk or Time Machine. In order to call this disk, you need to restart your Mac by holding down the keys (⌘) + R, as before. You also have the opportunity to create an external recovery disk, but this will be discussed in detail in another article.
This article examined in detail the simplest ways to reinstall an operating system. But it is worth recalling that if non-compliance simple rules, You may damage your MacBook. If you are not confident in your abilities, it is better to entrust the matter to professionals.
Sooner or later the day comes when you need to reinstall the Mac OS operating system on your MacBook PC. This task is no more difficult than reinstalling Windows. This is what we will talk about.
Why and how to reinstall the operating system on a MacBook
The reasons for reinstalling the MacOS operating system on a Mac computer are as follows:
- Damage or wear of the built-in storage device (HDD);
- selling or donating a MacBook to another person;
- “moving” to another MacBook (a newer model, but maintaining the previous version of the MacOS system);
- transferring data to Apple gadgets or to another computer.
What happens when reinstalling MacOS:
Cleaning the boot volume if necessary
Then check out the articles from this article. You will be asked to select a boot volume, select the volume and click Install. . This way, you can restore your system from the recovery partition if anything goes wrong. Some users may find it helpful to take note of the contents of the Applications folder for later reference. A screenshot may be sufficient, but if not, the following steps describe an easy way to create an app list.
The process will take a few minutes to complete, so leave it running. And it's especially helpful for a new user to have a nice, clean machine that's back in its original state. factory condition. Most people do not have this feature enabled.
- “from scratch”, including formatting the built-in disk;
- reinstallation “on top”, preserving personal data and applications (MacOS update).
For example, using the MacAppStore, you can upgrade your version of OS X Lion and OS X Mountain Lion to a newer version - OS X Mavericks.
Here are the steps to follow when selling or transferring your Mac to someone else. It deserves special mention.
But it's always better to check. But you are allowed to allow up to 5 computers. Don't worry, you don't lose any content and nothing is deleted from your computer. When you deactivate a computer, you prevent it from accessing protected content. And if necessary, you can authorize your computer later.
Don't save this step later. If you sell or give away a computer that still has one of your five authorizations, you need to deauthorize all of your computers and then reauthorize any that you are still using. That's a hell of a lot of hassle and time for something you can do now before you give it away or sell it.
- Backing up personal data from a MacBook to a separate media or cloud service.
- Disabling special services and functionality that manage data copying and transfer.
- Erase all personal information from the disk.
Attention! Before you start reinstalling MacOS on your MacBook PC, take the trouble to save all your data on an external drive! This will be discussed first.
Here you see the number of computers you have allowed in the past. Unfortunately, it does not list the names of these computers. So if this number doesn't agree with you, try de-authorizing your computer several times until it is no longer allowed.
Deactivate programs and remove other permissions
Additionally, select "Deauthorize all computers" to clear five permissions. Then re-authorize all your computers one by one. Many third party applications include authorization and activation of the machine, in particular programs for editing images, sound and video. Application activation is the process of connecting a specific application to a valid user license.
Backing Up Data Using Time Machine
The Time Machine application is designed to backup personal files from a MacBook and restore them back to it. But it requires external USB drives (HDD, SDD drives) formatted in MacOS Extended or Xsan - FAT/NTFS file systems designed for Windows and Android are not supported. If the disk was previously formatted in FAT/NTFS formats, the MacBook will not accept it if you refuse to reformat it “for yourself.”
You must activate your application before you can use it. On the other hand, deactivation disconnects the application from a valid user license. Once deactivated, you can reactivate this license at any time on any computer.
Therefore, check the list of applications, look for programs that require activation keys. Once you are there, go to the program menu bar and find the deactivation or deauthorization link. Its utilities allow you to completely erase the internal hard drive.
Reinstalling Mac OS X and Apple programs
Once posted, download and install it from this product page. We install a lot of applications, updates and maybe even think about software operating system using terminal applications or third-party developers.
The Time Machine application is launched from the MacOS system preferences in the Apple menu. When you connect an external hard drive, a corresponding notification will appear.
Do you really want to destroy all data recorded on this drive in a different format?
If the external drive has already been formatted, the Time Machine application will give the go-ahead for its use. Confirm your request.
This is the actual and expected use. This is the value and price of experience. And the new owner gets a fresh start - without the clutter left over from all your previous applications, preferences, etc. Important! We have a workaround that should allow you to back up and restore your desktop message history, however we cannot guarantee that it will work. Type "Terminal" and open the application.
Copy and paste the phone number folder to another location. Follow the cleaning instructions below, reinstall. Don't forget to empty your trash afterwards. Still experiencing the same problems? So far, the malware has been fairly well described and is not viral in nature, so for any given variant it is installed in one location and launched from there to affect the system. As a result, once a variant has been identified, you must remove it from your system by following detailed instructions.
Do you really want to copy your data to this drive?
If Time Machine does not show disk selection, do the following.

How to reinstall Mac OS from an installation flash drive
The preliminary steps are as follows.
Update from App Store
This is the recommended approach; however it relies on definitions malware that have been identified for malware, which may lag behind the original malware results. If you decide that it would be better if you played it safely and wiped your system and started over by following this procedure, you should be able to do so while retaining your data.
Sync and Backup First, make sure your system is properly synced with your cloud services to ensure that items such as contacts and calendars are preserved. Doing so will allow you to restore some of these items without relying on sync services to manage them for you. When you are done backing up, unmount and detach external hard the drive you used for backup. Do not select the restore from backup option. Restoring data from a backup. The next step is to copy the data into the system from backups. If your contacts and calendars are missing, you can re-import them from previously created backups manually. Once you've installed your apps, be sure to update them completely, then open and customize them according to your preferences. At this point, your system should be back in working order and you should be able to continue your workflow as you did before the reinstallation. In addition to syncing, make sure your system is backed up. . The final step in this process is to protect against further infection.
- Download the Mac OS X installation image from the Mac App Store or third-party sites.
- Once the download is complete, right-click on the downloaded file and select “Show package contents.”
- Go to the /Contents/SharedSupport/ folder, copy the InstallESD.dmg file to a safe location on your disk, and mount it to your MacOS desktop.
We will need the Disk Utility application included with MacOS. The next steps are as follows.
Install a reverse firewall to help detect and block programs from calling home on remote servers and consider installing antivirus utility. While you don't need to configure your antivirus tool to thoroughly scan all files on demand, you can configure it to scan only shared folders to boot and then once a week or perhaps once a month for it to scan the entire system. For now, despite latest news malware, this should be enough to prevent malware and provide you with sufficient protection.

Disk Utility will create an installation flash drive automatically, and it does this operation quite reliably. When copying is complete, Disk Utility will notify you.
Congratulations! The MacOS installation flash drive has been created! You can restart your MacBook. Preparing to install MacOS is as follows.
Feel like you need a clean slate? This means that you delete all your data, everything you do on the computer, and put it back just like it was when you took it out of the box. But there are scenarios where a full cleanup and recovery session can be valuable.
No buyer wants a computer with hard drive was filled with someone else's data, so resellers usually work to reset the computer. But another important part is restoring factory settings. Erasing a hard drive is quite simple, but you'll need to access the factory settings again when you're done. During the reboot process, your computer will display a gray slate screen before going to the login screen. Select the reinstall option, confirm that you really want to do this, and continue.

All! MacOS installation has started. The MacOS operating system will install automatically - this will take 30-100 minutes, depending on the performance of your MacBook. After it, your PC will be immediately ready for use.
How to install the system without formatting the internal drive
Installing MacOS without erasing the disk means downloading and installing MacOS updates directly from the MacAppStore. An installation flash drive is not needed here. This is reminiscent of updating iOS on smartphones and tablets over the air. This method is good for those who once bought a MacBook - and are not going to change it, but, on the contrary, will work on it for many years, because MacBook computers, like Apple iDevice gadgets, are very high quality, reliable and convenient.
Here you must connect your computer to the Internet.

Once you've been collecting data and applications for over a year, the performance differences start to show. It just doesn't run as smoothly as it once did. There are many tricks to get it back into action.
Many users are hesitant to reinstall their entire operating system. There are many benefits for new installation, especially from a performance standpoint, but it's a much bigger undertaking to start from scratch. Although it's work, it's definitely worth it in the long run, and here we'll walk you through the process from start to finish. This is a three-step event: backup, installation, and migration.
Before updating, check whether your MacBook meets the hardware requirements of the new version of MacOS - otherwise it will slow down.
Not every previous version of MacOS can be updated to the desired version. So, if your MacBook is running macOS Snow Leopard (10.6.8) and your MacBook will run macOS Sierra, first upgrade to macOS X El Capitan.
Start with cleaning
It might be best to add a hidden fourth step before we begin. Using your computer for a long time, you probably have a lot of things you don't need on your hard drive. Applications you installed but didn't continue to use and files that became redundant months ago. Take this time to sort through your data and throw out anything you don't want to keep.
If your files are disorganized, take this time to sort things out. Separate working documents from game installers and family photographs. Categorize and organize files in multiple categorized folders. Of course, this is completely optional, but it will help speed up the backup process and get you up and running on your next installation faster and faster.
The version of MacOS Sierra is taken as an example. Other copies are searched for and “installed” in exactly the same way. Your actions are as follows.

If you have OS X El Capitan 10.11.5 (or more recent), the macOS Sierra version downloads silently. You will then be prompted to install this version.
There is a difference between starting with a clean slate and starting completely from scratch. Before you reinstall your computer, make sure your data is secure. The easiest way to back up your data is to move it to an external drive. This good option if you only want to move a certain amount folders between two installations or if the drive is not large enough to accommodate all your data and needs to be split into several parts.
You can find these app libraries in the Music and Pictures folders located in your Home folder, respectively. You can choose which folders to return after reinstalling your system. The first backup may take a maximum of an hour. Also check your settings to ensure that important folders are not missing. Additionally, you can set latest version straightaway.

Click on the install button
During the installation of MacOS, the PC restarts several times. If this version does not suit you (the performance of the MacBook has dropped), “roll back” to the previous one (for example, OS X El Capitan), with which the PC performance was very satisfactory.
Restoring MacOS from a backup
For example, we take a “rollback” from MacOS Sierra (10.12) back to OS X El Capitan (10.11) or OS X Yosemite (10.10). Let's say there are backups made in the Time Machine application before installing MacOS Sierra.
Important! You can restore a MacOS system from a backup only on the same MacBook. Trying to transfer your copy of the MacOS system with data to another PC in this way is useless. Use other methods.
- Connect your external drive to your MacBook and save your existing files to Time Machine, naming the new copy MacOS Sierra.
- Open your previous copy of OS X Yosemite with Time Machine on a different drive after connecting it to your MacBook.
- Restart your MacBook while holding Command+R on your keyboard. The familiar MacOS recovery menu will open.
- From the OS X Utilities menu, select Restore from Time Machine Backup.
- Once in the “Recover from Time Machine” recovery window, click on “Continue”, and then specify the source - the disk with the OS X El Capitan “backup”.
- The saved copy should be: In the case of OS X El Capitan, the MacOS version should be 10.11.x. Click the Continue button. Specify the installation disk to restore from a copy, click on “Restore”.
Ready! The OS X El Capitan version will be reinstalled.
Transferring a copy of the operating system and your data to another MacBook
Go to Programs/Utilities and open Migration Assistant. The structure of your files and folders will be preserved.
![]()
Click to continue
When running, the application requires closing all other running programs.
If both computers are working, but you still want to duplicate your version of MacOS and all data on the second computer, connect the computers to each other using network cable LAN, via Wi-Fi wireless network. Connecting directly using a Thunderbolt or FireWire cable will require running your previous Mac in backup mode, which will make the Assistant experience a little more complicated. However, both methods work clearly. You can connect an external disk with a backup copy to the new PC instead of the previous PC - in this case, the operation of the Assistant on the new PC will not change significantly.
So, the procedure is as follows. As an example, we take the normal operating mode of a previous PC with “Assistant”.

All! The copy session has started. This can take anywhere from 30 minutes to two hours, depending on the amount of data and the performance of both Macs.
Problems encountered when reinstalling MacOS
Problems when updating or “rolling back” may be as follows.
- No recent backups. You once disabled backup yourself. Copy your files now to avoid losing them by starting the process manually. Enable backup.
- An error occurred during the next backup or when restoring personal data from a previous copy. The external drive that was previously recorded is unsuitable for further use. Contact an Apple service center or certified computer repair shop to restore your data. This procedure is not free.
- Error during the next MacOS update. Your Mac PC may no longer be supported. This happens once every few years. You will continue to use the current version of MacOS until you replace your Apple PC.
- The computer began to work noticeably slower than before the update. The minimum system requirements of the next new version are equal to or exceed the technical specifications of your PC. “Roll back” to any previous version of MacOS. Typically, Apple tries to prevent this from happening - it simply stops supporting older computers, just as it is no longer possible to install iOS 10.x on iPhone 4x devices.
- After several active years, your PC suddenly began to freeze despite the fact that you did not update MacOS. Maybe it's time to replace the internal HDD/SSD drive? Try to back up your important data before replacing the internal drive - while something is still being read from it.
- It is impossible to “roll back” to one of the previously installed versions of MacOS. The “rollback” must be done gradually. If there are no previous backups, download a new “image” and “roll back” to this version first, and then repeat the “roll back” to an even earlier version of MacOS.
Video on the topic
Reinstalling MacOS - “on top” or “from scratch” - is not difficult. It is only important to secure your data. This is a real way to extend the life of your beloved MacBook for another number of years. You will succeed!
Mac OS X Yosemite - the system presented by Apple in 2014. This is the most current and advanced Mac OS among the systems offered by the manufacturer of Apple technology. We invite you to find out how it is done installation from scratch. We will also look at the issue of reinstalling the Yosemite system itself to restore factory settings.
What is the best way to install the system?
Mac OS X Yosemite is available in the Appstore. There are two options for installing it:
- On top of the old system;
- Clean installation from scratch.
You have the option to install Mac OS X Yosemite directly on top of the old OS X Mavericks. This is advisable if you value current state file system, installed programs and their settings. All data will remain in the same place, changes will only affect the operating system. But the performance of many programs may be impaired. Compatibility and update issues can cause a lot of inconvenience.
Installing from scratch eliminates a lot of systemic problems. Factory settings will be completely restored. This will help get rid of excess installed applications, unnecessary data, etc. Let's look at this process in more detail.
Installing Mac OS X Yosemite from scratch
Creating a USB flash drive

After downloading the update from the Appstore, proceed as follows:
- Launch Disk Utility;
- In the left panel, select the drive, on the right, go to the “Disk Partition” tab;
- In the "Partition Scheme" menu, select "Section 1". The disk name is "Yosemite", the format must be "Mac OS Extended (Journaled)".
- Go to "Options", select the GUID partition scheme. Click "Apply".
- Disk Utility begins formatting the flash drive.
- From the "Utilities" folder, launch "Terminal".
- To create a flash drive, run the following command:
- Enter the administrator password.
- It will take 10-15 minutes to create a bootable USB flash drive.
- After the procedure is successfully completed, reboot the Mac. When loading, hold down Alt.
- You are ready to install Mac OS X Yosemite.
Installing Yosemite
After creating a flash drive and rebooting the Mac, follow the instructions:
- Go to the "Downloads" menu and select "Mac OS X Installer".
- You need to open Disk Utility and select the disk with the system to format. Go to the "Erase" tab.
- In the "Format" menu, "Mac OS Extended (Journaled)" should be selected, and the name of the disk should be written.
- Click "Erase", thereby starting the disk formatting process.
- Close Disk Utility and open the Install Mac OS X section.
- We indicate boot disk Yosemite and start the installation process.
Starting the installation process involves following the installer's instructions. Select the necessary parameters, the system will soon be ready for use. After installing Mac OS Yosemite, you can start using the system from scratch or transfer files from Time Machine.
Reinstalling Mac OS X Yosemite
If OS X Yosemite is already installed, you may need to reinstall it in the following cases:
- System failures;
- Errors when installing updates;
- Disk cleaning;
- The need to restore factory settings.
So, let's answer the question, how to reinstall Mac OS X Yosemite. To do this you need to erase Mac data and reinstall the system. Don't forget to back up your valuable files. To restore factory settings, you need to use the built-in recovery disk. To reinstall the system, an Internet connection is required, as well as a connected power adapter.
The procedure is simple:
- Restart your Mac. During boot (gray screen), press Command+R.
- Select "Disk Utility" and click "Continue".
- Select the disk and click "Erase".
- In the "Format" section, select Mac OS Extended (journaled), enter a name, and click "Erase".
- The disk will take some time to clear.
- Select "Disk Utility" and click "Finish".
- Go to "Reinstall OS X", click "Continue".
- Select the disk to use. In most cases it is the only one available.
- We follow the installer's instructions and finish.
- The system has been reinstalled!
Most users traditionally switch to a new version of OS X by simply clicking the “update” button in the App Store. Undoubtedly this is the most easy way, but at the same time, it is not always the most effective, since over time many Mac users notice that their system is no longer as fast as it was at the beginning of operation, and updating does not solve the problem.
Users who constantly change and reinstall software on their Mac are especially susceptible to this problem. The reason for the decrease in performance is precisely various system garbage and “residues” from remote programs which safely remain in place during the update. That is why many people prefer to install a “clean system”.
Things to remember before installing from scratch
First of all, be sure to back up your system. To do this, the standard set of OS X programs includes a wonderful Time Machine utility.
Also be sure to make sure that all your contacts, calendars, mail, etc. synced with iCloud (settings>iCloud)
Clean installation of OS X El Capitan step by step
2. Reboot the Mac while holding down the key option(aka alt).
3. Select a USB flash drive as boot media.
4. After the Mac boots Recovery from the USB flash drive, visually it will happen like this:
open Disk Utility and format the Mac hard drive.
5. To do this, select hard section disk in the panel on the left, then in the top panel click erase(do not change the format and name) then click again erase(down).
6. After formatting is complete, close Disk Utility and select reinstall OS X.
7. In the next window, select only the formatted hard drive and after completing the installation process you will receive a crystal clear OS X El Capitan.
By the way, you can reinstall the system from scratch without bothering with a flash drive. True, you need to have Capitan installed on your Mac before, also from scratch, otherwise the version of the system that came “in the box” will be installed.
So, if such a need arises, then restart your Mac while holding cmd+R, open Disk Utility and format the hard drive as shown above. Then you also choose Reinstall OS X and wait for the installation to complete.
Most Mac users upgrade to the next generation of operating system with a simple click of the " Update" in the Mac App Store, although a clean install of OS X is considered to be the most in a reliable way. In this material we will tell you how to do this.
How to do a clean install of OS X El Capitan on a Mac by first formatting the disk?
1 . Restart your Mac and hold down the keys while turning on the computer ⌘ Cmd And R.
2 . In the loaded application, select the menu item " Disk Utility" and click the " Continue».

3 . In the left side menu select system disk(by default it is called " Macintosh HD") and in the main window go to the " Erase" and format it by specifying the format " Mac OS Extended (Journaled)».
Attention! All data will be deleted from the Mac.
![]() 4
. After finishing the formatting process, close " Disk Utility».
4
. After finishing the formatting process, close " Disk Utility».
5 . Select an item Install OS X in the window " OS X Utilities", if you need to download a copy of OS X El Capitan from the Internet and click the " Continue».

6 . If you plan to use a bootable USB flash drive (by creation), then close the “ OS X Utilities».

7. In the window that appears, click Boot disk...

8 . In the window that appears, select a bootable USB flash drive with OS X El Capitan that was previously connected to your computer and click Reboot.

The computer will reboot and offer installation of the system from the USB flash drive.
It is worth noting that you can also press a button ⌥Option (Alt) on the keyboard when you turn on the computer. A list of available drives will appear from which you must select a bootable USB flash drive.

Mac won't boot because macOS has stopped working? Now you don’t know how to “resurrect” the device? We tell you how to restore the system on a Mac even in the most hopeless situations!
Your Mac won’t start because your hard drive has died or you’ve done an unsuccessful experiment and the operating system on your MacBook or iMac is gone? This is quite a big problem, since getting a macOS image or bootable USB flash drive Apple, if you don't have a Mac, it's extremely difficult!
I was inspired to write this article by a comment on our YouTube channel, a user’s HDD drive on a Mac failed, he replaced it, but didn’t know how to get a bootable USB flash drive.
How to reinstall macOS
from "Recovery" mode
Absolutely all iMacs and Macbooks have a special “Recovery” mode. This mode allows you to:
- Restore data from backup
- Reinstall macOS
- Use Disk Utility

Actually, we need to reinstall macOS! I’ll tell you how to do this now!

Like this in a simple way You can reinstall the system on a Mac from Recovery mode.
How to reinstall macOS from Internet Recovery
How to reinstall the system on a Mac if the “Recovery” mode was damaged or you changed the HDD or disk? You should try installing the macOS operating system by switching your Macbook or iMac to Internet Recovery mode. From this mode you can download a system image and install the OS on a Mac.

If restoring mac os via
Internet not working?
Then you need to try changing the DNS servers on the router to public ones from Google:
- 8.8.8.8
- 8.8.4.4
How to create a bootable macOS USB flash drive on Mac
or Windows and reinstall the system?
What to do if the previous options did not help you, but there is regular computer Windows or another Mac? The correct answer is to create a bootable Apple USB flash drive on it! We described how to do this in previous articles; I will not repeat myself, but will provide links.
Yes yes MAC
You can find out how to make a bootable macOS USB flash drive on an iMAC or MacBook in our previous article -
There are several ways and reasons to install a new macOS from scratch, but first things first.
Why reinstall macOS from scratch?
Clean installation of the system – best way prepare your Mac for sale. This way, there will definitely be no user data or confidential information left on the computer.
This installation method is useful if the drive on the Mac was replaced and the system needs install to new disk.
Even if everything is fine with your Mac and you definitely don’t intend to sell it in the near future, you should periodically perform a clean installation of the system so as not to accumulate cache and all kinds of software junk.
When updating one system on top of another every year, it can become cluttered and carry over glitches. You should definitely do a clean install every couple of years. for prevention. A key macOS update is the best reason for this.
Attention! A clean installation involves removing all user settings, data and applications. Transfer the necessary files in advance to the cloud, to other drives, or to other logical partitions of the current drive.
A clean installation is possible in two ways: via recovery mode And using a flash drive. In the first case, you will not need any additional drives, but the process will take longer.
Now we will analyze both options in detail.
Installation via recovery mode
If everything is in order with the Mac drive, the recovery area is safe and sound, then you can perform a clean installation of the system from here. You don't need an external drive for this.
The algorithm of actions is as follows:
1. Be sure to create a backup copy in Time Machine or in to have access to the restore point or the necessary files that were not moved to a safe place.
2. Turn off the Mac and start it with the keys held down Command + Option (Alt) + R to boot from the recovery partition.
When clamped Command+R loading will occur with the ability to restore to the current one installed version, and when clamped Command + Option + R There is a download with the possibility of upgrading to the latest available version of the system.
3. After launch you should select Disk Utility.

4. Here you can either completely format the system disk, or delete a partition that has already been installed system, leaving other sections with data.
5. We return to the main menu of the recovery partition and select the item Reinstall macOS.
All that remains is to wait for the data copying process to complete and perform initial setup systems.
Installation using a flash drive

The previous method is not entirely convenient because loading new system will occur during the recovery process. Depending on your connection speed and how busy Apple's servers are, this may take a long time.
It is much easier to download the system in advance and install it from the drive. If you have a flash drive or external drive with a capacity from 8 GB and more can be installed through it.
For computer owners with T2 chip (iMac Pro, Mac mini 2018, MacBook Air 2018-19, MacBook Pro 2018-19) you will have to first disable protection to be able to boot from external drives using .
When everything is ready, do the following:
1. Connect a flash drive or drive to the Mac and launch Disk Utility.
2. We format the flash drive in the format Mac OS Extended, having previously saved all the necessary data from it.
3. In the app store Mac App Store find the installer macOS Catalina and download it to your computer.

4. After the installer has finished downloading, launch the application Terminal.
5. Enter on the command line:
6. IN Finder open the folder Programs, we find Installing MacOS Catalina and in context menu press Show package contents.
7. In a folder Contents/Resources/ find the file createinstallmedia and drag it to open window Terminal(the path to the file will be added to the command)

8. We continue writing the command, adding the following:
9. Now drag the formatted flash drive icon from the desktop into the window Terminal(the path will be added to the command again)
10. We continue to write the command and add the following there:
So during the installation process it will not appear dialog boxes with questions and notifications.

The command should look like this:
sudo /Applications/Install\ macOS\ Catalina.app/Contents/Resources/createinstallmedia --volume /Volumes/DRIVE --nointeraction
Of course, instead of “ DRIVE” the name of your drive must be entered.
11. Press the enter key, confirm the action with the administrator password and enter “y” after the corresponding request.
When the copying process is complete (about 15-20 minutes), you will receive a ready-made flash drive for installing macOS Catalina.
All that remains is to start the Mac with the key pressed Option (Alt).

In this article, we will install macOS Sierra on a computer using the BDU program ( Boot Disk Utility) and a special image for this utility. Finding an image for BDU and the utility itself on Google is very easy.
This is the easiest way to install macOS Sierra on a PC computer. True, this method will be simple only for those who have hardware compatible for these purposes. Specifically, you must have a motherboard with the following chipsets: H61, B85, Z77, H77, Z87, H87, Z97, H97, Z170. The processor must be at least Intel Core i3. The video card must be compatible. For example, Intel HD 4000 / 4600, AMD 7850, 7870, Nvidia 640, 650, 660 and so on (Kepler) or Nvidia GT 210.
If you use Fermi video cards (GTX 5XX, 710, 720, 730), then most likely you will not succeed with the installation. These video cards are extremely unstable. I will say the following about Nvidia 730 video cards: this video card can be either Fermi or Kepler. So, if the video card is Kepler, then it will work fine with web drivers. GTX 9XX, 1XXX video cards work only with web drivers.
Attention! If you are using an NVidia graphics card, then masquerade as an iMac 13.1 or 14.2; other devices may have boot problems, since in most cases Apple uses AMD graphics cards.
Remember, the more compatible your hardware is, the easier the installation will be. If you don't have Intel processor Core, but there is, for example, Pentium or Celeron, then you will have to disguise yourself as an Intel Core, and if you have an AMD processor, you will have to use a patched kernel.
Previously I showed the installation using virtual machine with OS X installed from under Windows. Now we will install using the Boot Disk Utility (BDU) program, and will also try to use the standard config from Clover. Let the bootloader determine our hardware itself. I'll just add the kext to the network.
About installing macOS Sierra, you can ask your questions in the comments, but be sure to describe your computer configuration as fully as possible, for example, I will install it on this configuration:
- Gigabyte GA-Z87m-HD3
- Intel Core i3-4330
- 8 gigabytes of RAM (2 x 4 GB, 1600 MHz. Samsung)
- Intel HD 4600 + Gainward GTX 660 Ti
- 2 monitors (DVI + DVI), as well as a TV via HDMI.
- 120 GB SSD from SanDisk.
I also want to remind you that, just in case, you should have a flash drive with all the kexts and the operating room Windows system, in case something goes wrong and you have to download files or programs. Well, or use another device for this.
Boot Disk Utility runs on Windows. In my case, I will use Windows 10. We will also need an image with macOS Sierra.
Let's launch BDU and format the flash drive:

Immediately after formatting the flash drive, the latest Clover will be installed on it. And all we have to do is deploy our image with the macOS Sierra operating system to a flash drive:


After we have written our image with the operating system to the flash card, I will upload the kext to the network. This is only needed for my computer and you may also need a kext, it all depends on your network card. By the way, when using BootDiskUtility, the FakeSMC kext is already in the kexts/other folder, so there is no need to insert it separately.
As soon as the flash card with macOS Sierra is written, we restart the computer and boot from our flash drive (F12). I will load in UEFI mode. I will also specify the -v switch so that the operating system loads in text mode.
If you are using a non-Kepler NVidia video card, boot with the nv_disable=1 key. If your system freezes at boot, try booting with the -x switch (safe mode).


After selecting the language, we need to format our hard drive or SSD:


We continue installing macOS Sierra as usual:

After installing macOS Sierra, you need to fill out a lot of information:


All basic installation completed. As you can see, it worked for me out of the box on macOS Sierra GTX video card 660 Ti. Yes, this is the best video card I've tried for Hackintosh. Looking ahead, here is a picture for you as a “seed”, though it’s El Capitan OS:

What to do after installing macOS Sierra?
After installing macOS Sierra, we will immediately install Clover on our SSD and configure config.plist, the config for each computer must be different, in particular the configs for Ivy Bridge / Haswel and laptops are very different, so it is recommended to read the khaki clover book and do experiments. If your system suddenly stops booting, you can always boot from a flash drive and fix config.plist.
I installed Clover with the following parameters:


You need to install the config on a hard drive, not a flash drive. Basically, if you have one, then Clover will select it by default. Also remember, the example config above is for UEFI systems, this Clover installation will not work for Bios Legacy.
After installing Clover, setting up config.plist and rebooting, we have a fully working system.
Briefly what I did in config.plist:
- installed 32MB of memory for Intel graphics in UEFI and registered ig-platform-id 0x04120004
- enabled P-states
- dropped extra SSDT tables, because of which SpeedStep did not work for me
- indicated iMac 14.2 model
Kexts that I used when installing and configuring Hackintosh:
- FakeSMC.kext
- RealtekRTL8111.kext - network
- HDMIAudio.kext - sound on TV
Everything else works out of the box. In addition to the sound motherboard. I didn’t turn it on on purpose, since I use sound on the TV. You can start sound using patched AppleHDA or VoodooHDA.
Remember, the more “correct” your Hackintosh hardware is, the easier the installation will be. Installing a hack on my computer is no more difficult than reinstalling Windows. But if you have specific hardware, for example PCI Wi-Fi adapter, sound card or something else, then in most cases these devices will not work with the hack.
That’s actually the entire installation of macOS Sierra on a regular PC computer.
Related posts:
 High magnification monoculars - features and benefits Monocular magnification 50
 World of Tanks crashes on startup - fixing errors World of tanks crashes after every battle
 Server key 1c over the network
 How to turn on WiFi on laptops Add a new wireless network to a laptop
 How to find out iPhone serial number?


